|
I am writing this page in English with Google translator. Click the Danish version and see the original Danish website.
The pictures show recipes that I have made through the ages. Go to "Choose your favorite recipe", select it and press "Go". You then come to the recipe - Bon 'aperitif. I have one comment for all the fish dishes that are baked in my oven. They are set 1/3 up from the bottom and on a rack. It gives a little longer frying time than if the dish was put directly on the bottom or on a plate. The dish makes direct contact with metal and therefore heats up faster, but can become too brown at the bottom. This "Recipes Mobile" page is suitable for cell phoneIt is mainly a page with fish recipes, but sometimes there are also other recipes related to my smokig oven and other recipes that I usually make every year at the same time, be it Danish holidays or personal holidays. You are welcome to use the recipes for personal use. If you want to publish the recipes, please first get permission. This is usually available if the source is also shown in the recipe. If you want to contact me regarding the recipes, please use my Guestbook.
|
|
|
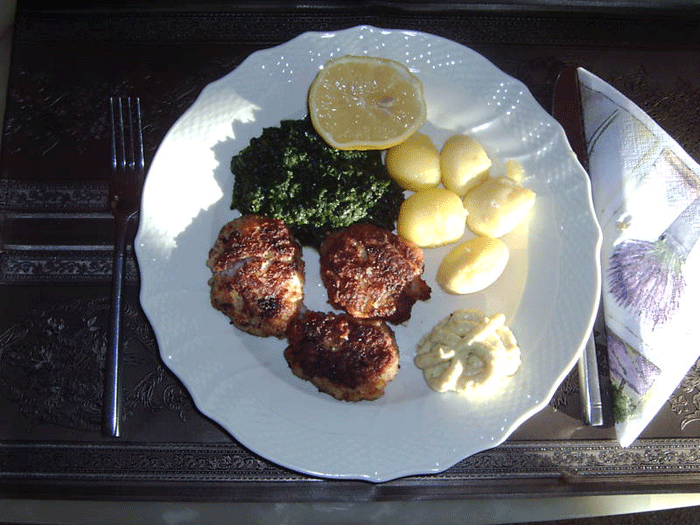
Seven "cool" fried herring in vinegar with new potatoes
Next Down
|
Even children will love this dish if you peel the herrings free of bones
|
Fish 14 herring fillets 1 tbsp. rye flour 3 tbsp. wheat flour 2 tsp. salt Coarse pepper from the mill 250 g butter for frying Vinegar Brine 3 cups vinegar 1 cup water 300 g sugar 2 onions (1 onion during boiling and 1 red onion for garnish) 2 cloves garlic 1 hot red chili pepper 2 slices of lemon 6 bay leaves 10 whole peppercorns Accessories 500 g new potatoes Parsley Sauce 
Seven "cool" fried herring in vinegar with new potatoes The recipe is included in Sřren Dahl's book on regional meals Procedure without liability: Cook first a marinade of vinegar, water, sugar, bay leaves and peppercorns. Once the sugar has melted, add onion rings, garlic, chili pepper and lemon slices. Bring to a boil and then take of the heat and place the marinade to cool.
Come rye flour, wheat flour, salt and pepper in a plastic bag and shake well. Then add the herring fillets and shake even more. Fry the herring fillets golden brown in butter in medium heat for a few minutes (5 to 7 minutes). The best way to fry the herring fillets is to fry the skin side until the meat is white. If the herring fillets are very thick reversed the fillets and they finally get approx. 30 seconds on the meat side. Let the fillets cool on a paper towel so excess fat drips off. The cooled vinegar syrup poured over the cooled fillets and let them soak until the next day in the refrigerator. Garnish with raw onion rings before serving. This will be a typical lunch meal. As a seafood dinner see Hint. 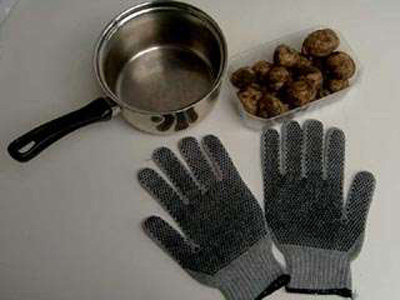
Gloves with buds on for cleaning new potatoes Hint: However, eat the fried herring on the first day, they taste wonderful. Therefore, vinegar marinade and fried herring shall not cooled down completely. Vinegar marinade may well be lukewarm. Server new potatoes with parsley sauce to the meal. Serving: Use accessories for the fried herring as desired and season. When the new potatoes come, it's a wonderful meal only to those new potatoes and cold butter, sprinkled with dill. You can benefit from scratching the new potatoes with these gloves with knobs on. Buy them in a construction market, costing approx. DKK 60.00 for 10 pairs. Drink: A cold beer and a dram is a must to the meal. "dram" = Danish snaps. Info: A good herring in medium size weighs 165 grams, so your 7 herring weighs 1.15 kg and in cleaned condition and made into fillets, the weight is 510 grams. A loss of 640 g or 56 %. |
Hot chili fish soup
Next Down
Next Up
|
This meal is very "HOT". Adjust the number of chili pepper. You can make the meal of many different kinds of fish
|
100 g fillet of cod, ling, tusk or catfish 100 g fillet of other lean fish perch or pike 100 g fillet of other lean fish from the sea "flatfish" 100 g mussels, deep-frozen 100 g giant prawns with shell, deep-frozen 1 large onion diced 4 cloves garlic 2 red hot chili peppers in small slices 1 red pepper not hot sliced 4 ripe tomatoes in boats and a can of tomato puree 1 fennel root in large cubes 4 large potatoes in coarse cubes ˝ peel of orange 10 strands of saffron or 1 tsp. turmeric 4 sprigs of parsley or try 4 sprigs of dill instead of parsley 4 tbsp. virgin olive oil 2 l fish broth or chicken broth 12 slices of toast of good quality, or garlic bread Season with salt, white pepper and cayenne pepper 
Hot chili fish soup Procedure without liability: Saute onion, garlic, red pepper and fennel in virgin olive oil in a very large soup pot until the onions are ready approx. 8 min. Add the broth, potatoes, red hot chili peppers, peel of the half orange, saffron (or turmeric) and the stalks of the parsley. Bring the soup to a boil and cook for 5 min. Add tomatoes and tomato puree and cook for another 10 min. The parsley stalks are picked up and the mussels are added. Bring the pan to a boil, then wait a moment to add the mouth-watering fish pieces. Let the soup simmer on low heat for 5 min. after the fish pieces have come in. Put the thawed giant prawns in, and as soon as the soup starts to boil, turn off the heat, otherwise the prawns will be tough.
A soup for real men Hints: If you want a more creamy soup, you can adjust with whipping cream, but be careful not to stir the soup too strongly, because then the fish pieces will become "plucked fish". Serving: Serve the soup with chopped parsley or dill and toast. Fish broth: If you catch your own fish - and we do - then all fish trimmings - but not gills, fish blood and entrails - are used to make a fish broth. Pour approx. 2 ˝ l water in a saucepan and add all fish heads and fish bones as well as 1 tbsp. salt, 10 cloves garlic, 2 large onions, 2 carrots, 5 cm fresh ginger, 3 green leek tops, 2 red chili peppers, 1 parsley root, 1 parsnip, 5 piri-piri, 1 tbsp. oregano, lemongrass or 1 whole lemon or dried lime leaves, 10 bay leaves and the top of a fennel tuber. In short, what you have on hand of good vegetables and spices. The vegetables are cut into smaller pieces before being placed in the pan. The whole thing is boiled for exactly 20 min., After which it is said. Let the broth stand and settle for half an hour. Measure the amount as indicated above, but avoid getting the precipitate with. Adjust the amount with a dry white wine. If there is enough broth, then you can just drink the wine. Drink: Cold glass of white wine: Gewurtztraminer is suitable. |
Fish meatballs with remoulade sauce and French fries
Next Down
Next Up
|
Children will love these Fish meatballs with remoulade sauce and French fries
|
1000 g of fish fillets of your catch: cod, saithe, ling, pikeperch or pike - it's lean meat 100 g smoked lard (use only 10% of fish weight), or bacon 1 onion 2 cloves garlic 2 tsp. salt 1/4 tsp. white pepper from the "mill" 40 g wheat flour (use only 5% of fish weight) 2 whole eggs 3/4 dl cream 3/4 dl water maybe. See procedure Virgin olive oil for frying (possibly mix with butter or margarine) Extras: 1 kg new potatoes or 1 packet pasta or 1 packet French fries or 1 packet cream stewed spinach 1 bowl tartar sauce and 1 lemon 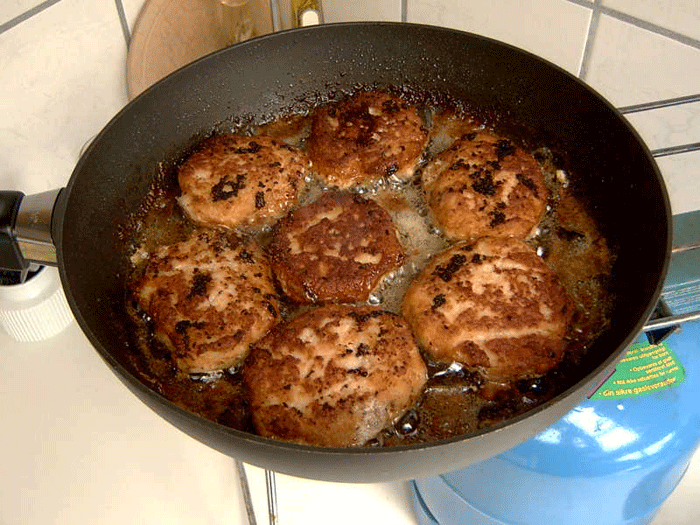
A pan full of fish meatballs Procedure without liability: First, chop the smoked lard or bacon through the meat mincer. Take the lard/bacon out of the bowl and now chop the fish, onion, garlic and the smoked lard/bacon again. One now has a suitable coarseness of fish meat and lard/bacon for adults. Kids usually like it chopped again. Stir the mince with salt and pepper, add flour and eggs, and stir well before adding cream and water. Use the cream first and then the water needed. Maybe you should not use water at all. The amount of water depends on the fish you use, as not all fish are equally watery in the meat. Now the farce should rest in the fridge, preferably for 1 hour. Fry the fish cakes golden in virgin olive oil. Mix any oil and butter. Be careful not to heat too hard, because then a hard shell will come, and inside they will not be really fried through, approx. 5 minutes on each side for small portions and 10 minutes for large portions.
Fish meatballs served with cream stewed spinach and new potatoes Hints: Instead of smoked lard/bacon, you can also use smoked salmon when you have the freezer full of salmon. Serving: Use accessories for the fish cakes according to your own wishes and season. When the new potatoes arrive, it's a wonderful eat only with these new potatoes added a little remo and lemon, sprinkled with dill. All children like a good pasta. Drink: Cold glass of white wine, or a cold beer. |
Oven baked cod with mustard sauce
Next Down
Next Up
|
Again, you must out with MS Havlit and catch cod
|
1 large fresh caught cod between 2 and 3 kg or more small cod so there will be approx. 1 kg fish fillets 1 onion 1 clove garlic 4 bay leaves 1 tsp. salt to sprinkle 1 small tsp. white pepper to sprinkle 1 lemon, juice of the half, the rest for garnish 6 dl milk or semi-skimmed milk for the sauce 20 g butter, 15 g to the sauce, 5 grams to the meal 3 tbsp. wheat flour 2 tbsp. fish mustard 1 tbsp. white wine vinegar 1 tsp. salt 1 tsp. sugar 1 dl grated horseradish 2 eggs 1 small glass pickled beetroot 1 kg small potatoes 4 twigs parsley for garnish 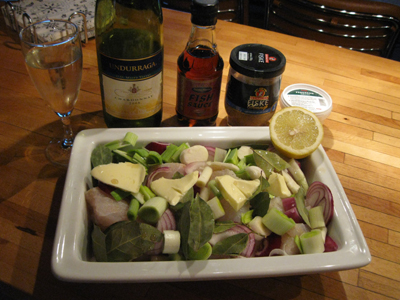
The cod were caught on the Yellow Reef by John. It weighed 7 kg and gave 4 kg of fillet Procedure without liability: Fillets the cod, or as many you've caught, so you get at least 1 kg plain fish meat without bones and skin. Cut the fillets into large pieces approx. 6 cm, and place fillets with slices of onion and garlic in an oven proof dish that is greased with a little butter. Sprinkle with salt and white pepper. Dripping a few drops of lemon juice on each fillet. Sprinkle 2 tbsp. white wine over the fish. Put the fillets in a 200°C hot oven in approx. 30 minutes. If fillets are very thick, the cooking time is maybe a little more. Try to stab the fish with a fork. If fish flesh looks "glassy", it is not enough done.
Mustard sauce: Prepare the sauce while the fish is baking and potatoes is boiling. Pour the milk, butter and flour in a saucepan and whip it together during heating. Boil the sauce through and season with salt, white pepper, fish, mustard, vinegar and a little sugar. Pour some liquid from the fish in the saucepan, and the sauce gets a nice consistency. Extras: Boil the eggs for 7 minutes. (hard boiled). The cold chopped eggs are served with chopped beetroot and grated horseradish. The accessory is served in bowls next to the fish when the meal is served. Boil the potatoes with the skins for 20 minutes in slightly salted water and peeled. 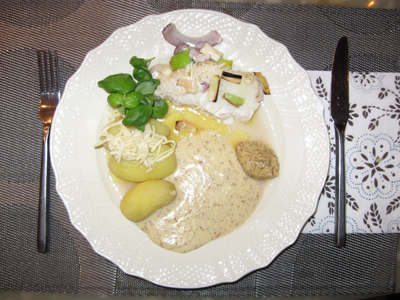
Oven baked cod with mustard sauce Hints: Instead of cod you can use fillets of pollack, saithe, haddock, hake, ling and catfish. Use the liquid from the fish to come into the sauce. When you use fillets, it is a child-friendly meal: There is no bones, as they say. If you catch your own fish, you can cut them in fine pieces and boil (simmer) those from 10 to 20 minutes in water containing different spices: onion, garlic, bay leaves, carrots, leeks, salt, peppercorns, sugar, vinegar (white wine) and parsley twigs. Then the sauce is made from fish water instead of milk. Ornament or green: Lemon Slices placed on the fish. Garnish with parsley. Drink: A cold beer and snaps. |
Fresh, fried mackerel
Next Down
Next Up
|
Mackerel are caught in July, August and September
|
4 small, whole and fresh mackerel of 350 g or 2 large, whole and fresh mackerel of 700 g Dressing for fish and salad: 4 tbsp. good olive oil 4 tbsp. god balsamic vinegar 4 tbsp. white wine Salad: 4 red snack peppers in strips 8 small red tomatoes in both 1 red, hot chili pepper finely chopped 4 cloves garlic finely chopped 2 spring onions finely chopped 1 tsp. salt (maybe 2 tsp.) 1 tsp. sugar 1 tsp. coarse, black pepper from the mill 2 sprigs of rosemary 150 g sliced cream cheese. Goat cheese / sheep cheese which is Feta cheese or the Danish cheese on cow's milk Apetina Accessories: Coarse rye bread with pepper-tomato salad for lunch or potato salad for main course 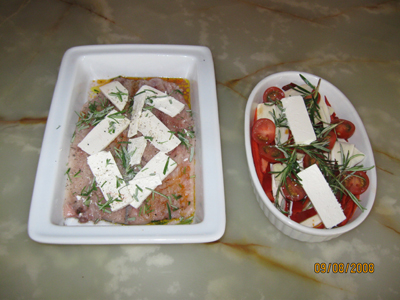
Fresh mackerel for 2 people to put in the oven Procedure without liability: The mackerels are cleaned and filleted so that they are boneless, but leave the skin on. The above dressing is distributed in the bottom of a dish, on the fillets and on the salad. Place the fillets in the dish with the skin side down and sprinkle with a little salt, sugar and coarse, black pepper. A sliced creamy cheese (Feta Greek or Apetina Danish) is placed over the mackerel. Sprinkle with rosemary sprigs and cover with film in the fridge while the salad is being prepared. Fry the mackerel fillets in a preheated oven at 200°C for 30 to 35 minutes.
If you do not have an oven with you on the fishing trip, use a frying pan. The best way to fry the fillets is to fry on the skin side until the meat is white. If the fillets are very thick, they are eventually turned over and get approx. 30 seconds on the meat side. No rule without exception. If you do not catch mackerel, you can use smoked mackerel. Then do not use the above dressing over the smoked mackerel. Simply clean the mackerel of bones by dividing them in two lengthwise and carefully take out the backbone along with the side legs. Use a fork for that. Let the skin sit on. Heat the mackerel fillets on the skin side in butter on a medium-hot pan for approx. 5 minutes. They are smoked. 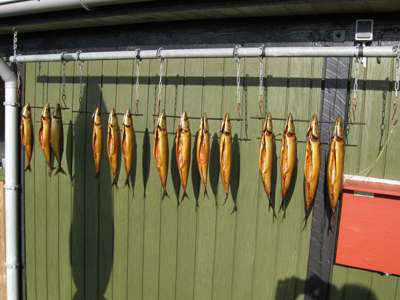
Smoked mackerel for several people. 650 g per piece in smoked condition Side dishes: Coarse rye bread with butter and the good pepper-tomato salad with a creamy cheese (Feta cheese Greek or Apetina cheese Danish) are suitable for this. As a main course, serve potato salad with the dish following this procedure: Stir A38 and a little mayonnaise together with lemon juice, nutmeg, Dijon mustard, finely chopped onion and or chopped chives. Cut the boiled, cold potatoes into slices and mix them into the dressing. Season with salt and white pepper. Drink: A cold beer and a dram. White wine for the main course. |
Salad with marinated cod
Next Down
Next Up
|
Using fine small summer cod to this meal
|
800 g cod fillet approx. 2 to 3 medium size summer cod 1 dl virgin olive oil 2 tsp. cane sugar 2 oranges just juice 1 lime juice and lime peel 4 shallots in strips 2 cloves garlic chopped 1 fennel in thin slices 6 twigs thyme 1 tsp. cumin crushed in a mortar Salt and white pepper. Butter to grease the baking dish. 400 g mixed salads with the seasons - it is summer: radicchio, hearts of lettuce and endive, if you can get it. 1 cup mixed chopped herbs such as coriander, parsley, dill and chives. Or use your own recipe. 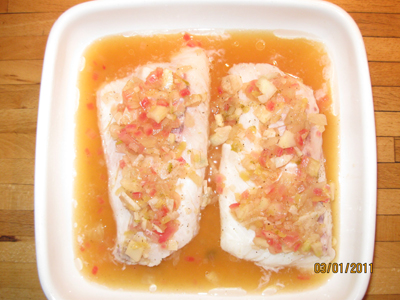
Marinated cod Procedure without liability: Clean and filitér the cod, but leave the skin on. Preheat oven to 140 degrees. Sprinkle cod with salt and white pepper and put them in a greased baking dish with the skin side up. Bake the cod to the feasibility of pilling the skin in a snap. Depending on thickness it takes between 6 to 10 minutes.
Limes scalded and peel grated, the juice squeezed out. Mix the lime peel, lime juice, orange juice, virgin olive oil, thyme, garlic, shallots, fennel and cumin in a saucepan and bring it boil. Season with salt, white pepper and sugar cane. Pour the hot syrup over the cod and let it soak in a couple of hours at the kitchen table if you want to eat it now. Otherwise you can put the dish in the refrigerator, and then let the cod soak in to the next day. Serve salad with herbs on 4 plates and top with fish and vegetables from the marinade over the salad. Use the marinade as a dressing. 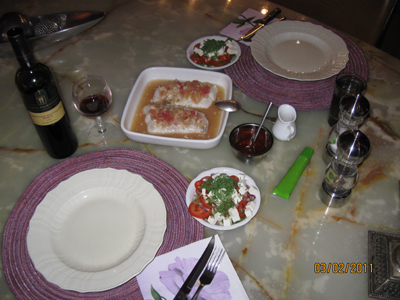
Marinated cod served with salad Extras: Fresh, coarse bread eaten with the meal. Bread dripping in dressing. Drink: Cold glass of white wine or a cold beer. |
Oriental plaice fillets
Next Down
Next Up
|
You can use all kinds of flatfish for that meal
|
800 g plaice fillets 1 red onion 1 clove garlic 1 sour apple 2 cm fresh ginger 1 courgette or zucchini or squash 1 leek 1 small tin tomato purée 1 tbsp. rose paprika 1/4 tbsp. white pepper 1 tsp. salt 1 cup chopped parsley to sprinkle 40 ml water and 160 ml coconut milk 1 small fish stock cube Extras: 1 kg potatoes to mash potatoes or 8 baking potatoes ˝ cup chives 100 g butter 
Oriental plaice fillets First, some facts: Squash, zucchini and Courgette is the same herb, but only three different names. The first name Squash used in the United States and the second name Zucchini in Italy and the last Courgette in France.
Procedure without liability: Clean your fresh plaice (flatfish) and filleting them, or thaw fillets, if you buy frozen fish. Sprinkle with salt, white pepper and parsley. Fold fillets. Peel and chop onion and garlic. Wash and cut leek, apple, ginger and gourgette into cubes. Peel if necessary the apple if the skin is "nasty". Mix the "green" and pour it in a butter greased casserole. Put the fillets as shown in the picture slightly overlapping each other on top of mixture. Mix the tomato purée, rose paprika, coconut milk and water with fish broth and pour over the fillets. The meal is prepared in a pre-heated hot air oven at 180 to 200°C for 35 to 40 minutes. 
You can use all kinds of flatfish for that meal Extras: Serve the meal with mashed potatoes or baked potatoes. Garnish with chopped chives. Hints: Instead of gourgette you can use leeks if gourgette unavailable. Got some fresh salmon, try adding some strips inside plaice. Drink: Cold glass of white wine or a cold beer. |
Roasted rainbow trout with spicy green wrapped in tinfoil
Next Down
Next Up
|
A rainbow trout from a Put & Take lake has been used
|
1 rainbow trout of approx. 1.5 - 2 kg 1 tbsp. rosenpaprika 1 knsp. white pepper 1 tsp. salt 1 finely chopped onion 1 clove finely chopped garlic 1 bunch finely chopped parsley 1 bunch finely chopped dill 1 bunch finely chopped chives 100 g butter Accessories: 1 kg of new potatoes 1 good salad 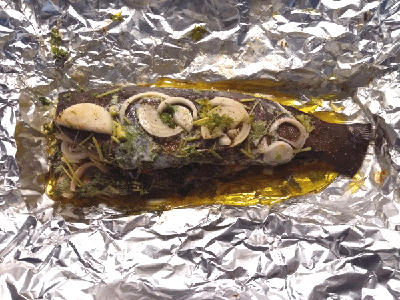
Roasted rainbow trout with spicy green wrapped in tinfoil Procedure without liability: Clean the freshly caught rainbow trout from Karlstrup P & T lake. Scrape the mucus of the fish from head to tail and scrape the scales of the fish from tail to head. Cut if necessary. head off if the fish is too large for the oven. Rinse the fish in cold water and let it drip well before drying it in a paper towel.
The fish is rubbed inside and out with salt, white pepper and paprika. The soft butter is mixed with the herbs and the mixture is now placed in the abdominal cavity of the fish. The rainbow trout is placed with the belly up on tinfoil and wrapped tightly. Place the package with the opening in a frying pan or other refractory dish and fry the fish at 160°C in a hot air oven for approx. 40 to 50 minutes. Alternative: Wrap the fish in tin foil and place it on the grill or in an oven at 180°C for approx. 50 to 60 minutes. The oven must be heated. The fish weighed 1.2 kg in live weight. The time depends on the weight of the fish. Side dishes: Serve the dish with fresh, boiled potatoes and a good salad. 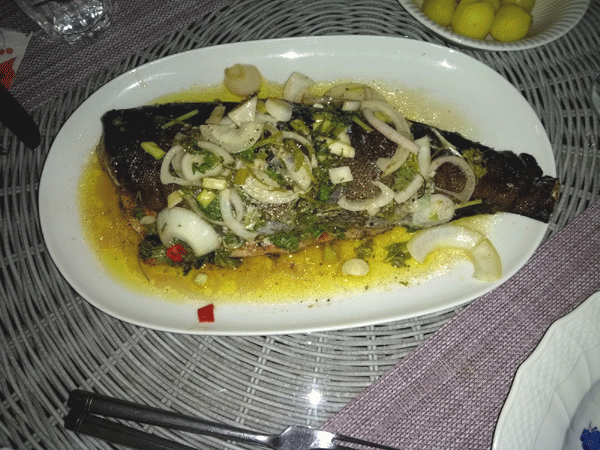
Roasted rainbow trout with spicy greens served on a platter Hints: Pour a glass of white wine down to the fish and use the water for the dish. Come if necessary. other vegetables by and fried them with. They are good as accessories. When the fish is wrapped in tinfoil, the fish becomes less dry. Drink: Cold glass of white wine. Note: Trout caught in Put & Take lakes - fish farming trout - have a lot of brown fish fat on the body compared to wild salmon or wild sea trout. It's because of the way they live. Aquaculture trout are served the food and do not have much space to swim in. Once you have cooked the fish and peeled it at the table, remember to scrape off most of the brown fat that sits between the skin and the red fish meat - it just does not taste good. |
Fish soup with tiger prawns and lobster tails
Next Down
Next Up
|
This meal is suitable for those who do not catch fish
|
24 lobster tails deep-frozen 24 giant prawns with shell deep frozen 4 red tongue fillets without skin 2 spring onions with the green 1 fennel 1 clove finely chopped garlic 1 carrot in coarse pieces 1 zittauer onion in coarse pieces 3 cm fresh ginger in fine pieces 1 bunch dill finely chopped for garnish 2 tbsp. squeezed lemon juice 1 liter of fish broth ˝ tsk. salt 3 whole peppercorns 1/4 liter whipping cream Accessories: 8 good envelope breads Cognac whipped cream 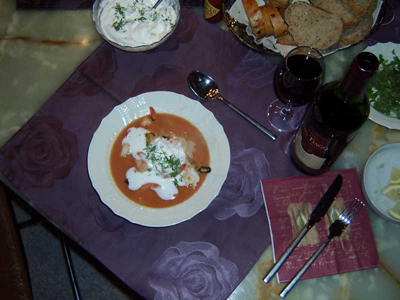
Fish soup with tiger prawns and lobster tails Procedure without liability: Now you have to start peeling the thawed giant prawns and lobster tails. Store the shells in a saucepan as they are to be used for fish broth. Clean the fish and cut it into mouth-sized pieces. Clean spring onions and fennel, cut them into thin strips and save the tops for fish stock.
Now you make a fish broth from: the shells from lobster tails, giant prawns, the top of spring onions and fennel as well as garlic, carrot, zittauer onion and fresh ginger. Put 1 bottle of dry white wine and 3/4 l water in the pot and boil the broth under a lid, remove the lid when it boils. Let it simmer on low heat for 20 minutes. Then remove shells and vegetables with a slotted spoon. Strain the broth into a coffee filter. Replace if necessary. the filter a few times as it clogs. Boil the soup until there is approx. 1 liter. Season with salt and white pepper from the mill. Take 1 dl of the fish broth, ˝ tsp. salt, 3 whole peppercorns and 1 tbsp. lemon juice up in a saucepan and bring to a boil. Steam lobster tails, giant prawns and fish over low heat under a lid for approx. 3 minutes. It must in no way "noise" boil, because then the shellfish will be tough and the fish will "pick fish". Remember the rest of the soup can also be used. But then be careful with salt in this broth. Side dishes: For a gala dinner, the dish is served with cognac whipped cream according to this recipe. Add 1/4 l whipping cream, 2 tbsp. cognac and 1 tbsp. lemon juice up in a bowl. Whisk to a light foam and turn in the finely chopped dill. Refrigerate for 30 minutes. Good envelope bread is eaten with the soup. For daily I just use to pour whipped cream into the soup. 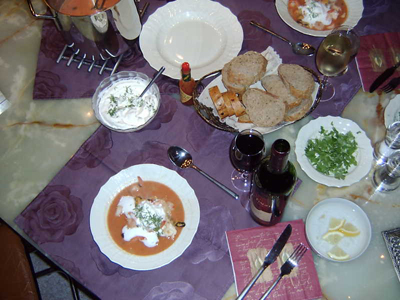
The soup served with a good bread Serving: Now divide the thin strips of spring onion and fennel into hot serving bowls along with the lobster tails, giant prawns and fish. Pour the hot soup over and give on top a spoonful of the cold cognac whipped cream. Or serve it separately in a small bowl. Drink: A dry sherry or a dry, cold white wine is suitable for the soup. |
Cooked salmon with Hollandaise sauce
Next Down
Next Up
|
The recipe can be made both on salmon or trout
|
1 salmon or trout of 3 kg 1 onion 2 cloves garlic 1 leek 2 carrots 1 cup mixed green parsley, dill, sage and thyme 1 red hot chili pepper 3 cm fresh ginger 1 fennel 2 slices of lemon 1 tsp. salt 1 tsp. sugar 3 tsp. vinegar 100 g butter to the sauce 3 til 4 tbsp. flour to the sauce 1 to 2 eggs, only egg yolks 2 l water Extras: 1 kg new potatoes 1 Dijon mustard 200 g melted butter Freshly grated horseradish 
Cooked salmon with Hollandaise sauce Procedure without liability: Clean the fish for fish mucus and scales. Cut from anal fin to the head and remove the intestines. Clean the abdominal cavity for fish blood. Cut the gills out but let the head sit on. It looks so great when the fish looking at you at the table. This requires of course that, you have a big fish pot. In this pot you'll put the cleaned, sliced vegetables, a bundle of green, lemon slices, salt, sugar, vinegar and water. Is the fish fresh - not frozen - put the fish in when the water boils. Bring to a boil and boil the fish under the lid on very low heat for 20 minutes. Do you use a fish that is frozen; you should take the fish straight from the freezer and put it in cold water. Bring to a boil, it takes normally 30 minutes, and from boiling to finish the fish, it takes 30 minutes more. But remember the fish shall only simmer in the boiling water the last 30 minutes.
Hollandaise sauce: This recipe is not the "real" Hollandaise sauce, but in my opinion, better and less "fattened". I think? In a thick bottomed saucepan melt the butter and flour mixed in while stirring until you get a "flour roll". Pour the fish soup in the pot, but a bit of time, under strong stirring. Continue until you get the consistency that you want the sauce. The sauce boil for 3 minutes, then turned off for this. One or two egg yolks stir into a cup and add some of the sauce while stirring. When the cup is half full, add this mixture while stirring the sauce and season with salt, sugar and vinegar. It is important that the sauce does not boil more when the egg yolks have come in. 
Too many cooks spoil the meal Extras: New potatoes or small, solid potatoes. Melt 200g butter and grated horseradish comes in. Serving: Serve fish on a large dish at the table. You as the host distribute fish pieces on plates. Pour the sauce over the potatoes and melted horseradish butter over the fish. Serve a lump of Dijon Mustard. Good appetite. Drink: A dry, cold white wine suitable for the meal. |
Steamed pollack fillet with vegetables and white asparagus
Next Down
Next Up
|
The recipe can be made both on pollack or saithe. However, pollack is best
|
800 g pollock fillet or saithe fillet Pollack has better meat, but also twice as expensive per. kg 4 spring onions or 1 pore 2 stalks celery leaves 2 cloves garlic 2 tbsp. lemon juice or 3 lemon slices on each fillet 1 tsp. sweet paprika 2 tbsp. extra virgin olive oil 1 dl white wine ˝ red chili pepper Garnish with lemon balm or coriander leaves Butter patches Salt and white pepper 1 kg white asparagus 2 tbsp. lemon juice 1 tsp. fine salt Butter patches 1 glass of Hollandaise Sauce 
Steamed pollack fillet with vegetables and white asparagus Procedure without liability: Clean and fillet the fish in 2 large fillets and sprinkle with salt and white pepper. Let the fillets rest while you clean and cut the vegetables into strips or slices. You can also buy 2 large fillets of 400 g/each at your fishmonger. Make sure all bones are taken out of the fish.
The fillets are dabbed dry with a paper towel and placed on an oil-smeared heavy piece of tinfoil. Lemon juice and olive oil are dripped over the fish before spices and vegetables are spread over the fillets. I used lemon slices, which I put butter on. White wine is poured down to the fish and this is wrapped well in the tin foil. Is now ready to be put in a 180°C preheated oven for 20 minutes until it is white and firm in the meat. Asparagus: In May and June, the tasty white asparagus are available and you must definitely try these in this way: Buy approx. 4 to 5 asparagus per person of the large thick. Peel them from head to bottom - avoid peeling the top of the head - cut approx. 3 cm from the bottom away. Put them on a heavy piece of tinfoil, drizzle with lemon juice, fine salt and add butter pats. The asparagus is wrapped tightly in the tin foil and they are also ready to be put in a 180°C preheated oven for 20 minutes with the fish. New Danish potatoes: The season coincides with asparagus. Clean with gloves with rubber pads under running cold water. Put in lightly salted boiling water and cook for 16 minutes. Put the pan under the cold tap for 10 seconds so that the potatoes get a cold shock and the cells burst. It is the same procedure as cooking beets. See the gloves under recipe No. 1. 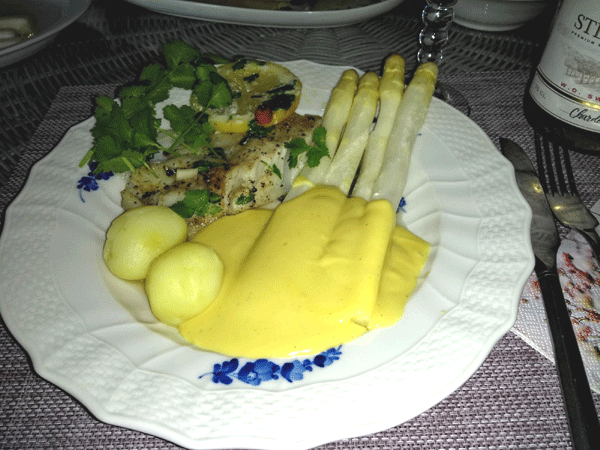
The dish here is only made for 2 people Serving: Serve the fish on a platter as shown in the picture. Garnish with lemon balm or coriander. Serve the dish with asparagus and new Danish potatoes and a good Hollandaise Sauce in a glass. Pour Hollandaise Sauce into a bowl and heat it in the oven along with the fish and asparagus for the last 15 minutes of the frying time. Drink: Cold glass of white wine, like the one used for the fish. |
Fried turbot or brill with root vegetables
Next Down
Next Up
|
Do you know the difference between a turbot and a brill?
|
1 kg turbot or brill with skin 4 tbsp. virgin olive oil 100 g butter 1 onion 10 spring onions 4 cloves garlic 1 parsley root or parsley 1 small celery root or celery 2 carrots 1 lemon or lime 4 cm fresh ginger 1 twig thyme 1 twig fresh coriander salt, white pepper and hot paprika Extras: Coarse bread or white bread as desired 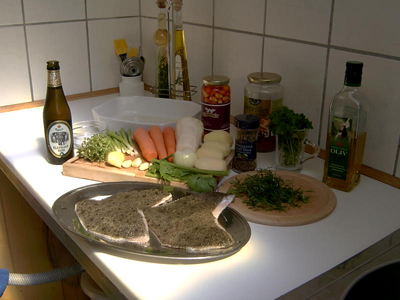
Here are all the ingredients for the dish Procedure without liability: Clean and fillet the fish. You may like to let the skin sit on. Or get the fisherman to do it; you catch no turbot or brill! Or do you? Start with the root vegetables, cleaning them and cut them into slices. Onions and garlic peeled and cut into slices. Add onion, garlic and all root fruits in a baking dish lightly greased with butter. Add lemon slices and sprinkle with thyme leaves, salt, white pepper and hot paprika. Use rest of butter to put over the vegetables.
Place the baking dish in a pre-heated oven at 180°C to 200°C for approx. 30 to 40 minutes. Just before the root fruits are ready, fry the fish, which you have seasoned with salt and white pepper, in virgin olive oil. Remember just a cut above his back, so the fish do not "bend". The best way to fry fish fillets is on the skin side until meat is white and firm. Is very thick fillets reversed and they finally get approx. 30 seconds on the meat side. Place the fish over the root vegetables and bake them together the last 10 minutes in the oven. Serving: Place the vegetables and fish fillets on 4 plates. Use the beautiful gravy from the fish to sauce and drippings of the bread. 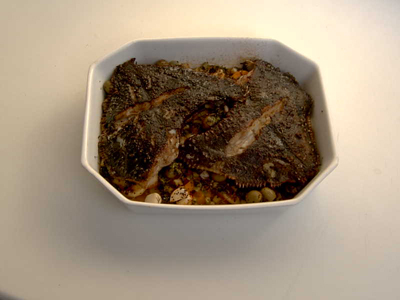
Main course with potatoes on the bottom Hints: Would you like to use the meal as a main course, you can get sliced potatoes in the baking dish and adjust with butter, salt and pepper. Oven times perhaps additional 5 to 10 minutes. I have this time fried the whole fish, but if children should eat the meal it is recommended to use fish fillets. Drink: Cold glass of strong white wine. Or the good Wiibroes vintage beer 2001. Perhaps an Elephant beer from Carlsberg. |
Spicy blue mussels soup with garlic bread for starter
Next Down
Next Up
|
Go out and collect your own blue mussels
|
2 to 3 kg of fresh blue mussels in shell 1 onion 4 cloves garlic 1 red hot chili pepper 1 leek 2 carrots 1/4 celery and 1 fennel 2 cm fresh ginger ˝ lemon or lime 1 cup fresh parsley or dill 10 stems saffron or 1 tsp. turmeric 100 g butter 1/4 l whipping cream 1/2 bottle dry white wine and slightly water salt and white pepper Extras: Garlic bread on request 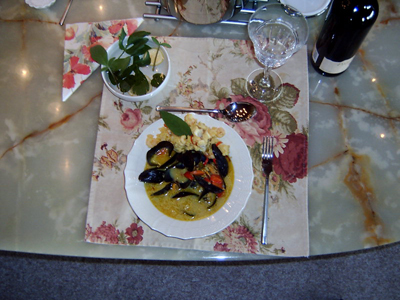
Spicy blue mussels soup with garlic bread for starterr Procedure without liability: You can even pick your mussels for personal consumption, but remember it must be in a place where the water is clean and non toxic algae in the summer and no sewer nearby. At the Food Authority's website you can follow the toxic algae in Danish waters. Otherwise buy fresh mussels at your fish shop.
Mussels brushed and rinsed under water, "beard" removed with a knife. If some of the mussels are open tap on the shell to see if they close themselves. If they don't does it discard them. Take a nice, big pot, which you can put on the table and pour white wine, juice of half lemon or lime, 1 tsp. salt and mussels in. Boil immediately until the mussels have opened, and immediately remove the pot of the heat. The mussels, which are still closed, discarded. Chop onion, garlic, red chili, leek, carrots, celery and ginger and sauté in butter. Add saffron or turmeric. Liquid from the mussels sieved over the vegetables and everything is given a rehash. Add whipping cream and let it simmer approx. 10 minutes. Add mussels, season with salt and white pepper, sprinkle with chopped parsley or dill. 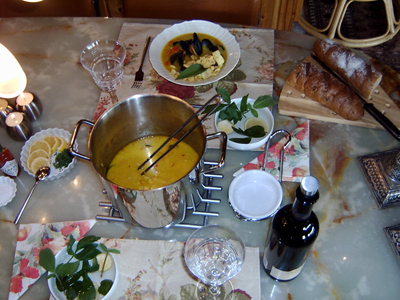
Spicy blue mussels soup with garlic bread for starter Serving: Put the pot on the table. Use warm soup plates, spoon and fork, and rinse bowls with warm water and lemon slices. Serve garlic bread with the meal. Hints: If you do not use fennel then pour a small glass of Pernod in the pot with the vegetables, it offers a French taste. Drink: A glass of cold, rich, French white wine. Maybe a cool Riesling. |
Rimmad (curing) salmon with scrambled eggs and flavouring snaps
Next Down
Next Up
|
Now you have to go out and catch a fresh salmon for this meal
|
600 to 800 grams of salmon 4 dl water 60 g salt 40 g sugar 2 tsp. mustard seeds 1 tsp. coriander seeds 1 tsp. dill seeds 1/2 tsp. whole white pepper 1 dl dill schnapps 1 bunch fresh dill Make salt content: 13% or 12 °B before the schnapps is added 10.7% or 10 °B after the schnapps is added 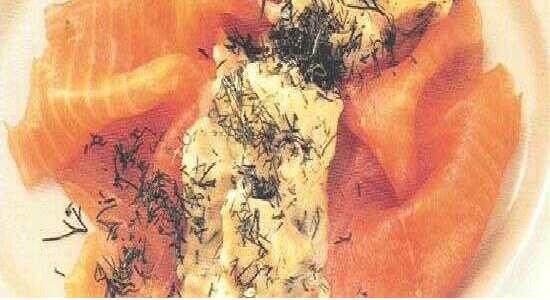
Rimmad (curing) salmon with scrambled eggs Procedure without liability: Catch the salmon and use the large middle piece of approx. 600 to 800 g. Fillet the fish so you have two pieces. Cut away side bones with a sharp knife and take out the nerve legs with strong tweezers or pliers. Take a bowl or a dish in which the two sides of the salmon can lie. Pour a cold brine according to this recipe over the fish and put it all in the fridge for a day or two. Thin side 1 day - thick side 2 days. See also under alternative method.
Preparation for rim salting: Boil 4 dl water, 60 g salt, 40 g sugar, 2 tsp. mustard seeds, 1 tsp. coriander seeds, 1 tsp. dill seeds, ˝ tsp. whole white pepper and the dill sticks. The dill leaves are used for decoration. When the layer is hand-warm, add 1 dl spice schnapps. Cool the layer completely in the fridge and then pour over the salmon. After 1 to 2 days in the refrigerator, the salmon is taken out and rinsed briefly under cold, running water. Pat dry with paper towel and cut into thin slices. Arrange on serving plates and garnish with chopped dill. Serving: Scrambled eggs or egg yolk are served with the dish. Break 4 eggs into a bowl and add 4 tbsp. cold water and 2 tbsp. spice schnapps and beat well with a hand whisk until everything becomes "airy". A dab of butter on the pan and melt it over medium heat. Pour in the egg yolk and let it harden under the lid over medium heat. Season with salt and white pepper when the eggs are done. Distribute it on the plates next to the salmon. 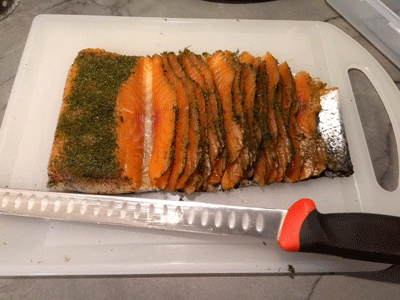
Rimmad (curing) salmon for 4 days Tip: Small new Danish potatoes boiled in lightly salted water are also good for the dish. Very small, new Danish potatoes only need to be boiled for 15 minutes, after which the water is poured off and they are briefly air-dried. Put the potatoes back in the pot, and 2 tbsp. spice schnapps is poured over. Put the lid on and shake the pot briefly until the schnapps has been absorbed into the potatoes. Drinking: Drink your favorite beer with the dish and wash it down with the rest of the spice schnapps. You will hear the angels sing. This dish originates from Sweden and is called "Rimmad Lax". Alternative method: Dry salting is also an option for rimmed fish - here salmon - but remember that all fish MUST first be frozen at -20°C for at least 24 hours. It is to kill any Herring Worm and Cod worm. Thawing must take place in the refrigerator to avoid excessive liquid loss. Salmon, which rimmed, is prepared by first being frozen, then seasoned with salt and sugar - perhaps also a few spices. I hereby give the recipe for a salmon side of 1000 grams, so you can scale down/up according to your own weight. Just remember the weight is of the finished cleaned fish with skin. 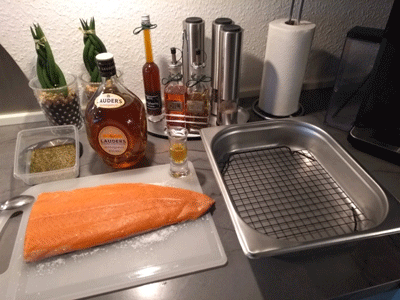 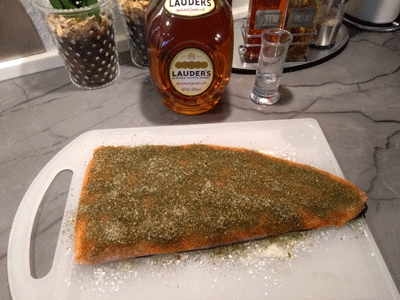
Fresh salmon 600 g ready for salting with Whisky. The salmon has received the 2.6% mixture below. Salting according to the equilibrium method 2.6% 1000 g cleaned salmon side with skin 26 g Lćsř salt or Kosher salt 13 g Muscovador cane sugar light 3.3 g Dill dried 1.6 g Pepper, white from the mill 2 cl Dill schnapps or Whisky NB: I never use nitrite salt for fish. Hint: I have created an Excel spreadsheet for calculating salt, nitrite salt, sugar and spices for an arbitrary quantity of meat and meat of every kind. See sheet Fish.
Procedure without liability: Place the cleaned salmon side in a dish with the skin side down - or a Gastro tray. Just remember to pat the fish dry first. Drizzle the fish with dill schnapps, spread salt and sugar on the meat side and sprinkle dried dill over. The salmon is a fatty fish and must be marinated for 4 to 6 days in the fridge at a maximum of 5°C. Measure the thickness of the salmon, if it is 20 mm thick and above then 6 days, under 20 mm thick then 4 days - a good rule of thumb. You can advantageously mix all the spices in a bowl and sprinkle it over the fish in an even layer. 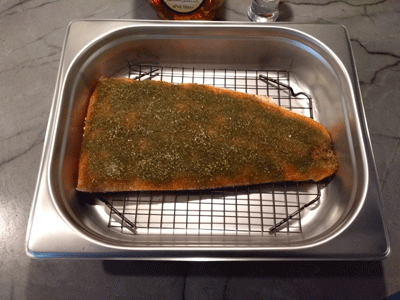 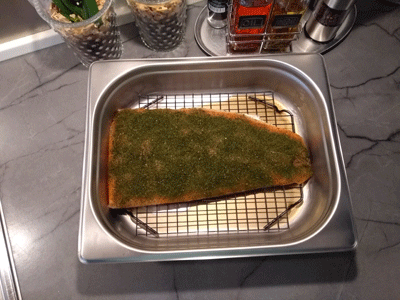
The salmon is placed on a grid in the new Gastrobakke. The salmon can be seen here after 1 day in the fridge A fish emits approx. 5% liquid, so it would be a good idea to put the fish on a rack at the bottom of the dish. Alternatively, the dish must be emptied of liquid 1 to 2 times a day. And remember that aluminum trays are a NO GO for food when salt and acid are used. |
Chef of the wilderness best perch
Next Down
Next Up
|
Take a wilderness vacation in Sweden with the kids and catch perch for this dinner
|
1 kg fresh fillets of perch 4 carrots 1 lemon 2 whole eggs 1 dl milk 100 g butter 1 dl breadcrumbs 12 potatoes for mashed potatoes 1 dl fresh lingonberries, sugar as desired For frying: Salt, white pepper, fish pepper mix and breadcrumbs thyme and French tarragon For mashed potatoes: Butter, salt, white pepper and nutmeg 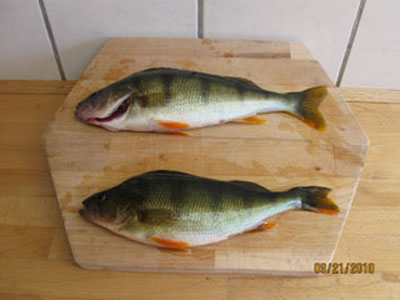
Chef of the wilderness best perch Procedure without liability: There is nothing better than a freshly caught perch, breaded and fried with a splash of fresh lemon juice, served with mashed potatoes, grated carrots and sugar stirred lingonberries.
Whips eggs with a little milk and pour mixture into a plastic bag. Pour the breadcrumbs and spices in a plastic bag. Grate the carrots and pour lemon juice over, pour carrots with lemon juice in a plastic bag. Put now the potatoes over the fire, so they are cooked. It takes approx. 20 minutes. Place perch fillets in egg and milk mixture, then in breadcrumbs and spice mixture and shake well the plastic bag. Remove the fillets from the plastic bag and put them on foil so they can dry slightly before they are fried. Get 50 grams of butter and the rest of the milk and the cooked potatoes in a saucepan. Boil up and whips it to mashed potatoes. Add salt, white pepper and nutmeg. Fry fillets in butter in frying pan, and max a few minutes on each side depending on size. 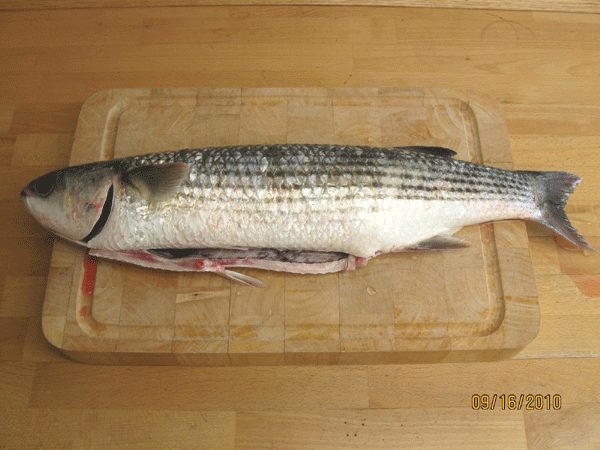
Perch or mullet with orange sauce For frying: 2 whole eggs, a bit of milk, 1 dl breadcrumbs, 1 tsp. salt, 1/2 tsp. white pepper, 1/2 tsp. fish pepper mix, 1 tsp. French tarragon and 1/2 tsp. thyme. Serving: Served with mashed potatoes, grated carrots and sugar stirred lingonberries, and you have the chef's best wilderness-coated perch. Hints: Drip a little lemon juice over perch fillets. On the web you can find a page how to fillet a perch. Mix also grated carrot with grated apples. Drink: In the wilderness you can probably find a good home distillery, where you with clear, fresh, cool spring water can make you a snaps to the dinner. |
Perch or mullet with orange sauce
Next Down
Next Up
|
Perch or mullet with orange sauce. This dish was sent to me by my good fishing friend Egil
|
2 large fresh perch or 1 big mullet with orange sauce 2 carrots 4 potatoes 2 onions 2 food apples 20 almonds Lemon juice from 1 lemon Orange juice from 2 oranges Butter, wheat flour and milk for the sauce Salt, pepper and a little sugar Herbs to taste and liking White wine Fish Fund
Chef of the wilderness best perch Procedure without liability: This dish must be made at home as it is a little more complicated but tastes amazingly good. Start by cleaning the fish.
The perch are scraped thoroughly and all scales are removed. The fins are cut off, but not the tail fin. The fish are thoroughly cleaned in the abdomen and the gills are removed. The belly is rubbed with coarse salt and can be filled with herbs to taste. The skin is scratched with 3 cuts on both sides. Carrots, potatoes and onions are peeled and cut into slices. The fish is placed in an ovenproof, greased dish together with the sliced vegetables and a little white wine is added to the bottom. The dish is covered with tinfoil and baked in ovens at approx. 150 degrees until the vegetables are tender and the fish is baked through. Make sure there is always some liquid in the bottom of the dish and add white wine as needed. Finally, remove the tin foil, brush the fish with butter and continue baking at approx. 200 degrees until the fish get a golden color. A white baked sauce is made which can be added a little fish fund. Add the orange juice and season with salt, pepper and lemon juice. The sauce is balanced with a pinch of sugar. The apples are peeled, the cores are removed and they are cut into coarse pieces. Heat the apple pieces in butter on the frying pan until tender, then crush them into a coarse apple puree with a fork. Add a little salt to the puree. The almonds are slipped and chopped into coarse pieces. They are toasted on the frying pan in a little butter until golden brown.
Perch or mullet with orange sauce Serving: The whole thing is served on a large, heated plate. Fish, vegetables and a blob of apple puree are served separately. Drizzle the fish with the orange sauce and sprinkle with the roasted almonds. Hints: Perch is now in short supply, so try the recipe with a pike or mullet. Both fish are white in the flesh. Drink: For the dish you can drink a glass of cool Riesling, or if you are into it, a glass of Gewürtsraminer. |
Jřrgen Walters Fishing Cakes
Next Down
Next Up
|
Do you desire for a good and delicious Fishing Cakes after a nice fishing trip? Do not be afraid, there are no fish in the cake. Try one of these four below
|
FISHING CAKE BOTTOM
250 g butter 250 g sugar mix butter and sugar 3 eggs stir in eggs, one at a time mixed with 200 g finely crushed hazelnuts 200 g wheat flour 1 tsp. baking powder 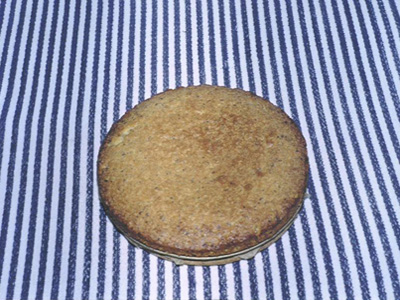
Fishing Cake bottom has been made Get the dough in a baking dish or springform. Bake approx. 40 min at 175 degrees. Lightly grease a medium baking dish or springform with butter, then the cake release better. Cleave the cake when it has cooled.
Chocolate mousse made by Eva and Conny Kock CHOCOLATE MOUSE FOR INTERLAYER 4 eggs 4 tbsp. icing sugar 1/4 l whipping cream 150 g dark chocolate 100 g nougat Chocolate and nougat melted in water bath. Egg whites whipped stiff. Whip the cream to whipped cream. Egg yolks and icing sugar whipped together. Chocolate whipped in. Whipped cream and chocolate mixture comes into the egg white with light hand. Does cold for 1 hour.
CHOCOLATE CREME TO THE TOP 100 g dark chocolate 100 g butter 100 g sugar 1 tsp. vanilla sugar 1 tsp. coffee powder 
Fishing cake decorated and ready for eating Melt chocolate to cream in a water bath. Stir butter and sugar well together. Add vanilla sugar and coffee powder. Spread the creme over the cake when it is cool. Garnish with toasted almond flakes and orange balls.
Drink: Find a good dry Port Wine and serve it with a good cup of coffee together with the Fishing cake. |
Jřrgen Walters Fishing PretzelShopping List for 8 adults - Danish versionFor the dough: 500 g of flour Amo 250 g butter 2 dl water 3 eggs 3 tbsp. sugar 1 pkg. yeast (50 g) To Remoncen 250 g butter 200 g brown sugar or cane sugar 10 g of cinnamon or 10 grams of cardamom 1 large cup light raisins 1 small cup of Swedish Blossa Starkvinsglögg or Port wine For brushing and sprinkle 1 beaten egg Pearl sugar Some raisins Finely chopped nuts or almonds Choose sprinkle to your taste 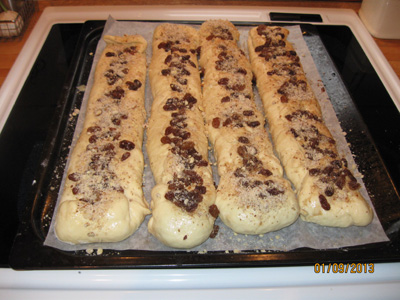
Fishing Pretzel is now made and to be baked Procedure without liability: Begin the day before to put raisins soaked in Glögg or Port. The day after pouring lukewarm water, eggs, sugar, yeast and margarine in a large bowl. Yeast and margarine, divided into appropriate smaller fragments. Everything should be at room temperature, so remove it from the refrigerator at least 6 hours before use. Let the mixture stand in the kitchen of approx. 1 hour. Then add flour a little at a time, while kneaded with "Five of Clubs" on the right hand. Keep the left hand clean if you need it to take other things. It might be a little more flour, the flour amount depends very much on the size of the eggs.
Knead the dough thoroughly until it does not stick, but it should not be too dry. Cover the bowl with a clean, wet cloth and let rise until double about. 1 hour. While dough rises the remonce are made. Pick margarine in a bowl sprinkle sugar and cinnamon (cardamom) above. Use a dough hook and knead the mixture until it is well mixed. Sprinkle a little flour on the dry kitchen table, beat the dough slightly and fold it several times before the dough is rolled out with a rolling pin. Measure your baking tray (L = 40 cm x W = 35 cm). Roll out the dough in length 40 cm and width 44 cm. Cut 4 strips a 40 cm x 11 cm. Distribute remoncen and half of the raisins in the middle of all four strips and folding the dough from both sides against each other. The end pieces also folded over, so remoncen does not flow out. Try pressing the dough together a bit so it does not blow up during baking. Press with a flat hand on top of all the pieces to be flat. Brush with beaten egg, sprinkle pearl sugar, the rest of the raisins and chopped nuts (almonds) on top. Set the unbaked Fishing Pretzel on the baking tray with baking paper and let them rise a bit more before being put into a preheated oven and bake for 15 to 19 minutes at 220°C. The time may vary according to how many raisins with liquid, you get into the Fishing Pretzel, and of course your oven. Just be aware of the time, for suddenly can the Fishing Pretzel become too brown. 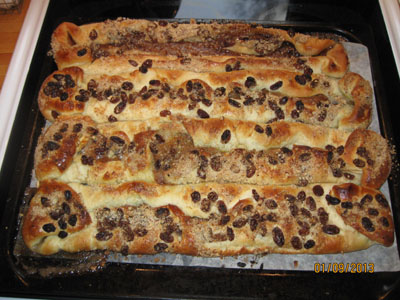
Fishing Pretzel has now been baked for 16 minutes Drink: Find a good dry Port and serve it with a good cup of coffee together with the Fishing Pretzel. For Christmas, the Swedish Blossa Glögg is very suitable. Hints: A Swedish 10 % Blossa Glögg contains all the necessary spices. Blossa Glögg is available in several variants - strengths - and the strong one must be bought at Systembolaget. I can recommend the two of 15% (orange label) and 10% (red label). |
Jřrgen Walters Fishing BrunsvigerShopping List for 6 adults - Danish versionFor the dough:250 g Amo flour 25 g of butter soft 1 ˝ to 2 cups lukewarm milk 25 g sugar ˝ tsp. cardamom 1 pinch salt ˝ pkg. yeast (25 g) NB. Cold raising in refrigerator overnight only 1/4 pkg. yeast For Remoncen: "Lord Mayor filling" 125 g butter 150 g brown sugar 4 tbsp. dark syrup 100 g of hazelnuts Brunsviger from FynShopping List for 8 adults - Danish versionFor the dough: 400 g Amo flour 30 g butter soft 1 dl lukewarm milk 1 dl lukewarm water 50 g sugar 2 pcs. whole eggs 5 g salt (1 small teaspoon) 30 g yeast NB. Cold raising in refrigerator overnight only 15 g yeast For Remoncen: "Lord Mayor filling" 200 g butter 400 g brown sugar 2 tbsp. cake cream w. vanilla flavor 100 g of hazelnuts 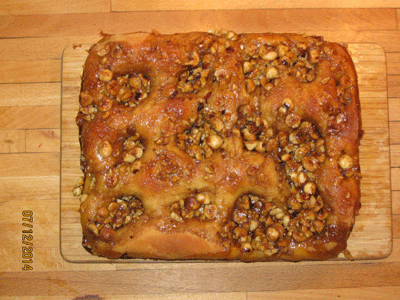
The fish brownie is baked at 180°C for 22 minutes Procedure without liability: Dissolve the yeast in the lukewarm milk (water). Mix flour, sugar, salt, melted butter, spices and eggs in a bowl and pour in milk and yeast while kneading with a machine. Knead the dough for at least 5 minutes. Put the dough for raising under a wet tea towel for 45 minutes.
While the dough is raising, the remone is made. Pour butter, brown sugar and syrup into a saucepan and put it over low heat so it all melts. Put the hazelnuts on a clean and dry pan, warm up so that they take color and the shells come loose. Put the hazelnuts in a dry tea towel and fold over so you can roll the nuts around and get the shells off. Chop the nuts coarsely and pick them up in the pan for the Lord Mayor filling. Mix it all well and let it cool while you go to the next step. If cake cream is used, it comes in when the remone is slightly cooled. The dough is very sticky, so pour it into a baking tin 20x30 cm (I use an aluminum drip tray for barbecue only greased with butter), but remember to put baking paper in the bottom which is lubricated with butter. Replace the dough for raising under a wet tea towel for 45 minutes or until it is raised twice. When the dough is raised to double, press with a index finger as many grooves as possible. (I got 12 grooves). In these grooves, the Lord Mayor filling come and the rest is evenly distributed over the dough. Place the baking form into a pre-heated oven and bake for 20 to 25 minutes at 180°C. The time may vary slightly depending on your oven. Just pay attention to the time, because suddenly the brownie may become too brown. 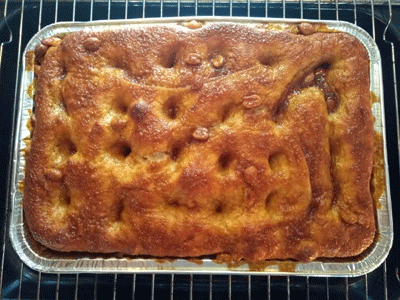
Fynsk Brunsviger is baked at 180°C for 25 minutes Drinks: Find a good, dry Port Wine and serve it with a good home cooked coffee together with the brownies. Note: Brownies are sometimes known as "Poor man's birthday cake". Hints: I have tried cold raising for 24 hours in the refrigerator, giving a better structure to the brownies. Remove the bowl from the refrigerator and place it on the kitchen table for a few hours before pouring it into the greased aluminum drip tray. Spread the dough all the way to the sides and then make the grooves in the dough with butter-lubricated finger. Place the dough in a warm place under a wet towel for raising one more hour. |
Jřrgen Walters Fishing carrot cakeShopping List for 8 adults - Danish versionFor the cake:300 g brown sugar 4 whole eggs 2 dl grape seed oil 2 tsp. vanilla powder 2 tsp. cinnamon 2 tsp. cardamom 2 tsp. cocoa powder 2 tsp. baking powder 275 g of wheat flour 50 grams of Walnuts 275 g carrots finely grated For garnish: 1 cup Creme Fraiche Plums in Madeira See my recipe below 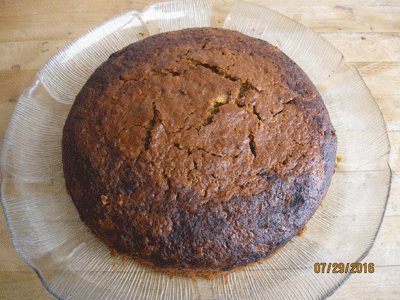
Fishing carrot cake is now baked in 55 minutes Procedure without liability: Begin by pouring brown sugar, eggs and oil in a large bowl. Beat it well within the remaining ingredients is put in. Vanilla, cinnamon, cardamom, cocoa and baking powder mix well with flour. All Stir in the brown sugar mixture - preferably through a sieve. Finally, add carrots and walnuts, the whole is mixed well into a homogeneous mass with a dough hook.
A 25 cm diameter springform lubricated with grape seed oil and cake dough distributed in the form. Cake dough is placed in a preheated 170 degree oven and baked for 50 to 60 minutes. The time depends somewhat on the stove and at what height you set the springform. I put my springform on a rack 1/3 up so 55 minutes was just right. 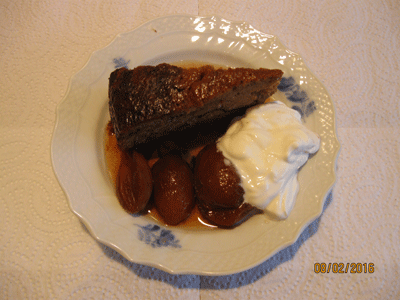
Fishing carrot cake garnished with Creme Fraiche and plums in Madeira Drink: Find a good Madeira and serve with a good home cooked coffee together with the Fishing carrot cake. Plums in Madeira: For 1 kg plums without stones, use 500 g pearl sugar, 2 vanilla rods, 1 cup water, 5 dl Madeira and 1 tbsp. Atamon. The plums rinsed in cold water and wiped off. Halve the plums and remove the stones, place the plums in a clean Atamon washed jars (about 2 liters). Boil water and sugar to a syrup with vanilla rods, which just been cut into quarters. Turn off heat and come Madeira and Atamon in the syrup. Pour the hot mixture over the plums. The liquid should cover the plums, if not, then top up with Jamaica Rum or a strong Stroh Rum. Do you use Rum in a good amount, then you can simply rinse the glass with Atamon and failing to get it in the plums. The glass container sealed with the seal and put in a cold, dark and dry place. Now formed vacuum in the glass when the glass is cold, and it helps to extend shelf life. In the first week I usually take the glass out and shake it so that the plums coincide and all plums are below the liquid. Unopened glass I've had in two years, but when they first opened, I put the glass in the refrigerator and then they can keep for about 1 month. Hints: Can not find Madeira, then use a Portvin. Both types of wine has a strength of between 19% and 20% - also called liqueur. |
Nettle soup a la Conny "Kock" Bĺstad Sverige
Next Down
Next Up
|
Do you have nettle in your garden, you should try this soup
|
2 liters of fresh nettle top leaves 2 l chicken broth or veal broth 4 shallots 4 cloves garlic 2 baking potato in cubes 50 g butter or olive oil 50 g blue cheese 1 small canned tomato puree (gives the soup a brown color) 1 cup Creme Fraiche 38% 1 cup parsley, finely crushed 1/4 l whipping cream 1 packet or freshly grated horseradish Salt and pepper added at the end as desired Nettle soup is normally green, but turns brown, when tomato puree is added. I'll omit that next time 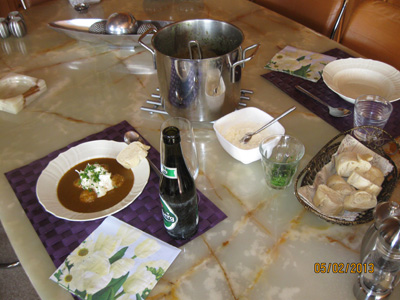
Nettle soup a la Conny "Kock" Bĺstad Sverige Procedure without liability: Use only fresh top leaves without stalks. First rinse nettle free from sand under running water. Then they dried on a piece of kitchen paper or tea towel. Melt butter or olive oil in a large saucepan, finely chopped shallots and garlic blanched slightly in the pan. 2 l broth is poured on and cooked up easily with the precooked potatoes in cubes. The dried nettles, which are roughly chopped, add to the pan and boil lightly for 5 minutes. Add crushed blue cheese to the saucepan, and now the meal must not boil any more. You can benefit from using a handheld blender in the soup now.
Get 1 cup 38% Creme Fraiche to the pan while stirring - still, the meal must not boil. (A small can of tomato paste added while stirring. Nettle soup is usually green but turns brown, when tomato paste is added. I will refrain tomato paste next time). Season the soup with salt and pepper. 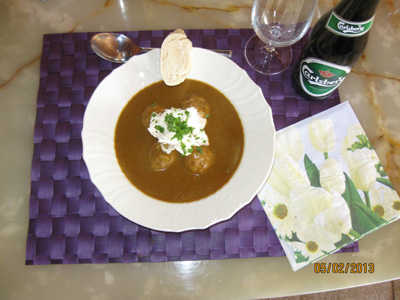
If you add tomato paste, the soup will turn brown Serving: Served with horseradish whipped cream. Whip the cream as firm as the bowl can be turned upside down and add finely grated horseradish. Pour the soup into warm plates and add one or two large spoons, whipped cream horseradish. Garlic Bread fits to the meal. If you want to use the dish as a main course, you can serve meatballs (Köttbullar in Swedish) for the soup, as I have done here. Garnish: Sprinkle with "round hand" finely crushed parsley around horseradish cream. Drink: Serve a half dry Sherry with the soup and "rinse" after with a cold, top-fermented and unpasteurized beer. Hints: Do you have sensitive hands, use gloves when you pick the nettle. This meal was written by my good fishing friend from Stensĺn in Bĺstad Conny "Kock". He passed away several years ago. Honor be his memory. |
'Steward' cod
Next Down
Next Up
|
Cod in a different way, and easy to go to
|
4 small or 2 large cod. A total of 4 kg fresh fish 4 Garlic flute 150 g butter 2 onions if you like use red onions 1 garlic, whole small fresh 4 tomatoes 1 leek or spring onion 1 cup parsley 1 tsp. salt ˝ tsp. white pepper 1 tsp. rose paprika Hints: 1 bag of shredded horseradish 125 g melted butter or 1 kg large potatoes 1/4 l whipping cream 
Here are all the ingredients for the dish Procedure without liability: First you must catch cod but it can be difficult, because in these days, the cod is lacking. Sea biologists give fishermen blame for that not many cod are left in our water. Fishermen say that the water surrounding your country has been too warm for cod. Whom should we believe? But one is sure, the water is warmer, mullet has come to Křge bay in the majority.
Cod is filleted and boned, so there is not any kind of fish bones in it. Lightly grease a baking dish with butter, then added cod fillet in baking dish with skin side down, if you choose to keep the skin on the fish. Cod fillet sprinkled with salt, pepper and paprika rose. Put on the cod fillet, alternating slices of tomato, onion, garlic and leek, then add 150 g butter daub on everything. Bake at 200°C in a pre-heated oven for approx. 30 to 35 minutes depending on cod fillet thickness and size. I had to give extra 5 minutes, because the baking dish came straight from the fridge. 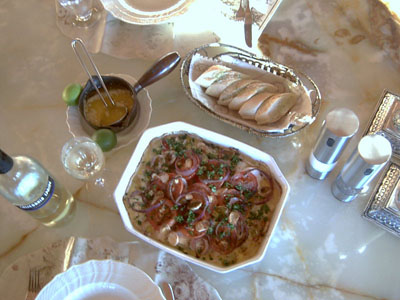
'Steward' cod dinner with potatoes in bottom of the dish Serving: "Steward" cod served with warm flute. Select flute that taste you best. Flute Garlic goes well with the meal. Garnish: When the meal is finished and before it put on the table, sprinkled it with chopped parsley. Drink: A cold white wine fits well with the meal, try a California Chardonnay. But do you prefer beer; try a cold top-fermented and unpasteurized beer. Hints: Missing something? So you should try to melt 125 grams butter, which you add a bag of shredded horseradish. Or some large potatoes cooked in 10 minutes and cut them into slices. Place potatoes in bottom of baking dish. Sprinkle with salt and add a little whipping cream over. Otherwise proceed as described above. Here I shall propose to take the skin of the fish. |
Rum Smoked Salmon - Romrřget laks
Next Down
Next Up
|
Salmon in a different way. Follow the 10 images. Each image takes 15 sec
|
1 stor hel laks pĺ 3 kg 1 salmon fillet 2 pounds 1 kop mřrk rom 1 cup dark rum 1 kop brun farin 1 cup brown sugar ˝ kop groft salt ˝ cup coarse salt 1 spsk. sort peber 1 tablespoon black pepper Hints: Regnbueřrred fra Karlstrup er OK Hints: Trout can do 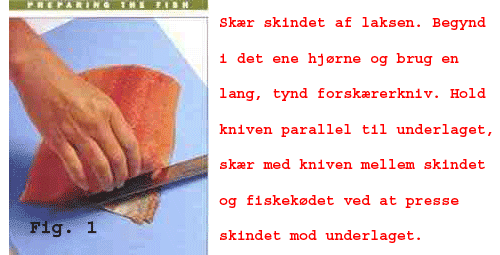
Romrřget laks - Rum Smoked Salmon This recipe I have chosen to write in EnglishPreparing the Fish: Skin the salmon fillet and remove any bones as shown in Preparing the Fish, Fig. 1 to Fig. 3. Rinse the salmon under cold running water and blot dry with paper towels. Lay the salmom in a baking dish just large enough to hold it and pour the rum over it. Let marinate for 15 - 20 minutes, then drain the salmon and blot dry with paper towels. Clean the baking dish for later use.
Make the cure: Mix brown sugar, salt and pepper in a bowl, make sure to mix it thoroughly. Spread half of the mixture at the bottom of the dish. Add the pieces of fish on the side where the skin was down and spread the rest of the mixture over the fish pieces by folding it onto the fish. Cover the dish with film and put it in the refrigerator for 4 hours. Set up a charcoal grill for indirect grilling, place a drip pan in the center and preheat to medium heat. Rinse the cure off the salmon with cold running water and blot dry with paper towels. When ready to cook, toss 2 cups wood chips on the coals. Brush and oil the grill grate. 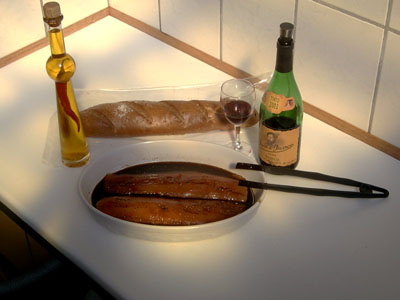
Rom marinated Salmond Place the salmon in the center of the hot grate over the drip pan away from the heat. Toss the remaining wood chips on the coals, and cover the grill. Smoke the fish until cooked through, about 20 minutes. To test for doneness, press the top of the salmon with your finger. It should feel firm and break into clean flakes. Transfer the salmon to a rack to cool. When cool, wrap it well in aluminum foil and refrigerate until cold. Serve cold or at room temperature. Smoked salmon stays in the refrigerator, covered, for 3 to 5 days. Salmon Chips: Salmon skin is so tasty that "Sushi Masters" have made their own recipe. I think it's even better when grilled. Brush on both sides with Asian dark sesame oil. Season well with salt and pepper. Grill the skin directly over medium heat until crackling crips, 10 minutes per side. Serve at once. 
A small trout from Karlstrup can do Service: Rum-Smoked Salmon with bagels, cream cheese and sliced tomato and onion. Decoration: Chives or dill can do well. What to drink:. A glass of cold, dry white vine is perfect to the fish. Hints: 4 cups wood chips - alder or beech - soaked for 1 hour in cold water to cover the charcoal, then drained. |
Lemon pepper smoked salmon or sea trout with mashed potatoes
Next Down
Next Up
|
A delicious spiced salmon or sea trout hot smoked
|
A salmon or sea trout approx. 3 kg fish fillets 8 baking potatoes for mashed potatoes 1 dl whipping cream for mashed potatoes 100 g butter for mashed potatoes ˝ tsp. salt for mashed potatoes ˝ tsp. white pepper for mashed potatoes Brine 10 % eller 10 °Baume 2 l water, 220 g salt and 1 tsp. sugar 1 tbsp. lemon pepper for the fish, bought but can be made yourself in the following way: salt, brown and yellow mustard, onion pepper, paprika and lemon oil Tip: Serve a good acidic salad to the meal The first picture shows half of a salmon side. Other picture shows half trout of 1.5 kg made in almost the same way. Both meals were enough for two people for a good dinner. 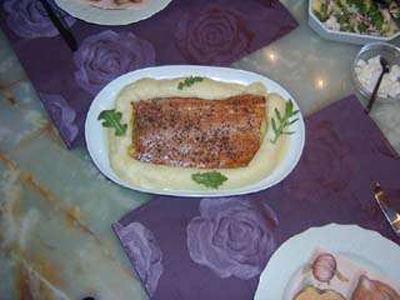
Lemon pepper smoked salmon Procedure without liability: For this dinner you can use salmon, sea trout or rainbow trout. The fish must be fresh caught and have a good size preferably between 2 kg and 3 kg. Smaller fish are a little dry in taste. Cut the fish through from head to tail, so backbones can be taken away. Put the two pieces of fish in a dish and pour cold 10% brine over. Put in the fridge for two hours. The temperature must not exceed 5°C.
After two hours take the fish out and rinse under cold water. Boned and trimmed the fish fillets so there is not any kind of bones in it. Rinse fillets under cold water again and put on kitchen towel with skin side down and pressed dry on meat side. Sprinkle the mixture of lemon and pepper over fillets. The mixture, which I used, purchased ready-mixed in a supermarket to DKK 20.00 per bag, and a table spoon with top of both fillets were suitable for my fish of 2.5 kg. In the two hours the fish are in the refrigerator, you can use to fire up in Smoking Oven. The temperature should preferably be 70°C when you put fillets on top of the grid in Smoking Oven. This temperature is kept at approx. 20 minutes with an open damper in the top and open valve at bottom. It is to get water vapor out of Smoking Oven. Then slowly lowered the temperature to 50°C and the fish is smoked finish at this temperature for approx. 2 ˝ to 3 hours. Meat temperature in the fish is approx. 40°C. My little rainbow trout of 1.5 kg was "cold" smoked for 9 hours at 30°C on a cold winter day. The fish is seen in picture No. 2. Mashed potatoes: Peel potatoes and cut them into cubes. Pour them into a pot with a little water, so they barely covered by water. When water boils calculated 20 minutes to the water poured from the potatoes. Mash potatoes with a "Mash Iron". Pour whipping cream and butter on the potatoes and stir in the pot. Season with salt and white pepper. Cool slightly and the mashed potatoes come in a "dough syringe". 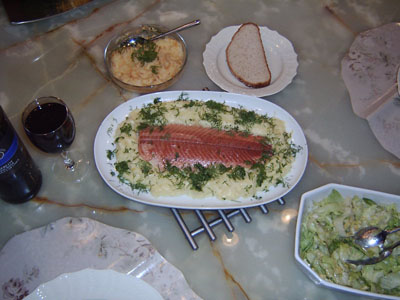
Sea trout with mashed potatoes Serving: A fillet placed on a plate and delicious mashed potatoes sprayed around the fish from a "dough syringe". Four small daub of butter placed on the mashed potatoes and the plate is put into a 180°C hot oven for 10 to 12 minutes. Garlic flute goes well with the meal. Garnish: When the meal is finished and before it put on the table, decorates with a little green season. Drink: A cold glass of dry French white wine well suited to the meal. But do you prefer beer, try a cold top-fermented and unpasteurized beer. Hints: A "dough syringe" or a "dough spray" can be made of parchment paper. So there is no dish washing afterwards. |
Escargot from farm to table
Next Down
Next Up
|
Breeding your own escargots or collect live escargots
|
Ingredients for the oven: 32 large escargots 4.5 cm 2 freshly baked baguette or flute Butter of Escargot "a la Burgundy" 250 g butter 4 cloves garlic 1 cup parsley 2 shallots salt and black pepper Ingredients for the soup: 1 liter chicken broth or 2 cubes with 1 liter water ˝ liter white wine 2 shallots 4 cloves garlic ˝ cup thyme 1 tsp. salt ˝ tsp. white pepper ˝ tsp. rose paprika 1 red chili pepper 4 bay leaves 1 parsley root 1 carrot Take away the mucus: 100 g salt per liter water 4 tbsp. of vinegar per liter of water 
Escargot are cooked first in a good soup Start with some facts: Escargot - also known as "Rampart Escargot" - is the biggest shell-borne escargot in Denmark. It lives in many places in Eastern and Northern Jutland and on East Sjćlland. The escargots like to live in places where the soil is calcareous. It is assumed that they were introduced to Denmark in the middle Ages by monks who ate these escargots in Lent. Snails and carp fish was not considered "real" meat and might be consumed in Lent. Well! They were some strange "Fish" or "Snails" - those monks. The word Escargot is used on edible snails.
The escargot was protected in 1991 in Denmark, but not quite, it means that it must be collected for personal consumption. You can collect escargots in August and prepare them for your own consumption but not for re-sale. If you want this, do your own "Escargots Farm". How do you get an Escargots Farm? Find two escargots in May when it rains, but remember to look after if the escargots are both right-twisted. Most escargots are right-twisted and only two identical twisted escargots can mate. Mark escargot shells 1 and 2 with a waterproof pen. Let these two escargots live in your garden until August and put them back where you found them. They have now laid between 20 and 60 eggs in your garden, next year you have your own escargots stock, shall we say 40 escargots. Lifetime of escargots is from 6 to 8 years, so you will have 102.400.000 (40*40*40*40*40) escargots in your garden after 5 years. Escargots are hermaphrodites, so it is only necessary to collect two. When they meet, they decide for themselves what sex, they each will be. It is quite convenient, since it all goes with the "escargot's pace". There is no time to lose. One of the pictures shows an escargot that has dug down and is about to lay eggs. It was a rainy day around midsummer (Sankt Hans). Procedure without liability: As a starter for 4 people, you need 32 large escargots between 4 cm and 5 cm in diameter. They gathered best on a rainy August day, where they have laid eggs, and therefore have made their "duty of escargots". The offspring is guaranteed and the escargot has eaten itself large and thick. Escargots must now be prepared for human consumption, i.e. all toxic "things" - poisonous mushrooms - which the escargot can eat, must be discharged from the escargot's esophagus and intestinal tract. Esophagus sits in the "foot" and intestine sit up in the twisted escargot shell. You eat only the foot, the gut is cut away. Preparation is best done in a solid box of white wood placed in the shade. White wood without tannic acid. Escargots spraying regularly with temperate water for two days, you are sure that stomach contents are emptied out. Would you like to give the escargots a wholesome replacement and a spicy taste, you can feed them with parsley, parsley root and herbs the first two days, the last two to three days are fasting and purging days. Escargot discharges its stomach contents sitting in the "digestive rest" on the wood box sides; it takes usually a few days. My escargots were collected Saturday, went until Monday on herbs for sprinkling twice a day. Monday herbs were removed and escargots sat down in the digestive position until Thursday when they were prepared. Escargots are killed quickly and easily (read human) in boiling, slightly salted water. Before you do this, check the escargots are alive. Get them in the sink and shower with temperate water. After 15 to 20 minutes is the escargot awaked and come out of his shell. Those who do not come out discarded. Use a large pot of at least 5 liters to kill the escargots in. Put the escargots up in the boiling, salted water and take them out with a skimmer 5 to 10 minutes after water is boiling. While escargots are still lukewarm, pull escargot's body - read feet, stomach and intestine - out of their shells with a small fork. Stomach with intestine is cut off. Warning: Never kill the living escargots in salt. It is cruel and has no purpose. Please use my description above. The escargots freed of mucus in several portions slightly salted, boiling water with a little vinegar before being cooked finished in the soup. It is a procedure that can take time. I used two portions boiling water for this process. The soup is a good broth made of a boiled chicken added onion, garlic, carrot, parsley root, bay leaves, red chili pepper, and thyme. In short, what you have in your herbal garden. The cleaned escargots are softly cooked at low heat approx. 2 hours in this broth. Escargots placed for quick cooling under running cold water in a colander. There are now two options, either frozen escargots in the soup for later use or the pre-cooked escargots prepared now. I spent a good chicken broth made from cubes and all the best from my herbal garden for the soup. Preparation of pre-cooked escargots: The absolute cleaned and dried escargots shells are located in salt in a baking dish with the opening up. One to two escargots placed in each shell and melted "Butter of Escargot" poured over. Put in a 225°C hot oven for 10 minutes. Serve immediately with freshly baked flutes to immerse in the butter in escargot shells. Images of the final meal at a later date because I have frozen the escargots. Drink: It is really very difficult to choose the correct "drink" to this meal, so I think you must choose yourself. Is it summer, and you sit on the terrace, I recommend a dry, cool white wine. Perhaps Champagne would be good to it. Judge yourself. 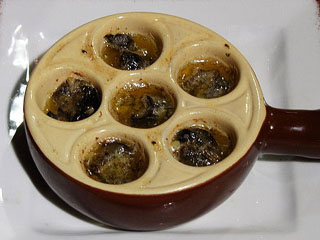
Escargots then baked in butter, garlic and parsley Hints: You can buy canned pre-cooked escargots with cleaned escargots shells, so you're saving yourself a lot of work. But remember it must be the right canned escargots and not the finished deep frozen in parsley and garlic butter. This is marsh snails - read sewage snails from Far East. Instead of escargots shells, you can find in the trading houses a plate with 6 to 8 holes where the escargots are placed and you only poured the "Butter of Escargot" over, and then baked in the oven at 200°C for 10 minutes. Escargots shells cleaned: Remove the last remnants of the intestinal system and boil escargots shells in water containing a little soda. Escargots shells rinsed well in hot water and put to drain. Finally they are baked in the oven at 200°C for 10 minutes. They can now be used as described above. Note: You are obviously not having as many escargots in your garden, as described above. Many die during winter. They are eaten by animals and birds. The largest escargot eater, you have in your garden, is the hedgehog. Use hedgehog if you have Iberian snail's alias Killer snails in the garden. Remember definitive no poison in your garden when you have an escargot. |
Cooked, cold trout in jelly a la Bente
Next Down
Next Up
|
Meal attributed the wife of a pro fisherman from Karlstrup
|
1 nice rainbow of 1.5 to 2 kg 2 new baked flute or other good bread 1 cup dill or chives or spring onions 125 g mayonnaise 125 g Creme fraiché 38% 1 tsp. carry, the mild one 1 packet frozen prawns 4 small tomatoes flavor 2 hard boiled eggs 1 lemon 1 bunch asparagus, white or green 12 isinglass Broth: 4 dl dry white wine 6 dl water 2 tsp. salt 2 leeks or 4 spring onions only the green 1 onion 2 cloves garlic 1 red chili peppers 4 bay leaves 1 carrot 4 cm fresh ginger 1 twigs lovage, bouillonurt or maggiurt 1 twigs thyme 1 twigs sage 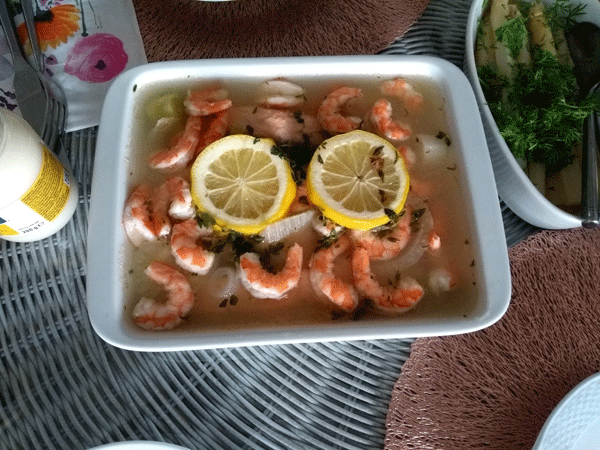
A festive dinner - Cooked, cold trout in jelly a'la Bente Use the same procedure for eel in jelly. 1 kg skinned and cleaned eel Procedure without liability: First you have to catch a big trout suitable for 4 persons. A trout of 2 kg is sufficient as main course. Is it used as a starter, there is for 8 persons. Cut the trout from bowel opening to head and cut off the head. Clean the trout free of guts, blood, skin and slime under cold water. Prepare a broth in a fish pot of 4 dl white wine and 6 dl water. Pour all the above ingredients in the fish pot and let it boil softly for 10 minutes before the fish comes up in the boiling broth. Trout placed in the fish pot on grid and return to a boil. Reduce the heat, cover and simmer for 15 to 20 minutes. Turn off the heat and the fish is resting 5 minutes in the broth. A small fish boil only for 10 to 15 minutes. Try for yourself - can the bone of the dorsal fin be pulled out easily - is the fish fully cooked. If you want to try with eels, the times are the same for large eels (600 g) and small eels (300 g) live weight.
Do you use a frozen trout, pour all ingredients in the cold broth and put the deep frozen trout on the grid in the cold broth. Warm up to a boil and let the fish simmer for 30 to 45 minutes depending on size of fish. Same rest time as above. A deep-frozen trout may be turned on the grid after half the time, so that the upper part is under water. Grid with the trout is taken up and to cool. When it is lukewarm, the fish flesh peeled from their bones. Meanwhile, poured boiling broth through a strainer into a bowl and made sedimentation. 12 leaves of gelatins into softened in cold water for 10 minutes. The almost clear, boiling broth measured up to 1 liter, and if there is missing a little attenuate with water or white wine. Bring now the broth to a boil and 12 isinglass be poured in one at a time while stirring. Turn down the heat and stir vigorously in the layer - do not boil. The fish clean from skin and bones, remember also the brown fish fat on the sides, it is not tasty when consumed in large portions. Add the nice pieces of fish in a dish with high edges and pour over fish broth. To cool and then covered with film. Put in the fridge for the next day. Now you have two options for serving the fish. As a starter serve on individual plates or as a main course serve in the whole dish. As a starter you share the fish with some jelly on the individual plates and decorate the dish with things you like best. As a main course you decorate the entire dish with everything and put it on the table. Then, guests can choose from the decoration. 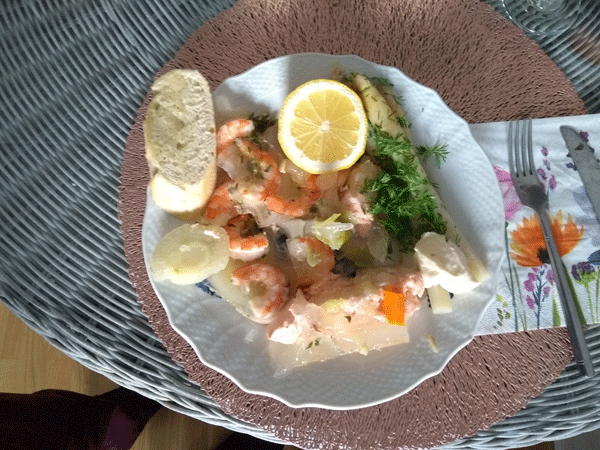
A festive dinner - Cooked, cold trout in jelly a'la Bente Use the same procedure for eel in jelly. 1 kg skinned and cleaned eel Garnish: Make a dressing of mayonnaise and sour cream together with the carry and decorate plates or meal. Garnish with asparagus, prawns, eggs, tomatoes and lemon slices. Cut dill over the meal. Chives and the white of spring onions -if you prefer - can also be used. Drink: A cold glass of dry French white wine well suited to the meal. But do you prefer beer, try a cold top-fermented and unpasteurized beer. Hints: If you are making this dish for the wife and yourself, arrange it on two plates, which are then decorated. The rest of the fish in gel is immediately put back in the fridge, and it can keep there for 3 to 4 days at a temperature below 5°C. If a soup is to be 100% clear, you must use 2 egg whites with shells per 1 liter of soup/stock. Search net, how to do it. |
An anglers "Dried and Salted Cod"
Next Down
Next Up
|
Meal can be made by all anglers
|
1 kg "Dried and Salted Cod" or 3 kg cut fresh cod 1 packet shrimps for garnish 4 tomatoes 2 onions 1 garlic, whole small fresh or 4 cloves garlic 1 lemon ˝ dl white wine vinegar and ˝ dl water mixed or 1 dl apple juice 1 red chili peppers 1 glass of green olives without stones 1 dl. whipping cream 1 twigs sage 1 twigs rose marin 1 twigs lovage - only leaves 1 tsp. carry, the mild one 1 tsp. coarse black pepper 1 dl olive oil 1 dollop of butter 1 kg new Danish potatoes 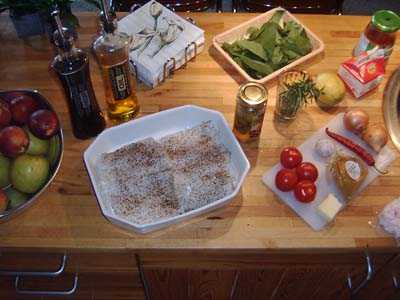
Salt cod a gala dinner garnished with shrimps Procedure without liability: You can start in two ways. Either buys ready-made Dried and Salted Cod from fish dealer. Or you prepare your self caught cod to Dried and Salted Cod. This is the last description, which I've used in my meal. But you get both descriptions.
First description: For ready-made Dried and Salted Cod, you need approx. 1 kg to 4 adults. Dried and Salted Cod placed in a large pot or bowl with cold water in a day. The water changed at least a few times in this day. Is the weather hot the pot or bowl must be placed in the refrigerator. How salt, the meal must be depends on how many times you change water. Now you have the fish for further processing. Second description: I used 15 cm of the thick part of a 10 kg cod for 2 persons. The weight was probably around 1 kg or just over. Cod piece was filleted into two pieces, all bones were removed, but the skin remained. 500 g fine salt was spread over the fish as follows: In a suitable dish sprinkled some salt on the bottom. A piece of fish placed with skin side on the salt, new salt sprinkled on meat side. The second piece of fish also sprinkled with salt on meat side added with this meat side on top of the first piece of fish. Over the two pieces of fish sprinkled the rest of the salt. Cover with film and put in the refrigerator for a day. It draws a lot of liquid out of the meat and the fish are now so firmly in the meat as it now looks like ready-made Dried and Salted Cod pulled in cold water for 12 hours. Take the two pieces of fish from the refrigerator and clean the rest of the salt off in cold water. Place fish pieces in a bowl with cold water in the fridge for three hours. How salt, the meal must be, depends on how many hours in cold water. Now you have the fish for further processing. Place the fish pieces in a lightly greased baking dish with skin side down, and drip the fish with lemon juice. Sprinkle the spices over the fish, top with vegetables and butter evenly. Pour whipping cream and juices over. Juice is either ˝ dl white wine vinegar and ˝ dl water mixed or 1 dl apple juice. Put in a 200°C pre-heated oven for 15 minutes. Then reduced to 180°C and bake further 45 minutes. Turn off the oven and sprinkle with thawed shrimps. Takes after-heat with oven doors open for 10 minutes before serving. 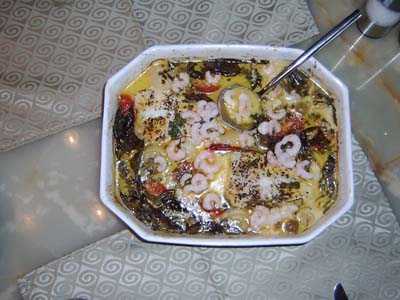
The dish here is only made for 2 people and garnished with shrimps Serving: Put the dish on the table and serve with new Danish potatoes. Garnish: Well! it was only shrimps to be used. Drink: To the meal fit a cold lager with a snaps. Hints: Garlic flute goes well with the meal. Dip it in the "sauce". |
Grilled Rainbow with toasted pine nuts in garlic olive oil
Next Down
Next Up
|
Meal can be made of a "Rainbow Trout" from Karlstrup Lime Grave
|
2 kg of fresh caught rainbow trout 200 g pine nuts 1 kg new Danish potatoes 1 dl olive oil 4 cloves garlic 1 lemon 1 twig sage 1 twig rose marin 1 twig lovage - only the leaves 1 tsp. coarse black pepper 2 tsp. salt 1 dollop of butter 1 garlic bread Salad: Mix your favorite salad and serve it to the fish 
A light and easy dish by the grill on a balmy summer evening Procedure without liability: Of course, the fish must be caught first. Or purchase the trout. The fish must be cleaned from fish scale. This is done by scratching the fish from tail to head with a "blunt" knife. Brush with a stiff brush under cold water. Cut the fish up from the gut to the head, cut the head off and pull all the guts out. Clean the renal blood out from the abdominal cavity with a knife and a brush under cold water. Fish fillets and cut away all side bones. Wipe the fish dry with kitchen towel.
Sprinkle a little salt on the skin side and place the fish on a plate. Sprinkle salt and pepper on the meat side and sprinkle the fish with olive oil. Let the fish soak in the fridge for 20 minutes before it grilles on both sides. 10 minutes on skin side and 5 minutes on meat side are appropriate. Meanwhile, you prepare the potatoes for frying in foil on barbecue. Clean the potatoes and dripping with oil, sprinkle with salt and pepper, various herbs came in and put a temperature sensor in the biggest potato. Close the foil and place it on the barbecue. When the temperature is 99°C to 100°C, the potatoes are done. My experience says it takes between 30 and 45 minutes. Make a foil tray with a piece of double foil. Come pine nuts, garlic, butter and olive oil in foil tray and set it on the barbecue. When pine nuts are slightly brown maybe black, they are ready for serving. Use to garnish the fish. 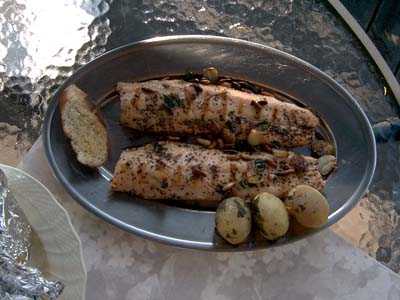
Served with new Danish potatoes and garlic bread Serving: Put the dish on the table and serve with new Danish potatoes. The fish trickle with lemon. Garnish: Well! It was the pine nuts to be used. Drink: To the meal fit a cool white wine. Hints: Garlic flute goes well with the meal. Dip it in butter and olive oil. But remember also to eat the skin, it is crunchy and good. |
Grilled and smoked mullet in a salt crust served with Salsa Verde
Next Down
Next Up
|
Meal can be made of several kinds of fish
|
2 kg of fresh caught mullet or 2 at 1 kg 2 kg coarse salt or more for 2 fish 2 garlic bread Salad Salsa Verde 1 cup parsley 1 cup mint 1 small glass of capers 1 clove garlic ˝ tsp. grated lemon shell ˝ lemon juice ˝ dl virgin olive oil 2 tbsp. boiling water ˝ tsp. Lćsř salt ˝ tsp. coarse black pepper Salsa Verde must be consumed immediately after production Can also be purchased ready-made in specialized stores Try also the other forms of Salsa 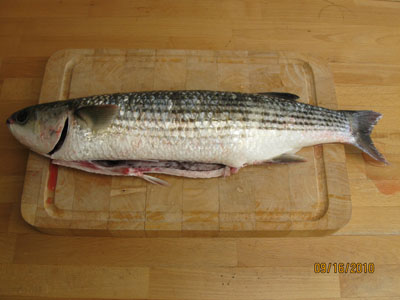
Mullet 1.75 kg and 52 cm in a salt crust for the smoke oven Procedure without liability: Of course, the fish must be caught first. Or purchase the mullet. The fish must be cleaned from fish scale. This is done by scratching the fish from tail to head with a blunt knife. Brush with a stiff brush under cold water. Cut the fish up from the gut to the head, cut the head off and pull all the guts out. Clean the renal blood out from the abdominal cavity with a knife and a brush under cold water. Also remember to brush away the dark skin in the abdominal cavity of the mullet.
In a suitable aluminum tray or roasting pan if you use your oven instead of barbecue, sprinkled coarse salt 1 cm at the bottom. The area must be slightly larger than the fish, as this must be laid on the salt. Press the fish bit down into the salt and pour salt over the fish so it completely covered with 1 cm thick layers. Folding salt flat around the fish. Your grill should be set up for indirect heat, the procedure can be found here. Charcoal or briquettes from two barbecue starts poured on barbecue. One on each side. When barbecue is appropriate warm approx. 175°C, aluminum tray with the fish is placed in the middle of the barbecue. Two hands full "wetted" beech wood dust distributed on the coal. The lid put on the barbecue and the fish "Smoke fried" in 40 to 50 minutes at 175°C. The time depends on fish size and temperature that you can keep in the barbecue. The thermometer shows the temperature inside the fish. Plug the sensor into the thick part of the fish and keep the shielded cable away from the hot coal. When the temperature is between 65°C and 70°C the fish is done. Salt crust allows the smoke to penetrate the fish, and the fish is damp fried in its own brine. Salsa Verde: Mix chopped parsley, chopped mint, capers, garlic, lemon juice and peel, olive oil and boiling water in a blender. Blend to a suitable consistency and season with salt and pepper. There should be a cup of it. Indian Chutney: Want to try something exotic instead; you should try making this accessory. Can be used with all fish meals, but I like it most to fried or grilled fish. 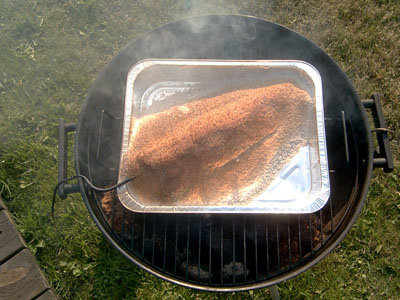
A different dish with mullet at the grill on a warm summer evening Serving: Present fish in salt crust for your guests by putting aluminum tray on the table. Use two spoons to remove the top crust of salt. Now remove the skin at the top of the fish and the upper file loosened and put on a clean dish. Backbones removed and the lower file placed on the clean dish. Garnish: Use a little green, parsley, mint and lemon. Drink: To the meal fit a cool white wine. Hints: Garlic flute goes well with the meal. Bread buttered with Salsa Verde. A good idea would be to put a clover garlic, a little onion and parsley into the belly of the fish. Chop it roughly first. Do you have other good herbs in your garden, use them. It gives a good flavor that suits Salsa Verde. Drip a little lemon juice on fish before it is prepared. |
Homemade "Gravlax" this is a rainbow trout from Karlstrup
Next Down
Next Up
|
Meal can be made of salmon or trout
|
2 kg freshly caught salmon or trout 200 g coarse kitchen salt 100 g brown cane sugar 10 g of lemon pepper 1 bag dried dill for digging 1 bag dressing "Rćvesovs" 1 twig fresh dild to decorate 1 fresh bread according to your own taste 1 bag unsalted butter NOTE: Try this if you do not want to use dressing "Rćvesovs" for the salmon. A small glass of cognac or whiskey or pors (Myrica) snaps pour over the fish before it is salted and put in the refrigerator. Use only dried dill for "Gravning" because of soil bacteria in fresh dill. Fresh dill is used as a decoration at the table.
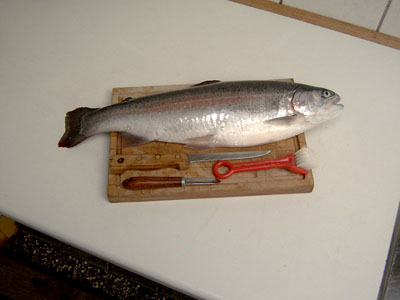
1.5 kg Rainbow trout from Karlstrup P & T Procedure without liability: Use only a freshly caught salmon or trout, which coarsely cleaned immediately after the catch. Never put the fish on earth, but put it immediately in a plastic bag to avoid soil bacteria.
At home the fish is scaled from tail to head with a blunt knife and a stiff brush. I use a potato knife to scale the trout. The fish fillets and then all side bones cut off, so there remain only the vertical nerve bones. These can usefully be taken out with a tongs just before the fish should be eaten. It is only necessary to take the nervous legs out if the fish is large. For fish less than 2 kg, I do not think that these bones are annoying. They are soft after the fish has soaked in salt and they are cut into small pieces. In an appropriate dish sprinkled salt and sugar at the bottom, the fish is placed on the skin side down. Salt, sugar and dill spread over the meat side. Dish covered with film and put in refrigerator to soak in 48 hours. It draws some liquid from the fish, so take the fish up in a clean and dry the cutting board before cutting slices of the fish. 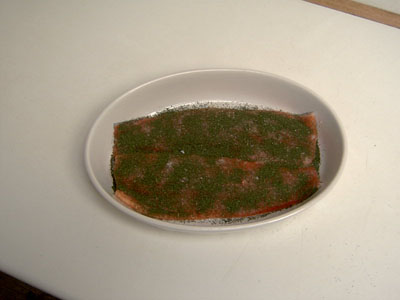
Homemade "Gravlax" of a freshly caught Rainbow Trout Note: If you use cognac or whiskey or pors (Myrica) snaps, it should be poured over the fish before you sprinkle with salt, sugar, lemon pepper and dill. Serving: Can you eat the whole fish at once cut the fish at the table. Otherwise just take it, which can be eaten now. The rest remains in the fridge and it can last for max 3 days. Garnish: You can now decorate fish pieces with fresh dill, if you like. Drink: To the meal fit a cool white wine, or a cold beer with a dram. Hints: The file pieces can be frozen before the preparation, but not after. It may be a good idea to freeze the salmon/trout for 48 hours before the preparation. There could be Ascaris suum (Roundworm) in the fish. It is a requirement of the authorities that fish, that are not heat treated, must be frozen for 48 hours if the fish is to be used for Sushi. |
Home made Böhmische semmel dumpling
Next Down
Next Up
|
The meal here is made with spelt flour and provides two large dumplings
|
250 g spelt flour 150 ml lukewarm liquid Here, made of 50% water & 50% whole milk 1 whole egg ˝ pkg. yeast, 25 g 1 tsp. sugar 1 tsp. salt Option for semmel dumpling Day-old bread the size of a rolls 25 g of butter for frying the bread Option for speck dumplings 200 g bacon 1 lřg 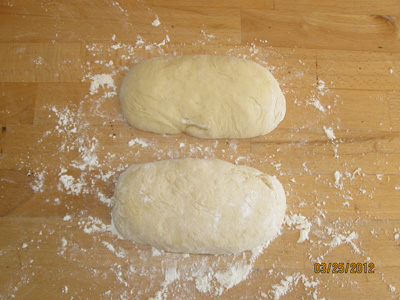
See the airy dumpling balls Procedure without liability: Pour the flour, sugar, salt and a whole egg in a large bowl. Dissolve yeast in lukewarm milk/water. Add the milk/water with the yeast to the flour with vigorous kneading. Adjust the dough with flour or liquid until it do not sticks to the bowl sides. Let the dough rest and rise until double in a tea towel for 40 to 60 minutes at room temperature while you prepare the next step.
It is a matter of taste whether you want to mix day-old bread in this semmel dumpling. It dates from old times (war-time), where nothing was wasted. Cut day-old bread into small cubes and fry them golden brown in butter. Roll out the dough on the table - remember flour on board and hands - put all bread cubes on top of dough. Now knead dough and bread cubes together, then divided the dough into two pieces, which then formed into semmel dumpling, resting covered for 30 to 40 minutes. Add semmel dumpling in boiling salt water and simmer for 25 minutes. After half time, semmel dumpling reversed, so the top will now be under water. There was in old times a semmel dumpling-steam pot in which semmel dumpling were steamed. I will try my fish pot - why not? It has a grate at the bottom, to which the water is filled up to. On the grate I put the semmel dumpling when water boils. Give them 25 minutes under steam and do a sample taste with one. See the picture semmel dumpling are steaming in my fish stew. Provides the most perfect result. 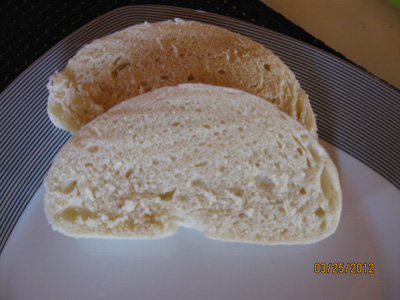
Home made Böhmische semmel dumpling Serving: Bread dumplings cut into neat slices before being served with the meal that you intended to eat them with. Here I come up with some good advice: Is very suitable for meals with a good, strong, hot and plentiful "cream sauce". Goulash, pork roast, roast goose, wild rose, roast beef and cod with mustard sauce. Anyone who has been in Praha, have probably tried "Goulash with Knödel" at the brewery and restaurant "U Fleku" translated into "At the Fleks". Coming from the family name Flekovsky. Garnish: You can save some toasted bread cubes or bacon for garnish. Drink: A "Pilsner Urquell" will be a natural thing to this meal. Hints: You may need to adjust the amount of flour depending on the size of eggs. You'll find it easy yourself. I spent approx. 100 grams more flour to adjust and to table and hands. You can also boil semmel dumpling in a soup made of chicken and herbs. It would be ideal to this meal "Flekovsky Goulash" which comes below. Note: This recipe I have promised a fishing buddy on a fishing trip, but when and to whom, I have forgotten. But now it is here. Was it Lars? Look! As it was, after all, a "fish" recipe. semmel dumpling were steamed in a fish stew. There are two types Knödel: Bread dumplings as described above and then speck dumplings. For speck dumplings add bacon and onions instead of bread cubes. For this recipe used 200 grams of bacon and 1 onion. Roast it for a few minutes in the pan for it takes a little color (glassy). Allow to cool and add it to the dough, as described above with the bread crumbs. Speck dumplings used especially for soups, cabbage meals and coleslaw. |
Homemade Böhmische Goulash with semmel dumpling
Next Down
Next Up
|
Made after a Bömisch recipe
|
1 kg of beef shoulder or boneless beef chunk 200 g bacon, diced 2 tbsp. flour ˝ to 1 tsp. salt ˝ to 1 tsp. ground black pepper 4 tsp. sweet paprika 2 tsp. hot paprika. For the brave 4 tsp. 1 tsp. ground caraway seeds 1 ds. 70 grams of concentrated tomato paste 6 bay leaves 1 green pepper, sliced 1 red pepper, sliced 6 cloves garlic 1 to 2 onions ˝ til 1 bottle Limfjords Porter Double Brown Stout Or similar red wine Used beer, add 1 tbsp. vinegar 4 tbsp. olive oil for frying Or try with half the olive oil and butter 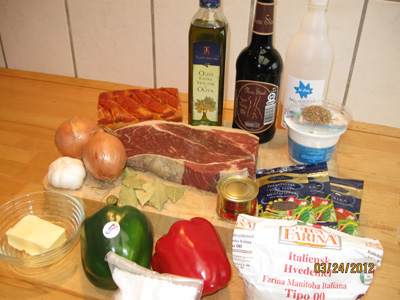
All ingredients for Böhmische Goulash. Dumplings see above Procedure without liability: Roast bacon in its own fat, add a little oil/butter and brown the hakked onion and garlic lightly in it. Cut beef into bite-sized pieces, put them in a plastic bag with flour and paprika and shake the bag well. Brown then the meat in the pan. Add salt, pepper, caraway, concentrated tomato paste, bay leaves, green and red peppers into strips.
Stir into the saucepan and add the beer or wine to taste. I use a Limfjords Porter Double Brown Stout Beer and a tbsp. vinegar. Let the pot simmer for at least 1 ˝ hours under a lid. Check that the meat does not boil dry. Add a little water/beer/wine if necessary. If too much liquid take the lid of the last few minutes so that it evaporates. 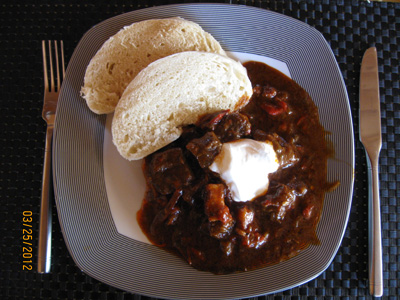
Homemade Böhmische Goulash with semmel dumpling Serving: Bread dumplings cut into nice slices before being served with the meal that you intended to eat them with. Here I come up with some good advice: Is very suitable for meals with a good, strong, hot and plentiful "cream sauce". Goulash, pork roast, roast goose, wild rose, roast beef and cod with mustard sauce. Anyone who has been in Praha, have probably tried "Goulash with Knödel" at the brewery and restaurant "U Fleku" translated into "At the Fleks". Coming from the family name Flekovsky. Garnish: You can save some fried bacon for garnish and sour cream on top. Drink: A "Pilsner Urquell" will be a natural thing to this dinner. Hints: The sauce thickness is adjusted with the flour from which the meat is shaken with the plastic bag. I used 1 large spoon to my meal with 33 cl beer and it was just right. |
Cooked crayfish in seasoning
Next Down
Next Up
|
The meal is made on crayfish from Karlstrup P & T
|
25 male crayfish Brine 2,6 % eller 3 °Baume 8 l water 1 dl / 215 g salt 2 tbsp. black pepper grains 2 tbsp. sugar 4 til 5 dill screens 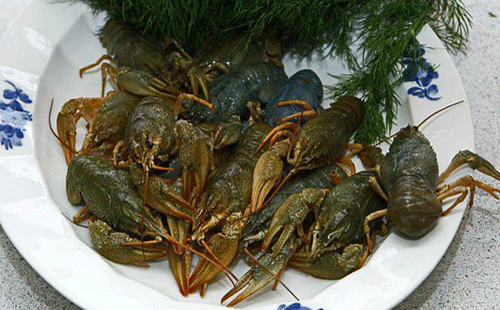
Live crabs are black Procedure without liability: Notice that I write male crayfish, it is because female crayfish is protected in the lake. Do you buy your crayfish elsewhere; it is naturally subordinate whether it is male or female crayfish.
This recipe is suitable for two adults who can eat 25 crayfish. Take a 10 to 12 liter pot and add 8 liters of water. When it boils, add 1 dl salt, 2 tbsp. sugar, 2 tbsp. black pepper grains and 4 to 5 dill screens. Let boil for 1 minute and come crayfish fast in one by one. Depending on the size crayfish must cook 5 to 7 minutes. Turn off the heat and remove the pot. Place the pot with crayfish in the water to cool overnight. Take crayfish up 3 to 4 hours before they must be eaten, put them on a plate with paper towel and let them dribble before they are served. Should you make this meal for 4 adults i.e. 50 crayfish, just cook 25 crayfish at a time. Remove the cooked crayfish from the pot when they are cooked. When all 50 crayfish are cooked put all the crayfish in the pot and to cool. Maybe you need a bigger pot when there are so many crayfish. But always remember that water should be boiling before the crayfish comes in the pot. 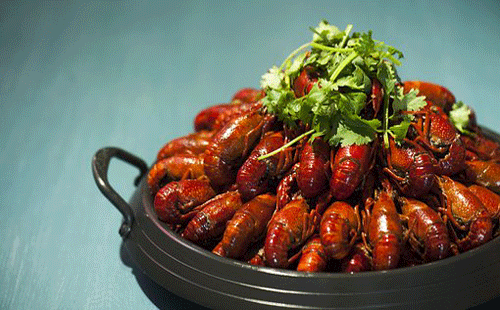
Cooked crayfish are red Serving: The crayfish are best eaten with a good, coarse country bread with butter and one or more dram. Garnish: Fresh dill and perhaps lemon slices. Drink: The Snaps should preferably be mild, there is a dill Snaps from Aalborg. Rinse with a beer. Cold white wine is also a possibility. |
Irish Lamb Stew. The dish can be made on a
Next Down
Next Up
|
|
For salting: 1,5 kg lamb-shoulder or 1,5 kg lamb-leg Brine 14 % eller 11 °Baume 3 liters of water 490 g of salt 200 g brown sugar 15 bay leaves 1 whole garlic 1 onion 1 red chilli pepper 10 black pepper grains 10 whole juniper grains 1 cinnamon rod 10 cloves Garnish: parsley or mint For smoking: 5 to 10 liters of beech wood dust 1 l juniper wood dust Hot smoked for 10 hours between 50°C and 60°C in the smokig oven or Cold smoked for 48 hours at a maximum. 25°C in the smokig oven Main course: 1 large Savoy cabbage or white cabbage 8 nice potatoes 2 carrots 1 parsley root 1 leek 2 onions 4 cloves garlic 1 red chili peppers 100 g butter 2 tbsp. oliven olie 2 dl apple juice 1 tbsp. brown sugar 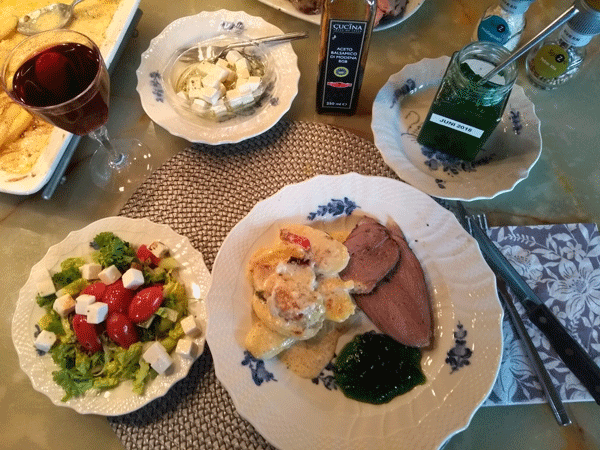
Irish lamb smoked and grilled served with with Shopska salad Procedure without liability: This recipe comes from an ancient recipe, where you preserve the meat by salting and smoking. The method can also be used to make smoked pork roast. See recipe below. Pour water into a suitable large saucepan and bring to a boil. Add salt, sugar and all the spices. The brine brings to a boil and simmer for at least 10 minutes. Subsequently, the mixture is set aside to cool overnight.
If the lamb shoulder / lamb leg has bones - it is usually - the meat must be inserted into the bone in several places with an awl or large meat needle. This is because that the brine must penetrate into the bone in order to prevent the meat from broken down by microorganisms. When this is done, the meat is placed in a suitably large salt bath and the cold brine is poured over. Now place it in the refrigerator at 5°C for 3 days. Inspect the meat is under the brine. If not, use a plate on top of the meat. On the fourth day take up the meat and cleaned under running cold water. Meat cord is plug into the thin end and the meat suspended in Smoking Oven for drying for 24 hours before being smoked. Remove the meat from Smoking Oven and set fire to the wood dust with 1/4 dl ethylated spirits. Let it burn for approx. 20 minutes with the door and the "hat" ajar. When smoke production is good, the meat is put in Smoking Oven. Now it is up to you to maintain the temperature between 50°C and 60°C for the next 10 hours for hot smoking. For cold smoking you must smoke at least 48 hours at max. 25°C. If you start in the morning, you can simply let the meat hang overnight in Smoking Oven, so it cools slowly in the night. Now follow the recipe of Irish Lamb Stew with lamb-shoulder or lamb-leg. Put lamb-shoulder or lamb-leg into a saucepan and pour water on till it the covers. Cook the lamb for 30 to 40 minutes. While it is boiling prepare the vegetables: Potatoes peeled and cut into 2 cm thick slices. Carrots and parsley root peeled and cut into 5 cm long beams. Chop onion and garlic finely. The leek chops into 2 cm thick slices. Chilli pepper cut longitudinally, just leave the seeds in, it gives a better and stronger taste. Savoy cabbage cut into quarters and cut off the stalk, then chops roughly. Take a large frying pan with high sides - or a pot - and get in butter and olive oil. Come in Savoy cabbage and sprinkle with brown sugar, let it take a little color. Pour all the vegetables in the pot and add a little apple juice and soup from the boiled lamb. Be careful with the salt, the soup from the lamb is very salt. The meat of lamb-shoulder or lamb-leg cut from the bones in mouth right pieces. Get it on the frying pan or pot and cover with a lid. The meal must now simmer for 30 minutes, but see that there is enough fluid. Fill with apple juice or soup from lamb, if necessary. 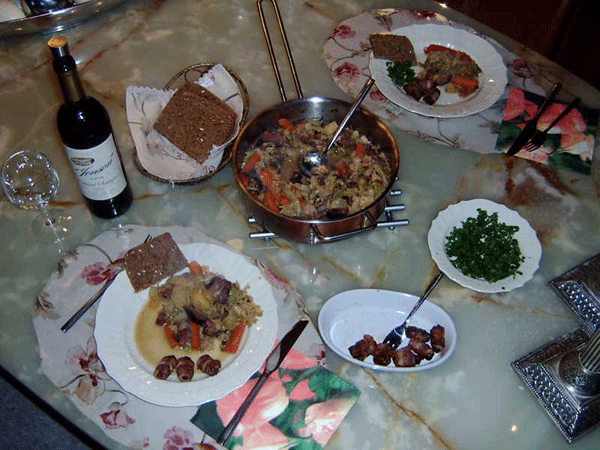
Smoked pork tenderloin made as Irish "Lamb" Stew with fried dates Serving: Put the pan on the table, as shown here, or serve dinner on a dish nicely. Full-grain rye bread served with the meal. Garnish: The dish may decorate with chopped parsley or mint leaves / mint jelly. Mint jelly made from 200g fresh mint leaves, 1 liter unsweetened apple juice, 750g pearl sugar 1 sachet Yellow Melantin and a little green food coloring. Should the jelly be transparent, you have to use a filtered apple juice. The fresh mint cooked in apple musts for three minutes and the juice is poured through a coffee filter. Then follow the recipe for Yellow Melantin bag. Is apple musts sweetened use Blue Melantin and follow the recipe on the bag. Remember, the jelly should be poured in small canning jars and closed when the jelly has become cold. The jelly fills approx. 1.4 liter, use 5-7 glass. Drink: In Ireland, they will probably prefer an Ale, but red wine also goes well with the meal. Hints: Before I've used the pan to the meal, I've done stoned dates wrapped with bacon. See the little plate in the picture above. It can be recommended as a "snake" up to Christmas Eve. The frying pan should not be cleaned before the next meal. Postscript: Irish "Lamb" Stew was made on smoked pork tenderloin, as the family would rather have the lamb shank on the grill. Alternative dry-salted and smoked pork tenderloin: Trim 4 pork tenderloins approx. 2 kg and put them on a layer of salt and sugar in a suitable salt container with a lid. Pour salt and sugar to cover. Make sure that the fillet are not touching each other. I used 1 kg of salt and 200 g sugar. Place salt container in the refrigerator for 3 days. Take the fillet out and clean them well in running water. Tie meat-leash in the thin end and hang them up to dry in the refrigerator for 24 hours. Cold smoke them at max. 25°C for 2 days, and let it hang overnight in the oven to cool. Cut very thin slices of tenderloin and use these to orders with egg and chives. 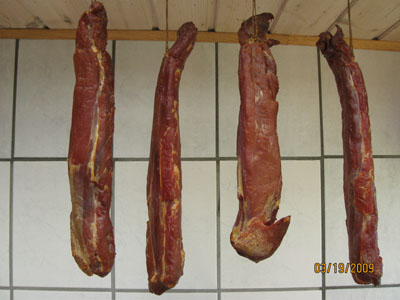
Smoked pork tenderloin can be made into Irish Stew Alternative wet-salted and smoked pork tenderloin: Trim 4 pork tenderloins approx. 2 kg and put them in a spicy brine in a suitable salt container with a lid. I used the following recipe: 3 liters of water, 490 g coarse salt, 200 grams of brown sugar, 15 bay leaves, 1 whole garlic, 1 onion, 1 red chili pepper, 10 black peppercorns, 10 juniper berries and 1 cinnamon stick. The whole is given to the boil in 10 minutes and then cooled overnight. The 4 pork tenderloin are placed in brine the next day and put in the refrigerator for 3 days at 5°C. Take the tenderloins out and rinse them well in cold water. Tie meat-leash in the thin end and hang them up to dry in the refrigerator for 24 hours. Cold smoke them at max. 25°C for 2 days, and let it hang overnight in the oven to cool. Cut very thin slices of tenderloin and use these to orders with egg and chives. |
Salmon or trout baked in puff pastry
Next Down
Next Up
|
|
1 salmon or trout at 1.5 kg to 2 kg 1 package frozen puff pastry with 5 slices 1 cup cottage cheese 1 red chili peppers 2 cloves garlic 4 spring onions or 1 leek - only the white 1 cl. Rum 1 to 2 tbsp. salt. Depending on fish size 1 tbsp. cane sugar 1 tsp. cayenne pepper 1 whole egg Loose rice for 4 people The easy Hollandaise sauce bought on glass Or the real Hollandaise sauce Or the fake Hollandaise sauce Salad of your choice Dill, basil or fresh coriander leaves 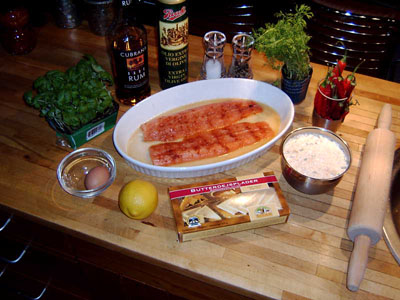
2 trout fillets marinated and ready for baking Procedure without liability: Salmon or trout fillets are cleaned and free of bones and skin. Nerve bones taken out with a rod tip or tweezers by pulling cautious in the same direction as they sit in the fish. You can feel the bones by moving a finger over the fish from head to tail. Put fish fillets in a dish, pour a little Rum and sprinkle the mixture of salt, sugar and cayenne pepper over the fish. Cover with foil or film and set the dish in the refrigerator for 2 hours. The fish must have made some fluid before use. Sometimes one can usefully wait to pull the nerve bones out after the fish are salted - called gravad, because they are not sitting so firmly in the fish meat.
While you wait, you mix cottage cheese with finely cut red chili peppers, garlic and spring onion or leek. Let it also soak in the refrigerator until used. You can usefully make the mixture a day before it is used. Take the fish out and cut the files into appropriate pieces. A fish this size can provide 3 pieces of approx. 5 cm of each file. Roll puff pastry into very thin plates and place a piece of fish in the middle of the plate. On top of the fish you distribute the mixture of cottage cheese, and come a new piece of fish on top. Pak puff pastry together on everything and "glue" it with a touching egg. Make all 5 pieces in the same way and brush with a touching egg on all sides. Put all the pieces on baking paper in a 180°C hot oven and bake for approx. 55 minutes. Turn off the heat and let it soak in the hot oven for 5 minutes with open door. Keep an eye on the upper side will not be incinerated. This can happen if given too much of upper-heat, or you only brush the side with egg yolk. See the two pictures. The very brown brushed are with egg yolk and the bright one with egg white and yolk. 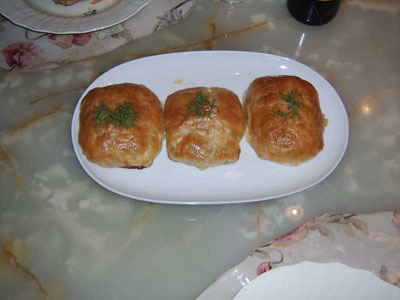
The trout fillets are finished baked in puff pastry Serving: Loose boiled rice with Hollandaise sauce fits excellently with the meal. A fresh, acidic salad can usefully be served. Garnish: The dish may decorate with chopped dill, basil or fresh coriander leaves. Drink: It is a taste issue, whether to drink red wine or white wine with the fish meal. A cold beer is also suitable. Hints: Even if there are only two people to eat the fish dish, just make all 6 pieces, because they taste super cold the next day for cold cuts. Cut them into thin slices and eat them on butter smeared rye bread. Pieces smeared with egg yolk become dark. Pieces smeared with egg yolk and egg whites become light. There is also puff pastry in A4 sheet size, so you can make a whole fish in the oven. The recipe is the same, but the time in the oven may be longer. |
Fried eel with boiled potatoes in white parsley sauce
Next Down
Next Up
|
|
The Fish 1.4 kg of cleaned and peeled eels. Approx. 2 kg live eel 200 g margarine 200 g butter Wheat flour, rye flour, salt and white pepper for frying Cream stewed potatoes in parsley sauce 1 kg of potatoes 75 g butter 75 g wheat flour 3/4 l milk or cream Maybe also some water for the sauce 1 large bunch of parsley 2 lemons Season the sauce with salt and white pepper 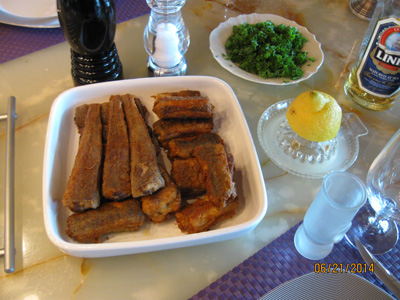
A dish of fried eels for 2 adults flanked with parsley, lemon and a dram Procedure without liability: Now the recipe had to come. After many recipes with fish, is this recipe lacking for fried eel. It's not difficult to make this recipe, as long as you follow certain rules. Eels must be freshly caught and cleaned just before you fry them. Forget to deep freeze eel - even if it is in water - eel tastes best fresh. I am not saying that it is hazardous to eat deep-frozen eel, but the taste can become rancid because eels are a fat fish.
The best eels are between 250 grams and 300 grams for frying. Clean the eels yourself or get the fish dealer to do this for you. Cut the eel into 6 to 8 cm pieces and put them in a plastic bag with 2 tbsp. wheat flour, 1 tbsp. rye flour, 1 tbsp. salt and 1 tsp. white pepper. Shake bag well so the mixture sticks on the eels. Take them out of the bag and frying them on the pan in margarine on all sides, it takes approx. 8 to 12 minutes. Take the eels of the pan and clean the pan before they are fried again in plenty of butter. They will fry by size from 6 to 10 minutes again in plenty of butter. Dribble on kitchen towel before serving. The eels can be kept warm in a 100°C hot oven before serving. One thing is important, the bones MUST slip easily from the meat if not, the eels are not fried enough. Tip: For very large roasting eels, cut a deep cut lengthwise on both sides to prevent the eel from bending the sides up on the pan during frying. At the same time, the excess eel fat disappears. Frying in margarine takes place under medium heat, in butter under light heat. Boil the potatoes in slightly salted water for 20 minutes. Take them out of the water and place them cool before cutting into slices. Make a butter rolls: Come butter in the pot when it is melted stir flour in gradually. Pour with cream (or milk) and stir until you have the right consistency, if there is not enough cream use a little water. Season sauce with salt and white pepper, boil up and turn off the heat. Potatoes and chopped parsley comes up in the pot. The sauce takes the after-heat, if you have electricity plates. Do you have gas, then supplement with a little heat, but the sauce must not boil after parsley has come in. The sauce must not be eaten the next day (soil bacterium). 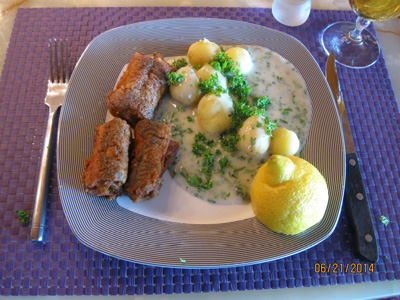
A portion of fried eel with cream stewed potatoes in parsley sauce, lemon, beer and a dram Serving: Server just the warm eels on the dish and boiled potatoes in white parsley sauce in a nice pot, so keep it more warmer. Garnish: Chopped parsley and lemon juice and lemon slices. Should it be nice, place rinse dishes on the table for the fried eel is eaten with your fingers. Drink: There is no way out. The eels must be served with a cold beer and one or more drams. I prefer the Norwegian Line Akvavit, which is round, soft and mild in taste. Put eel bones around the plate and count the bones. Number of bones is equal to the number of dram. So don't cut the eel into to long pieces. Hints: The only tip that I can give is, if not eaten up, cold eels are really good day after on a piece of rye bread with butter and coarse salt. |
Homemade salted herring and homemade marinated herring
Next Down
Next Up
|
|
This should be used for salting white spiced herring: 20 large beautiful, fat and fresh harvest herring (uncleaned) A harvest herring weighs about 165 g It produces 3.3 kg of harvested herring (untreated) 825 g coarse table salt and 33 g cane sugar It gives 2.7 kg of harvested herring (purified) 677 g coarse table salt and 27 g cane sugar This should be used for marinating white spiced herring: 1 l vinegar 600 g to 800 g cane sugar 2 dl water 2 large onions 6 bay leaves 1 tsp. allspice 10 cloves White herring is diluted 12 hours before marinating This should be used for salting spice herring: 20 large beautiful, fat and fresh harvest herring (uncleaned) A harvest herring weighs about 165 g It produces 3.3 kg of harvested herring (untreated) 825 g coarse table salt and 66 g cane sugar It gives 2.7 kg of harvested herring (purified) 677 g coarse table salt and 54 g cane sugar Herring spice mix see below This should be used for marinating spice herring: 1 l vinegar 600 g to 800 g cane sugar 2 dl water 2 large red onions 1 bag Herring spices Herring Spices Spice herring is diluted 6 hours before marinating New: Add 200 ml of water to 1 l of vinegar for a milder taste 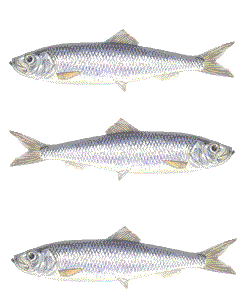
The good harvest herring I caught 40 herring on the boat 6.6 kg, which I divided into two portions, and made ordinary white salted herring and red spiced salted herring. The ingredients for red and yellow spice herring can be found elsewhere on my website. All spices are first mixed well and then with salt and sugar according to the above recipe for salting. Gutted herring means: Scales cleaned, which is usually done on the boat, as it make a lot of mess, beheaded and stomach with gut string has been removed. There is a loss of about 18 to 20 %. Each batch fills a bucket of 6 liters. These buckets I have got for free in the supermarket. There has been potato salad in the buckets. Notice that I have indicated two amounts of salt and sugar. An amount for salting with head and an amount without head. You choose which method you want to use. I have made an Excel spreadsheet Spegesild for determining herring, salt and sugar. Generally, between 200 and 250 g of salt and 10 to 20 g of sugar per 1 kg of fresh whole herring are recommended. In my recipe, 250 g of salt per 1 kg of herring has been used. For salted herring 10 g sugar and for spicy herring 20 g sugar per 1 kg herring.
Procedure of salting without responsibility: I must warn against making your own salted herring, if the hygiene can not be observed to the letter. The herrings must never come into contact with soil bacteria. This can happen if they have been lying on the ground, or have been in contact with vegetables. Therefore, only dried spices are used. All "stuff" must be cleaned and suitable for food. The temperature during salting - ripening - must not exceed 5 to 8°C. Therefore, place the bucket (approved for food) in a deep and dark basement or in a refrigerator. Now we can begin. If the herrings have developed roe (female herring) and milk (male herring), this should remain in the herring. Therefore, simply cut an incision across the neck down to the spine and the spine is cut across. The head is pulled off with the stomach and intestinal tract, then the salt penetrates into the abdominal cavity of the herring. I always cut the head of the herring, as it only fills up the bucket, and I also get the gills with blood away from the brine. Too much blood can make the herring a little "bitter". Get a 6 to 10 l bucket, the one used for remoulade, pickles or potato salad in commercial kitchens, sprinkle a layer of one of the above mixture in the bottom. Top with a layer of herring, alternating direction with head and tail. Sprinkle carefully again a mixture over the herring. Come again a layer of herring on top, but now on X of the lower herrings. Sprinkle again with a mixture. This is repeated until the bucket is full. A plate is placed on top of the herrings so that they remain under the brine, which will now develop. The first few days the herrings are placed on a "warmly" place, 10 to 12°C for maturation will take place and the brine can be formed. Look at the herrings after 2 to 3 days, to check if the brine covers the herrings. If not all herring is under the brine, make a brine of 1 l of water and 250 g of salt. Boil and cool to 5°C before pouring over. Now place the herrings cool next week with the lid loosely put on. Air must come to the herrings. Then fasten the lid and turn the bucket upside down, therefore a good lid is a necessity. Why is that? The salt settles to the bottom, the lower herrings become too salty, and the upper ones will lack salt. This only needs to be done once, because after a few days, the lid is slightly eased so that it does not end 100% tight. The explanation is that fermentation takes place in the bucket, sugars and enzymes in the fish are converted into alcohol, gases (carbon dioxide and hydrogen sulphide) and acid (acetic acid, butyric acid and fatty acid). Acetic acid is formed only if oxygen enters the bucket. The lid must protect against evaporation, and impurities come down to the herrings. You could also use the old-fashioned baby cloth diapers, but first cook them well and thoroughly so that the bleach comes out. The home brewer of beer and wine are familiar with the problem of coming oxygen to the yeast tank. If this happens it becomes vinegar instead of wine. For the next 12 to 16 weeks, the herrings stay cool. If you follow all hygiene rules, after 16 weeks you will get a good product without the risk of "sausage poisoning", also called "Clostridium botulium", and can continue to marinate your spiced herring. If you do not want to salt your herring yourself, you can buy these at the fishmonger or in the supermarket and continue from here. Remember it must be old-fashioned matured herring, these herrings are matured in min. 6 months preferably for 8 months. Procedure for marinating without responsibility: The herring must now be filleted. Place the herring on a suitable cutting board with its back towards you and the head to the right. I'm assuming you're right handed! Place your left palm over the herring with your fingers pointing towards the head and with a SHARP knife, carefully cut down to the backbone and turn the knife so that the surface is parallel to the cutting board. Then cut along the backbone herring all the way down to the tail. Turn the herring so that it has the belly towards you and cut again along the backbone down towards the tail. You now have two file pieces where the abdominal bones must be removed by cutting obliquely from the back towards the abdomen. The skin is removed by pulling it off from the head towards the tail. White salted herring diluted 12 hours before marinating: The fillets must now be diluted so that the salt content suits your taste buds. Here you have to try. But try with a golden mean, put the fillet pieces in a bowl and pour cold water over so it just covers. Put the bowl in the fridge overnight and then try to taste the herring the next day. If it is OK, you can continue making the marinade. If the herrings are too salty, you have to change water again and wait a little to make marinade. A good marinade consists of three "things" vinegar, sugar and spices. 1 part vinegar and 0.6 to 0.8 part sugar as well as various spices. I have mentioned above various spices which are a must for a good marinated herring. But you can of course add your own favorite spices and bring out the flavor that you want. If you want a different sweetness in the herring, you can adjust the amount of vinegar and sugar. Bring the vinegar and sugar to a boil while stirring, when the sugar has melted add the spices and give a short boil. Then set the marinade to cool before pouring over the herrings. The herrings must "swim" in the marinade, i.e. as much marinade as herring. The herrings must now take the flavor of the marinade in a cool and dark place - the refrigerator - for at least 1 week. If you are short of time, you can cut the herring into smaller pieces and store them on the kitchen table overnight so that the taste can penetrate into the herring. The shelf life of homemade marinated herring depends on how you store these herrings. If the herrings are covered with the marinade in a glass with a lid and they are stored in the refrigerator, they can last for 6 weeks. No preservative has been used. If air comes to the herrings, they will turn rancid and taste bad. Have you tried old cod liver oil? That was the recipe for white, marinated herring. Red and yellow spice salt herring diluted for 6 hours before marinating: If you want red or yellow, marinated spicy herring, you must make a spice mixture, which is added to the herring during salting. Spice blend can be found elsewhere on my website. When I mention that "Red and yellow spices herring are diluted for 6 hours", the reason is that the herring should not lose its good spice taste to the water. The "dilution" will also take place in the marinade that the fillets are to soak in. Make a marinade according to the recipe above and let the fillets soak in it, at least a week before eating. Serving: Rye bread smeared with butter or spiced lard is the case. Garnish: Onion rings, capers, cress a raw egg yolk, just to mention something that fits well with the herring. Drink: You can not be in doubt. Your favorite beer and snaps is a must. Hints: Once you've made the marinade, then taste it, the herring will take the same taste of acidity, sweetness and the spices. It is now the time to adjust the taste, so the herring fits your taste buds. The recipe and the amount of marinade is not enough for all 60 herrings. You take maybe 10 herrings up and doing the first portion. Then perhaps you differ on the mixing ratio of vinegar and sugar, and try other spices. Just go ahead and test your taste buds. Salting with head: One also uses salting with head, and the method is called "blood salting". Cut throat halfway through from the belly, put the herrings in a bucket with 50 g of salt per kg herring. Put the the bucket very cold, like to the refrigerator for a few days. Take out the bucket, and when possible rub the herrings from tail to head, so that the blood comes out. Then salt the herrings as described. The method is cumbersome and takes time, so I salt the herrings without a head. The heads just fill up in the bucket. Here is my own recipe of a delicious Salad of pickled herring. Also try Herring in Hot Chili Pineapple Sauce. Alternative: Purchase Lykkeberg old day's matured herring. See also the food magazine: Herring from sea to plate and the video How to filter herring. Note: Since I wrote this recipe, Tenax Herring in Nyborg has bought into Lykkeberg Herring in Holbćk, and started making herring according to its own recipe. I have learned by "taste" that these herrings do not live up to the fat herrings that I knew from Lykkeberg Sild. So buy "old-fashioned matured herring" in barrels from Norway from your fishmonger, and make them yourself according to my recipe above. Below are some statements from other customers. Tenax Sild takes over Lykkeberg. |
Hot smoking of cod roe
Next Down
Next Up
|
|
1 kg fresh cod roe 2 liters of water - must cover cod roe and vegetables 105 g salt 5 % solution 5 °Baumé 50 g sugar 3 cloves garlic 1 to 2 onion 5 cm fresh ginger 1 red chili peppers 5 bay leaves 1 twig thyme 10 juniper grain root vegetables of your choice carrots, parsley root. Yes! Make your choose 
My "Lunchbox smokig oven" and my camping gas system Procedure without liability: Large cod is becoming a scarce commodity, so it is difficult to get cod roe. If finally you find a fisherman who has cod roe, then the price is sky-high. But you can go on a fishing tour with a fishing boat on Oresund in January or February and catch your own fresh cod. Clean the cod on the boat and take the eggs out gently and put them in a plastic bag. The protective skin must not burst.
Returned home rinse cod roe in cold water and put it up in a pot. For each 1 kg cod roe pour 2 liters of cold water. Add 105 g of salt and 50 grams of sugar and various spices, see above. Well! Try to find your own taste. Bring pot to the boiling max. 95°C and immediately turn down the heat as cod roe only simmer for 10 to 15 minutes for small cod roe and from 15 to 30 minutes for large cod roe. Take the pot of the heat and place to cold until the next day with the cod roe in the "soup". It is not meant the cod roe will be finished cooked right to the center, it must of course be smoked afterwards. When you do it this way, cod roe seems not so hard and dry as if you just smoked it in "fresh" state. I cooked my 2 cod roe of 1 kg in total for 20 minutes. Method 1 is for large cod roe 1 kg Now the cod roe is taking out of the "soup" and set to drain for a few hours on a cold and dry place. I like using my Smoking Oven for drying place, because it is cold in January and February. Take the cod roe from Smoking Oven before you fired up on this. After a half to a full hour has Smoking Oven reaches 70°C and smoke production is well underway. The cod roe is quickly put on the grate and the "Hat" is closed with a small 1 cm crevice provides a draft in the smokig oven, allowing water vapor to escape quickly. I may have 12 cod roe in two layers in my Smoking Oven so that corresponds to approx. 12 kg cod roe. Now the cod roe must be smoked: Oven temperature starting at 70°C. The cod roe are smoked in 2 to 3 hours with the "Hat" slightly open. The oven temperature is reduced to 67°C and cod roe are smoked for 2 hours with closed hat. Total 4 to 5 hours. 5 hours sounds a lot, but it is great cod roe from cod of 10 kg. Method 2 is for small cod roe If you just need to smoke a few cod roe - as shown here ˝ kg - it is too much work to start the big Smoking Oven. Therefore I use a "Lunchbox Smoking Oven" on my camping gas. Do it this way, you get a good result. Add 1 cm smoking wood dust at the bottom - 3 handfuls beech wood and 1 handful juniper wood - set drip tray and grid on, place the cod roe on the grid. Put the lid on, but there must be a small opening in one side so the steam can escape. Power up and let it "burn" in 15 minutes. Turn off the gas and then let it rest for 20 minutes. Turn on again with the lid completely closed for 10 minutes and then turn off of the gas. Let it rest in the "Box" for 1 hour before the cod roe be eaten. 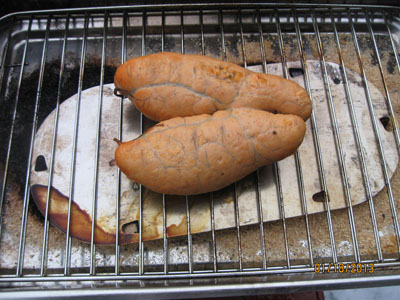
Home Smoked cod roe in a 'Lunchbox smoking oven' The cod roe you do not need here and now, can stay over night in Smoking Oven - in winter time. Otherwise wrapped cod roe in parchment paper or freezer bag and put in the fridge; it can really drag smoke flavor into the eggs. Or vacuum packed and in the freezer. Serving: I would just come up with a good recipe for a piece of bread and butter with "Smoked cod roe". Cut two nice pieces along the cod roe put them on garlic butter toast with a lettuce leaf and put remoulade on top sprinkled with finely crushed red onion. Garnish: A lemon slice and cut cress on top. Drink: A cold beer and a dram is extremely well suited to this. Hint: The cod roe can be freed from skin and stired with mayonaise. Butter on bread and you have a snack. |
Seafood Paella
Next Down
Next Up
|
|
1 kg mussels - sea fresh 200 g giant prawns from deep frost 12 pcs. scallops from deep frost 1 ds. squid in tomato sauce 110 g. Can be omitted 1 to 2 shallots depending on size 4 cloves garlic 1 red hot chili pepper. Use as much as you like 1 red or yellow pepper fruit 1 to 2 carrots. By size 200 g sweet, green peas 250 ml white wine. The one you drink with the food 1/2 box saffron of 1 g 4 to 8 tbsp. Extra virgin olive oil 250 g Spanish Paellaris Valencia rice Season with butter, salt and pepper 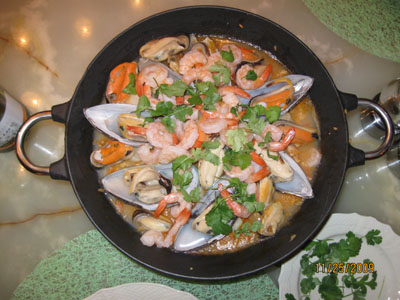
Paella pan with fresh mussels is preferable Procedure without liability: Start by thawing and salting the scallops. Mix 1 tsp. fine salt and 1 tsp. fine sugar for 12 scallops. Sprinkle the mixture over the scallops and put them in the fridge until needed, an hour will be appropriate. Also thaw the prawns and put them in the fridge until needed.
Vegetables: Clean the vegetables. Carrots, red/yellow peppers, onions and garlic are cut into cubes. Mussels: Thoroughly clean and rinse the mussels under the cold tap and discard those that are not closed after this treatment. Onions and garlic are sautéed in oil for a minute, after which the mussels are added and seasoned with salt and pepper. Stir in the pan a few times and add a few glasses of white wine. Steam the mussels for 6 to 8 minutes or until they have opened. Stir in the pan a few times. The mussels that have not opened are discarded. The soup is poured into a saucepan, the mussels are set to cool, so you do not burn your fingers when the mussel is to be taken out of the shell. Keep the soup very warm until it is to be used in the rice. The easy way with mussels is to use canned mussels. They are simply put for draining in a sieve just like the shrimp. The downside is simply that it does not provide the right flavor. But you can compensate for that by using a good fish soup. 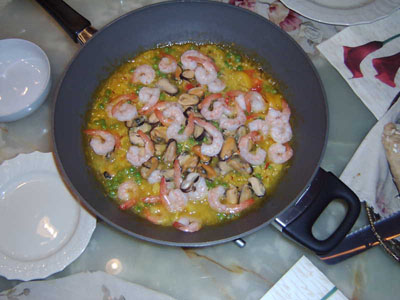
However, wok pan with canned mussels can be used Risotto: Heat the oil in a paella pan, it has two handles one on each side. A Tefal Wok pan with a lid can also be used, so it simply does not have to be put in an oven, but continues to fry on the stove under the lid. I first used a Wok pan, which is seen below. Later I got a Paelle pan, which is seen above in the first picture. Onions, garlic, chili peppers, red or yellow peppers and carrots are fried in the oil until the onions are ready - 3 to 4 minutes. Then add the rice - a little at a time - while stirring in the paella pan. Make sure all rice grains are greased into oil. When the rice grains become a little clear at the edge, add the warm soup from the mussels a little at a time. Let the rice grains soak up the soup while stirring. Be careful not to boil the rice dry, add with a little more wine / fish soup / water, but not too much so the rice floats in the soup. Continue until the rice is almost cooked, taste them and see if they have a bit of a bite. Now add the peeled mussels, shrimp, squid in tomato sauce and peas to the risotto. Stir gently in the pan so that it all mixes nicely. Add a few pats of butter, place the lid on the paella pan and place it in a 200°C preheated oven for 12 to 15 minutes. The finished risotto should be nicely creamy. Once the paella pan is placed in the oven, do not stir in it. The rice should fall to the bottom so they can form a golden and crispy crust. It is the secret of a perfect paella and coveted by true paella lovers. 
Prawns, mussels and green peas set to drain, while the meal simmering. Red and yellow peppers and a box of saffron 1 g Scallops: They were "rimsalted", which is a form of digging, so they do not need to be fried very much. Make a quick and vigorous browning of the scallops and turn off the heat so that they draw the heat into the center. The paella pan is taken out of the oven and the scallops are placed on top. Serving: The paella pan or wok pan is placed directly on the table. Garnish: Finely chopped parsley or coriander, tomato boats and lemon boats. Save some mussels with shell for garnish. Drink: Of course a cool white wine of your choice. I have chosen an Argentinian Chardonnay wine that goes well with fish, chicken, pasta and cheese. Great choice. I got 3 bottles for DKK 100.00. Hints: Grate the peel of an organic lemon, squeeze one or two cloves of garlic, chop the parsley or coriander very finely. Mix the three things in butter and put it in a soft rolls. Put the soft rolls in the residual heat from the oven for 5 - 10 minutes. Serve the dumpling to the dish. Note: It's hard to find Spanish Paellaris, so I tried Oryza Sushi rice, which gave an excellent result. It is a medium grain rice. If you do not have a paella pan, use a work pan with a lid and heat it up on the stove. It will be (almost) just as good. |
Home smoked giant prawns
Next Down
Next Up
|
|
Number of prawns for a starter 32 frozen giant prawns with shell or 1 kg frozen prawns with shell 1 tsp. cane sugar 1 tsp. salt 1 red hot chili pepper Dressing: 1 cup Cheasy fraîche 9% 1 tbsp. cold pressed virgin olive oil 1 tsp. hot curry 2 cm green wasabi Or Aiolie for dipping 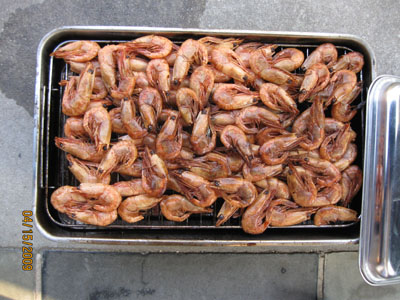
Shrimp smoked in a lunchbox smoker Aioli 1 whole egg (50 ml) 1 cup (150 ml) grapeseed oil or Rapeseed oil or corn oil or sunflower seed oil 2 tbsp. white wine vinegar 1 Tbsp. lemon juice and / or sherry vinegar 6 small or 4 large cloves garlic 1 pinch of salt 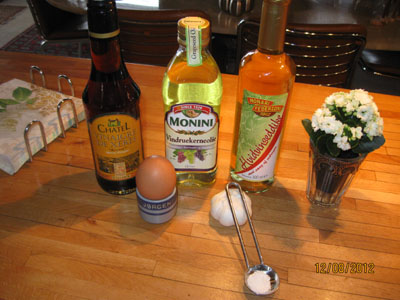
Ingredients for Aioli Garnish: Salad leaves Dill twigs Lemon slices Procedure without liability: Buy pre-cooked, frozen prawns in shell. In Denmark, I have only seen these prawns in ˝ kg and 1 kg bags. In Sweden they are in a special freezer where you shovel prawns into a bag. Take the number you want to smoke and pour them into a plastic bag in which you have first pouring a mixture of cane sugar, salt and finely cut red chili. Shake bag well and take up the frozen prawns, put them on a screen or in a sieve and hang them in Smoking Oven.
Smoking Oven has now been prepared and develop a good smoke at a temperature of 60°C to 70°C. Let the prawns remain in the next 60 minutes to 90 minutes on the grid, after which they are taken out and served on a plate or several plates. Temperature and time can vary depending on size of prawns and Smoking Oven you use. But remember the prawns must be frozen when they come in the Smoking Oven. The prawns, which you see here on the the front image above, have been in for 60 minutes at a temperature of 60°C. The result was satisfactory - not too much smoke and not too little smoke. The lower image shows prawns smoked in a "box Smoking Oven" in 40 minutes at a temperature of 80°C. It was probably 10 minutes too long, or maybe the temperature was too high. 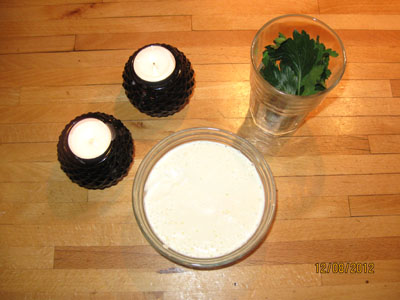
Aioli for home-smoked giant prawns Dressing: You make the dressing by first mixing the olive oil in Cheasy fraîches and then a strong curry and wasabi. Decorate with finely crushed dill. Aioli: You make the aioli by beating a whole egg into a glass, pour the oil on top, come the vinegar and lemon juice in, sprinkle a little salt over, sprinkle the coarse chopped garlic in. Put a hand blender to the bottom of the glass, turn on and blend for 2 minutes, pull up the hand blender a bit as aioli'en thickens. Important: all ingredients should be at room temperature before mixing and it should also be a neutral oil. Adjust the number of garlic, 6 pcs. is very strong. 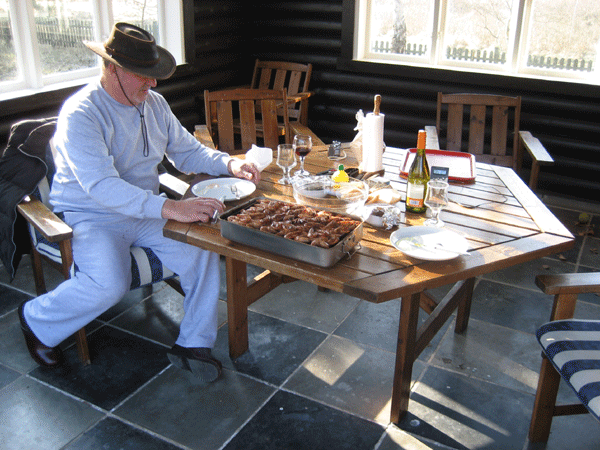
Then smoked prawns must be peeled in Bĺstad house 1 Serving: Serve the smoked prawns with the above dressing, a good white bread and rinse bowls with lemon slices. Garnish: Salad leaves and dill twigs. Drink: Cool white wine or a dill snaps with a beer. Hints: Will you use the meal for a dinner, just smoke a lot more prawns, and even find some good accessories that can feed you and the guests. I recommend that you first give less smoke than too much smoke. Try your taste during the smoking process by simply adding more prawns in, than you need. The prawns, which I used, I would not describe as giant prawns, why they got only 60 minutes. |
Oriental cod with coconut milk and curry
Next Down
Next Up
|
|
1 kg of cod fillet, without skin and bones 400 ml coconut milk canned 1 lemon, juice only 1 big onion or 2 small 4 cloves garlic 4 ripe tomatoes 1 red hot chili pepper 4 cm fresh ginger 1 small can of concentrated tomato puree 1 tbsp. hot Indian Curry ˝ dl groundnut oil 1 cup fresh coriander Season with salt, sugar and white pepper Loose boiled rice served with the meal 
Oriental cod with coconut milk and curry Procedure without liability: This meal gets 10 points, so try it. Cod fillets should be with no skin and bones. The pieces should be approx. 5 cm wide and preferably from the head end.
After the fish has been cleaned and salted with 1 tbsp. salt put it in the refrigerator for at least 2 hours. Chop onion, garlic, chili peppers and ginger into small pieces. Saute these spices in peanut oil without that they take color. Add curry and tomato puree and stir for 1 minute. Add lemon juice and chopped ripe tomatoes and boil for 2 minutes. Add coconut milk and boil again for 2 minutes. Remember to shake the can of coconut milk well before opening. Season with salt, sugar and white pepper. Cod fillets are taken from the refrigerator and rinse the excess salt in cold water. Place cod fillets in the sauce and let the meal simmer until fish pieces are tender. I let the fish take the after heat on the boiling plate for 10 minutes and it was absolutely perfect. Use preferably a low pot of large diameter, then fish pieces do not lay on top of each other. 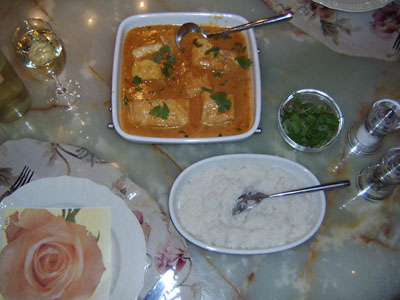
Oriental cod with coconut milk and curry Serving: Take cod fillets gently out of the pot and put them in an appropriate large dish and pour sauce over. Garnish: Freshly cut coriander sprinkled over. Drink: Cool white wine. An Argentine Chardonnay is appropriate for the meal. Hints: Cooked rice is the absolute accessory that you need for an oriental meal. |
Steamed halibut with white asparagus
Next Down
Next Up
|
|
800 g halibut fillets without skin and bones 20 white asparagus 1 big onion 1 clove garlic 1 red hot chili pepper 1 twig lovage 2 twigs parsley 4 twigs coriander for garnish Salt, white pepper and sugar 1 glass of white wine 2 glasses of water only for the fish pot 2 tbsp. white wine vinegar or 1 lemon 1 glass of real Hollandaise sauce 1 kg new potatoes 200 g butter 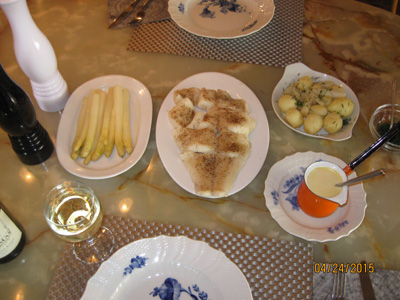
Ingredients in the picture is for 2 people Fremgangsmĺde uden ansvar i en fiskegryde: Buy 2 large fillets of halibut, this is approx. 800 g. Sprinkle a little salt and white pepper over and cut each fillet into 4 pieces. Come wine, water, vinegar and chopped herbs in a big fish pot. Add grid and adjust the water so it reaches the grid. Put the fish on the grid and put a lid on. Bring to the boil and simmer for 5 minutes. Turn off the heat and let the fish soak under lid for about 15 minutes. It is important with a good lid that closes tightly when the fish steam cooked. Hint: Put the pot with Hollandaise sauce on top of the fish pot.
In the oven: If you do not have a large fish pot, you can cook the fish in the oven. Put a strong tin foil in the bottom of a dish, drizzle a little olive oil over and put the whole fish on. Sprinkle a little salt and white pepper over along with the spices and some pats of butter. Put a few slices of lemon on the fish and add a glass of white wine. Wrap the fish well and put it in a 180°C oven for 20 minutes. Then take it out and leave it wrapped for 5 minutes before serving. The new potatoes scraped with gloves with knobs. See the picture below Seven "cool" fried herring in vinegar brine with new potatoes. Boil them for 15 to 18 minutes in slightly salted water. White asparagus peeled from head downwards. Cut the bottom off the fresh white asparagus approx. 2 to 3 cm up. The asparagus bundled with cotton yarn and placed vertically with their heads up in an asparagus pot. Heads should not be covered with water. If you do not have an asparagus pot, use one big plain pot where asparagus can be tilted with their heads above water. Put the lid on tightly, so that the heads are steamed tender. Put them in boiling water with salt, sugar and a little lemon juice and cook for approx. 5 minutes. Remove the pot from the heat and add a little cold water. Let the asparagus soak for approx. 5 minutes before serving with melted butter and grated cheese. Warm Hollandaise sauce gently in a small saucepan; put the saucepan on the lid on some of the other things that boils. 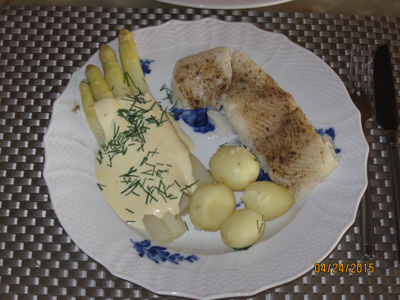
Steamed halibut with white asparagus Serving: Serve fish, potatoes, asparagus, as shown in the picture and add some Hollandaise sauce over the base of the asparagus. Garnish: I can recommend to decorate with coriander leaves. Drink: Cool white wine. An Argentine Chardonnay is appropriate for the meal. Hints: I used a glass Hollandaise sauce from Beauvais, but later found out that my fishmonger have home made Hollandaise sauce. Please check with your fishmonger. Alternative: Are you not happy with Hollandaise sauce, try clarified butter over the asparagus. Sprinkle with grated cheese or freshly grated horseradish. "Clarified butter": Is butter, where the whey is skimmed off. |
Home smoked herring for lunch
Next Down
Next Up
|
|
4 freshly smoked harvest herring 1 big red onion 1 cup chives 4 organic eggs 8 slices rye bread, good quality Butter the rye bread 1 cup radishes 2 ripe pears Salt and white pepper to smoked herring A sprinkle cayenne pepper on egg yolk The ingredients in the picture below are for 2 people These two pieces of herring sandwich are from a herring 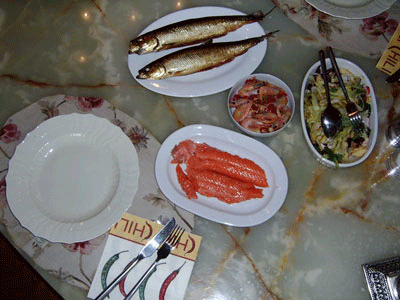
Home smoked herring for lunch Procedure without liability: If you wish to smoke your own herring, find my website: Hot-smoking of large harvest herring.
Don't you have a chance to smoke your own herring, then purchase freshly smoked herring at your fishmonger. You clean herring as follows: Cut the head and tail off with a very sharp knife. Open the belly, cut only from anus to tail. It is the small piece that is not cut before smoking. When the herring opened this way, backbones usually sit in one half of the herring. Help with backbones remain in the lower half of the herring. Now you take gently backbones up, so most ribs come out with it. The rest of the bones removed with a fork to scrape inclined from the center towards belly. The smaller nerve bone is so small and soft, so they pose no danger. 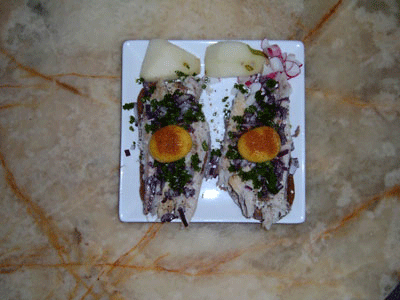
Home smoked herring for lunch, shown here for 2 people Serving: Serve the smoked herring on a rye bread smeared with butter. Season with salt and pepper, sprinkle finely chopped red onion and chives over. Make an indentation in the herring and got a raw egg yolk in. Garnish: I used sliced radishes and two halves of pears. Do you smoke herring yourself, try also with smoked giant prawns. Drink: Beer and a dram are suitable for the meal. Hints: I would just come up with a good recipe for "Herring Salad." Cut all meat from the bones, divide meat into small pieces, and blend the meat with the mayonnaise, lemon juice from a fresh lemon and white pepper after your own flavor. Serve on toast with a garnish, lettuce leaf and raw egg yolk with finely crushed red onion as sprinkle. A cold beer and a dram are extremely well suited to this. Herring salad is suitable for children as nerve bones are blended and thus not be seen or felt. |
Home smoked cheese or "Rygeost"
Next Down
Next Up
|
|
3 l fresh, low-pasteurized, unhomogenized and organic whole milk 2 dl fresh buttermilk as Acid-rich 1 pinch lipase, enzyme mixed in 10 ml cold water Note: Used raw milk or low pasteurized whole milk (72°C for 15 seconds) and unhomogenized whole milk no need for lipase Used high pasteurizing whole milk (80°C to 90°C for 5 to 30 sec. ) and homogenized whole milk use lipase ˝ tsp. ca. 8 drops of rennet mixed in 10 ml of cold water 1 tbsp. Lćsř sewing salt, Do not use salt with iodine 1 tbsp. Caraway, dried or 1 tbsp. Chili, dried and crushed 
Home smoked cheese or Rygeost Read about: Acid range, Rennet, Lćsř sewing salt, Fakta whole milk and Farm milk. Lipase enzyme from lamb mild and Lipase enzyme from goat medium
NOTE: Rennet can stay in the refrigerator for several years. Impact loses 1% per month, so it can be compensated by adding more rennet. My bottle has been around since 2008. In 2018 I had to buy a new one. I'm familiar with Danish whole milk is low-pasteurized.
The amount of milk gives 720 g of smoked cheese Procedure without liability: Smoked cheese is a fresh cheese that is eaten fresh without storage. So in principle one can omit lipase, but by adding lipase, one can proceed to Feta cheese.
Sweet whole milk and buttermilk are heated to 32°C (90°F) in a clean steel pot. Measure the temperature so that the limit is not exceeded. In a glass with 10 ml of cold water add starter culture lipase, stir in the glass. If the lipase is made the day before, optimal effect is achieved. Add the mixture to the milk mixture and stir gently in the pot. There should not be air bubbles in the cheese milk. Cover the pot with a clean towel to keep warm and place the pot in a warm place min. 24°C (75 ° F) for 30 minutes. In a glass with 10 ml of cold water add rennet, stir in the glass. Add the mixture to the milk mixture and stir gently without air bubbles coming into the cheese milk. After 1 hour at 24°C (75°F), the milk is coagulated and is now swimming in the whey. Now cut the coagulated milk for approx. 3 cm cubes, crosswise and obliquely, as can be done in the pot. Take a skimmer and gently stir in the curd and share the lumps that are not split properly. After 1 hour at 24°C (75°F), the curd has fallen to the bottom and can now be poured into a sieve lined with cheesecloth or a juice bag on a stand. When most of the whey is dripped - takes an hour to two - add salt and spices. Mix these spices well into the curd and bring the curd back into the cheesecloth. Tighten the cheesecloth by twisting the cloth so that more whey runs out. Then put it all into the refrigerator and let it drain for the next day. The curd is now divided into 2 or 4 aluminum trays, depending on the size. A larger surface gives a more smoky taste in the cheese. Sprinkle a little caraway/chilli on the surface before placing the trays in the smokig oven. I use another method. I hang the whole sieve with the curd in the smokig oven. The view is shown in the picture above, where the cheesecloth is now removed. Here you must of course choose whether or not to add caraway/chilli. You get two trays of smoking cheese of 300 g per tray. It's the pure gold. Smoking: Come approx. 2 liters of smoke sawdust - I use beech sawdust - on the sawdust tray in the smokig oven. Set the temperature regulator to 30°C (86°F) and pour 1 dl of alcohol on the leading edge of the sawdust. Light up and wait approx. half an hour to the temperature and the smoke development has stabilized around 30°C. Hang the sieve into the smokig oven. If you use aluminum trays, put them on a grate at the top of the smokig oven. If you let the cheese smoke for 60 minutes, you get a light smoke flavor. I smoke my cheeses for 2 hours but never reaches more than 32°C (90°F). If you can get oat straw, then come something on the smoke dust. Other herbs are also suitable for giving a characteristic flavor in the cheese. The larger the surface you have on the cheese, the more smoke it penetrates into the cheese. 
Home made smoked cheese and two yogurt bread Serving: A good piece of rye bread is greased and then a layer of smoking cheese. Garnish: The freshly ground coarse pepper, radishes and chives decorate a food. Drinking: A cold pilsner with a good bowl of snaps fits excellently into homemade "Smoked Cheese". Hints: Make two trays with caraway and two without caraway. Not everyone likes caraway. 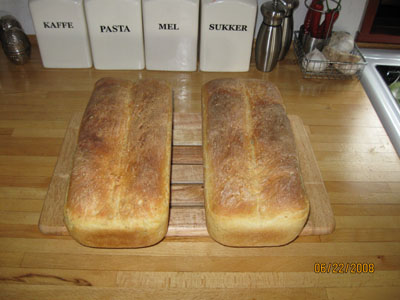
Home made smoked cheese and two yogurt bread Du har sikkert bemćrket, at jeg rřger mine oste i 2 timer, hvor imod andre opskrifter siger nogle minutter. Hvorfor nu det? Rřg ved lav temperatur indeholder mindre tjćrestoffer - PAH (Polycycliske Aromatiske Hydrocarboner) som kan vćre krćftfremkaldende. Derfor rřger jeg osten i lang tid ved lav temperatur. Andre opskrifter angiver nogle minutter ved hřj temperatur.
Du begynder med ca. 3,2 kg mćlkeprodukter og ender med 720 g ost. Resten er afdryppet/fordampet valle, som enten kasseres eller bruges til bagvćrk. I Norge laver de myseost af vallen. I Schweiz laver de sodavand (Rivella) af vallen. Bager du hvidt brřd, sĺ udskift vandet med valle. Křb en pose Yoghurtbrřd og 50 g gćr, udskift 6 dl vand med 6 dl valle. Fřlg sĺ blot opskriften pĺ posen og du har et fantastisk godt brřd. Drys lidt sesamfrř pĺ toppen inden du bager brřdet. Billederne tv viser en střrrer portion "rygeost" i alu bakke med 360 g i hver. Der blev ogsĺ bagt to yoghurtbrřd af en pose mel og 6 dl valle med 100 g sesamfrř oplřst i vallen. 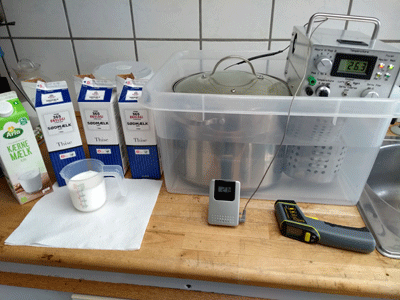
Homemade smoked cheese in my Sous Vide appliance 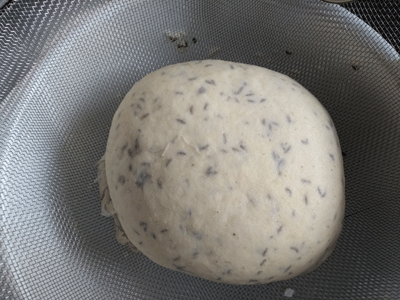
Homemade smoked cheese in my Sous Vide appliance |
Beach Crab soup with monkfish
Next Down
Next Up
|
|
1 to 2 kg large beach crab 1 kg monkfish fillets or other lean fish 2 l water ˝ l apple juice or apple cider or white wine 1 dl oil select your own choice of oil 400 g canned peeled tomatoes 1 small can of tomato paste Russo 165 ml canned coconut milk 1 lime fruit slices for garnish Herbs of your choice: thyme, parsley, parsnip, basilikum, dill, coriander, sage, and red hot chili pepper 1 to 2 sour apples, 1 carrot 2 big onions, 4 cloves garlic 3 leeks, only the green 5 cm fresh ginger 1 tsp. rose paprika 2 tsp. salt, 2 tsp. cane sugar 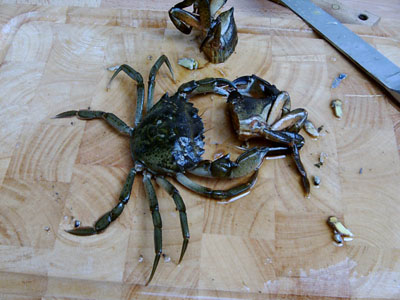
A live beach crab and a dead beach crab. Beach crabs are cannibals Procedure without liability: Contact a fisherman, you know, and ask him to take a bucket of crabs back home to you. There are so many crabs in our waters, so it is a pity not to use these for a good soup.
Take hold of a rear of crab legs and steering the crab around on his back with the knife. Cleave the crabs from the underside with a sharp knife from head to tail. Sauté the crabs five minutes in oil in a large or saucepan. Meanwhile, you have cooked a soup of water, apple juice, apple cider, white wine, salt, sugar and herbs. Come crabs into the pot and boil them in 40 minutes. Half can be crushed or blended before being cooked in the soup. It gives a strong flavor to the soup. Sieve it all up in a clean bowl and let it settle. The soup can now be divided into 2 portions of 1 liter. Freeze one half if you only have to be 4 persons. The other half poured in a pot with the peeled tomatoes without liquid, tomato paste and coconut milk. Cook to a boil and season with salt, sugar and white wine or a little white wine vinegar. If you don't like coconut milk, you can use cream. Clean the monkfish fillets free from bones and skin, cut them in the mouth right pieces and sprinkle some salt on. Steam them on the grid of a fish pot in approx. 2 minutes. Put first grid with fish pieces in the fish pot when the water or white wine boils. 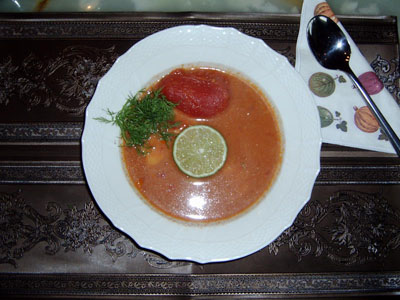
Beach Crab soup with monkfish Serving: Place fish pieces in a deep plate and pour the hot soup over. Garnish: Freshly cut dill or coriander is suitable as a sprinkle. Some giant prawns decorate the edge of the plate. Slices of lime fruit added to the soup. Drink: I think there must be served the same white wine that is used in the soup. Hints: Toasted garlic bread can be served with the meal. |
Potato and leek soup with smoked eel
Next Down
Next Up
|
|
2 large baking potatoes 1 leek 1 sour apple ˝ fresh garlic. This is the new and mild garlic, or 2 cloves garlic 4 pepper grains ˝ dl good olive oil ˝ tsp. mild turmeric ˝ l water 1 glass of white wine 1 cube vegetable bouillon 2 tbsp. Creme fraiché 1 piece of smoked eel approx. 200 g Season soup with salt and white pepper Chives for garnish 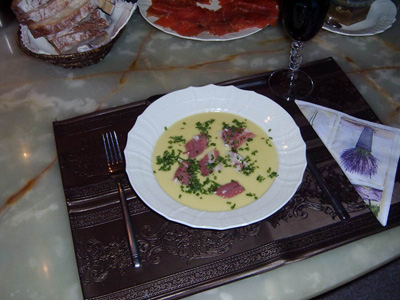
Lovely potato and leek soup with smoked eel Procedure without liability: This meal comes really from Sweden, but has been modified slightly to my taste. Peel the potatoes and apples, cut them into cubes. The leek cleaned and cut into 2 cm wide slices. Fresh garlic divided into two parts. All vegetables sear in a hot pan with olive oil added a little curry (give flavor and color) or turmeric (only gives color).
When the vegetables have taken a little color pour water and white wine on and add one cube vegetable bouillon. Now boil for 15 minutes until potatoes are almost tender. While the meal boils peel your smoked eel and cut it into small mouth right pieces. Put the eel pieces aside on a plate for later use. When the potatoes are finished pour the entire contents into a blender and blend until you have a soft texture. Please just note if your blender can withstand boiling water. Can it, continue from here. Creme fraiché, salt and white pepper poured into the blender and blend again. The soup is poured directly into hot deep plates. If your blender can't withstand boiling water, you must first cool the soup to a suitable temperature before blending. Blend the soup when it is lukewarm, and pour the contents into a saucepan, and return to a boil. Stir in Creme fraiché, salt and pepper. Soup poured from the saucepan directly into the hot deep plates. 
The main course is Gravad Salmon with mustard dressing on coarse bread Serving: Place the pieces of smoked eel over the soup in the middle of the plate. Garnish: Finely chopped chives sprinkled over. Drink: The natural choice would be the same white wine, which is used in the soup. Hints: A blender, where the bowl is made of glass, can withstand boiling water. A plastic bowl may not always withstand boiling water. See the manual, it is written there. |
A piece of smoked eel, scrambled eggs and chives
Next Down
Next Up
|
|
1 smoked eel approx. 400 grams 4 slices rye bread, good quality Butter for the bread 6 organic eggs 1 tsp. white Pepper ˝ tsp. turmeric (give a little color) 6 tbsp. cold water 3 tbsp. whipping cream 1 tsp. salt 1 bunch of chives Black pepper from the mill Make you a snaps suitable for eels as follows: 1 bottle Red Aalborg and 10 new twigs of thyme put them in the bottle and soak for 1 week at room temperature 
A piece of smoked eel, scrambled eggs and chives Procedure without liability: Clean the smoked eel. Put them in the fridge again until needed.
Turn 6 whole eggs in a bowl. Whipping them loosely together and get 6 tbsp. water, 3 tbsp. whipping cream and ˝ tsp. turmeric 1 tsp. white pepper in and thoroughly whip the egg mass together. Pour the egg mass into a suitable flat aluminum tray (˝ liter) and insert it into the oven. The oven must be prepared as follows: Fill a little water in a baking dish (1 cm high sides) and set the thermostat at 150°C when it boils put the egg mass into the oven. Set the thermostat at 120°C and the time to 40 minutes. The scrambled eggs are now ready made. Take it out and sprinkle with salt. Use only under-heat when the scrambled eggs are in the oven. 6 eggs give approx. 350 g scrambled eggs. 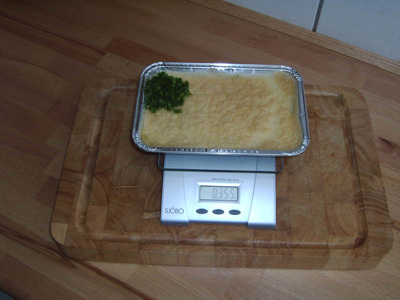
355 g freshly baked scrambled eggs for smoked eel Serving: Butter the bread and arrange the eel and scrambled eggs, as shown in the picture above. Garnish: Sprinkled with finely chopped chives and black pepper from the mill. Drink: A cold beer and a snaps does good to the "fat" eel. Hints: Scrambled eggs is also suitable for Rim salted salmon and smoked mackerel. |
Anglers yellow peas
Next Down
Next Up
|
|
1 duck approx. 3000 g fresh or frozen 1 kg cooking pork loins or neck 1 kg smoked bacon or smoked ham 500 g of the best "Medisterpřlse" Medistersausage 1.5 packets "Mřllerens Gule Ćrter" - Miller's Yellow Peas 1 packets provides a thin soup to 4 l 2 packets provides a very thick soup to 4 l Soup spices for cooking the meat: Leeks, carrots, parsley, parsnips, thyme, bay leaves, onion, garlic and chilli Soup Herbs: 1 pk. frozen soup herbs 1 kg 2 glass pearl onions 4 l soup The brine for curing the duck 6 % or 6 °Baume: 6 l water, 400 g salt, 150 g sugar. (300 g of common salt and 100 g of sodium nitrite 0.6% salt) 20 whole juniper berries, 1 onion, 1 red chili pepper, 10 bay leaves and 10 peppercorns Use 20% Sodium nitrite 0.6% salt E250 is best, gives red duck meat Can be purchased in Sweden or try at your butcher. Important: Because of the brined duck, soup should season with salt and pepper at the end If you own a smoke oven, you should try something new, namely to smoke the duck 3 hours (2 kg duck) to 5 hours (3 kg duck) on medium heat. If you do this, you should of course not also use smoked pork / ham. The duck is naturally smoked after it has been curred and dried. Extras: Hot Dijon Mustard, beetroot and Full-grain rye bread 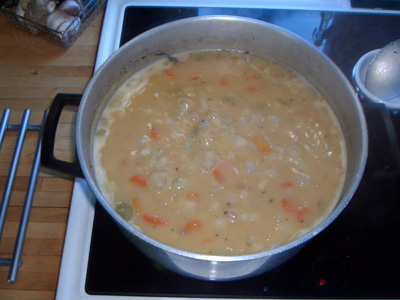
Anglers yellow peas Procedure without liability: The yellow peas should be made the day before they are eaten, but there is a long preparation time before you come so far. The cured duck must be prepared three days before the yellow peas should be made. Well! I know that it is not a fish recipe, but we are always a few anglers that eat yellow peas January, 17. The day after the start of trout fishing in the sea.
The brine must be cooked well through with the spices before it is poured over the duck. The brine resting overnight to cool max 5°C. Place the thawed duck in a suitable large plastic container for food and pour over the cold brine and place it in the refrigerator for the next three days. Remember the duck must be completely covered with brine and the temperature is maintained at 5°C or less. Use a plate to keep the duck below the surface. The cured duck is taken out of the brine and rinsed under the tap before putting it in clean, cold water for an hour. Then the duck is boiled in 4 liters of water together with pork, smoked pork, medister sausage and a "Suppevisk" = a bundle of green. (Some water disappears during boiling). Tip! Divide the duck into 4 pieces and it will fit better in the pot together with the other meat. The sausage boil for 20 minutes, the two pieces of pork cooked in 1 ˝ hours and the duck in 2 hours. Remember skimming the surface from "impurities". When the meat is tender take it up and cools before placing it in the refrigerator for use the next day. The soup filtered and aliquoted to 4 l, if anything is missing, add water. The soup is placed cold to the next day. Now the duck fat and lard congealed and lies like a lid on the surface. 90% of this is removed and can be used later to make spiced lard of. Can not wait till next day, the soup skimmed of fat before continuing. Cook the soup and add the frozen vegetables and a bunch of thyme. Bring soup and herbs to a boil and cook further for 10 minutes, then pearl onions and 1 to 2 packets Miller's Yellow Peas sprinkled slowly, stirring constantly. Find a suitable consistency and cook on the low heat 10 minutes more, stirring constantly. The yellow peas can of course be eaten immediately, but they are best the next day. Yellow peas are always a little thicker day after. 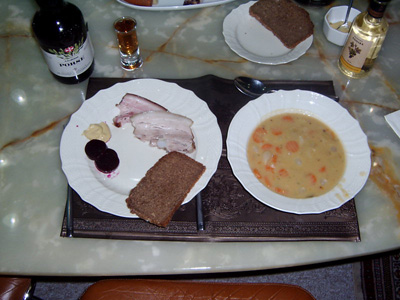
The angler's yellow peas my favorite meal on January 17th when I get home from a cold fish premiere Serving: It may be a good idea to cook some nice potatoes into the soup and servers them to the meal. Garnish: Fresh thyme needles make nicely and tastes good in soup, but remember that it must be the new twigs, which are soft. Drink: A cold beer and a Porse Snaps do well for the heavy soup. Hints: If you want the soup a little thicker, you can dribble a little vinegar in the yellow peas before serving. |
Cod gratin in a new way
Next Down
Next Up
|
|
600 g cod fillets without skin and bones 1 dl whipping cream 1 whole egg Grated peel of half organic lemon 1 to 2 small summer cabbage or 1 Savoy cab 3 tbsp. olive oil Salt and pepper Grated nutmeg Lemon Cream: 1˝ dl whipping cream 1˝ dl dry white wine Grated peel of half organic lemon and the juice of half lemon ˝ tsp. anise seed or fennel seed crushed in a mortar Salt and pepper 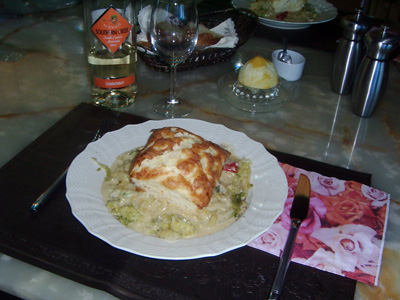
Cod gratin in a new way. With salmon at the bottom Procedure without liability: Cod fillets cut into smaller pieces and put it up in the blender. Blend tough with a little salt. Come the fish meat into a bowl and stir in whipping cream gradually. Stir eggs, salt, pepper and lemon peel in the fish meat. Place the stuffing cold for a few hours to soak.
Fish stuffing divided into four lightly greased portion baking dish and bake in water bath 40 minutes at 180 degrees on the bottom grate. The water should boil before the stuffing come in the oven. The time is sometimes a little depending on your oven. Check that they are baked. Use a meat stick. Clean and cut the cabbage into small pieces before being put into salted, boiling water. Bring to the boil and let the cabbage soak for 10 minutes. The heat is off, while the cabbage soaks. Drain and steam the cabbage in olive oil just before serving. The lemon crčme is made while the fish is baking and cabbage is soaking. Boil wine, whipping cream, lemon peel, lemon juice and a little anise powder into a suitable thick texture and season well with salt and pepper. You can also use crushed fennel seeds. 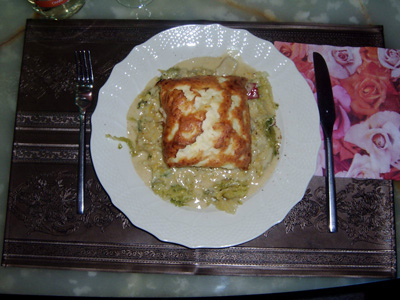
Cod gratin in a new way. With salmon at the bottom Serving: Serve on a hot plate. First cabbage are being poured with lemon crčme and top of the fish that are taken out of the portion baking dish so the bottom is facing up. Sprinkle cabbage with nutmeg. Garnish: Use a little green for garnish. Fresh coriander leaves can be used, but not too many. Drink: The same white wine used for the fish. Hints: Will you make the meal extra fine; you should try putting a piece of smoked salmon on the bottom of the portion baking dish. Customize the smoked salmon pieces to the bottom and come on top the fish stuffing. The cut of pieces from the salmon are blended along with the cod. Serve a good slice of bread with cod gratin. |
Blinis are Russian pancakes with real Russian caviar
Next Down
Next Up
|
|
200 g Russian caviar or roe of trout or roe of lumpfish 200 g cold smoked salmon or 200g hot smoked salmon or trout 200 g buckwheat flour 100 g wheat flour 2 whole eggs, divided into yolk and white 1/3 packet yeast = 17 g 3 dl whole milk 20 g melted butter to the batter and 10 g to the baking 1 tsp. salt and 1 tsp. sugar 1 dl Creme fraiché to the batter The rest of Creme fraiché with blinis 1 red onion finely cut with blinis 1 cup finely cut dill with blinis Alternative to blinis Yorkshire Pudding 4 whole eggs whipped 200 ml of milk 200 g wheat flour 1 tsp. salt Pinch white pepper 1 dl Sunflower oil App. 0,08 cl in each hole (12 holes in the mold) The batter provides 500 ml. 42 ml per hole. Metal Muffin Trays for backing. Metal Muffin Trays are available with 4, 6, 11, 12 and 24 holes. My Metal Muffin Tray is with 12 holes and I have made this recipe for 12 holes. The cakes can be frozen. 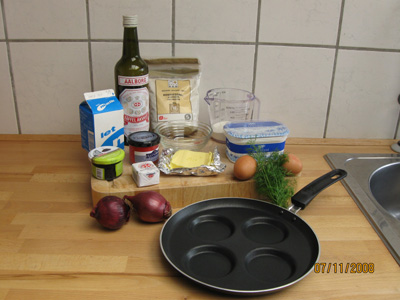
The ingredients for Russian pancakes with caviar Procedure without liability: In the 15 years I was traveling in the USSR, I was almost "stop-feeded" with blinis and Russian caviar without thinking about the price and how blinis was made. I asked my Old Russian interpreter, what kind of ingredients was included in the recipe for blinis. Above you'll find a recipe for blinis, but as Russian caviar is very expensive, this replaced with a more affordable product. In Russia they used Kefir, now only available in special stores in Denmark. I used Creme fraiché instead. Arla has previously produced Kefir, but due to lack of sales, the product is discontinued.
Warm milk and butter up to 37°C and dissolve the yeast in it. Add Kefir or Creme fraiché, the two varieties of flour, sugar, salt and egg yolks, constantly stirring. The batter should be very soft, like pancakes batter. Put the batter warm for one hour. Egg whites whipped stiff, and turned into batter. Blini pan heated with a daub of butter in each hollow and 2 tbsp. of batter comes up in each hollow. Broil now for 2 minutes on each side over good heat. Do not scorch = be too dark. There will be approx. 28 pieces out of the recipe. Note: I recently could not buy Buckwheat flour so I tried out with Durum flour from Italy. They were amazing good, try it if you did not get Buckwheat flour. Just remember that Buckwheat flour does not contain gluten as Durum flour does. So, if you have gluten intolerance. 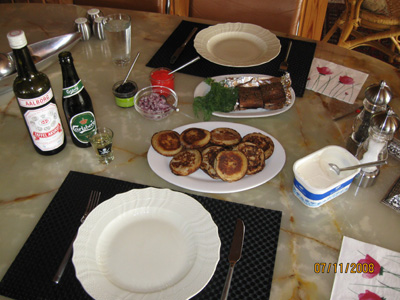
Russian pancakes with caviar and hot smoked trout Serving: Blinis served warm with "caviar" or trout roe little cold or hot smoked salmon, Creme fraiché and finely crushed red onion. Garnish: Dill finely crushed. Drink: In Russia I always drank Stolichnaya vodka and mineral water to blinis. Alternative Russian Champagne dry (sec = sukhoe) or half-dry (demi-sec = polu-sukhoe). Hints: Blinis can successfully be made also in an ordinary frying pan, just to make sure they do not become too great. Blinis can be frozen for later use, add parchment paper between layers. Thawed and warmed in the oven at 120°C for approx. 10 minutes. Taste as freshly prepared, I have tried it. Alternative: Yorkshire Pudding. Get all eggs into a large bowl and wip well through. Put milk in and whip. Put flour in and whip well through. Add salt and pepper, wip until there are no lumps in the batter. Set the batter aside and let it rest for at least 1 hour at room temperature. Just before using the batter, add 3 tbsp. water and wip the batter again. The batter provides 500 ml. 42 ml per hole. 
Metal Muffin Tray and Yorkshire Pudding While the batter is resting, the oven is heated to 200°C. Sunflower oil comes directly into the Metal Muffin Tray and put the Metal Muffin Tray back in the hot oven until it is very "HOT". Sunflower oil has a "smoking point" of 227°C, which must not be exceeded in the oven. The Metal Muffin Tray is taken out and the batter is immediately distributed in the 12 holes - fill 1/2 up - after which the Metal Muffin Tray is returned and baked for 20 to 25 minutes at 200°C. The cakes rise a lot, even without the raising agent. The oven must never be opened until the end, because the cakes collapses. They are very suitable for a dish with much sauce (gravy) in which the cake is dipped. Use Palmin (Palm oil) if eating the cake as a dessert, and sprinkle with icing sugar instead of salt and pepper. Palmin (Palm oil) has a "smoking point" of 232°C. NOTE: If not all holes can be filled with batter, DO NOT leave oil in the empty holes due to fire hazard. The oil can evaporate and set fire to the oven. Trix: Fill the 3 holes to the left with oil and tilt the tray so the oil runs down to the other holes. When the oil reaches the edge of the last row, the oil is evenly distributed. Serving: Fill the hole with sour cream, added with little lemon and grated horseradish. Put some sliced smoked salmon over and garnish with "Black Caviar" (Lumpfish roe) and crushed dill. 
The dough should be better distributed next time |
Pollock or saithe in hot, red Thai mix
Next Down
Next Up
|
|
Hot, Red Thai mix: 2 red and 2 green hot chili peppers 1 bunch fresh coriander 2 red paprika 10 cm ginger 10 cloves of garlic 3 medium-sized onions 2 lemongrass 1 ds. large tomato puree or 2 small 1 tbsp. coriander seeds 2 tsp. smoked paprika 1 tsp. salt 4 tbsp. water and 4 tbsp. olive oil Sambal Oelek is a ready-made product 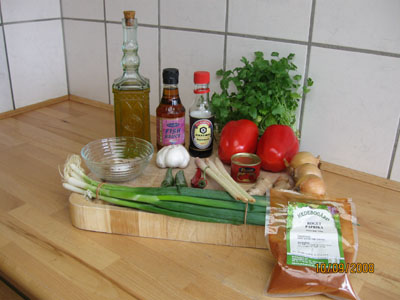
Ingreadients for Saithe in Hot, Red Thai mix Fish cut as fillets: 1 kg pollock or saithe or cod as desired 1 ds. 200 ml Yam-Yam coconut milk 18% 2 tbsp. Hot, Red Thaimix see above 4 carrots in thin slices 1 bunch spring onions 6 pcs. (save the green for decoration) 4 tomatoes cut into slices 2 tbsp. olive oil 2 tbsp. Kikkoman Soy Sauce 2 tbsp. Santa Maria Fish Sauce a little salt to sprinkle on the fish Other names: Pollock, Boston blues and Silver bills 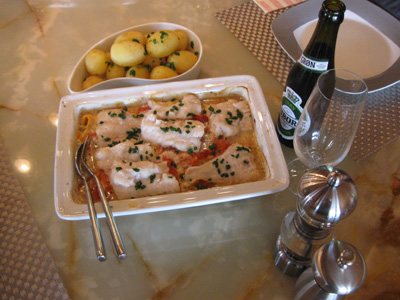
Pollock in hot, red Thai mix here made for only 2 persons Procedure without liability for Thaimix: You can benefit from making Hot, Red Thai mix the day before. The volume above, give 8 bags with 2 large spoonfuls Hot, Red Thai mix that can be frozen and used for other meals to give a hot taste. See the bags above. Vegetables cleaned and cut into smaller pieces, then poured in a food processor with the other spices, water and olive oil. Blend for a smooth and soft paste.
Procedure without liability for the Fish: Come olive oil in an ovenproof dish with high sides and 2 tbsp. Hot, Red Thaimix. Stir and come the very finely sliced carrots (I use a potato peeler), spring onions and tomato slices in the dish. Pour the coconut milk, soy sauce and fish sauce and bake in a 220°C preheated oven for 20 minutes. Take the dish out and come wide strips of fish on the vegetables. Place the dish in the oven and bake for approx. 15 minutes. Do not use salt on the vegetables because it comes from the sauces. However, a little salt on the fish. Pollock or saithe:: There are two species of Pollock or saithe. Light pollock and dark saithe. Light pollock is also called lubbe, which is the most expensive fish to buy, but is also the best edible fish. If you have bought a salad called "Sřlaks" (Sea salmon salad) it is made on light pollock. Pollock is light in the flesh, saithe is dark in the flesh. 
Pollock in hot, red Thai mix here made for only 2 persons Serving: Served in deep plates with the sauce, where you dip the bread in. Can be served with rice in the winter. However, I used new Danish potatoes here in July. Garnish: Garnish with the green of spring onions and/or fresh-cut coriander. Drink: A cool white wine is ideal if you want beer, a Tuborg Pilsner do good. 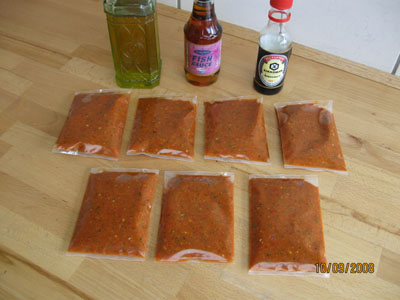
Hot, Red Thai Mix is ready-made and comes in vacuum bags Hints: You can advantageously make a large portion of Hot, Red Thaimix and freeze the rest in portion bags of 2 tablespoons. It can be used for cooked dishes of any kind. Also, try replacing the fish with giant, thawed, drained prawns. The prawns are finished at the same time as the fish. If you do not want / have time to make Thaimix, you can buy a Sambal Oelek Hot Chili Sauce, and use this instead. Go online and see all the types that exist. |
Herring Salad on my own Pickled herring
Next Down
Nćste op
|
|
Herring Salad with red spiced herring:
4 marinated herring fillets - "Home made" 75 g mayonnaise (1/3 tube) or homemade Aioli 150 g Creme fraiché 9% 1 tbsp. Dijon mustard 10 large slices pickled beetroot 10 Cornichon 1 large sour apple 1 small onion 3 cm fresh and finely grated horseradish ˝ tsp. white pepper A little syrup from beetroot and Cornichon 1 tsp. sugar (maybe) Accessories: Rye bread, hard boiled eggs, lettuce leaf and chives 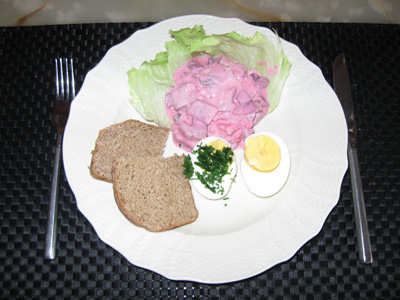
Red herring salad of own marinated spicy herring Procedure for red herring salad without liability: Mix mayonnaise, sour cream, Dijon mustard, pepper and sugar in a bowl. Peel the apple and onion. Cut beets, gherkins, apple and onion into smaller cubes. Grate horseradish finely. Put these vegetables in the bowl and mix well. Adjust the red color with pickles from beetroot and the sour taste with pickles from gherkins. Decide if you need sugar in. If necessary, season the mixture with salt.
Herring Salad with yellow curry herring: 4 marinated herring fillets - "Home made" 75 g mayonnaise (1/3 tube) or homemade Aioli 150 g Creme fraiché 9% 2 tsp. curry 1 tsp. turmeric (for color) 2 gherkins 1 large sour apple 1 small onion 1 tbsp. capers ˝ tsp. white pepper a little lemon juice 1 tsp. sugar (maybe) Accessories: Rye bread, hard boiled eggs, lettuce leaf and chives 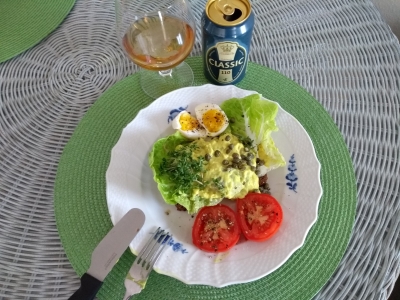
Yellow herring salad of own marinated spicy herring Procedure for yellow herring salad without responsibility: Mix mayonnaise, Creme fraiché, curry, turmeric, pepper and sugar in a bowl. Peel the apple and onion. Cut Cornichon, apple and onion into smaller cubes. Put these vegetables in the bowl and mix well. Adjust the yellow color with turmeric and the sour taste with lemon juice. Decide for sugar. If necessary, season the mixture with salt. If you have made the marinated herrings according to my recipe above, just select 4 large fillets and cut these into large cubes or strips and mix them in the bowl with the other ingredients. Divide the herring salad into two cups with lids and store them in the refrigerator. Shelf life up to 6 days in the refrigerator. Not suitable for freezing. Serving: Place a lettuce leaf on plate and top with lot of herring salad. Serve with rye bread and a smiling egg. Garnish: Dill or chives are fine as garnish. Drink: Here, as always, a cold beer and a dram are suitable for herring. Hints: Can also be served with small fresh potatoes when these can be purchased. The herring salads can also be made from white old-fashioned marinated herring, if you have not made spiced herring yourself. |
Plaice fillets with seafood mousse
Next Down
Next Up
|
|
Fish & Shellfish: 8 plaice, flounder, or sole fillets 200 g raw China prawns also known as Black Tiger Prawn 200 g 10% Greek Yogurt 1 tbsp. flour 3 cm fresh and finely grated horseradish 1 clove garlic salt, pepper and mild paprika, edelsüss Saucen: 1 big onion 1 red pepper 1 dl 10% Greek Yogurt 2 tbsp. Avocado oil for frying Water, white wine see Tip salt, pepper and a mild paprika Extras: New potatoes or cooked rice Butter steamed green beans 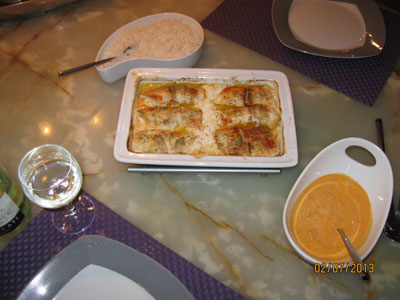
Plaice fillets with seafood mousse Procedure without liability: Peel the prawns - save the shells - and the black string (the intestine) is removed. prawns, mayonnaise and Greek Yogurt are blended coarsely. Mousse blended with flour, horseradish, salt and pepper. If you do not have a blender, just chop the prawns with a sharp kitchen knife. Add the flour to keep the mousse together.
The mousses distributed on the fillets, which have got a little salt on the inner side and paprika on the outside. Keep the fillets together with toothpick and place them in a greased casserole to finish frying in a hot oven at 200°C for approx. 30 minutes. If the heat is too hard, you can put a piece foil over. Onion and pepper cut into small cubes and sauternes in the avocado oil in a saucepan for approx. 1 minute. A little water or better white wine - see tip - be poured in the pot and the lid put on. The vegetables are steamed until they are tender for approx. 4 minutes. Blend the vegetables and mix with Greek yoghurt. Season with salt, pepper and paprika. 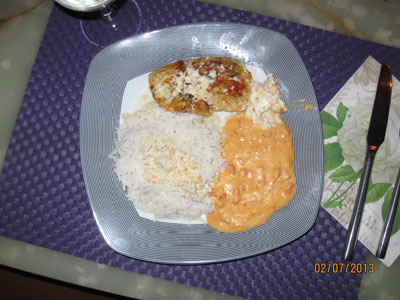
Plaice fillets with seafood mousse Serving: Serve the fish with sauce and new potatoes/rice and butter, steamed green beans. Season for the fish coincides with the new potatoes in May and June. Garnish: Lemon boat and dill are good garnish. But a little exotic, fresh coriander is also good. Drink: A cold white wine well suited to the meal. Hints: Boil prawns shells in 10 minutes in 1 dl water and 1 dl white wine added a little salt and some peppercorns. Strain the mixture and use the "soup" to the sauce instead of water or white wine. |
Creamy Jerusalem artichoke soup with smoked salmon
Next Down
Next Up
|
|
200 g smoked salmon, hot-or cold-smoked Use smoked salmon you like best 600 g fresh Jerusalem artichoke 2 fresh baking potatoes 1 onion, 2 onions if no leek 1 clove garlic 1 leek, only the white 2 tbsp. Avocado oil 1 liter good soup of chicken, veal or fish 2 dl whipping cream added some lemon juice or 2 dl sour cream instead of Salt, white pepper and grated nutmeg or saffron Extras: Bread or Flutes 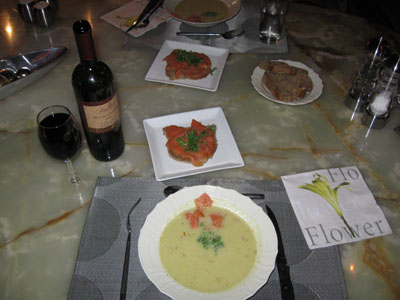
Creamy Jerusalem artichoke soup with smoked salmon Procedure without liability: Jerusalem artichokes and potatoes rinsed and peeled. Onion and leek skinned. The vegetables cut into cubes and seared slightly in a saucepan with added avocado oil. Remember the vegetables should just take the color.
Add the soup (broth), which you like best and let it simmmer in 20 minutes. Add whipping cream or Creme fraiché and let it simmer 5 minutes. Blend the soup and then season with salt, white pepper, nutmeg and maybe a little more lemon juice. Please just note if your blender can withstand boiling water. If your blender can't withstand boiling water, you must first cool the soup to a suitable temperature before blending. Blend the soup when it is lukewarm, and pour the contents into a saucepan, and return to a boil. Stir in whipping cream or Creme fraiché, salt, white pepper, nutmeg and maybe a little more lemon juice. Soup poured from the saucepan directly into the hot deep plates. 
The smoked salmon is smoked in a "Lunchbox Smoke Oven" Serving: Smoked salmon pieces distributed over the soup. If you use hot smoked salmon, be sure to take the fish bones away first. We took a salmon sandwich afterwards decorated with cress. Garnish: Dill is good as garnish, but a little fresh coriander are also good. Drink: A cold white wine well suited to the meal. Hints: A blender, where the bowl is made of glass, can withstand boiling water. A plastic bowl may not always withstand boiling water. See the manual, it is written there. |
Pangasius fillet with new Danish potatoes and white asparagus
Next Down
Next Up
|
|
4 pcs. pangasius fillet from deep frost 1 lemon 1 cup parsley ˝ cup sage 5 spring onions 100 g butter 2 tsp. salt 2 tsp. sugar ˝ tsp. mild curry 1 tbsp. Dijon mustard 1 tbsp. rapeseed oil ˝ tsp. pepper Accessories: 1 kg new Danish potatoes and ˝ kg of white asparagus Hollandaise sauce purchased ready-made or homemade 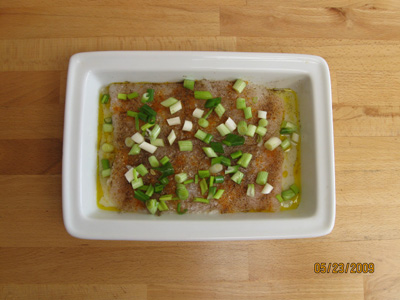
Pangasius fillet ready to be baked in the oven Procedure without liability: The new Danish potatoes, rinsed and scraped with a glove. See the picture under Seven "cool" fried herring. White asparagus peeled with a potato knife, and the bottom 3 to 4 cm is cut away. Spring onions are cleaned and cut into smaller pieces. Rinsed and chopped herbs. Pangasius fillets dry up slowly in the refrigerator - 12 hours - or at the kitchen table - 6 hours - and rinse in cold water, wipe dry in kitchen towel and place in a greased oven proof dish with rapeseed oil.
Sprinkle the fish with spring onions, salt, mild curry, peppers and a little lemon juice. Stir soft butter with parsley, sage and Dijon mustard. Add butter daub over the fish. Cover the dish with foil and put the fish in a pre-heated oven at 225°C for 30 minutes. Boil the new Danish potatoes in slightly salted water for 15 minutes. Asparagus cooked in slightly salted and sugared water for 10 to 15 minutes, depending on the thickness of them. 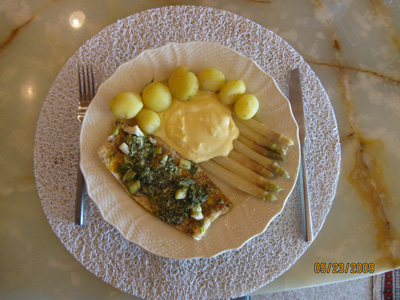
Pangasius fillet with new Danish potatoes and white asparagus Serving: The fish, potatoes and white asparagus are served on a plate as shown here in the picture above. Garnish: Parsley is good as a garnish, but a little fresh coriander are also good. Drink: A cold white wine well suited to the meal. Hints: If you can not get Pangasius fillet, try another lean fish. Pike, perch, pikeperch, cod, ling, saithe - yes there are many of them. But time in the oven may be different. |
Marinated herring fillets with new Danish potatoes
Next Down
Next Up
|
|
8 old mature marinated herring fillets 1 kg new Danish potatoes excavated same day 2 onions 6 spring onions 200 g butter 4 tbsp. sour cream Salt and Pepper Herbs that you have in the garden The world's easiest dinner here in June 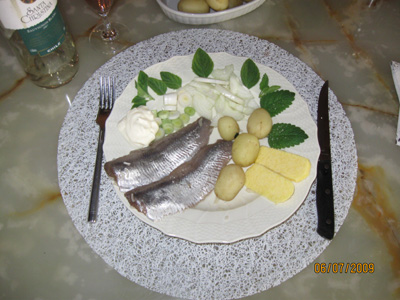
Marinated herring fillets with new Danish potatoes Procedure without liability: The new Danish potatoes, rinsed and scraped with a glove. Spring onions are cleaned and cut into smaller pieces. Onions are cleaned and cut into rings. Rinse and dry the herbs in the kitchen roll.
Boil the new Danish potatoes in slightly salted water for 15 minutes.
New Danish potatoes are rinsed and scraped with gloves Serving: Herring, potatoes and onions are served on a plate as shown in the picture above. Cold butter and sour cream are served. Garnish: Herbs that you have in the garden. Here are used Lemon balm. Drink: A cold white wine well suited to the meal or a cold beer and a schnapps. Hints: You can also use your own marinated herring, which you'll find recipes above. |
Cod baked in tin foil with Feta or Apetina cheese and spices
Next Down
Next Up
|
|
1 kg cod fillets without bones 1 kg new Danish potatoes excavated same day 1 red onion 8 small cherry tomatoes 1 cup of basil 1 sprinkle of dried oregano 12 stoned black olives 1 red pepper 100 g butter 200 g Feta or Apetina cheese cubes Salt and Pepper Here used parsley in the absence of oregano 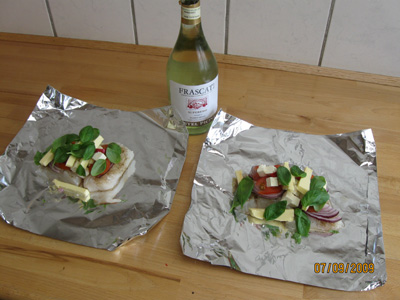
Cod baked in tin foil with Feta cheese. Here only for 2 Procedure without liability: The new Danish potatoes, rinsed and scraped with a glove. Cherry tomatoes rinsed and cut into slices. Red onion cleaned and cut into rings. Peppers cut into strips and cleaned of seeds. Rinse and dry basil in the kitchen roll.
Boil the new Danish potatoes in slightly salted water for 15 minutes. Meanwhile, clean the cod fillet and shared so that there are 4 good pieces of 200 to 250 grams each. Cod Fillets placed on aluminium foil, salted and sprinkled with pepper from the mill. On top of the fish put tomato slices, onion rings, strips of peppers, black olives, basil, Feta cheese cubes and butter in thin rods. It all sprinkled with a little dry oregano. Wrap everything into aluminium foil. Use any strong aluminium foil or double layer of the ordinary. Put the fish into a 200°C hot oven for 30 minutes. The meal is also suitable for a ball grill in the garden or over a open fire. Here, the time of course depend on the temperature, which can be achieved in the barbecue or open fire. Please try your way. At the ball grill or open fire should be strong aluminium foil used. The fish rests in aluminium foil 10 minutes before it is eaten. 
The cod served with new Danish potatoes and gravy sauce Serving: The fish with spices and potatoes served on a plate if you eat right at home. Out in the open unpack the aluminium foil and implemented on top the potatoes and everything eaten directly from the "package". Garnish: A lemon slice doing well and looks also nice on the plate. Drink: A cold white wine well suited to the meal or a cold beer and a schnapps. Hints: You can of course also use other fish that you catch on your fishing trip. If you also want to eat good bread to the meal, use more butter and came a little white wine in the package. It makes a good sauce to dip the bread in. |
Pangasius fillet with mushrooms stuffed with garlic cheese
Next Down
Next Up
|
|
4 pcs. pangasius fillets from frozen 1 lemon 1 whole, new garlic or 3 garlic cloves 9 large mushrooms, plus a few more 125 g GARLAN cream cheese with garlic 2 red tomatoes 1 small onion 2 tbsp. apple balsamic 2 tbsp. grape seed oil 50 g butter Salt and Pepper 
Pangasius fillet with mushrooms stuffed with garlic cheese Procedure without liability: Pangasius fillets are sprinkled with salt and pepper and rest 15 minutes before the fry in butter. In the meantime, are you doing this.
Mushrooms brushed clean of any soil and the stem snapped off. The lower part of the stem is cut away before chopped into small pieces with a few whole mushrooms. A completely new garlic or 3 cloves garlic, chopped into small pieces and mix with the chopped mushrooms. Roast in the pan in the butter until it is light brown. Cool mixture before mixing with the cream cheese with garlic. Spread mushrooms and cream cheese in the nine large mushrooms and place them in a 200°C hot oven for 20 minutes. Make a good tomato salad with onion, apple balsamic and Grape Seed Oil. Sprinkle with like something green if you have this in the herb garden. Now it's time to butter roast pangasius fillets for approx. 3 to 4 minutes on each side. Drip before serving the fish with lemon. 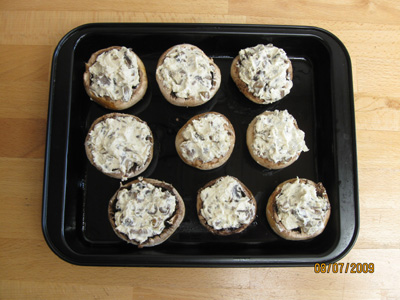
Mushroom with cream cheese / garlic ready for the oven Serving: Serve on a hot plate and give a good bread. Garnish: Use like something green. Basil can be recommended. Drink: A cold beer in summer heat can be recommended. Hints: Of course you can also use other fish you caught on your fishing trip. |
Cauliflower soup with coconut milk and shellfish
Next Down
Next Up
|
|
1 large cauliflower 2 onions 1 whole, new garlic or 4 garlic cloves 1 red hot chili pepper 2 tsp. sweet Bombay curry 330 ml coconut milk Xing Fu (2 small cans) 1 cube herbal broth 2 tsp. fish broth 3 tbsp. olive oil, white truffle 8 dl water Soup season with salt, if necessary Seafood of your choice Here is used frozen: 500 g saltwater clams - Solenidae 500 g of crayfish tails 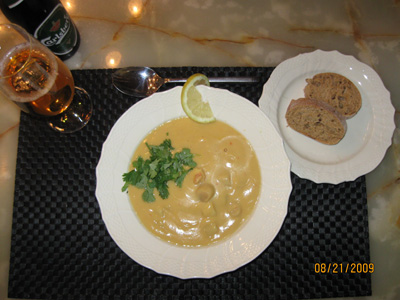
Cauliflower soup with coconut milk and shellfish Procedure without liability: Onions, garlic and red chili cut into small pieces and brown slightly in a saucepan with olive oil added to curry. 8 dl water poured over and a herbal broth and fish broth, add to the pan. The cauliflower is picked in small pieces and put into the pot. It all boiled for 10 minutes, then pour the coconut milk and cook further for 2 to 5 minutes.
Soup cool slightly before blending. Only if your blender does not tolerate boiling water. Pour the blended soup back into saucepan and pour the shellfish in. Give now a short rehash and the soup is ready. NB not boil too long, since shellfish become tough. 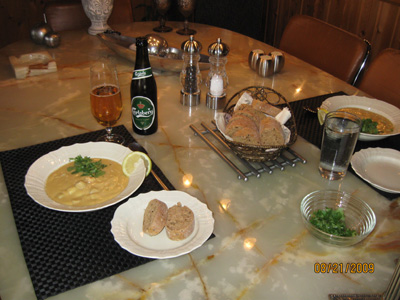
Cauliflower soup with coconut milk and shellfish Serving: Serve in hot deep plates and give a good bread. Garnish: Use like something green. Coriander leaves may be recommended. Chives can also be used. Drink: A cold beer or white wine is recommended. Hints: Of course you can also use other shellfish. For example, large shrimp. A little lemon grass (or a slice of lemon) can be added to the soup for a sour taste. |
Mock turtle with egg and fish balls
Next Down
Next Up
|
|
1˝ kg of dear veal 2 to 4 pcs. Osso Buco of veal shank 1 **calf tongue app. 800 g 3 to 4 liters of water, meat must be covered with water 2 leeks 4 carrots 1 small celery 1 large parsley root 1 large parsnip 2 onions 4 cloves garlic 1 red hot chili peppers The soup season with salt For the sauce 90 g butter 90 g flour 1 small can tomato paste (100 g) 1˝ to 2 liters of soup 1 tsp. The four spices made of: 5 parts white pepper, 2 parts nutmeg, 1 part ginger and 1 part carnation The sauce season with 2 tbsp. Oestersauce and 2 tbsp. Fish sauce Blue Dragon and a little salt if necessary 1 tbsp. mild paprika 1 to 2 dl of dry sherry or dry Madeira Sauce stained with gravy browning Accessories: Boiled white *fish balls from can Hard boiled eggs or smiling eggs Puff pastry or Rustic Baguette Ingredients for Mini Fish Cakes: 600 g fish fillet, skinned and chopped fine of: cod, pollock, sole, white fish or mixed fish 1 tsp. salt 1 pinch white pepper 1 to 2 tbsp. wheat flour 1 to 2 whole eggs 1 dl whipping cream 1 tbsp. butter / olive oil for frying Ingredients for Mini Meatballs: 500 g minced veal and pork 1 small grated onion 2 cloves grated garlic 1 tsp. thyme 1 whole egg 1˝ tbsp. wheat flour 1 small glass of Sherry / Madeira ˝ tsp. The four spices 1 tbsp. butter / olive oil for frying 
Mock turtle with egg and fish balls Note: Original mock turtle is made with Madeira. I recommend buying Mini Fish Cakes to 20,00 DKK for 200 g and Mini Meatballs to 27,00 DKK for 450 g at Rema 1000. The meatballs taste excellent when they have spent the night in the good sauce and than you also save a lot of time cooking. But still, the dish has to be made at least the day before so that all the meat is permeated with the lovely taste in the sauce.
Procedure without liability: I remember this meal from my childhood, where we used a calf's head, as well as several other pieces of meat, which I can not really recall. We were three families who went to the local slaughterhouse and bought meat, and at the greenery store we got the vegetables. Everything was cooked in the old disused wash copper boiler, which previously served as cooking vessel for laundry. It is now a "thing of the past", so here comes the new version without the risk of BSE (Bovine Spongiform Encephalopathy) also known as mad cow disease. You start the day before eating the dish. Place the meat in a large pot with 3 to 4 liters of water, the meat should be covered with water, preferably a little more because something evaporates along the way. Bring the water to a boil and froth well when boiling. Season with salt and cook while you clean all herbs and chop them into cubes. Add the herbs - bring to a boil - and cook under low heat for another 2 to 3 hours. When the meat is tender it is taken up and the veal is put under pressure until the next day. The soup is sieved and some of the herbs (carrot, celery, parsley root, parsnip) are blended and can be added to the soup at will. The soup is stored for the next day. The next day, start by boiling the soup for half an hour without a lid so that the soup becomes concentrated. The veal, which has been under pressure overnight, is cut out into bite-sized cubes. The tongue is peeled and fat and tendons are removed before the meat are cut into bite-sized cubes - maybe you should peel the tongue when it has cooled and you can touch it without burning your fingers. Osso Buco the pieces of meat are peeled off the bone, fat and tendons are removed before the meat are cut into bite-sized cubes. Make this sauce and bring the meat in: Make butter and flour into a dumpling bowl in a suitable large saucepan. Then pour in small quantities up to 1˝ liters of the soup, which has been cooked and skimmed for fat. Remember to whip well so that lumps do not form in the sauce. Find a suitable texture and seasoning with tomato puree, Oyster sauce, Fish sauce, salt, the four spices and Sherry / Madeira. Color the sauce with food coloring. Add Mini Fish Cakes and Mini Meatballs gently warm it all through. The fishballs from the can are heated separately in a 220 degree hot oven for approx. 10 minutes. They are laid on top of the dish along with half eggs. 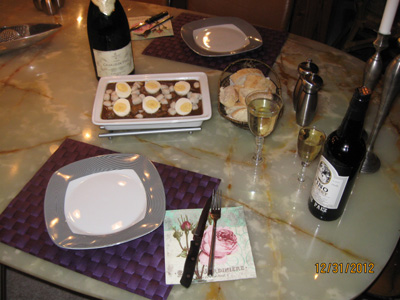
What have mock turtle with fish to do. Only the fact that fish balls are included in the dish and it's my favorite New Year's Eve Mini Fish Cakes: Mix salt with minced fish and whisk the dough for a few minutes. Whisk the mixture well and add flour, spices and eggs one at a time. Gradually add cream until an appropriate consistency. If the mixture solidifies, put the bowl in hot water and whisk until smooth again. Check your spices and season to taste. Let the mixture stand 1 hour in the refrigerator. Form fishcake into small round balls with 2 spoons dipped in warm water. Fry them on the pan in butter and olive oil. Mini Meatballs: Come minced veal / pork in a bowl and grate onion and garlic. Add eggs, wheat flour, salt and spices. Heat a pan with butter and olive oil and form small meatballs in your hand with a desert spoon. Fry them on medium heat on both sides until golden brown. The dish can be frozen without fish balls. I like to make a large portion in early December and divide it into two, since we are not 8 persons for the New Year. The four spices: Made of 5 parts white pepper, 2 parts nutmeg, 1 part ginger and 1 part cloves. All crushed spices. Serving: Serve in hot deep plates and serve with puff pastry or Rustic Baguette. Garnish: A small glass of Sherry/Madeira poured over. Drink: Continue with the same Sherry/Madeira and a mineral water. Or a dry Champagne for New Year. 
Happy New Year to everyone Hints: *Warm the fish balls for themselves and get them over the dish before serving. **Boil the calf tongue by itself in 2 liters of salted water for approx. 1˝ to 2 hours added some sugar, peppercorns, bay leaves and a sprinkle of fresh thyme. You can also make a good dish "Calf tongue in Madeira" with half the tongue and the rest for the mock turtle. |
Baked mullet on herbs
Next Down
Next Up
|
|
The fish 1 kg mullet fillet with skin but without fish scaling 1 bunch dill 1 bunch parsley 4 twigs thyme 1 twig sage 2 dabs of butter 1 tsp. salt ˝ lemon juice 1 tbsp. olive oil Saffron sauce 1 dl. white wine 1 dl. fish broth 1 dl. whipping cream 50 g butter 1 pinch saffron The sauce season to taste with salt and white pepper lemon juice and a little sugar Extras 1 kg small new potatoes Saute of: Spring onions, spiced tomatoes, fennel, sweet peppers and celery 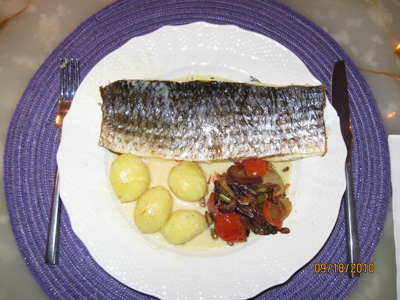
Baked mullet on herbs Procedure without liability: The first thing you must do is to catch a mullet, which is big enough for 4 people. The one I used here is for 2 people, weighed 1.75 kg and was 52 cm, enough for 2 people, after it was filleted.
Remove the scales from the fish with a blunt knife from tail to head and cut it up into its belly. Remove the entrails and rinse the abdomen carefully for blood and black skin in the belly and then cut the head off. With a very sharp knife cut now one fillet on top of the back bone. The fish turned and the other fillet cut of the back bone. Fillets treated for chest bones and edges cleaned so the 2 fillets look good. Fish waste - what you cut off - boil for approx. 2 cups water to a fish broth with a little salt. In a suitable ovenproof dish spread the herbs and the fish presented with the meat side down. Meat side has got a sprinkle of salt. On the skin side poured a little olive oil, lemon juice and 2 dabs of butter. Let the fish rest covered with film in the refrigerator a few hours before it is baked in the oven. When ready to cook the sauce and the accessories, you take the fish from the refrigerator and put it in a 220 degrees oven for approx. 30 minutes. Time depends on the fish's size and whether it comes straight from the fridge. Saffron sauce: Pour white wine and fish broth with a little saffron in a saucepan and boil until half. Add cream and give a brief rehash. Add the cold butter, stirring and tasting the sauce with salt, white pepper, lemon juice and sugar. Saute vegetables in butter over low heat. Be careful not to be too brown, because it must not be brown onions for steak. 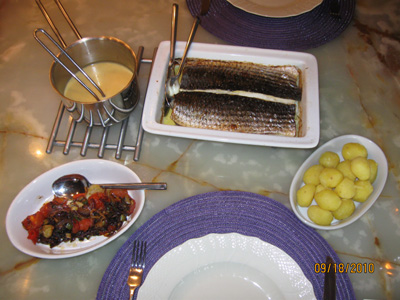
Baked mullet on herbs Serving: Arrange the fish as the picture on the right. Garnish: You can use the rest of the herbs. Drink: Use like the rest of the same white wine you used for the sauce. Hints: If you do not catch a mullet, then you can use a trout or salmon instead. |
Pot soup with shrimp and mussels cooked with root vegetables
Next Down
Next Up
|
|
500 g "Giant Tiger Shrimp" 500 g "Greenshell Mussels" 3 tbsp. olive oil 2 tsp. red curry paste 1 large onion 4 cloves garlic 1 ds. diced tomatoes 5 cm fresh ginger 1 red chili pepper 1 bunch dill or coriander for garnish Fish Bouillon after this prescription 2 liters of water 4 Knorr cubes fish broth 2 tbsp. Bong Touch of Taste fish broth 1 carrot 1 parsley root 1 beetroot 1 parsnip 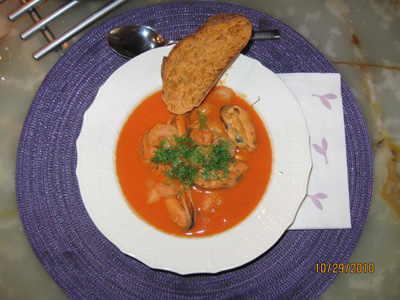
Pot soup with shrimp and mussels cooked with root vegetables Procedure without liability: Red curry paste fry in oil in a frying pan or saucepan. Minced onion, garlic, red chili pepper and ginger, add and fry for 2 minutes while stirring. A can of diced tomatoes added and the whole thing is given a brief rehash. Cool mass while fiskebouillonen cooked.
Come 2 liters of water in a large (nice) pot together with fish bouillon cubes, carrots, parsley root, beetroot and parsnips. Root vegetables are first cleaned, peeled and cut into rustic pieces. Boil it all in 10 to 15 minutes. Blend the vegetables and root vegetables to a very fine mass and it came up in the pot of fish soup. Give a brief rehash of 2 minutes and then joined the shrimp and clams in the soup. It should not boil more, then the shrimp get rubbery. Warm it just quietly through in approx. 5 minutes. 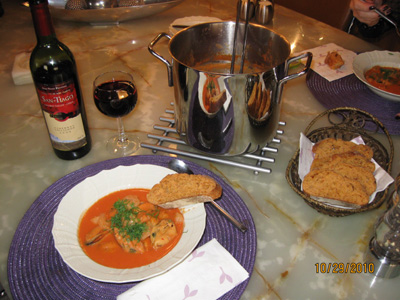
Pot soup with shrimp and mussels cooked with root vegetables Serving: Put the nice pot on the table and serve the meal with good bread. Garnish: You can use the rest of the herbs. Choose either dill or coriander. Not both. Drink: A sparkling wine will go with the soup. Hints: The soup can be made more "soft" if it thickened with whipped cream before shrimp and mussels are added. |
Rimmet Christmas Salmon with Dill Schnapps
Next Down
Next Up
|
|
1 salmon fillet around 500 g 4 tbsp. sea salt 3 tbsp. organic sugar 2 tsp. dill seed 2 tsp. coriander seeds 1 tsp. white peppercorns saffron quantity after your wallet 1 organic lemon juice and grated shell of lemon 1 dl dill aquavit (5 snaps glass) 1 bunch dill for garnish Hints: Make your own dill schnapps with Brřndums Snaps Klar. Or Vodka Fill the bottle up with a lot of dill stalks and let it rest for one to two weeks max. 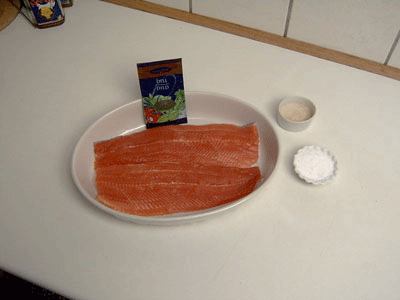
The Christmas salmon ready to be Rimmet with Dildsnaps Procedure without liability: At the risk of repeating myself, I will come here with a slightly different method of rimet salmon. (Described above in No. 14 fillets the fish as described). Come sea salt, sugar, dill seed, coriander seeds and white peppercorns in a food processor or blender and run for half a minute. If you only have a mortar, it can also be used to crush the seeds, then mixed with salt and sugar.
Lćg en del af blandingen i bunden af et passende stort fad og kom laksesiden ovenpĺ med skindsiden nedad. Resten af blandingen fordeles pĺ křdsiden. Laksen filmes og sćttes i křleskab natten over - seks timer - fadet tages ud og den vćde der er trukket ud af laksen hćldes forsigtig bort. Put some of mixture in bottom of an appropriate dish and came on top the salmon with the skin side down. The rest of the mixture spread on the flesh side. Salmon filmed and put in refrigerator overnight - six hours - the dish is removed and the liquid pulled out of the salmon carefully poured away. Take the salmon up after maturation and put it on a clean tea towel and pat it dry with paper towels. If you put the salmon on a paper towel the salmon "glue" onto the paper and it is annoying to get it off again. Should be added to the meat side with too many spices they scraped away with a knife. The fresh dill chopped finely and then pressed into fish flesh. Cut the salmon into thin slices. Starting from the head and cut to the head - the missing head.
The finished Rimmet Julelaks with Dillsnaps Serving: Cut as many pieces of salmon, as you can eat, and put them on a plate. The rest of the salmon should be immediately put in fridge so it can keep fresh for approximately 3 days. A good bread spread with unsalted butter is suitable for rimet salmon. Garnish: Use the fresh dill for extra decoration. Drink: A cold Pilsner beer and a dill aquavit is preferable. Hints: If you want to make two fishing sites at once. So wait with the fresh dill to the day you will eat the fish. Think of soil bacteria in herbs. Alternative to fresh dill is dried dill, but the taste is not as intense. Rimmet fish tastes great, but what does rimmet mean? Rimmet is an old-fashioned preservation method and the word comes from the Swedish word for "blast" = salting. |
Bloody Mary Marinated herring
Next Down
Next Up
|
|
4 diluted Icelandic Salted Herring gives 8 fillets 1 dl Vodka 2 dl tomato ketchup 1 tbsp. Worcester sauce 1 tbsp. Angostura bitter 1 tsp. Tabasco sauce 1 tsp. white peppercorns crushed 1 tsp. celery salt 1 chopped celery stalk with leaves for garnish 1 cup vinegar and 100 grams of sugar boiled to a syrup and cool 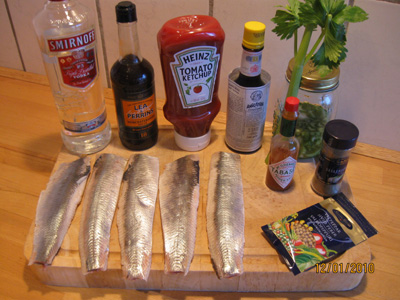
Raw materials for Bloody Mary Marinated herring Procedure without liability: The salted herring is first filleted and then diluted. Put the herring on a suitable cutting board with the back to yourself and the head to the right. I assume that you are right handed! Your left palm put over the herring and with a SHARP file knife you cut gently down to the backbone and turns the knife so the surface is parallel to the cutting board. Then you cut along the backbone of the herring toward the tail. Turn herring so it has the belly facing you and cut again along the backbone toward the tail. You now have two file pieces, where the fine fish bone must be removed by cutting diagonally from back to belly. The skin is removed by pulling it from head to tail.
File pieces must now be diluted so the salt content suit your tastes. Here one must try it out. But try with a middle way, put file pieces in a bowl and pour cold water over, so it just covers. Put the bowl in the refrigerator overnight and then try to taste herring next day. Is it OK, pour the fillets with cold vinegar syrup and soak in a few hours while you make bloody Mary marinade. Mix vodka and tomato ketchup, put all the spices in and mix well. You can choose to put the whole herring fillets in a suitable dish (jars) or cutting them into smaller pieces. Do you use whole pieces recommended a store in the refrigerator for a week. Should they be eaten next day it is better with smaller pieces. But quite clearly a store in the refrigerator for a week is best. Pour Bloody Mary marinade over the herrings so that it covers. Wait with the garnish to you servers the meal. 
Bloody Mary Marinated herring Serving: A good rye bread spread with unsalted butter one suitable for herrings. Garnish: Use a freshly chopped celery stalk with leaves for garnish. Drink: A cold Pilsner beer and vodka are preferable. Hints: Bloody Mary Marinated herring might keep 4 to 5 weeks in the fridge. Put first celery stalk on when serving. This is to prevent soil bacteria. I've made my herring 1st. of December in a 2 liter preserving jars, with intent to use them for Christmas. Fills approx. 1 liter. |
Kedgeree for the next days hangover
Next Down
Next Up
|
|
500 g smoked haddock fillet without skin and fish bones 250 g basmati rice 4 good organic farm eggs 1 onion chopped finely 2 cloves garlic chopped finely 1 fresh red chilli chopped (with or without seeds) 1 bunch fresh coriander chopped finely 4 bay leaves 1 lemon 1 tbsp. red curry paste 3 tbsp. Olive oil and a knob of butter Lćsř salt and freshly ground black pepper put on the table Yogurt for serving 
Kedgeree for the next days hangover Procedure without liability: Can be eaten as breakfast, lunch or dinner but is particularly good for the "next day". So a cure for hangovers.
Put a large pot of lightly salted water and bring to a boil with 2 bay leaves. Wash out the rice well and put them into the boiling water along with 4 eggs and juice from half a lemon. Once the rice is cooked (check package approx. 10 minutes) drain the water into a sieve and set aside. The eggs are peeled and cut into quarters and set aside. Place the pot over again with lightly salted water and bring to a boil with 2 bay leaves and the juice from half a lemon. Getting smoked haddock fillets in the pan and turn off heat. After 3 to 4 minutes the fish is cooked so it separates into flakes. The fish are separated into large flakes and set aside. Place a large frying pan over low heat and add a little olive oil and a knob of butter. Sauté onion, garlic, chili pepper and red curry paste in approx. 5 minutes. It must not browned, the onions should only become clear. Add the rice to the pan and mix carefully. Sprinkle with coriander and mix again. Eggs and fish flakes mixed now cautious in the dish and given a sprinkle coriander on top. Put the frying pan on light heat for 5 minutes to get it nice and hot. It gives the meal lots of flavor. 
Kedgeree for the next days hangover Serving: Yogurt can be served to. Is particularly good if you do the meal "HOT". (Chili with seeds) Garnish: Use fresh coarse chopped coriander leaves for garnish. Drink: A cold porter with a drop of whiskey on the bottom doing well. Hints: If smoked haddock not available, try using smoked lumpfish. Lumpfish must not boil, but just peel the meat out and cut into large flakes. Otherwise you'll have to smoke your fish. |
Borscht soup cooked on Osso Buco with Danish root vegetables
Next Down
Next Up
|
|
1 kg mixed Danish roots as: 3 large beets and 3 large potatoes 1 pcs. of each carrot, parsley root, pastinakrod, 1/4 celery, 1/4 white cabbage 4 pcs. osso buco with marrow ˝ kg beef - like the bow ˝ kg smoked bacon lamb or goat meat can also be used - it got in Thashkent 3 L of water ˝ cup white wine vinegar and a little sugar 4 bay leaves, 1 red chili peppers and 15 peppercorns 1 large onion and 4 cloves of garlic 1 small can tomato paste Salt - taste the soup 3 tbsp. salt for cooking beetroot 500 g sour cream 38% for serving 5 cm freshly grated horseradish for serving 1/2 liter of vodka and 1/2 liters of water per man in Russia 
Borscht soup cooked on Osso Buco with Danish root vegetables Procedure without liability: Meat: Osso buco, shoulders and smoked bacon or lamb put in a saucepan with water to cover. Cook up fast so it foams, remove the foam completely. Have a new pot ready with 3 liters of boiling water and add the meat. Add the bay leaves, chili peppers, peppercorns, onion, garlic and salt (Add the good residual root vegetables). Bring back to a boil and let it simmer over low heat for approx. 1 ˝ hours. Remove the meat and cut it into bite-sized pieces, if it has not fallen apart. The bones are taken up and thrown away, but remember to save the marrow for a rye bread with coarse salt. The soup is sieved into a nice pot and very finely sliced potatoes and cabbage is added together with the cleaned root crops and boiling continued for 15 minutes. Beetroot with a little vinegar/sugar and tomato paste are added the soup the last 10 minutes of cooking time. Total cooking time approx. 2 hours.
Root: Carrot, parsley root, parsnip and celery cleaned and cut into bite-sized pieces (cubes) and set aside for later use. Use the good remains of the root vegetables to cook the meat in. Beetroot: Boil for itself in salt water with the peel on for 30 minutes for medium beets. The water is poured off and the beets are covered with cold water and stand for 15 minutes. The skin popped the beets when they are lukewarm, top and bottom cut off and cut into bite-sized pieces (cubes) and place in a bowl. Soak the beetroots in ˝ cup of the best wine vinegar and a little sugar for a sour/sweet taste and to preserve the color later. Soup: Season with salt, vinegar/sugar and tomato paste. Put the nice pot on the table and serve directly from this. In Russia I got brown bread. Sour cream with horseradish served "On the top" and of course you drink Russian Vodka. There was no tradition in Russia (when I was there) to drink beer, so we drank water and Vodka 1 to 1 It makes no headache. 
Borscht soup cooked on Osso Buco with Danish root vegetables Serving: Sour cream mixed with grated horseradish served "On the top". Garnish: Parsley will be suitable for the dinner. Drink: Plenty of vodka and mineral water. Or plenty of Russian Champagne - Semi Dry. Hints: If you do not eat pork, it is definitely a good idea to use lamb or goat meat. |
Seithe in spicy coconut milk with shrimp, rice / bread and herbs
Next Down
Next Up
|
|
800 g of saithe fillets 200 g frozen prawns 1 red onion 1 leek 1 small garlic 1 apple 1 small can tomato paste 2 Tbsp. red curry paste 2 Tbsp. Fish Fund Touch & Taste 3 Tbsp. olive oil 165 ml Thai coconut milk salt and pepper 1 bunch fresh coriander 1 lemon sliced Serve with rice / bread of your choice 
Seithe in a dish in spicy coconut milk with shrimp, rice and herbs Procedure without liability: Saithe fillets and prawns set to thaw and drain. Saithe fillets salted when they are thawed. Clean the herbs and cut them into appropriate pieces. Heat olive oil in a frying pan, came in red curry paste and fry it lightly. All herbs fry it without that they will brown. Pour tomato paste, fish stock and coconut milk and stir. If the meal is too thick primed with a little water or wine. Season with salt and pepper.
An ovenproof dish greased with butter on bottom and saithe fillets laid over. Herbal mixture spread over fish. Put the dish in a 180 degrees preheated oven for 20 minutes, pour the shrimp over the fish and give another 10 minutes in the oven. Take the dish out and cut fresh coriander over the fish before serving. Boil the rice according to instructions on the bag. Come a few stalks of coriander in the rice during cooking, it gives a good taste. 
Seithe in bowl in spicy coconut milk with shrimp, bread and herbs Serving: Place the dish on the table and serve the fish with a good bread. Garnish: Coriander is recommendable. Drink: A cold beer is suitable. Hints: Other lean fish species can also be used. |
Tuna and shrimp in a spicy salad with feta cheese
Next Down
Next Up
|
|
1 can of tuna in oil (or water) 200 g cutter-shrimp cutter-frozen shrimp are best 1 to 2 romaine lettuce ˝ cucumber (peeled) 1 red onion 2 spring onions 2 large red tomatoes ˝ canned Feta or Danish Apetina 1 pk. Tapas green and black olives 4 scrape eggs, hard boiled or poached 8 tbsp. virgin olive oil 6 tbsp. apple vinegar 4 garlic ˝ red chili pepper (strong) 8 small cherry tomatoes salt and a little sugar (honey) in the dressing 1 bunch fresh parsley 1 bunch fresh basil Bread of your choice: Carrot bread with sesame seeds or Rustic Baguette 
Tuna and shrimp in a spicy salad with feta cheese Procedure without liability: Start by making a dressing, mix virgin olive oil and vinegar in a bowl. Come finely chopped garlic, chili pepper, salt and sugar (honey) in. Halve cherry tomatoes and put them in the bowl with a package Tapas olives and feta cheese into cubes. Let dressing drag a few hours at room temperature.
Clean, rinse and dry the vegetables. Romain lettuce cut into suitable pieces and place in bottom of a dish. Some of the above tsp. dressing poured over. Cucumber Slices, spring onions, tomato slices and onions slices mixed and placed into a nice layer. Add the remaining dressing over the content. Spread the drained tuna over the salad - spread drained shrimp over tuna. The meal garnish with 1/4 eggs or poached eggs, as shown here. Parsley and basil sprinkled generously. The eggs sprinkled with salt. Make plenty of dressing, so you can dip your bread in it. Dressing is allowed to be "Hot". 
Tuna and shrimp in a spicy salad with feta cheese Serving: Place the dish on the table and give a good bread for tuna / shrimp salad. I used a Rustic Baguette bread warmed in the oven a few minutes. For sandwiches will triangular carrot bread with sesame seeds, which also warmed in the oven first, be suitable if there would be anything left. Garnish: Parsley and basil will be suitable for this purpose. Drink: Summer a chilled white wine. Winter a good, light red wine. Hints: "Salad" can be used in a burger as a takeaway sandwich. |
Spicy seafood with noodles
Next Down
Next Up
|
|
1 kg fresh, Danish blue mussels in the shell or 4 ds. Bornholm smoked mussels in brine 600 g of raw frozen black tiger shrimp 250 g of Go-Tan noodles 2.5 cups organic coconut milk or 2.5 cups whipping cream 100 g cashews nuts - toasted salt and chopped into small pieces 20 g sesame seeds - toasted salt together with cashews nuts 6 tbsp. Svansoe cold pressed extra virgin olive oil 1 carrot into small cubes 1 leek or/and 2 spring onions into small slices 2 shallots, chopped finely 2 cloves garlic, chopped finely 1 red bell pepper into small cubes 1 small head broccoli into small pieces (only the head is not the stalk) 2 cups white wine preferably dry. Or that you severer for food 1 to 2 tbsp.. Chu-Chum real chili sauce available in the "Hot" and very "Hot" 1 tbsp. salt roasted cashews nuts and sesame seeds 1 bunch fresh parsley or coriander for garnish Bread of your choice. Dip it in "sauce" 
Spicy seafood with noodles Procedure without liability: If tiger shrimp are frozen, they must first be thawed in a colander (strainer), so the liquid runs off. Use fresh, Danish blue mussels in the shell, so follow the recipe on the package. I used Bornholm smoked mussels in pickle for the family's sake. They do not like all the mussel shells.
Clean, rinse and dry the vegetables. Carrots, leeks, spring oions, shallots, garlic, peppers and broccoli, cut into suitable pieces and fry lightly in olive oil in a pot approx. 5 minutes. Getting the black tiger shrimp in the pan and cook further until they are red, approx. 10 minutes. Add the white wine, coconut milk or cream and salt roasted cashews nuts and sesame seeds. The whole steamed, covered, for 5 minutes under low heat. The last 3 minutes with the Bornholm smoked mussels. Using Danish blue mussels in shells, follow the instructions on the package. After cooking pour the mussels in a colander and then add the meal. Meanwhile, boil 2 liters of lightly salted water. When the water boils pour the noodles into the pot. Remove the pot from the heat when the water boils up again and leave for 10 minutes under the lid. Stir into the pot so noodles separeras apart. Then poured into a colander (strainer), so the liquid runs off. Get the hot noodles on a platter and garnish with green. 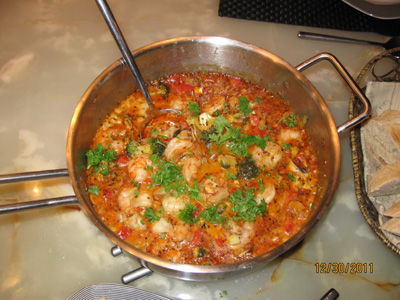
Spicy seafood with noodles Serving: Put the dishes on the table and give a good bread to the meal. Garlic bread goes well with the meal. Dip it in "sauce". Garnish: Parsley and coriander will be suitable for this purpose. Parsley and whipping cream - Coconut milk and coriander. Drink: A dry well chilled white wine. Hints: If you have suitable pots/pans, it will be suitable to make the meal herein and severe it directly on the table from the pot/pan. |
Cold smoked salmon for Christmas
Next Down
Next Up
|
|
The salmon in the picture weighs 4.6 kg in gutted weight I used 2 salmon of the same size for this recipe 10% brine made of: 666 grams of coarse salt 50 grams of sugar 6 liters of boiled, cold water (5°C max) 15 to 20 l smoke sawdust beech and/or alder (mix half of each) ˝ l juniper mulch provides a good, strong flavor but be careful with the dosage Obviously a smokig oven A lot of patience, it takes 3 to 4 days in total The fish were salted 36 hours in a refrigerator Smoked for 36 hours at an average temperature of 16°C Used 18 l smoke sawdust mixed as described above The salmon smoked weighs 2.9 kg. Wastage 1.7 kg or 37% 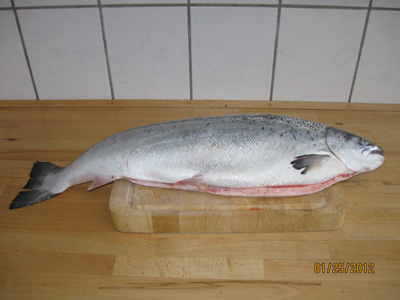
One big, smoked salmon becomes sandwiches for many people Procedure without liability: Let it be said right away, you can only cold smoke, if air temperature is below 10°C. There must be a difference between air temperature and the temperature in the Smoking Oven. Today - in late December 2013 - is the air temperature about 6°C at day time and at night time 2°C. Perfect for cold smoking, which is below 27°C.
Start by cutting the head off. Put the sharp knife just behind the breast fin and sloping up towards the back behind the gills. Cut through the back bone and down to the lower breast fin. Cut then the upper file off by passing the knife through the fish along the upper side of the back bone. The fish turned and the other fillet cut off in the same way. Fillets refined for the cutted ribs and back bones at the top, and the nervous bone that sits out from the body. Place the two fillets skin-side down in a suitably large plastbox suitable for food. Pour 666 grams of salt, 50 grams of sugar and 6 liters of cold water in a large saucepan and bring to the boil, untill the salt and sugar are dissolved. Set the brine to cool overnight. When the brine has a temperature of 5°C pour the mixture over the fish. Keep the fish in the brine with a dish. Place all in the fridge - if necessary - and keep the temperature below 5°C for 36 hours. This kind of salting called wet salting and provides a more uniform salty taste of the fish. In dry salting the fish are placed on a salt layers and on top pour so more salt to the fish is covered. This dry salting I use for small, freshly caught fish at a maximum of 3 kg and time is only 3 to 6 hours. After 36 hours remove the fish from the brine and rinse well in fresh, cold water. Wipe with a clean tea towel and put a string in the tail and tie the following way: Prick a hole through the skin 5 cm from the tail tip and put the string through. Tie a knot on the left side and then the right side. Do not tighten too strong, so the string cut through. Hang the fish to dry for several hours before being hung in the oven. I use my Smoking Oven with advantage to this, with the door and the hat open, there are drafts and the fish hangs in the shade. 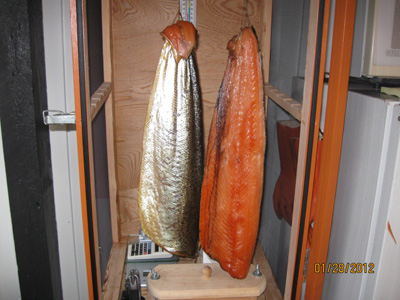
Two large salmon fillets finished smoked Note: If the temperature gets too high, the albuminous substances (protein) in the fish begins to coagulate and the meat will release the skin, which then fall down and just skin hanging back in the string. If the temperature can not be controlled and kept below 27°C, I recommend putting the fish on the grates with skin side down. If necessary, use eel mountings hooks together with string. Now it is smoking time. The fish are taken out of the Smoking Oven before lighting up. Fill the labyrinth sawdust tray with smoking wood dust. A small cup of rubbing alcohol (˝ cup) into the front of smoking wood dust and ignited. The door is ajar and smoking wood dust starts to burn by itself. Now the fish is hung into the Smoking Oven when the alcohol is burned off. Leave the door ajar throughout the process. The fish hung by the tail in the middle of the oven. In the beginning keep an eye on the temperature and after 1 hour it will stabilize at around 11°C. Ambient temperature is only 1°C, so there is a difference of 10°C between the temperature inside and outside. Gradually the ambient temperature increaseo 6°C and cause the temperature in the Smoking Oven to rise to 16°C, which was the average temperature in the entire process. In the firing process, where there are flames, the temperature inside Smoking Oven rise to 25°C for a short period. That's why I do not have fish in Smoking Oven before the flames are extinguished. The fish was smoked for 36 hours, so I had to filled up twice with smoking wood dust. I let all smoking wood dust burn out before there was filled up again. Start at 10:00AM burned out at 10:00PM. Did a new refill and that burned out during the night. Again 09:00 the next morning was a refill and 20:00PM it was burned out. The fish hung overnight and cooled in the Smoking Oven. The smoked salmon seen above and is ready to be divided into 3 pieces per side and packaged for the freezer. Garnish: Dill or cress is suitable for garnish. Drink: A cool, good, dry white wine in the summer. A beer and a dram in the winter. Tip: Come boiled, frozen prawns in a colander and put them into the Smoking Oven for the last 12 hours and you get fantastic shrimps. |
Original Indisk homemade Chutney
Next Down
Next Up
|
|
1 kg ripe peaches or 1 kg ripe nectarines or 1 kg ripe mangoes Also try to mix all three kinds of fruit 3 apples, peeled and diced 2 pcs. red onion diced 2 pcs. red pepper diced 250 g raisins 250 grams organic sweet apricots 2 red chili pepper sliced 1 green chili pepper sliced Note: Include the seeds if it should be "Hot" 6 pcs small dried whole chili piri-piri 5 cm fresh ginger, chopped finely 1 seedless lemon sliced finely diced with the shell 6 cloves garlic, sliced 3 dl apple vinegar or other good white wine vinegar 1 dl red wine 500 g brown sugar ˝ tsp. ground cinnamon ˝ tsp. ground allspice ˝ tsp. ground cloves ˝ tsp. ground rose paprika 1 tsp. salt The sweet / sour taste adjusted with brown sugar and vinegar 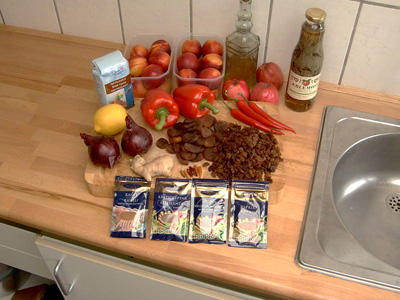
Original Indian homemade Chutney can be frozen or boiled and stored for many months. Here are all the ingredients Procedure without liability: Clean the fruit in cold water and peel the shell, if desired. Cut the fruit into quarters and remove the fruit seed.
Pour all the fruit in a saucepan with vinegar, red wine, apples, onions, garlic, pepper, Piri-Piri, raisins, red and green chili pepper, ginger, lemon, brown sugar, cinnamon, allspice, rose pepper, cloves and salt. Set over at medium heat and let it cook (simmer) for 20 to 30 minutes. Just before it is finish season with brown sugar and vinegar / red wine. Let it just boil up and then off. Pour the chutney into a nice bowl and set it to cool before it is used as an accessory. Chutney can be frozen in a freezer tray up to several months, but remember to take it out in time, so it is served at room temperature. Chutney poured into glasses that are washed in Atamon (preservative). 1 tbsp. Atamon poured into the chutney just before it is cooked. Canning glass closed immediately and can keep a year on a dark, cool, dry place. |
Salmon baked in Spelt bread with mustard sauce
Next Down
Next Up
|
|
Spelt Bread: 250 g spelt flour 150 ml lukewarm wet Here made from 50% water & 50% whole milk 1 whole egg ˝ pk. yeast, 25 g 1 tsp. sugar 1 tsp. salt Salmon: 2 nice pieces of salmon of 120 g per. PCS. 4 tbsp. coarse salt for "gravading" 1 bunch coriander / dill / parsley to taste. Select only one variety Mustard Sauces: 40 g butter 2 tbsp. wheat flour ˝ l whole milk 1 tsp. salt 1 tbsp. the fish sauce 2 to 3 tbsp. fish mustard Shopska Salat: ˝ cucumber 2 tomatoes 1 onion or 4 spring onions 1 green pepper (paprika) 1 green chili pepper parsley for garnish 8 green / black olives Feta cheese in cubes 36% Olive oil and balsamic vinegar, a sprinkle of salt for dressing 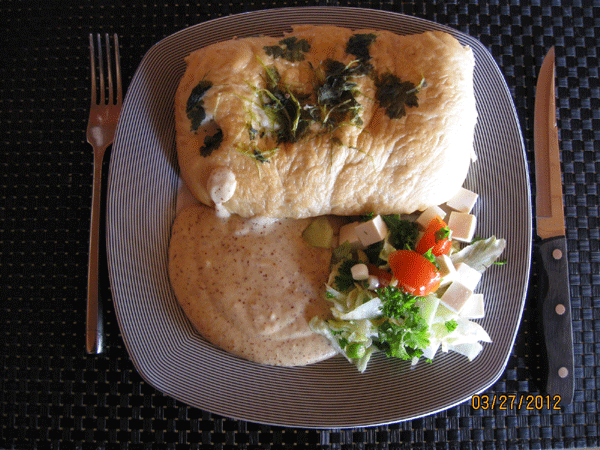
Salmon baked in Spelt bread with mustard sauce and a good salad. The recipe gives 2 servings Procedure without liability: Start by cleaning the salmon for skin and bones (available frozen) and put them in a dish, over which is sprinkled salt. Place the salmon in the refrigerator for a few hours and continue with the dough. Warm the liquid and add salt, sugar and yeast. Stir so the yeast dissolves. Spelt flour is weighed into a mixing bowl, beat an egg and add the liquid little by little while kneading vigorously in the bowl. Adjust the dough with flour or liquid until it don't sticks to the bowl sides. Let the dough rest and rise until double under a tea towel for 40 minutes at room temperature while you prepare the next step.
Mustard sauce made as follows: Melt butter in a saucepan - not brown - whip flour in the butter until a lump is obtained. Pour the milk in while you whip vigorously. Continue until a suitable thickness is obtained. Must be boiled under stirring for at least 2 minutes, so that it does not taste of flour and all lumps are dissolved. Season with salt and fish sauce. When sauce is ready add fish mustard, as much as you think, then the sauce must not boil anymore but keep warm. Turn dough out on the table - remember flour on board, rolling pin and hands - and split into two. Knead the two balls and roll it out on the table with a rolling pin. They must be so big, so there may be a piece of salmon on them and wrapped in "pancake". The salmon rinsed free of salt under cold water and dried in a clean tea towel. Put the salmon on the "pancake" with herbs on top and wrap the salmon in. Let them rest for 30 minutes, then placed on the grate in a fish kettle with boiling water. The water is only up to the grate. Steam cook the meal for 30 minutes, but look after the fish pot does not boil dry. After filling with boiling water as needed. The half-hour you use to make a Shopska Salat. Cut the cucumber into cubes and tomato in 4 to 8 pieces. Onions are cleaned and cut into fine slices. Paprika is cut into strips and green chili pepper into fine slices. Distribute the salad on serving plates with olives, feta cheese and parsley on top. Just before serving spinkle with salt, olive oil and balsamic vinegar. Serving: Arrange on two plates, as shown in the picture above. Garnish: Use the same spice for garnish as you came on the salmon. Drink: A good cool, dry white wine in the summer. A cold beer and a dram in the winter. Hints: A couple of thawed frozen prawns can be added on top of salmon. |
Blue shark steak on a bed of Kohlrabi with a mushroom sauce
Next Down
Next Up
|
|
Fish blue shark: 4 pcs. blue shark steak from frozen 180 to 220 g 20 g butter 2 tbsp. virgin olive oil 800 g small new Danish potatoes 1 lemon Sauce: 2 shallot 2 cloves garlic 250 g mushroom 20 g butter 2 cups white wine 1 to 2 cups whipping cream salt and white pepper Accessories: 2 pcs. Kohlrabi - German turnip 1 bunch fresh dill or 1 bunch fresh coriander or 1 bunch fresh parsley 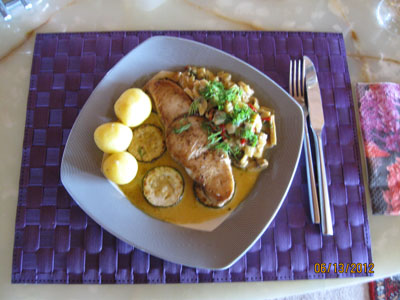
Blue shark steak on a bed of Kohlrabi with a mushroom sauce Procedure without liability: Drizzle the fish with lemon juice and sprinkle a little salt. Melt butter and virgin olive oil in a pan. When the butter is golden brown, fry the shark steak in it for 2 to 3 minutes on each side. Remove from the pan and wrap them in foil. Keep them warm in an oven at max 100°C, but only briefly.
In the same pan fry finely chopped shallots, garlic and mushrooms in a little more butter for approx. 3 min. Add the white wine and let reduce by half. Add the whipping cream and season with salt and white pepper. Let it simmer for a few minutes before being poured into a warm sauce boat. Kohlrabi cut into thin slices (1 to 2 mm) and fry in butter in a pan for 2 minutes on each side. Season with salt and white pepper. Sprinkle with dill or coriander or parsley. 
Blue shark steak on a bed of Kohlrabi with a mushroom sauce Serving: Add sliced kohlrabi in a circle on the plate with the fish in the center. The sauce is poured over the kohlrabi and new Danish potatoes are served to the meal. Garnish: Using plucked fresh dill or coriander or parsley over the fish. (Only one kind - choose your own favorite). Drink: A dry well chilled white wine in the summer, a lager and a dram in the winter. Hints: If you can not get kohlrabi, try squash. Note: It is perhaps wrong to call a shark a fish as sharks give birth to live young, but there are other fish that give birth to live young. The blue fish, which were supposed to be extinct. Some aquarium fish such as Gubby and platy give birth to live young also. |
Smoked mackerel with Falafel, Hummus and green salad
Next Down
Next Up
|
|
2 large smoked mackerel 25 g butter Thai Xing Fu sweet chili souce (Dressing) Falafler 250 g Svansř organic dried chickpeas 1 large onion 5 cloves garlic 1 tsp. cumin crushed 1 tsp. allspice crushed 2 tsp. salt ˝ tsk. freshly ground pepper 1 bunch of coriander 1 bunch parsley ˝ tsk. chili flakes 1 egg whole ˝ lemon, only the juice 2 to 3 tbsp. wheat flour 1 tsp. baking powder 1 l oil for deep frying (Rapeseed oil is best) Make your own favorite salad or homemade hummus 
Smoked mackerel with Falafel and green salad Next Down Next Up Homemade hummus 250 g Svansř organic dried chickpeas 4 cloves garlic 1 tsp. cumin 1 cm grated ginger 2 tbsp. Tahin (Sesampasta) The juice of a lemon 2 dl Extra virgin olive oil 2 tsp. salt 1 tsp. white pepper 1 tsp. honey or 1 tbsp. Blue Dragon Oyster Sauce 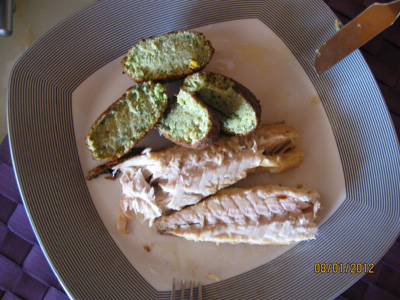
Smoked mackerel with Falafel and Hummus Hummus: Take half of the soaked chickpeas and rinse them well in fresh water. Boil the chickpeas for 1 hour to one and a half. You can add a good vegetable broth or good spices. The chickpeas should be completely tender. Allow them to cool slightly before blending. Blend all the ingredients finely in a food processor. Add the olive oil little by little so that it becomes a smooth mass. Season with salt and pepper. Blue Dragon Oyster Sauce is highly recommended. The cooked chickpeas can be frozen. Hummus can also be frozen.
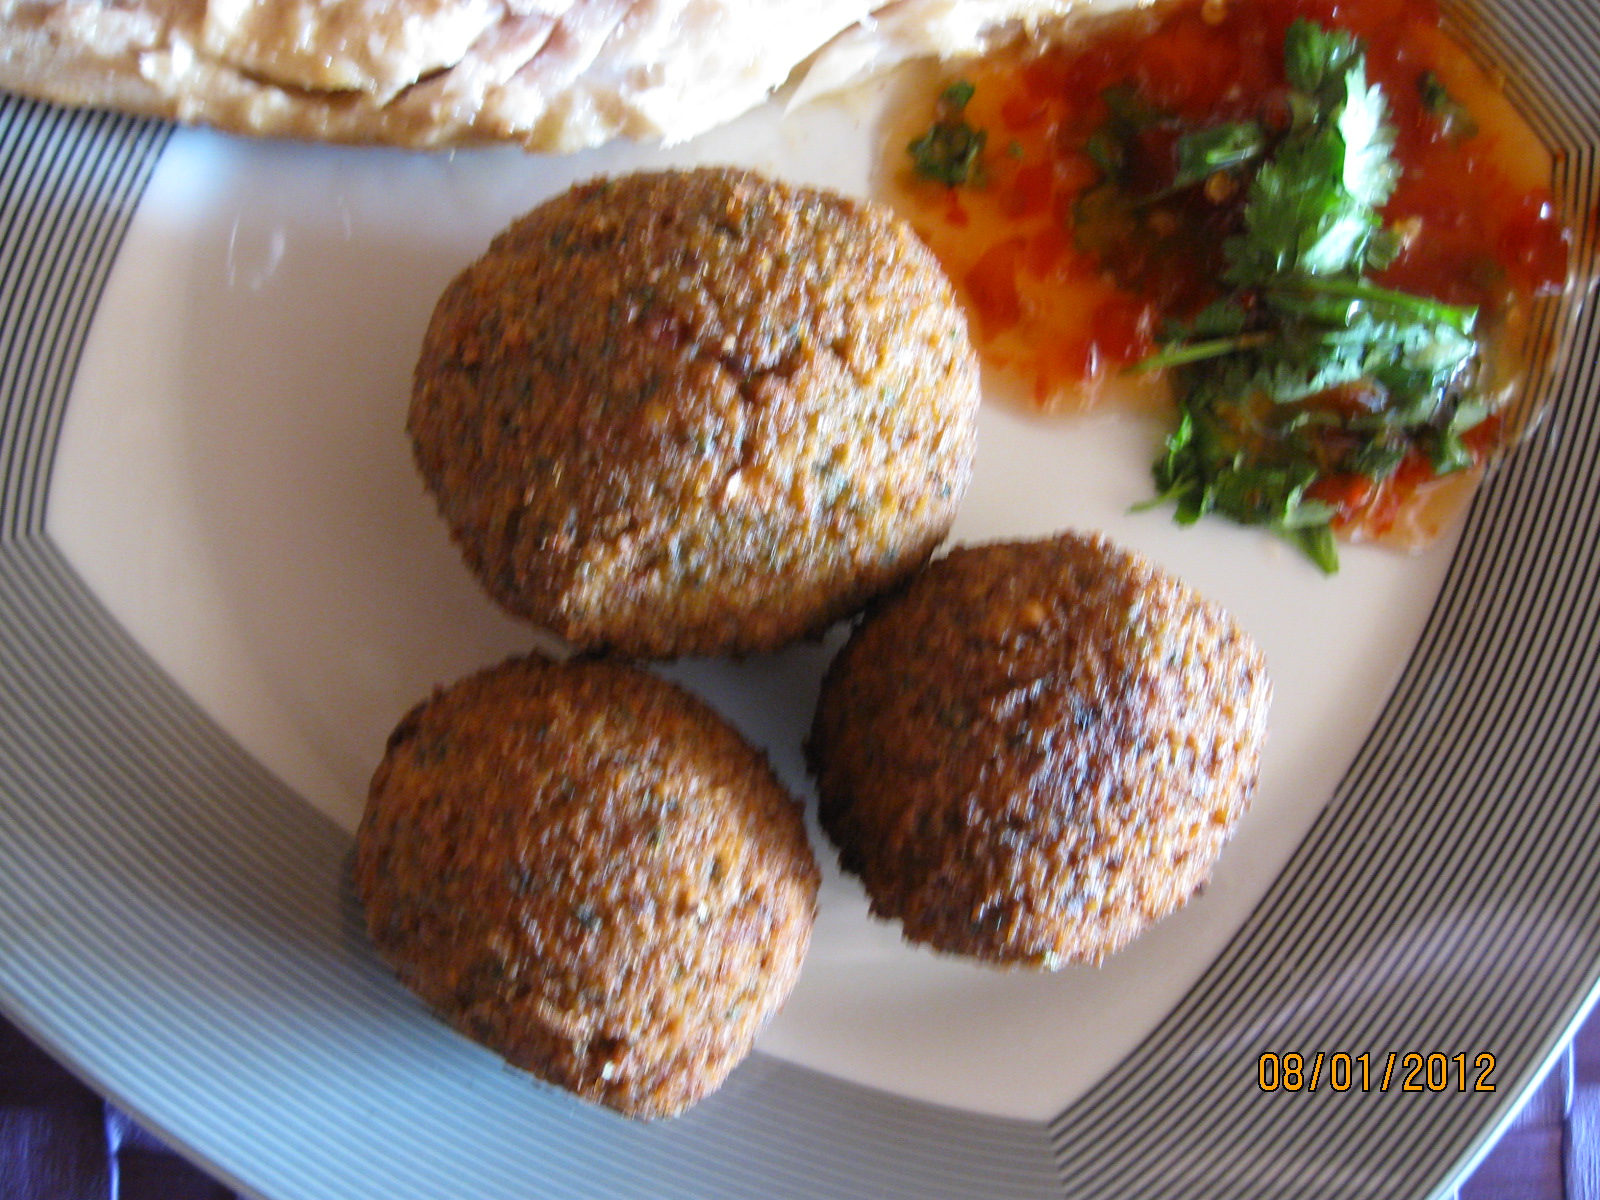
Homemade hummus for falafel Procedure without liability: Start the day before by soaking the 500 g chickpeas in plenty of water overnight. Make sure they are completely covered with water as the chickpeas swell to double. Usually chickpeas should be boiled, but NOT in this dish for falafels as they become deep fried. If chickpeas are boiled first, the rolls crumbling into something that looks like bread crumbs and becomes inedible. For hummus, the chickpeas MUST be boiled for 1 hour to one and a half hours after soaking overnight. Feel free to change the water a few times a day. Falafel: The next day the water is poured off and the chickpeas are rinsed and blended finely in a food processor. Take half off for falafel and for hummus. Put the blended chickpeas and all the spices in the food processor - not flour and baking powder - blend it all very finely again. Now mix the chickpeas and spices in a bowl with the flour mixed with baking powder. Try to make a small rolls, it should be able to stick together. If it is too dry, add a little water, but do not stick it. Find a saucepan that can hold 2 liters and pour 1 liter of oil in. Heat up to 180°C, use your grill thermometer, but remember it must be the one that can handle 300°C, and not the one used to measure meat temperature. Form the chickpea mixture into small rolls of approx. 50 to 60 g with a spoon in the palm of your hand. Put 2 rolls in the oil and fry them for 2 minutes and 30 seconds. Take them up and place them on kitchen roll for draining. Check if they are crispy on the outside and the middle is soft and delicious. Continue until all rolls are fried while keeping the rolls warm until they are to be eaten. Clean the mackerel: Cut off the head and tail. Cut up from the gill to the tail and split the mackerel so that the backbone is exposed. Lift the backbone up and remove all breastbone with a fork. Some nerve bones protrude vertically in the middle, they are best removed with pliers. Cut the mackerel lengthwise so that there are two halves, but leave the skin on. See the picture. Fry the mackerel fillets very lightly on the skin side in butter for two minutes. Remember that the mackerel is smoked and ready to eat, so it is only to emphasize the taste that the mackerel is heated (fried) in butter. Serving: Place a mackerel fillet and 3 rolls on a plate with a large "blob" dressing garnished with fresh coriander. Serve your favorite salad on a side plate. Garnish: Use picked fresh coriander or parsley over the dressing. Drink: A dry good cool white wine in summer a lager and a dram in winter. Hints: When the temperature is 180°C then try with 1 bowl for 2 ˝ minutes. It should be brown - not black or light brown. If the rolls gets too much it becomes black and the water in the peas disappears and the rolls draws the oil into the peas. It is clearly visible on the kitchen roll, it runs completely with oil. Warning: Be aware that the fumes from the oil can ignite if the oil is heated on a gas burner. Therefore, have a lid ready to put over the pot, should this happen, never use water to put out the flames. Heat the oil in the pan slowly without the lid. Some recipes state that Falafel is also made from horse beans. I would advise against it, as horse beans are toxic to some people if the recipe is not followed. Allergic to raw or unripe beans. |
Homemade liver pate with homemade beetroot
Next Down
Next Up
|
|
Liver pate 600 g calf liver (or pork liver) 300 g pickle salted smoked speck without rind 50 g duck fat (or butter) 1 pkg. thin bacon slices or field mushrooms for garnish ˝ l good soup (fund of pork, chicken, veal or beef) 3 whole eggs 2 onions 4 cloves garlic 1 peeled cooking apples (sour) 50 g wheat flour ˝ glass Lykkeberg anchovies approx. 7 pcs. Can be omitted 1 tbsp.. thyme 1 tsp. allspice 1 tsp. grated nutmeg 1 tsp. salt Freshly ground pepper 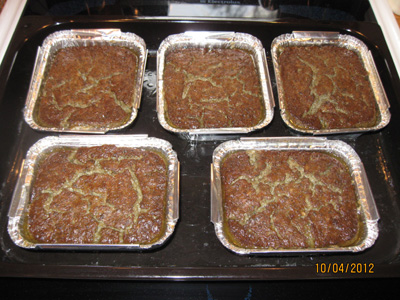
I got 5 trays liver pate a 4.5 dl of the recipe Beetroot 2 kg large fresh beetroot Vinegar brine 1 liter of vinegar 1 kg sugar 1 large onion (or 2 glass pearl onions) 4 cloves garlic 1 red chilli pepper 5 cm fresh horseradish 2 tbsp. caraway 1 Tbsp. Atamon Salt brine Water to cover beetroots 4 tbsp. salt for the cooking of the beetroots 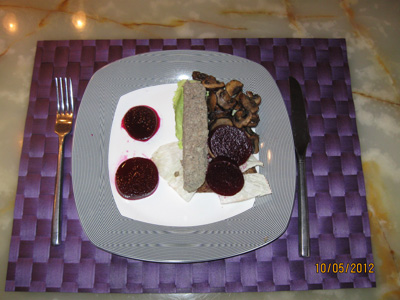
Rye bread with liver pate, beetroot and mushrooms Procedure for liver pate without liability: Start the day before to make a good soup (fond) cooked on soup bones and root vegetables. As a curiosity I can mention that I had to do the meal in Sweden, where I could not get "Danish soup bones", so I bought a packet oxtail and a packet roots. In this package there was also beetroot, which was not cooked with the soup, but used for pickled beetroots. Oxtail pieces were placed in a large pot with 3 liters of water and brought to a boil. The soup was good skimmed and added a little (1 tsp.) salt. Remember you can always add salt, but it's hard to take any salt out. The soup cooked under the weakest mode (half on the stove) for 10 hours while we were out fishing. By returning the broth was strained and measured up. Good 1 l was left, after the upper fat layer was skimmed off. It was the best foundation that I have ever tasted. The rest was used to cook a chicken soup on. If you do not like this work, you can use bouillon cubes of your choice, or Knorr Beef Fund "Du Chef". (Some people use milk instead).
Do you have a meat mincer of good quality, start chopping half the liver, then chop onion, garlic, anchovy, thyme, allspice, nutmeg, salt, freshly ground pepper and finally the rest of the liver in a bowl with the eggs? Stir liver mass well together. In another bowl chop the smoked bacon. It's because I chop smoked speck twice, it should be mentioned that I have cut the rind off. When the speck is chopped, chop the apple, and then the last speck comes out. Mix now liver mass and chopped speck. Must be stirred well before the sauce mixed in. Bake a thick sauce: Melt the duck fat (butter) in a saucepan and stir flour in to make a flour dumpling. Bake over a low heat, stirring constantly for 3 minutes while you slowly pour the soup in. The sauce must be cooled before mixed with the liver mass. Would you like to taste the liver mass to possibly more salt and pepper, then it is now. Now it's up to you how great baking aluminum containers you want to bake your liver pate in. I use 4.5 ml aluminum containers, which I bake in a water bath for approx. 60 minutes at 180 to 200°C. Aluminum containers put into a preheated oven (200°C) with baking tray in the bottom / middle shelf filled with ˝ liter of cold water. For this portion liver pate must be used 5 aluminum containers a 4.5 dl. There are approx. 2000 g of liver mass; 400 g of liver mass is filled into each baking aluminum containers. There are several sizes of aluminum containers: 2.5 ml, 4.5 ml, 9 ml, 1.2 liter and 2.2 liter, and all must have different baking times in the oven. Small aluminum containers less time and larger aluminum containers more time. You may even try this in your oven. Hints: If you use smoked bacon in liver mass, do not use thin bacon slices on top for garnish, but roast some field mushrooms and use them instead. Procedure for beetroots without liability: I never liked store-bought beetroot, because I think they taste "earthy". If you have the same idea, then you should try this recipe. With 100% guarantee they taste not of earth. Be careful cleaning of the beetroots. Wash beetroots free from soil and boil them in salted water for 45 minutes for large and 30 minutes for small beetroots. Then pour boiling water off and put the pot under cold running water for 5 minutes or more, they must be cold. The sudden change in temperature causes the beetroots get a "shock" and the cells burst and beetroots are tender. The skin is rubbed lightly by hand and the top and bottom cut off. Beetroots cut into suitable pieces and if it should be "smart" use a ribbed beetroot knife. Onions, garlic, chili pepper and horseradish cleaned and cut into slices. Vinegar brine brings to the boil with the sugar and the cleaned spices and caraway. Beetroots put in the vinegar brine and brought back to a boil for 3 minutes. Turn off and add 1 tbsp. Atamon. Beetroots put in clean glass, which is rinsed with Atamon. The glasses are filled up with vinegar brine to cover completely. The glasses are closed immediately and stored cold and dark. It occupies a total of 3 liters, so 6 glasses a ˝ liter will be suitable. They can easily keep for at least 6 months unopened, but believe me; they are eaten by then, because they taste wonderful. Many of my friends have asked for the recipe, so it speaks for itself. Come just started this fall, where beetroots are fresh and cheap. Serving: Beetroot is eaten with many meals, but what is bread with liver pate without beetroot, not to mention a pig or calves canning food with mustard and beetroot? Chopped beetroots to a beef tartar are a "must". Yes! I could go on, but now I have become hungry and will stop here. Garnish: Should I mention something, it becomes a green lettuce leaf underneath the liver pâté and roasted thin bacon slices on top. Drink: Without exception - a cold lager beer - is a "must". Hints: Instead of an onion, you can use 1 large or 2 small glass pearl onions. Maybe both, because onions also taste good on liver pate. |
Moussaka with cod or minced lamb
Next Down
Next Up
|
|
Fish 1 baking potato, thinly sliced lengthwise 1 aubergine, thinly sliced lengthwise 1 courgette, thinly sliced lengthwise 6 tbsp. olive oil for frying the fruits 600 g cod fillets 2 tbsp. olive oil for frying the cod fillets and 1 large onion, chopped and 4 cloves of garlic, chopped 1 tin of chopped tomatoes, almost without moisture ˝ small tin of tomato puree 4 tbsp. Thai Xing Fu sweet chili sauce ˝ dl white wine 1 sprig of fresh oregano Season with salt, pepper and ground cumin For the white sauce 50 g butter and 50 g wheat flour and ˝ l milk 60g grated gruyera cheese or 60g grated parmesan cheese 1 egg yolk 1/4 tsp. grated nutmeg Lamb 1 baking potato, thinly sliced lengthwise 1 aubergine, thinly sliced lengthwise 1 courgette, thinly sliced lengthwise 6 tbsp. olive oil for frying the fruits 500 g of minced lamb 2 tbsp. olive oil for frying lamb and 1 large onion, chopped and 4 cloves of garlic, chopped 1 tin of chopped tomatoes, almost without moisture ˝ small tin of tomato puree 4 tbsp. Thai Xing Fu sweet chili sauce ˝ dl. red wine 1 sprig of fresh mint Season with salt, pepper and ground cumin For the white sauce 50 g butter and 50 g wheat flour and ˝ l milk 60g grated gruyera cheese or 60g grated parmesan cheese 1 egg yolk 1/4 tsp. grated nutmeg 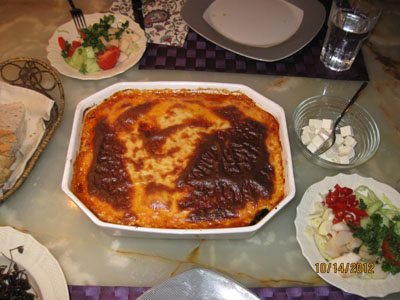
Moussaka with cod or minced lamb Procedure without liability: Let it be said right away, even though the recipes look almost the same, there is a big difference in taste, but both recipes taste great. The procedure is almost the same.
Preheat the oven to 180 degrees. Rinse the aubergine and courgette in cold water and dry them on kitchen paper and cut them into thin slices lengthwise. Squeeze a little lemon over. Lemon contains vitamin C, which acts as an antioxidant and prevents the aubergine and courgette slices from turning dark. Peel the baking potato and cut it into thin slices lengthwise. Now the three fruits must be fried on a pan in olive oil and it can be advantageous to fry them separately. Start with 1st layer: Potato. - 2nd layer: Aubergine. - 3rd layer: Courgette. Sprinkle the slices with a little salt when they are fried. Fish: Peel and chop the onion and garlic, fry it in 2 tablespoons of olive oil in a pan. Add chopped tomatoes almost without moisture, tomato puree, oregano and white wine while stirring. Let it all simmer uncovered on low heat for 5 minutes. Stir regularly. Season with salt, pepper and ground cumin. Finally, add Thai Xing Fu sweet chili sauce - taste as you go. The cod fillets are sprinkled with a little salt and pepper and fried very briefly in a hot pan in olive oil. About 30 sec. on every side. The moussaka is then assembled as follows: In an ovenproof dish greased with olive oil, put the 1st layer: Potato, above this fish fillet and tomato sauce. 2nd layer: Aubergine, above this fish fillet and tomato sauce. 3rd layer: Courgette, above this fish fillet and tomato sauce. Lamb: Peel and chop the onion and garlic, fry it in 2 tablespoons of olive oil in a pan. Add the minced lamb and brown it over medium heat while stirring. Season with salt, pepper and ground cumin. When the meat is browned and the liquid has evaporated, add chopped tomatoes almost without moisture, tomato puree, mint and red wine while stirring. Let it all simmer uncovered on low heat for 15 minutes. Stir regularly. Finally, add Thai Xing Fu sweet chili sauce - taste as you go. In an ovenproof dish greased with olive oil, put the 1st layer: Potato, above this lamb-tomato sauce. 2nd layer: Aubergine, above this lamb-tomato sauce. 3rd layer: Courgette, above this lamb-tomato sauce. Bechamel sauce: Then melt the butter in a saucepan over medium heat. Remove the pan from the heat and stir in the flour. Dilute with milk while stirring vigorously and increase the heat so that the sauce boils for 2 minutes. Be careful it doesn't burn. Remove the pan from the heat and leave to cool, then stir in an egg yolk. Season with salt, pepper and nutmeg. Grate the cheese and whisk it into the white sauce, pour the white sauce over the dish with Fish or Lamb. Bake for approx. 20 to 30 minutes at 180 degrees. If the surface becomes too dark, place a piece of aluminum foil over the last 5 to 10 minutes. Serving: Served with a tomato salad, a good bread (sour bread with cumin) and a good white/red wine. Garnish: Fresh oregano is the thing for fish and maybe prawns baked with the last 10 minutes. Fresh mint is the thing for lamb. Drink: Same white/red wine as used for the dish. Tip: Other types of lean fish can also be used. |
Smoked dab, in Danish smoked bakskuld
Next Down
Next Up
|
|
How to smoke a dab 16 pcs. fresh dab 5 kg coarse salt (depending on your salt jar) 16 liters or 4 kg smoke dust (depending on your smokig oven) 100 g of sugar 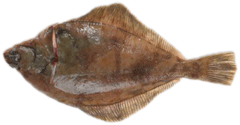
High season for dab from October to January How to serve a dab 2 pcs. dab per person 2 slices of good rye bread tooth thick butter to rye bread little unsalted butter for frying little tartar sauce (I don't use it) 2 pcs. lemon wedges 2 pcs. Cold beer 4 glass of aquavit (a must for some) 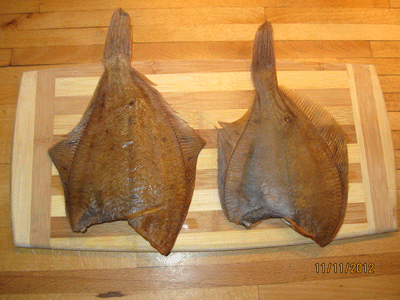
How to smoke and serve a dab Procedure without liability: A "Bakskuld" (Danish for smoked dab) is a salted, dried and smoked dab. Dab from the West Coast and is a known eating since the 1700 century. I even know dab from my childhood by the North Sea, and every time I go to Henne Strand, I'm going to the port of Esbjerg to buy a box of dab. In the old days it was a poor man's food, but trust me on Zealand is it the sea of gold.
Bakskuld = dab belongs to the flounder family and was also called dabs or shoulder. Dab was then caught on hooks attached to lines that were more than 100 meters long, hence the name longline. It was fisherwomen at Esbjerg Harbour, in the 1700 century put the bait on longlines, and got them in trays (bakker) with 400 hooks. From there the name bakskuld (trayshoulder). Let it be said at once, today's cooking of dabs is done in 3 days, because time is money. First day the fish are cleaned and salted, second day the fisk are oven dried and third day are the fish smoked. A live dab of 300 g becomes a smoked dab of 150 grams and costs about DKK 30.00 or DKK 200.00 per kg. In Hvide Sande, where they are called dabs, to DKK 11.00 for 100 g or DKK 110.00 per kg. My description below is the old recipe. It also means that weight loss is greater, but the shelf life is longer. How to smoke a dab: Clean the fish by cutting the head off and remove all the guts, rinse fish blood from the abdominal cavity with water. In a suitable salt jar sprinkle the bottom with salt and fish laid over without the overlap. Sprinkle again with salt over the fish. Add another layer of fish and sprinkle again with salt. This is repeated as long as there are fish, and ending with a layer of salt. You need a lot of coarse salt then buy it in the Metro in 25 kg bags. The fish are put under pressure with a suitable, clean material and put cold for 7 days. My salt jar suit the bottom shelf of the refrigerator. Then take the fish up and rinse thoroughly with clean, cold water. Now comes an important point, the fish MUST dry thoroughly before they are smoked. Tie them together in pairs in the tails with string. Plug a hole through the fish and pull the string through, tie each fish at each end of the string. The fisk should not slap together by drying and later by smoking. The time for drying may vary according to the season and how they dried. At the west coast, I have seen the fish hanging on the clothesline with laundry. They can also be dried in an open carport, but of course they can not hang out in the rain. I use my smokig oven who has a fan at the bottom. When the fish looks and acts like a rigid board, it is time to smoke. It might take a week to dry the fish. The fish are cold smoked (max 27°C) in two rounds. Start early morning with a labyrinth tray filled with smoke dust and let it burn through. In my smokig oven it takes about 12 hours with 8 l smoke dust. Repeat it again the next day and let the fish hang overnight. After the smoking process the fish must be dried again a few days before they are packed for freezing. Yes! You read that right, I freeze them in pairs so they can keep at least 9 months in the freezer and can be taken up in portion size. If you can not or feel like all this work, you grab for your wallet and buy the ready-prepared dabs. Do not miss to taste these "Sea Gold (fish)". 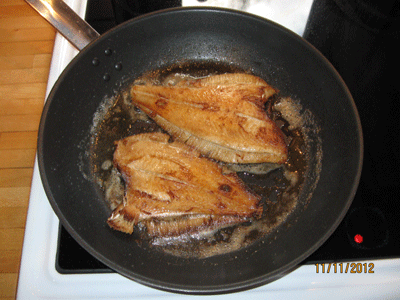
How to smoke and serve a dab How to serve a dab: My favorite meal: With a powerful pair of scissors, cut off the fins and tail. Carefully peel off the skin on both sides by inserting a knife under the skin on the side where the intestines were. Tear up and help with a thumb under the skin, then it goes like a breeze. Melt a good blob of unsalted butter on the pan and gently fry the fish in it. It must in no way "branke", the fish just needs to be warmed well through and draw butter into the meat. The dab is split into four fillets by cutting along the center line down to the backbones and out towards the sides. 4 fillets suit 1 piece of rye bread with tooth butter, 1 beer and 2 dram. Here I can mention in Hvide Sande they drank good coffee punch to the dab. It was probably because it was a "alcohol-free city" - at that time - then the alcohol was not seen. Grill: Fins and tail cut off as above, and then place it on the grill. But the skin will remain on. It can easily become too dry if it gets too much heat, so check often for the fish. Salt taste is also more penetrating, as the meat does not get butter. The skin ripping off before eaten as above. Microwave oven: See above under "My favorite meal", but instead of a frying pan placed the fish on a plate suitable for microwave oven with a good dollop of unsalted butter on top. How long it should have, I can not say, but try your way, first by 3 minutes and then with 1-minute intervals. Garnish: My opinion is that smoked dabs are served without too much garnish, but some prefer a little tartar sauce and lemon wedges. Drink: You must have a good beer and two punch / dram to each smoked dab. Tip: In the recipe above says 100 g sugar. I use a tablespoon for each layer of fish. There is a Facebook group called: Bakskulderne - Os der elsker Bakskuld. Mogens Lund is the author of the group. Visit the page and find out where you can buy BAKSKULD - (DAB). |
Smoked duck legs braised in beer
Next Down
Next Up
|
|
4 pcs. large duck legs Brine 13% or 10 °Baume 3 liters of water 5°C 450 g of salt 1 pc. whole garlic 1 pc. onion 8 pcs. bay leaves 10 pcs. peppercorns 1 pc. red chili pepper 10 pcs. cloves Smoking 8 liters smoke dust Braising 100 g duck fat ˝ l dark, strong beer, Warwik "Lause" 2 large, nice peeled potatoes 2 large, nice Jerusalem artichokes 2 large carrots 1 parsley root ˝ small celeriac 2 stalks celery leaf 1 large leek or 4 spring onions Cucumber pickles 1 kg snake cucumbers (4 pcs) 2 onions 2 cloves garlic 2 tbsp. salt 250 grams of cane sugar 3 cups apple cider vinegar Heidelberg 10% 2 tbsp. celery seeds 2 tbsp. yellow mustard seeds 1 tbsp. turmeric 1 red chopped chilli pepper 1 tbsp. Atamon To be honest, it's too much with cucumber pickles for this dish. There are so many good root vegetables in the dish that it is unnecessary. But I do not think I want to delete the recipe, because it is really good for many other dishes and especially for open sandwiches. Try it on liver pate.
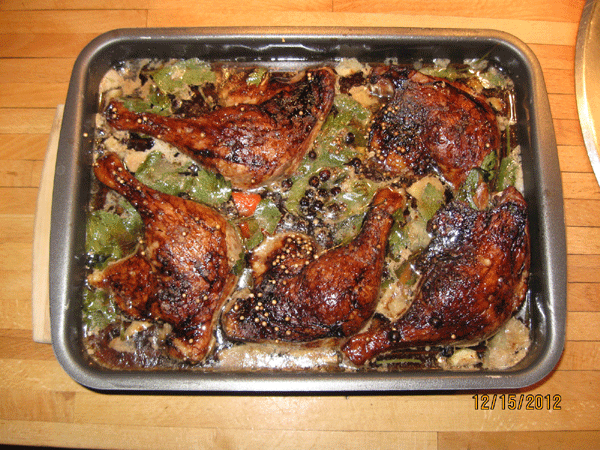
Smoked duck legs braised in beer Procedure without liability: Bring water and salt to a boil, come the spices in brine and boil it all in 10 minutes. Place the pot cold (5°C) overnight. Place the duck legs in a suitable salt cellar and pour the brine over. Be sure that the duck legs are covered with the brine, use a plate. Placed in a refrigerator until the next day (between 12 and 24 hours). Remove the duck legs from the brine and rinse thoroughly in cold water and dry them in a towel. Hang the duck legs in the smoke oven and smoke them for 12 to 24 hours at medium heat 30°C to 40°C.
Potatoes, Jerusalem artichokes, carrots, parsley root and celeriac are peeled and cut into mouth-sized pieces and placed in an ovenproof dish, greased with duck fat. The cleaned stems celery leaves and the leek are laid on top in mouth-sized pieces. Sprinkle a little salt and coarse pepper over the vegetables. Place the duck legs on top of the vegetables and pour a beer over. Spread some duck fat over the duck legs. Braising to be carried out in an oven at only 100°C, and it takes approx. 4 hours for this portion. Check if the meat releases the leg, then the meal ready. Cucumber pickles: Cucumbers peeled and split lengthwise, so the grains can be scraped out with a spoon. Cucumbers cut into 4 mm thick slices and put into a sieve. Peel the onions, cut them into small cubes, and put them up to the cucumbers. Sprinkle cucumbers and onions with salt, so that the liquid is pulled out of the vegetables for the next hour. Meanwhile prepared brine: Come vinegar in a large saucepan, add all the spices and sugar, bring to a boil for 2 minutes, stirring to all sugar is dissolved. Cucumbers and onions rinse under running cold water for excess salt. Is thrown dry in a salad spinner or a clean tea towel, and then put up in the brine. Bring to a boil and boil it all under low heat for 3 to 4 minutes, turn the heat off and add 1 tbsp. Atamon and stir into the pan. Come cucumbers in clean, Atamon rinsed glass and put a lid on immediately. Can keep unopened in a cool, dry and dark place for 12 months. Fills 2 glasses of 500 ml. 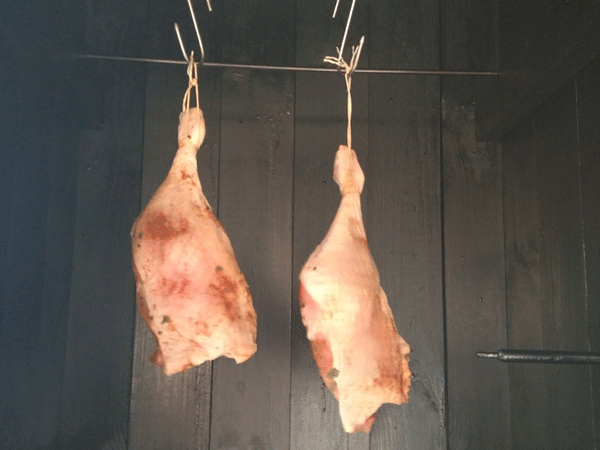
Duck legs are smoked for braising in beer for the dish Serving: A good bread is ideal as it can be dipped in the gravy. Cucumber pickles or gherkins - something acidic - will fit well with the meal. Garnish: Duck legs can garnish with orange slices. Drink: It would be natural to drink the same beer to the meal, as duck legs are braised in. Hints: There is a possibility of reducing smoking time and braising time, if you warm smoked duck legs in a "Lunchbox Smoking Oven", but you may have to experiment with times. Maybe the vegetables must have a rehash before you put them in the oven. Save your duck fat from Christmas time and try the recipe when there is a good deal on duck legs. |
Boiled cod with mustard sauce
Next Down
Next Up
|
|
The fish 3 kg fresh gutted cod with head 1 large onion 4 cloves garlic 10 pcs. bay leaves 10 pcs. whole juniper 10 pcs. whole peppercorns 1 Tbsp. fenikkel seesd 2 tbsp. salt ˝ cup vinegar 1 kg small potatoes Sauce 30 g butter 3 tbsp. flour ˝ liter of broth and a little milk/cream (approx. quantity) 150 g fish's mustard 2 tbsp. Blue Dragon Fish Sauce Garnish Grated horseradish Capers Hard-boiled eggs Diced beetroot Minced parsley dill Choose your own favorite Garnish 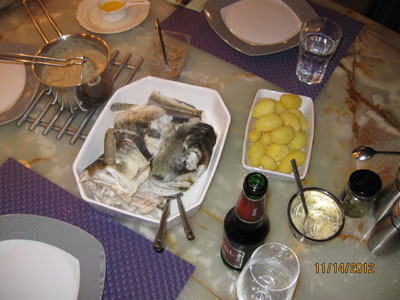
Boiled cod with mustard sauce Procedure without liability: Clean the cod well of blood and the black inner skin, if the cod head is to be used the gills must be removed. Cut off the head and the cod into suitable pieces. Lightly salt the cod pieces for 1 hour before using approx. 1 large tbsp. salt. Put all the root vegetables and spices in a suitably large pot and place the cod pieces on top. Pour in water so that it just covers and ˝ cup of vinegar and 1 tbsp. salt. Bring the water quickly to the boil and then turn down the heat so that it just simmers for 15 minutes. Maybe you need to skim off the proteins (the white foam) when broth is used for the sauce. While the sauce is being made, the cod lies in the hot water and soaks - however max. 5 to 10 minutes.
Place butter in a saucepan and melt it without browning. Put flour little by little while constant stirring. Stir broth and a little milk/cream in while stirring. Find one - for you - suitable consistency and cook the sauce for a few minutes while stirring. Come 2 tbsp. fish sauce and 100 g fish mustard in and stir it together. It must not boil more as mustard loses its flavor. Small fine potatoes are boiled for 20 minutes in lightly salted water and peel. The man doing the fish and the sauce and the wife pills potatoes, there's work distribution in most homes. 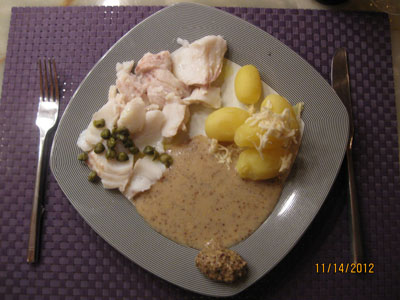
I want my cooked cod served simple only with capers and horseradish Serving: Server the cod with your favorite toppings. I think horseradish and capers are enough for the delicate cod meat. Garnish: Maybe a little green dill over the potatoes. Drink: A cold beer and a good dram must be the thing. Hints: Real salt cod can be made using the same recipe once the cod is diluted. In Portugal/Spain is made a meal called Bacalhau. See recipe below. There is also another form of dried cod - Stockfish. |
Bacalhau - Good Friday dinner
Next Down
Next Up
|
|
500 to 600 g dried salted cod (dry weight) 800 g firm potatoes 1 large onion 4 cloves garlic 100 ml extra virgin olive oil 25 ml dry white wine or white wine vinegar 100 ml whipping cream 8 pcs. black olives without stone 8 pcs. green olives without stone 8 pcs. bay leaves 1 bunch chopped parsley 2 large ripe tomatoes 1 large red bell pepper 1 tsp. grated horseradish 4 hard-boiled eggs (optional) Coarse black pepper from the mill Season with salt, if necessary 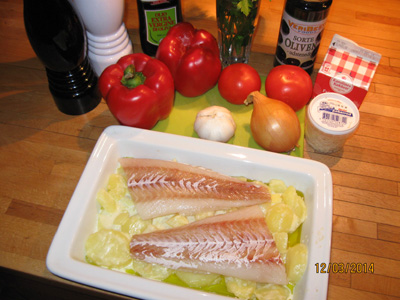
Bacalhau - Good Friday dinner for 2 people Procedure without liability: For Bacalhau is used salt cod, which is a salted and dried cod. Before you can use the salt cod, it must be diluted well. It takes 24 to 48 hours, depending on the thickness of the salt cod and also how hard/dry and salted the fish is. In the old days one bought a whole salt cod of 5 kg for no money, because it was considered "dog food", read poor man's food in Denmark. This is by no means more considered poor man's food. I would think that 1 kg costing well over DKK 100.00 I will return with a price.
In southern Europe, Spain and Portugal and other Catholic countries it is a delicacy and a must to eat fish during Lent (no meat). However, it is not the only reason to eat Bacalhau, for it tastes good when the cooking is done by the recipe. Try it yourself, buy a pack of salt cod from your fishmonger and look for the package with the thickest pieces of cod. Fillets cut into pieces of 8 cm and placed in a large glass / plastic bowl with cold water and placed in a refrigerator at 5°C. Every 6 hours replace the water with fresh cold water. You will see that cod swells and thickens every time. It is essential to have control over the temperature so as not to spoil the cod, but do not worry if you follow the recipe, there is no danger. When the time is up - 24/36/48 hours - you can taste a small piece of cod, and evaluate the results. Must taste salty, not too salty. Salt cod is sold with the skin on, and it must be removed before the dinner is made in the oven. This can be done either before the salt cod is diluted or after it has been diluted. I did it after dilution with no problems put a knife in between the skin and the flesh and pull the skin gently off. If you take the skin off before dilution, you may save 6 hours, since the fish pulls water in from both sides. Bring plenty of water to a boil in a large pot with bay leaves. When the water boils turned down the heat and the diluted salt cod are put in. Let it simmer for 5 to 10 minutes, then take the fish up in a towel to allow to drain and cool down. (Not paper towel for it glue to the fish). When the fish have cooled remove large fish bones and skins. Is it large fillets, they can eventual be cut into small (bite-sized) pieces. Save the fish a little longer. In the same pot with the same water put the potatoes and a tsp. salt, only boil for 15 minutes, so they do not cook out (mashed potatoes), but is still a la dente. Peel the potatoes and cut them into suitable slices. On a hot frying pan heat some olive oil and sauté the onion first, then the garlic. Do not brown but just be clear and golden. Preheat the oven to 200°C. In an ovenproof dish allocated half of the potatoes in the bottom pour whipping cream over and season with freshly ground black pepper. Place the fish over the potatoes pour white wine over season with freshly ground black pepper. The rest of the sliced potatoes and onions to be evenly distributed on top of the fish. Add tomato slices, pepper strips, chopped olives and sprinkle a bit of parsley on. Pour olive oil over. Place the dish in the oven for 30 minutes covered with aluminum foil, and then removing it, and the fish is baked about 15 minutes more. Remove the dish from the oven and pour dropwise rest of the olive oil over. 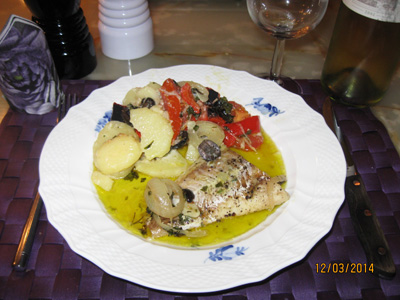
Bacalhau means cod in Portuguese Serving: Place the dish on table and serve it steaming hot. Garnish: The meal can be garnished with hard-boiled eggs in boats and chopped parsley. It is part for Easter. Drink: A cold white wine is well suited to the dinner. Use the same white wine, which is used for the dinner. Hints: There is also another form of dried cod - Stockfish. Stockfish is not salted, but must also be diluted before use. Perhaps only overnight, I have not tried it yet. |
Coq au vin Bourgogne
Next Down
Next Up
|
|
1 large young cock up to 2 kg 1 package bacon 2 bottles of red Burgundy 5 cups chicken bouillon (homemade soup) 2 large onions 6 cloves garlic 2 carrots 2 stalks celery 2 parsley roots 4 cloves 1 Tbsp. whole black peppercorns 1 tsp. salt 1 soup herbs (thyme, bay leaves, parsley, lovage and leek tops) 250 g of brown mushrooms 1 large glass pearl onions 200 g butter 2 Tbsp. sugar 6 Tbsp. extra virgin olive oil 2 to 3 Tbsp. wheat flour Bouillon season with salt and pepper 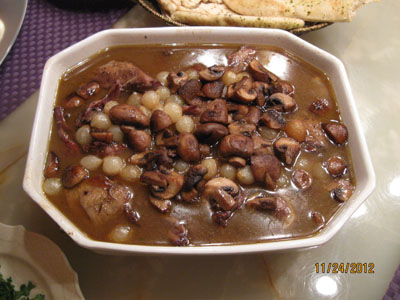
Coq au vin Bourgogne Procedure without liability: I will come up with a good recipe, we like to make on our fishing trip when we arrive and have not caught fish yet. Start by dividing the cock into 4 pieces. Cut the drumstick and upper thigh of in a single piece. Cut the wings of completely into the body. Cut the breasts and rid them of bones. The 4 pieces thighs and chest are stored for a while.
The hull is divided into several smaller pieces and place in a saucepan with the wings. Half the vegetables (onions, garlic, carrots, celery and parsley roots) cleaned and cut into coarse cubes, and put in the pot with salt, black peppercorns, cloves and soup herbs. Pour 1 liter of water and bring to a boil. Boiled for 2 hours and foamed in the process. Strain the soup and discard the rest. The 4 cock pieces seasoned with salt and coarse pepper, brown in butter and olive oil on both sides. Take up the cock pieces and store them for a while. Saute now the other half of the cleaned vegetables (onions, garlic, carrots, celery and parsley roots). Add perhaps more butter/olive oil, if it is too dry. Sprinkle flour over the vegetables and fry some minutes while stirring. Put the cock pieces back in the pan and add the bacon slices over the meat. Add half a bottle of red wine (marinade see Tip) and the homemade chicken bouillon. Inspect the cock pieces are covered with bouillon and wine. Bring the pot to a boil and then screw down on low heat. Simmer for approx. 1 hour to 1 ˝ hours. Pour pearl onions into a colander and set them to drain. Clean the brown mushroom from soil with a clean brush and cut them into quarters. Roast mushrooms in butter in a frying pan, season with coarse pepper and store for a while. Melt the sugar in a pan and come a little butter on when the sugar is melted. Pour the onion to the pan and stir so the onions become "sugar brown". Store them for a while together with mushrooms. When the cock pieces are done, take them out of the pot and place in an ovenproof dish. Strain the soup and discard the rest. You become approx. ˝ liter. Boil the soup and thicken slightly with a butter/flour dumpling (flour and butter kneaded together) or "Maizena Leveling". Pour the sauce over the cock pieces, onions and mushrooms spread over the meal. Sprinkle with chopped parsley and put the dish into a 200°C oven for 15 minutes. 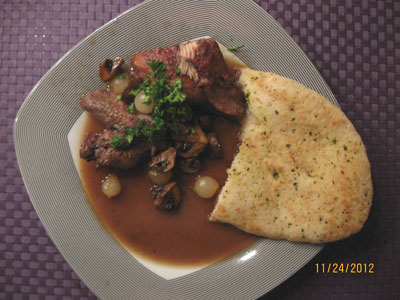
Coq au vin Bourgogne Serving: Place the dish on the table and serve it piping hot. Garlic Bread, Naan Bread or my Böhmische bread dumplings are served with the meal. Garnish: The meal can be garnished with fresh chopped parsley. Drink: Red wine belongs to the meal, of course, the same as is used in the meal. Hints: The cock pieces can be marinated overnight in red wine added your own favorite spices. Marinade is used again, as described above. |
Salmon with shrimp baked in FilloDough
Next Down
Next Up
|
|
8 pcs. frozen salmon pieces skinless approx. 1.2 kg 1 pkg. frozen shrimp around. 400 g of 1 pkg. FilloDej (Supermarket) 1 tray cottage cheese Choose your favorite brand or mix the neutral with: 1 red chili pepper in small slices 2 cloves garlic, finely chopped 4 springlřg in small slices 3 cm ginger grated finely Salmon pieces marinated in: 1/2 tbsp. salt 1/2 tbsp. cane sugar 1 cl. The Famous Grouse Whisky 1 tsp. paprika smoked Hollandaise sauce: 2 egg yolks, 3 tbsp. Sour cream 38% 50 g butter, lemon juice, salt and white pepper Dill or basil or coriander leaves Wakame seaweed salad Flour glue: Little water and flour mixed 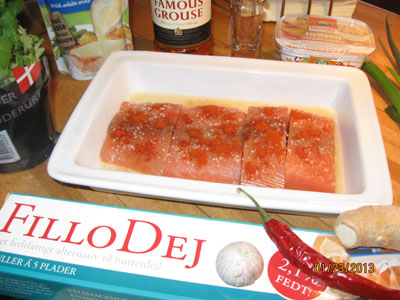
Ingredients for baked salmon in Fillo Dough Procedure without liability: Thaw salmon pieces in the fridge overnight and put them in a dish. Drip a little whiskey and sprinkle with salt, sugar and paprika. Put the salmon back in the refrigerator until ready for use (like 4 to 6 hours).
Mix your own neutral cottage cheese with the above spices and place in the refrigerator until ready for use (like 4 to 6 hours). You can also buy a ready-mix cottage cheese with flavor from Arla. The prawns are taken out one hour before use and thawed in a strainer. FilloDejen are taken out of the package and thawed on the kitchen table in a stack. It is important to put a damp tea towel over so the dough does not dry out. FilloDejen cut into appropriate sized pieces, to fit a piece of salmon with filling. Place a piece of salmon on FilloDejen, fill up with cottage cheese and garnish with shrimp. Fold dough over from one side, fold the ends over and roll, so the other covers. Just before the last lap covers, get a strip flour-glue on. The technique is the same as you are doing spring rolls. Is salmon pieces very large, it is advantageous to cut them into smaller piece. Baking time depends on how much filling you put in FilloDejen. Salmon packets placed on a baking tray with baking paper with flour-glue side down and brushed with water. Placed in the middle of a 180°C preheated oven and baked for approx. 30 minutes. Very small packets maybe only 20 minutes, and very large packets maybe 40 minutes. Keep an eye on the packets so they do not get too brown (black). My salmon pieces, as seen in the picture above, weighed 100 grams per piece. and had 30 minutes in the oven. Hollandaise Sauce: Whisk the egg yolks and sour cream together in a bowl over a water bath. The mixture must be fluffy before the cold diced butter is whipped into the egg mixture. Heat the sauce through without boiling it. Season with salt and white pepper. Add a little lemon juice and call the sauce Hollandaicesauce, add a lot of lemon juice and call the sauce Lemon Sauce. That's it. 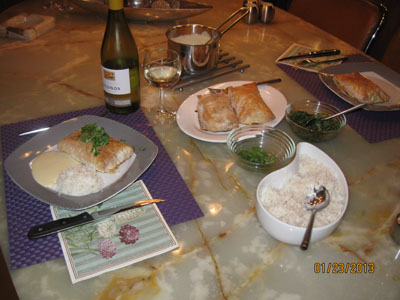
Finished baked salmon with shrimp baked in Fillo Dough Serving: Can be eaten with or without accessories, but I prefer cooked rice and a light sauce. Either a Hollandaise or a Lemon Sauce. Garnish: One of the above herbs chopped and sprinkled over the meal before serving. Drink: A dry white wine such as Trouos Chardonnay from Chile. Hints: You can with advantage put 2 sheets FilloDej together brushed with a little water before filling. Can extend the baking time by a few minutes. This recipe is very similar to my recipe above "Salmon or trout fillet baked in puff pastry". FilloDej contains less calories than puff pastry, and is also more crunchy. Try it. |
"Dirty" eggs in mustard sauce with picked cod
Next Down
Next Up
|
|
8 eggs 800 g of cod files or 2 kg fresh-caught cod 1 large onion 1 leeks 4 cloves 2 cloves garlic 4 bay leaves 1 red chilli pepper 2 tbsp. butter 2 tbsp. flour 1 bunch chives 4 tbsp. coarse fish mustard 1 liter fish broth salt and white pepper Bread: After your choice or Böhmische Semmel dumplings 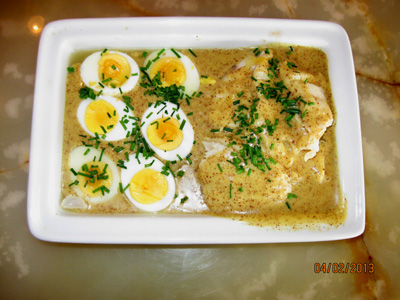
'Dirty' eggs in mustard sauce with picked cod for 2 people Procedure without liability: You can choose to do the meal by the remnants of boiled cod with mustard sauce, or from scratch, like the recipe here. Start by catching your cod, or go to the fishmonger and buy a fresh cod. Clean the cod and cut into suitable pieces. Getting the pieces in boiling water, which is added some herbs of your choice, and salt and pepper. When the water boils up again, reduce the heat and simmer the fish for 10 to 20 minutes. Small pieces of fish 10 minutes, and large pieces of fish 20 minutes.
Take up the fish and cool it off. Fish soup approx. 1 liter of filtered is used as broth for mustard sauce. Cod flesh peeled free of bones and skin, where it is cooled. Fish soup boil a little in with an onion stuck with cloves, garlic and bay leaves. To improve the soup came a little white wine in. Fish sauce: Melt the butter in a saucepan and come flour in while stirring. Let it bake a little before fish sauce poured on during strong whipping. Find a suitable consistency and cook the sauce for 1 to 2 minutes. Come fish mustard in and season with salt and white pepper. The sauce must not boil any more as fish mustard lose its flavor. The pure fish meat mixed in the sauce and get a little heat before it is poured over 8 boiled egg (cooked in 8 minutes) in a serving dish. 
"Dirty" eggs are a traditional Easter meal Serving: The dish placed directly on the table and served with a good bread. Possible my Böhmische Semmel dumplings will fit wildly good with mustard sauce. Or small new Danish potatoes when they show up in April/May. Garnish: Sprinkle with chopped chives in large amounts. Drink: A cold beer and a "hot" snaps do good. Hints: As mentioned above, the remains of boiled cod with mustard sauce increases day after with boiled eggs or poached eggs. |
Roast rump steak on the grill with Shopska Salat
Next Down
Next Up
|
|
1,3 kg Roast rump steak 16 medium potatoes 16 medium mushrooms Shopska salad 4 ripe spiced tomatoes on stem 1 large cucumber or 4 school gherkins (small cucumbers) 4 to 8 spring onions 1 to 2 lettuce (iceberg lettuce is suitable) 1 red chili pepper 1 green chili pepper 16 green or black olives 1 can of Feta cheese, diced or 1 dry Feta cheese for grater 1 bunch chopped parsley Dressing 3 parts olive oil and 1 part Heidelberg apple cider vinegar salt and freshly ground black pepper 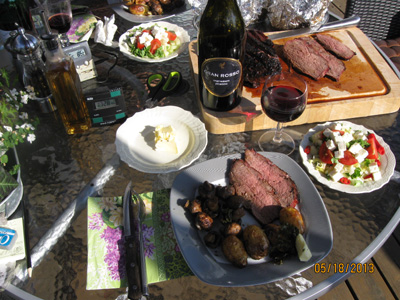
Roast rump steak on the grill with Shopska Salat Procedure without liability: Start by preparing the meat to a red wine marinade. Trim any sinews and too much fat, cut grooves in the surface. Sprinkle salt and freshly ground pepper in the "wound". Set rump roast in a foil tray and pour a little red wine over and put it in the refrigerator until 1 hour before you use it. The potatoes are not peeled but washed from the soil. 4 potatoes wrapped in aluminum foil with olive oil and salt. Mushroom brushed clean of soil - but without water - and packed in aluminum foil with olive oil, salt and pepper as the potatoes with 4 in each package. Put it in the refrigerator until 1 hour before you use it. It all can be prepared in the morning, so it just ready for a good barbecue where simply the salad is made ??while the meat grilling. The salad can be prepared as well, but there must not be poured oil, vinegar and salt before it is served, as it is not "crisp" more.
The recipe with regard to times and temperatures is for my charcoal grill with built-in heater for lighting the charcoal. The grill was made ready with heater and coal and turned on at 15.00 o'clock. 16.00 o'clock, the temperature was 230°C and rump roast has been placed on the grid with the cutted surface down. After 8 minutes, it was turned and got another 7 minutes. Then the rump roast was put in tin foil tray and put on the grid again with potatoes in tin foil around. The heater was turned off and the temperature dropped to 200°C, which was maintained throughout the process. After 40 minutes the core temperature was 60°C and the roast was taken out and wrapped in tin foil and a tea towel. After the roast had rested for 30 minutes, the temperature was increased to 68°C, and the meat was "medium done". Mushroom packages came in while the meat rested, so everything was ready at 17.30 o'clock. The salad was portion served and the dressing was poured onto at the table. Shopska salad: Cut the tomatoes into quarters. Peel the cucumber and cut it into cubes. Spring onions cut into small slices and the salad cut into small strips. Chili peppers and olives cut into very small slices. Parsley chopped. Feta cheese can be bought, diced or whole pieces which torn over the salad. Serve either in a large bowl or portion served. Olive oil, apple cider vinegar and salt poured/sprinkled first over before serving. Adjust how strong you want to make the salad with chili peppers, removing the seeds out is the salad not as strong (hot). 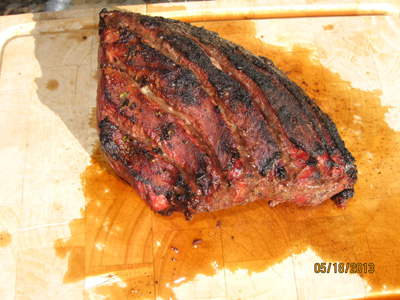
Roast rump steak on the grill with Shopska Salat Serving: Out in the open air around the grill a late evening hours. Garnish: There is hardly anything other than chopped parsley, that makes it. Drink: A good red wine is the case. I used an Italian red wine Gran Rosso Negroamaro Primitivo from the supermarket. |
Oriental curry chops in dish with rice
Next Down
Next Up
|
|
4 pork chops without rind min. 150 g per piece. 1 ds. pineapple, sliced 136 g 1 glass mushroom 285 g 1 chicken bouillon cube ˝ red chilli pepper chopped 2 tbsp. curry hot 4 cloves garlic minced 1/4 liter double cream 4 tbsp. olive oil 1 tbsp. flour 1 tbsp. butter salt and freshly ground pepper Rice for 4 persons of their choice 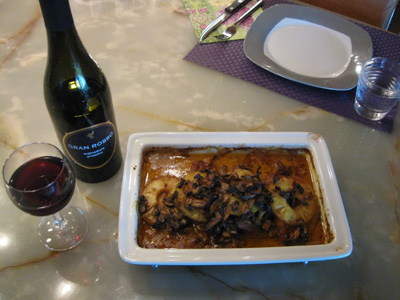
Oriental curry chops in dish with rice Procedure without liability: Mix 1 tbsp. flour, 1 tbsp. curry powder, salt (be careful with the salt when using broth) and freshly ground pepper in a plastic bag and shake well. Come one chop in the bag at a time and shake well, then the mixture is distributed on the chop. Brown chops on both sides in olive oil in the pan for a few minutes and put them in an ovenproof dish with space for accessories. Use the rest of the olive oil later to pineapple and mushrooms.
The juice from pineapple and mushrooms poured off and saved in a bowl. Pineapple slices toasted lightly in the pan and then placed over the chops. Mushrooms roasted in the pan and place also over the chops. Now the curry must be burned off in the pan with a little butter. Put butter in the pan and let it effervesce, then add 1 tbsp. curry and stir. Pan boil with the juice from the pineapple and mushrooms with chicken broth, minced garlic and chopped chili peppers. The cream is added and the sauce gets a short rehash. Then poured into the dish and placed in a 200°C preheated oven for approx. 40 minutes. The rice cooked according to quantity and time, indicating on the bag. 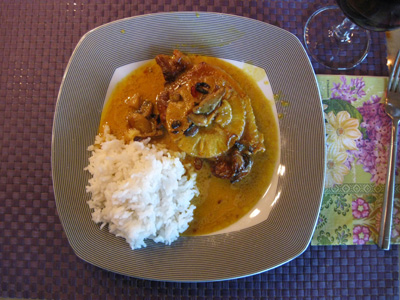
Oriental curry chops in dish with rice Serving: The dish put on the table along with 4 hot plates and a bowl of rice. Garnish: There is probably nothing more than chopped coriander to make it, now when it should be an oriental dinner. Drink: A good red wine is the case. I used an Italian red wine Gran Rosso Negroamaro Primitivo from the supermarket. But a cold Pilsner Urquell will also be a natural thing for this meal. Hints: Make it an experience and use organic free range pigs. The meat is tender and tasty, maybe a little more expensive, but it's worth it. |
Lunch omelette with bacon
Next Down
Next Up
|
|
8 large free-range hens eggs 400 g smoked and salted bacon 1 tbsp. beer per egg 1 tbsp. whipping cream per egg 1 red chili pepper chopped fine 3 cloves garlic chopped fine 1 bunch chives chopped fine salt and freshly ground pepper to taste, is added at the table Rye bread for 2 persons of your choice and a good mustard 
Lunch omelette with bacon Procedure without liability: Crack all eggs into a suitable large bowl. Beat the eggs with a hand mixer (not electric mixer). Add first beer and wip, then cream and wip thoroughly. Chopped chili peppers, garlic and chives and mixed well with the egg mixture. Let it soak while you fry bacon.
Cut the rind of bacon piece and cut the piece into appropriate slices - not too thick, but not paper thin. Fry them quietly in a frying pan over medium heat in its own fat. Use the fat from the bacon to fry the egg mixture in - do you think that is too much, then pour something from. Let bacon pieces allowed to drain on kitchen roll while you proceed with the egg mixture. Give the egg mixture with herbs vigorous stirring before it is poured on the frying pan. Wait with salt and pepper until you've tasted the omelet at the table as bacon can make the meal salt. Egg mass must "stiffen" under low heat for approx. 10 to 15 minutes. When the omelette is almost "stiffened" distributed bacon pieces on top of the omelette and garnish with more chives and tomato slices. 
Lunch omelette with bacon Serving: The frying pan put on the table together with 2 hot plates and a bread basket and a good mustard. Garnish: There is hardly anything other than chopped chives, which makes it. Garnish with the purple flowers if you have chives in the garden. I should perhaps mention tomato slices for garnish. Drink: I used a cold Carlsberg. But a cold "Pilsner Urquell" will also be a natural thing for this meal. Hints: Make it an experience and use organic eggs from free-range hens. The eggs are tasty, maybe a little more expensive but they are worth it. Note: Should you make the omelette for 4 people, I recommend that you use two frying pans, otherwise the egg mixture is too thick and it becomes difficult to cook it properly. |
Tuna steak with rice and tomato salad with mozzarella
Next Down
Next Up
|
|
4 large tuna steaks a 200 g 1 red chili pepper, sliced 3 cloves garlic minced 50 g butter and a little olive oil a little salt and pepper on the fish Tomato Salad 6 large ripe tomatoes 6 spring onions 1 pkg. Mozzarella cheese in brine approx. 250 g 4 tbsp. olive oil 4 tbsp. vinegar a little sugar, salt and pepper 1 tuft basil leaves 1 small glass pitted black olives Rice for 4 people 1 pkg. Wakame seaweed for garnish on rice (frozen from Netto) 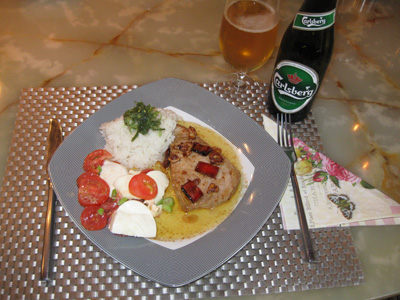
Tuna steak with rice and tomato salad with mozzarella Procedure without liability: Tuna steaks wiped off the liquid and season with a little salt and pepper. Heat a frying pan up, came first olive oil, then butter in. When the butter is "showered" off put chili peppers and garlic in the pan. Tuna steaks placed on top and fry for approx. 1 to 1 ˝ minutes on each side. Tuna steaks must be red inside.
Tomatoes and mozzarella cut into slices and place on a plate, so they overlap. Chopped spring onions sprinkled over. Dressing made of olive oil, vinegar, sugar, salt and pepper poured over just before serving. Garnish with basil and black olives. Cook the rice following the recipe on the bag. Garnish with green seaweed. 
Tuna steak with rice and tomato salad with mozzarella Serving: Serve dinner on 4 plates as shown above. Garnish: The rice garnished with green Wakame seaweed (frozen from Netto). Tomato salad can be garnished with black olives without stones. Drink: I used a cold Carlsberg. But a cold "Pilsner Urquell" will also be a natural thing for this meal. Hints: Definitely do not roast the tuna steaks by hard heat, or too long. The meat will then become too dry. If you can get mozzarella from buffalo milk, choose this, but it is probably difficult in Denmark. Another option could be smoked mozzarella. |
Stuffed peppers with tuna and bulgur
Next Down
Next Up
|
|
1 can tuna in oil or water 1 dl bulgur (or 75 g) 4 nice, big red peppers 1 red chili peppers chopped 2 cloves garlic minced 2 large, ripe tomatoes chopped 1 large onion chopped fine 16 pcs. pitted black olives chopped 2 tbsp. capers 100 g grated dry cheese 4 tbsp. olive oil if tuna in water Season with salt and pepper into the mixture A little butter/olive oil to the ovenproof dish Accessories Garlic baguette or a good bread to your taste 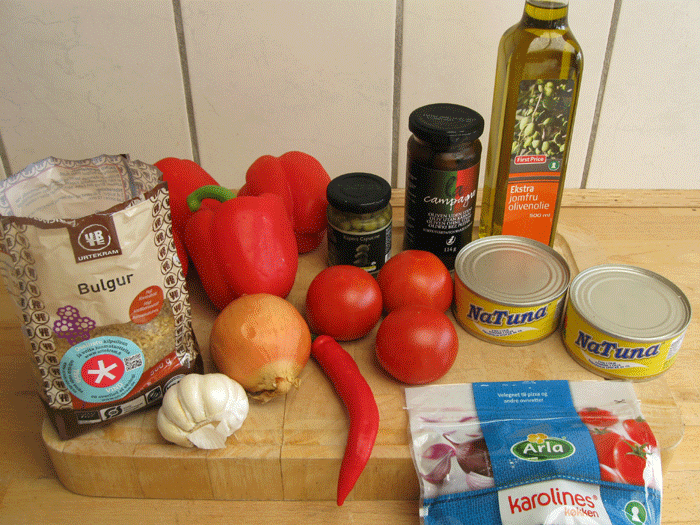
Ingredients for stuffed peppers with tuna and bulgur Procedure without liability: Rinse bulgur well in cold water and allow to soak for one hour, then pour all the water off. Boil 1 dl bulgur in 3 dl lightly salted water for 10 minutes. Then drain the bulgur into a sieve. Tuna in oil / water is also added to drainage in a sieve. Add some oil to the dish.
Prepare the stuffing for the peppers. Cut a cross in the tomatoes and pour them with boiling water. Peel the tomatoes and chop them roughly. Finely chop chili pepper, garlic, onion, olives and capers and mix it with the tomatoes. The tuna meat is peeled apart and mixed in the vegetables. If you use tuna in water then add some olive oil. Bulgur is then mixed in and the stuffing is ready to "stuff" the peppers. You can choose to do it in two ways. Slice the peppers lengthwise and remove the seeds and seed stalks (the white part) or cut the top off and use the top as a lid. Also remove seeds and seed stalks inside with a spoon. Keep the stalk on top and use it as a handle. I always use that method with the lid and handle. Fill the peppers with the "stuffing", put them in a greased ovenproof dish and bake in a 200°C preheated oven for 30 minutes for half and 35 minutes for whole peppers. Sprinkle with cheese and bake another 15 minutes for the half and 20 minutes for whole peppers. When using a convection oven calculates always 20°C lower temperature, but the same time. 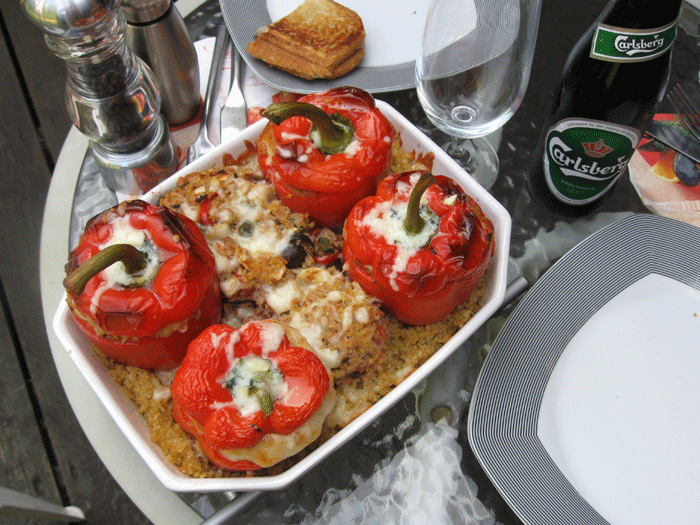
Stuffed peppers with tuna and bulgur Serving: The ovenproof dish put on the table along with a bread basket filled with your favorite bread. Garnish: Grated cheese of a dry type if you grate the cheese - otherwise there are many opportunities. Drink: I used a cold Carlsberg. But a cold "Pilsner Urquell" will also be a natural thing for this meal. Hints: Bulgur is steamed, dried and cracked durum wheat, which is eaten extensively in the Middle East with various spices. If you prefer rice, it can be used instead of bulgur. Put a small glass of dry Sherry in the bottom of the dish, it gives a nice aroma. Note: In my meal above, I used 2 dl of bulgur, but I think it was too much, so the rest came on the bottom of the ovenproof dish. |
Sun eggs with marinated herring or smoked salmon
Next Down
Next Up
|
|
Saturated brine 26%, or 24 °Baume at 4°C 1 liter of water to the brine 350 g of salt to the brine 8 large eggs of good quality 2 large onions to be sliced 1 red chili pepper, sliced 2 cloves garlic, sliced 3 cm ginger, sliced 2 tbsp. apple vinegar Fill to the eggs Mustard of your choice (Dijon) Tabasco Apple vinegar Accessories 4 marinated herring or 4 smoked salmon pieces 4 slices of rye bread with butter to your taste See my calculation of Brine Minimum strength of brine, 10% or 112 g of salt per liter of water 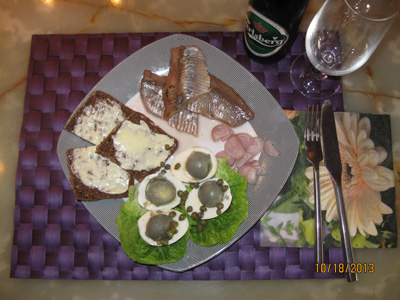
Sunny eggs with herring for 2 people for lunch Procedure without liability: Cut the onions with the brown shells into slices (peel gives the yellow color), cut chili pepper, garlic and ginger into thin slices. Get 1 liter of water in a pot with a little apple vinegar and bring to the boil with the spices for 10 minutes. Strain the water off and save it for the brine. In a pot boil the eggs in fresh water with a little vinegar for 30 minutes. Add the cooked spices. Why do eggs boil for 30 minutes? This gives a gray-green film on the yoke, which is caused by hydrogen sulphide in the albumen, which react with the iron in the yolk at a temperature in the yolk above 70°C. This gray-green film is quite harmless and is only for the optics.
When the eggs are cooked remove and cool. Press them and roll them around the kitchen table, so the cracks. This gives the eggs a great pattern that appear on the surface when peeled. Brine made of water from before with salt, bring to the boil and cool brine for about an hour. All eggs are laid in a jar with tight fitting lid. The cooled brine poured over to cover the eggs and close the cover. Set the glass cool and dark for at least 2 weeks before the eggs consumed. The eggs can be kept for several months when kept cool and dark. The amount of salt listed above is for "pub eggs", you get thirsty from eating them. 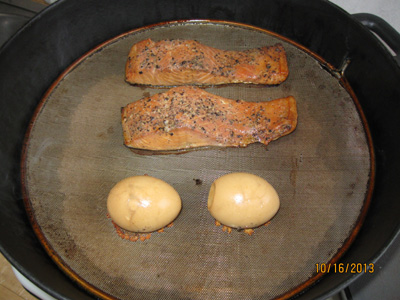
Sunny eggs with smoked salmon for 2 people for lunch Serving: Peel the eggs and cut them lengthwise and yolk removed. Fill with a little mustard, Tabasco, and vinegar in the hole. Add half a yolk onto with the cut surface down. Server 2 eggs and 1 marinated herring or smoked salmon per person on a plate with a buttered rye bread. The smoked salmon pieces are of course smoked in my old cast iron pot. Garnish: Dill, chives or other herbaceous will embellish the meal. Drink: I can only recommend a dram per half egg and a cold Tuborg/Carlsberg to rinse with. Note: An egg consists of a shell, egg white and yolk. The shell weighs approx. 10% and is porous so as to diffuse gas (carbon dioxide) of the egg. The white weighs approx. 2/3 and the yolk around 1/3 of the rest of the egg weight. The white of a fresh egg is "cloudy" and viscous, gradually diffuse carbon dioxide out of the eggshell and the white becomes more clear and thinner. The white of fresh eggs coagulate at 62 - 65°C, whereas the "old" eggs coagulate at 59-62°C. So it takes longer time to boil a fresh egg. Yolk coagulating at a somewhat elevated temperature, 65-70°C. Can you see the problem? The yolk is in the middle of the white, and protects it from the heat. If yolk should coagulate, the temperature should be above 70°C, and now the white stiffened and turned white. The limit I call boiled egg (smiling eggs); if you cut the egg over the yolk runs out. Eggs always gently submerged in boiling water. Piercing the blunt end with a needle, but be careful. Put the egg with the blunt end on a tbsp. and deep spoon with egg 1/3 into the water before it boils for a few seconds. This applies most for "old" eggs. The gas that has accumulated leaks, and prevent the shell cracking. Always boil in plenty of salted water or vinegar. The amount of water prevents the temperature from reducing much, if cooked many eggs taken straight from the fridge. Salt and/or vinegar coagulate the white immediately if it would flow out of a crack. I have made a spreadsheet for how long eggs should be boiled. Find it under "Excel Spreadsheets". I have set the following temperatures of the yolk: Soft Boiled 63°C , boiled egg 70°C and hardboiled 82°C. |
Sřlakse-salat
Next Down
Next Up
|
|
The fish is cut into two fillets 3-5 kg pollack, or saithe Cod can also be used Brine 13% or 12° Baume 3 liters of water 440 g of salt 40 g sugar 2 to 4 beetroots 1 to 2 lemons Dressing 1 dl neutral cold-pressed edible oil grapeseed oil or Rapeseed oil which is a healthy cooking oil 1 lemon juice Smoking 4 l sawdust of beech for hot smoking (3 hours) 8 l of sawdust of beech for cold smoking (48 hours) 
Fresh cod fillet without bones 
Cod fillet dyed in beetroot juice 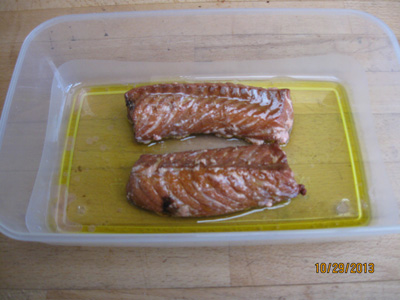
Hot smoked cod fillet put in oil 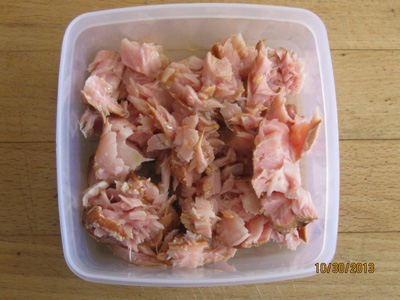
The cod fillet has been picked 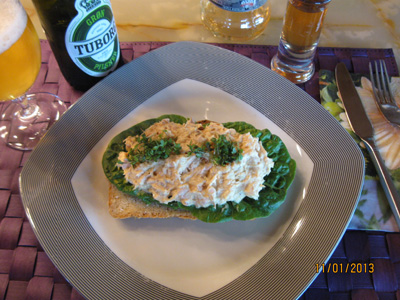
Finished Sea Salmon Salad mixed with mayonnaise stirred with a mild curry and seasoned with lemon Procedure without liability: Let it be said at once, "Sea salmon" does not exist, it is an invented name or just a trade name for a fish product invented around 1931 in Denmark and before in Germany. At the time, the North Sea was full of saithe and pollack, it was almost "bad" fish for no money. Therefore, the fish were processed and got the trade name "Sea salmon" and could then be eaten in Denmark and exported to Germany. "Sea salmon" was obtained by the saithe were filleted, colored pink and put into the smoke-acid (acetum pyrolignosum crud) or in English Liquid smoke. Then the fish was doused with various edible oils and preservatives, so you got the feeling of eating a fatty "Salmon". I must admit that I have eaten many bags of "Sea salmon" salad without knowing how it was made. It tasted good, and I survived. "Sea salmon" salad in this form are not produced any more due to two things: The method was not appreciated by the health authorities and breeding of caged-salmon in Norway was cheaper than going fishing for saithe and pollack. OK! it is not only in Norway, one is breeding salmon.
I come up here with a recipe for "Sea salmon" that does not contain dangerous dyes and smoke-acid, but only natural ingredients plus a little smoke. Start by making a brine solution of 13% with a little sugar and lemon juice. Boil water, salt, sugar and lemon juice with 4 peeled and sliced beetroots for 10 minutes. Set the brine to cool during the day and refrigerate overnight. The next day the two cleaned fillets are put in the brine and remain 12 hours in a refrigerator at 5°C. The fillets are taken up and rinsed in clean, cold water and hung to dry for several hours. Fillets may tail tied or placed on hooks within the smokig oven. Hot smoking Ensure good smoke in the smokig oven and the temperature is around 70°C. Hold this temperature for 15 minutes to 30 minutes and then go down to 50°C over the next two hours by pouring a good amount of sawdust on the fire. After 2 ˝ hours, the temperature would be around 30°C and the fish can then "spend the night" in Smoke house to pull the last flavors into the meat. However, only in the winter when night temperatures are low. Cold smoking Fill labyrinth sawdust tray with sawdust, and cold smoke the fish in the same way as if it was a salmon. The recipe for cold smoked salmon can be found on my website. I will here in the winter of 2013/14 try to cold smoked cod, to find out if sea salmon salad is just as good when cold smoked. Place a fillet on a plate and drizzle the meat side with lemon and pour a neutral cooking oil over the fish. Can you eat both fillets over 3 days you do the same with both fillets. Otherwise vacuumers the other fillets and frozen for later use. Serving: I would "picking" the fish into small pieces and put the meat on a lettuce leaf over a good piece of bread. Garnish: Drip perhaps more lemon on the fish, place a strip of mayonnaise and sprinkle with cress. Drink: A cold beer with a dram or a cold, dry white wine can also be used. Hints: You may mix some fish meat with mayonnaise and a mild curry instead of pouring the oil over the fish. Note: Smoke acid is also called wood vinegar. It is a brown liquid with a sour and bitter taste slightly after tar, which in no way must be ingested in concentrated form. It was used in the past to preserve food and give these a smoky taste. My sample with the two cod fillets was salted in beetroot juice for 24 hours and smoked for 10 minutes at 70°C in my cast iron pan. |
Marinated, smoked tuna steak with new potatoes and Shopska Salad
Next Down
Next Up
|
|
4 nice, big tuna steaks around 150 g per piece. ˝ cup soy sauce ˝ orange juice only ˝ lemon juice only 1 tbsp. coarse salt 1 tbsp. brown sugar 1 tsp. ground coriander seeds ˝ tsp. smoked paprika ˝ tsp. ground chili Shopska Salad 1 Romani salad plucked with the fingers 2 large ripe tomatoes roughly chopped 1 peeled cucumber, diced 6 spring onions, sliced 1 green chili pepper into small slices 1 red chili pepper into small slices 1 bunch parsley chopped 1 small glass stoned olives Feta cheese grated Salt and black pepper Olive oil and vinegar dressing Accessories Small, new boiled potatoes or cooked rice with Lemon souce - The sauce stained with Turmeric ˝ liter vegetable stock 40 g butter 40 g of wheat flour ˝ cup cream ˝ lemon juice and grated peel of the whole lemon 1 tsp. fish sauce, salt and pepper 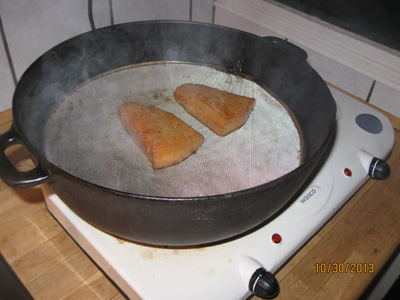
Marinated, smoked tuna steak with Shopska Salad Procedure without liability: Mix all spices well in a bowl. Getting the 4 tuna steaks in a plastic bag for food and pour spice mixture in the bag. Close the bag or if you have a vacuum machine, suck the air out of the bag. Put the bag 2 hours in the refrigerator for airless bag and 3 hours for normal closed bag.
Remove the tuna steaks and place them on a clean towel or paper towel and pat dry on each side. If you use paper towels, you risk that the paper is stuck on the meat. Fire up your "Lunchbox" smoker - pour smoked sawdust at the bottom when it's good hot, place the drip tray at the bottom of the rack and place the rack with tuna steaks in the "Lunchbox" smoker. Cover and set the valve at 50%. Give full heat for 5 minutes, and there would then be well with smoke from the valve at the top. Remove the tuna steaks from "Lunchbox" smoker and wrap them in aluminum foil until ready to eat (only for approx. 10 minutes). Lemon Sauce Melt the butter in a pot, bake the flour in the butter while stirring. Pour the vegetable broth into the pot, a little at a time, while whisking thoroughly until the right consistency is achieved. Add the cream and season with salt, pepper and fish sauce. Warm up the souce - do not boil - switch off the heat and add the lemon juice and lemon peel. Shopska salad: The green mixed in a bowl and just before serving, season with salt and pepper. Dressing poured over and decorate with grated feta cheese and olives. 
Here with rice in the absence of new potatoes Serving: Serve dinner on 4 warm plates as shown above. The salad may be served on 4 separate plates. Garnish: The potatoes sprinkled with chopped parsley or other green garnish to suit your taste. Driks: I used a cold "Pilsner Urquell" for this meal. Hints: Smoking time may vary with the thickness of the tuna steaks and your smoker. But tuna steaks should be red in the middle, otherwise they become too dry. |
Stone Age Bread
Next Down
Next Up
|
|
Numbers in parenthesis are for the small baking tin 100 g (80 g) of sunflower seed 100 g (80 g) of linseed 100 g (80 g) of sesame seeds 100 g (80 g) pumpkin seeds 100 g (80 g) walnuts 100 g (80 g) of hazelnuts 60 g (60 g) of pine nuts 40 g (40 g) of almonds 1 dl (3/4 dl) olive oil 6 eggs (4 eggs) medium 1 tsp. fine salt Stone Age Bread in large tin fills 1.35 liters Stone Age bread in small tin fills 1.0 liters 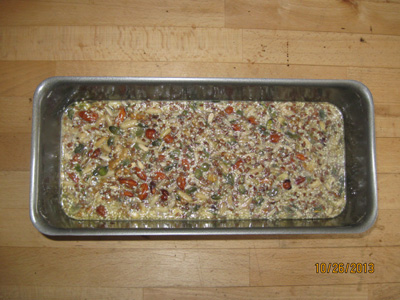
Stone Age bread unbaked 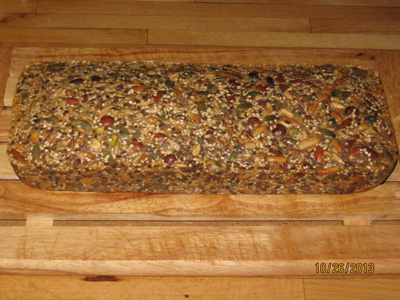
Stone Age bread baked 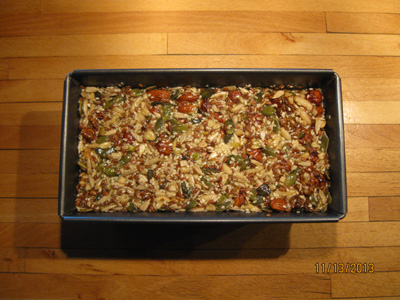
Stone Age bread in a new 1 liter baking tin. Unbaked 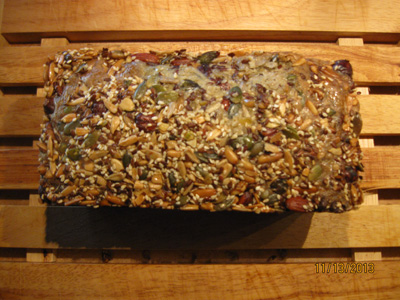
Stone Age bread in a new 1 liter baking tin. Baked Procedure without liability: It is important to follow the recipe exactly. Weigh out all the ingredients carefully, so there is 700 g (580 g) seeds and nuts in total. Do not use any kind of grains.
Crack 6 eggs into a bowl, whip lightly olive oil and salt in. Then mix all the seeds and nuts well in a new bowl before they empty into the eggs while stirring. Let stand and rest for 10 minutes on the kitchen table while the oven heats up to 160°C. The mixture was poured into a greased baking tin with olive oil. I have used a tin of 2.8 liters (1 liter of a new tin) for ordinary rye bread, thus becoming the Stone Age Bread not so high. A tin of 1 liter will certainly give a higher bread, but it is of course a matter of taste. One must remember that it is not a yeast bread, so it does not rise. I have now bought a new baking tin of 1 liter in Rema 1000 to 15.00 DKK. I shall try it and come up with a new description, because I think that the amount must be reduced, as the thin probably is a bit too small for the above quantities. I have now calculated the amount for the new tin, and the amount can be seen in parentheses. The mixture is put into the hot oven on the bottom rack and bake for 60 minutes. I used the eggs of size L/M, so I had to give 10 more minutes baking time. Your oven can also give rise to smaller/larger baking time. Serving: Stone Age Bread eaten as an accompaniment to many fish meals or as "snacks" to a cold beer or a good red wine. Garnish: Of course you can garnish everything, but Stone Age Bread needs no garnishment. It would just be a thin layer Heather honey from the Jutland heath. Drink: As mentioned a cold beer or a good red wine winter and a cold white wine summer. Hints: Set definitive the tin on a rack if it is put on a baking tray, the bottom of the tin will be too hot, so Stone Age Bread turns black at the bottom. It has something to do with all the eggs. |
Chicken legs braised in Porter
Next Down
Next Up
|
|
1 pkg. Chicken lower- and upper thigh 1.5 kg 2 leeks 2 carrots 2 parsley roots 2 stalks celery 1 onion 4 cloves garlic 1 red cilipeber 1 fl. Wiibroe Porter ˝ l chicken stock 1 tbsp. Apple cider vinegar 1 tbsp. Asian kitchen soy sauce ˝ cup olive oil 50 g butter 2 tbsp. flour 1 tbsp. smoke salt or ordinary salt 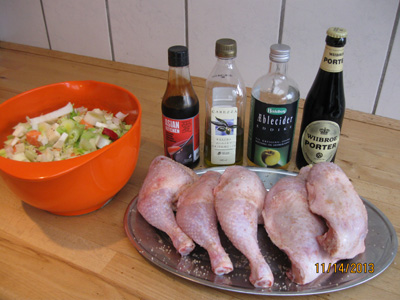
Ingredients for chicken legs braised in Porter Procedure without liability: Begin with salting the thawed chicken pieces. Clean the vegetables and cut them into smaller pieces. Pour vegetables in a plastic bag with flour and shake the bag well. Come olive oil and butter in a deep pan, when the butter has showered chicken pieces are browned on all sides. It takes approx. 10 minutes. Put the chicken pieces to the side and all the vegetables lightly brown in oil/butter. If there is too little oil/butter left add something more. Add chicken pieces down among the vegetables and sprinkle with apple cider vinegar and soy sauce. Pour Porter and chicken broth over to cover completely.
Bring the meal to a boil and turn down the heat so it simmer for 1 ˝ hours. Check that there is enough liquid, otherwise add more broth. Chicken pieces should be covered with liquid to be tender. You can prepare the meal in the morning or the day before, it should be served. An hour before serving you come the chicken pieces in an ovenproof dish, pour the sauce with the vegetables over and put the pan in a 120°C preheated oven. 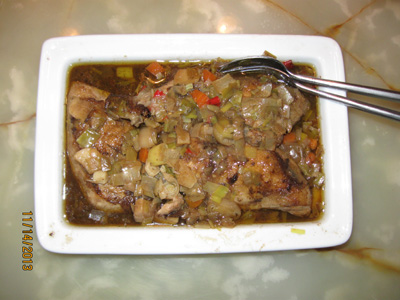
Chicken legs braised in Porter Serving: Place the dish on the table and serve either potatoes, rice, noodles, pasta or bread. Garnish: Fresh chopped parsley or coriander would be great. Drink: Of course the same Porter served to the meal. Hints: Instead of chicken under- and upper thigh you can use a whole chicken, divided into quarters. |
Smoked potato sandwiches with vigor
Next Down
Next Up
|
|
4 large and nice asparagus potatoes 4 slices rye bread of your choice Butter or flavored lard for bread again of your choice Lettuce leaves for garnish Chives chopped fine for garnish Salt and pepper 1st. proposals Chicken Salad with fried bacon 2nd. proposals Spiced herring with raw onion 3th. proposals Tomato Slices with mayonnaise and roasted onions 4th. proposals Hard-boiled egg slices with spiced herring 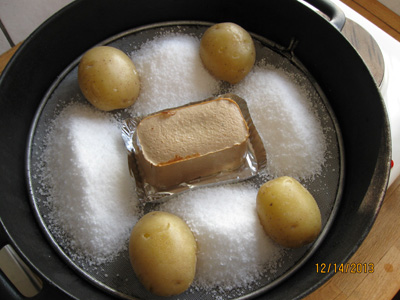
Smoked potato sandwiches with "Beat in" Procedure without liability: Wash asparagus potatoes thoroughly with a brush since they are eaten with the peel on. Put them in a pot of lightly salted water so they just covered. Bring the pot to a boil quickly. When the water boils, then lower the heat and simmer the potatoes for 8 to 10 minutes. Then pour the boiling water from the potatoes and put the pot under cold running water for 10 seconds. The potatoes are placed on a paper towel for 10 minutes to dry before they are smoked.
Now your "Lunchbox smoke oven" comes into its own. Place a layer of beech sawdust in the bottom, insert the grid and put the potatoes on the grid. A drip tray should not be necessary with potatoes. Turn on the heat with (alcohol, gas or electric.) and warm up well, so a good smoke production appears. Potatoes smoked for 10 to 15 minutes, depending on the size of the potatoes, how much smoke flavor you want and how hot your smoker may be. When the potatoes have been smoked and cooled cut them into appropriate slices so the 4 potatoes can cover 4 pieces of rye bread. 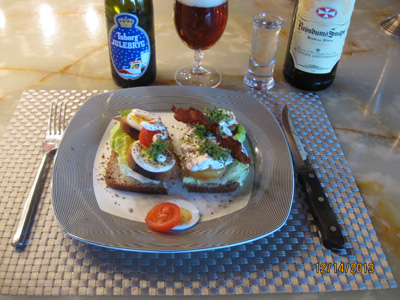
Smoked potato sandwiches with vigor Serving: Butter rye loaves with butter or flavored lard, add a rinsed and dry lettuce leaf above and get the potatoes on. Sprinkle with salt and chives. Then select one of the four proposals come on top of the potatoes. Garnish: Sprinkle with chives and freshly ground pepper. Drink: A cold Pilsner beer and Linie Aquavit round off the pleasure of the meal. Hints: Smoked asparagus potatoes can also be used in a cold potato salad to sausages at the grill on a hot summer day. I took the opportunity to smoke coarse salt and a canned cod roe. |
Spices lard of duck and pork fat
Next Down
Next Up
|
|
500 g of pork lard 250g duck fat 2 large onions 4 cloves garlic 1 large cooking apple 1 red chili 1 stalk thyme Bread Rye bread of your choice or Homemade Yogurt Bread with smoked cheese 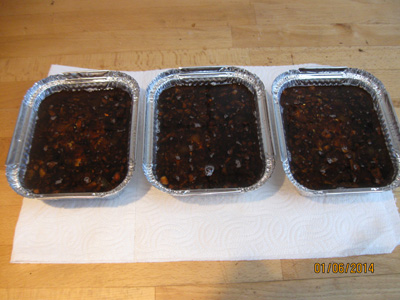
Spices lard of duck and pork fat Procedure without liability: It has just been Christmas and you have fried two ducks or a goose, you stand left with a great deal of skimming's duck fat or goose fat. Here it is then to make good flavored lard that not "runs" of the bread when it is placed on the table. You mix duck fat and pork lard with a good deal of spices.
First, put pork lard in a pan and turn on the heat. While it melts chopped onion, garlic and peeled apples fine. The red chili cut into two pieces so it is finally easy to remove. Herbs put in pork lard and boil for approx. 30 minutes. Then put duck fat and a stalk of thyme to the pan and cook for the next 15 minutes. You should be sure that all the water in onions and apples are cooked, and they are golden brown and floating on top of the lard. Of course, onions and apples must not be black, but should be like the roasted onions, which you buy in a can/package. I followed the temperature in the pot, when it was 120°C onions and apples flowed on top, and they had a nice golden color. One can also see the steam diminishes sharply from the food as the water boiled away. Chile pepper and thyme stalk are taken up; pour the mixture into aluminum trays, which stands cold until it was stiff. The mixture here gave three trays of 500 ml. Good to freeze when vacuum packaged in a plastic bag. Serving: Grease a piece of good bread; put a good slice of smoked cheese on. Garnish: Of course, there are cut chives on top. Season with salt and pepper. Drink: A cold Pilsner beer and Linie Aquavit round off the pleasure of the meal. Hints: The amount of 250 g duck fat was what I got from two ducks. You can use up to 500 g, fifty - fifty is OK. |
Marinated lamb with creamed potatoes
Next Down
Next Up
|
|
2 kg leg of lamb boneless 2 kg of potatoes 5 cups milk and cream (half of each) Salt, white pepper and grated nutmeg Ingredients for the marinade 2 tbsp. sea salt 2 tbsp. olive oil 1 tbsp. dry tarragon 1 tbsp. dry parsley 1 tbsp. dry rosemary 5 cloves garlic 1.5 ml red wine Mix these ingredients in a blender Add the fresh herbs Some fresh thyme stalks Some fresh rosemary stalks Some fresh parsley stalks Some fresh tarragon stalks Some bay leaves Some anise stars 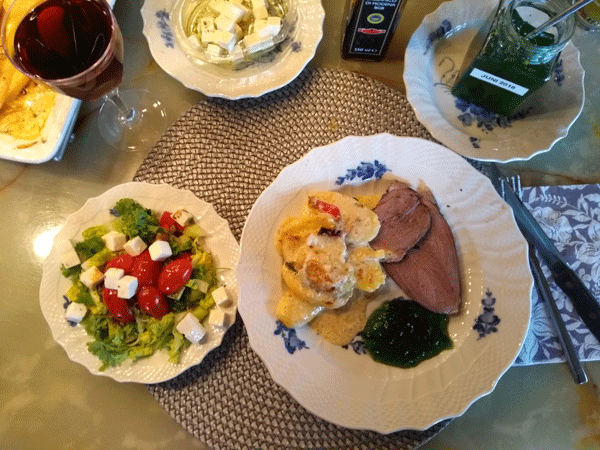
Marineret lammekřlle med flřdestuvede kartofler og Shopska Salat Procedure without liability: The recipe for this wonderful marinade for a good Easter lamb I got from my fish mate wife here for Easter. When the dried spices, salt and red wine is blended rub it well into the leg of lamb and then placed in a solid plastic bag with the fresh herbs. The rest of the wine with the blended spices poured in. The bag is closed tightly (use maybe 2 bags) and place in the refrigerator for several days (like three days) and turned daily a few times.
Now the leg of lamb shall be roasted and there are many ways to do it. Here I use a hot air oven. Cooking time depends on the oven temperature and the weight of the leg of lamb, and how red the meat should be. Therefore, use a meat thermometer and check the core temperature. When the meat has reached these temperatures: Red meat between 60°C and 63°C - medium between 63°C and 66°C - well done between 66°C and 70°C. Remember that the roast must rest at least 20 minutes wrapped in tin foil and a clean tea towel before being cut out. The temperature of the roast will rise at least 5°C, so take this into consideration. Heat the oven to 150°C with hot air, set the temperature sensor into the center of the meat, set the clock to 1 hour and 30 minutes, then the meat should be about medium rare for a leg of lamb at 2 kg. Keep an eye on the temperature during the process. Peel the potatoes and cut them into thin slices. Place in an ovenproof dish and sprinkle with salt, white pepper and grated nutmeg between the layers. Pour the cream and milk over so it just covers. Place the dish in the oven under the roast lamb so that it drips down onto the potatoes. It gives a good flavor to the potatoes. 1 hour and 30 minutes goes well with potatoes, see however, that they do not get too brown or bake dry. Serving: Slice the roast and place it on the table with creamed potatoes in the ovenproof dish. The best salad to the meal is a Shopska Salad. See under hints. Garnish: Parsley or mint, perhaps a mint gel. Drink: The same red wine, which was used for the marinade. Hints: Shopska salad made of: ˝ cucumber, 2 tomatoes, 1 onion or 4 spring onions, 1 green pepper (paprika), 1 green chili pepper, parsley for garnish, 8 green/black olives, Feta cheese, diced 36%, Olive Oil and Balsamic, a sprinkle salt for dressing. |
Baked haddock with white asparagus, new potatoes and dill sauce
Next Down
Next Up
|
|
1 kg haddock fillet with skin but no bones 1 kg white asparagus (20 pcs.) 1 kg new Danish potatoes 250 g clarified butter 1 pkg. Easy Fish Dill Sauce 1 bunch. Fresh dill Grated Parmesan cheese over the white asparagus (as desired) Salt, white pepper and smoked paprika Spices in the bottoms of the dish Lovage leaves Lemon balm leaves 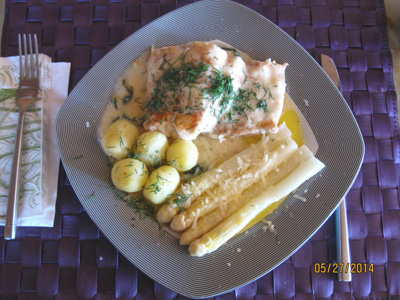
Baked haddock with white asparagus, new potatoes and dill sauce Procedure without liability: Haddock can be caught throughout the year and from May to October season for haddock. The peak in September and October. The fish is related to cod and tastes almost like cod. Here is a great and tasteful recipe.
Haddock are seldom caught by anglers because it lives on 20 to 300 m depth, buy it from the fishmonger, he can also fillet the fish. A nice filet weighs about 1 kg is for 4 people. Cut the filet into 4 equal pieces - by weight - place them with skin side down in a casserole dish on a bed of herbs. Note: The skin side is scraped clean of mucus and scolding. I used lovage and lemon balm. Sprinkle the fish with salt, white pepper and smoked paprika. Pour over the fish the ready-made dill sauce and place the dish in a 180°C preheated oven for 30 minutes. Cleaned new Danish potatoes boiled in salted water for 16 minutes with lovage. The peeled white asparagus cooked also in lightly salted water for 10 minutes. Melt 250 g butter over low heat, when it is melted, pour the golden surface of the butter into a jug. The white precipitate may not be included. 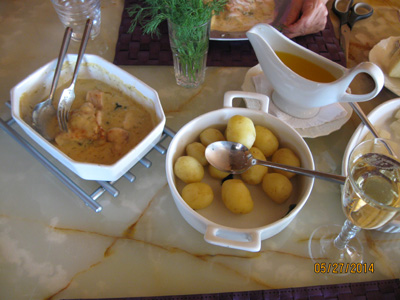
Baked haddock with white asparagus, new potatoes and dill sauce Serving: Place the fish with dill sauce, new potatoes and asparagus on four plates. Pour clarified butter over the potatoes and asparagus. Sprinkle chopped fresh dill over the fish and potatoes. Grate the cheese over the asparagus. Garnish: Dill and again dill. Grated Parmesan cheese over the asparagus (as desired). Drink: A cool and dry white wine is extremely well suited to the warm spring. Hints: Can not get haddock, try: cod, ling, tusk, catfish, monkfish, pollock, gurnard, hake, whiting, Greenland halibut and halibut. All species have lean, white meat, and are good eating fish. Another good eating fish will be redfish, which have bright red firm flesh. |
Rake fish is a Norwegian specialty made of trout
Next Down
Next Up
|
|
This will be used for salting:
10 live trout between 550 g and 750 g each It is important that all trout are equal and total fresh 60 grams of salt per kilogram of slaughtered fish (6 % salt/kg fish) ˝ tsp. sugar per layer fish in the "barrel" This will be used for new brine: 1 liter of water 50 g salt Boiled and cooled to 5°C Rakefisk is a Norwegian specialty which is made of small trout. It is most trout, rřye, char, whitefish, grayling and perch. In Denmark one could benefit from using rainbow trout. If you buy the fish, they must be a live on the purchase. The fish must not have been in contact with the soil. The word "barrel" refers to an approved food plastic container with a lid.
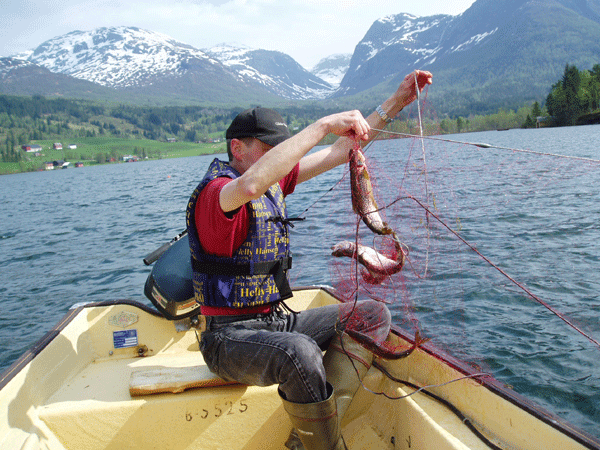
Rake fish is a Norwegian specialty made of trout Procedure for salting without responsibility: I must immediately warn against making rake fish yourself if no hygiene and temperature can be respected to the letter. Trout should never come into contact with soil bacteria. This can happen if they have been on the ground, or been in contact with vegetables. All "tackle" must be clean and suitable for food. The temperature during the curing process - maturation - should not exceed 5-8°C. The barrel or plastic bucket is placed in a deep, dark cellar or in a refrigerator.
Now we can start. I usually cut the trout from the gat to the head and take the guts out. The gills cut out and all blood washed away. Obtain a 10 liter plastic bucket, it is used for tartar sauce, pickles and potato salad in commercial kitchens. Or a different size to suit the amount of fish that you will "rake". But remember that plastic bucket must be approved for food item. Here is the Norwegian recipe and some preface: Both enzymes and certain microorganisms found naturally in fish, they become active when the fish are slaughtered. The process is initiated in the fish, leading to altered taste and increase shelf life, food is easier to digest. One explanation is that the enzyme initiates a cleavage of the long protein molecules, while the naturally occurring lactic acid bacteria convert carbohydrates into acids. The process of raking of fish is a slow process where you have to play with the laws of nature. It is very important that everything must be scrupulously clean and accurate, so there is NOT blooms of undesirable bacteria (Clostridium botulinum, which in small doses is used in Botox). It also ensures that exclude air from the process, which could otherwise develop Botulinum toxin in the fish, if you is imprudent. Industrial fish checked for this before they reach the market. All contact with the soil and sand are absolutely prohibited. Food & Drug Administration expects all rakefisk also the commercially prepared is a risk product because of the danger of Listeria infection. Food Administration recommends that pregnant women and people with compromised immune systems (old and sick), do not eat fermented fish. There used fresh trout between 550 g 750 g or more of uniform size in the same barrel, which cleaned of gills and blood, rinsed, salted and layered with belly up in the barrel. Originally there used wooden barrels. But today is plastic by far the most common for most manufacturers, with the exception of the most exclusive. Using wooden barrels is a vulnerability in the process, and since plastic barrels gives more predictable results, preferred these. Then, cover the fish with brine before it is put to maturation. In some cases, rinse the fish in vinegar or placed in vinegar for half an hour before putting it in the barrel. In the belly of each fish added to 60 g of salt per kilogram of fish. Place a heavy plate over so the fish is pressed down the brine After a few days, check whether there is enough brine formed so that the fish is covered. If not, add more brine in the form of water and salt. The brine prepared from boiled water with 50 g of salt per liter of water. The ripening process can be controlled by temperature and time. When the fish put down it is mild in odor and taste, but maturation continues as long as the temperature is sufficiently high. The recipes are diverse and vary between communities. In some villages sprinkled little sugar in order to speed up fermentation. The fermentation can also help to get started by putting the barrel a little warmer up to 8°C for a few days, but it can quickly get out of control. Normal temperature during ripening is 4°C. There may also be significant differences from barrel to barrel with the same temperature depending on how carefully the fish is cleaned of excess blood. More blood gives a stronger taste. When the barrel is opened after the fish have matured, smells strong content. The contents have been through a fermentation process that has lasted for at least 8 weeks. The fish has in this time fermented and has been fermented trout. Some manufacturers believe that the best result is achieved by maturing at a low temperature for a long time. When the fish is fermented or matured, so it should be stored at 0-4°C (refrigerator temperature). If you want rakefisk with stronger flavor, so the fish can be kept one or two days at a somewhat higher temperature, up to about 8°C. When the fish is fermented or matured, it can be frozen. It stops the process. Vacuum packaging fish are particularly suitable for freezing. Fish in buckets or barrels that are not frozen, shall at all times be covered by the brine. If there is too little brine one can do something new, by boiling 50 grams of salt per liter of water. Let brine cool and pour over the fish. Fish placed in the brine should be frozen at very low temperatures to freeze. Maturation of fish can also be impeded by creating a new brine. This was prepared as above for replenishment, 50 g salt/liter of water. There are local variations, where the most significant variation is the amount of blood left in the fish, as well as whether sugar is used in production. Added sugar will speed up the process. Variations may be where the barrel is placed. Put the barrel warmer so the process will go faster. If sugar is added and the barrel is too warm, the process can get out of control. If this should happen rakefisken discarded. 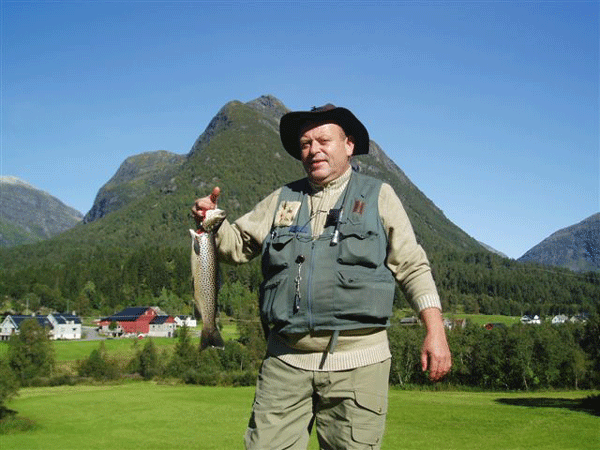
Haukedalen Fishing holiday in Western Norway with Terje Serving: The fish must be spreadable and fresh in color. How it is served varies, but if the fish is whole, so it is often served in small pieces. Accessories are often almond or Ringerike Potato, kohlrabi with carrots, sour cream and onion. Rake fish can be served filleted on flat bread or Lefse with good butter, sour cream and onions/beetroot lettuce. Files can also be wrapped in freshly made potato cakes with sour cream and onions. In more festive layer can rakefisk used on flat bread as tapas, or as canapés held in place with toothpicks. Garnish: Onion rings, capers, cress a raw egg yolk, yes just to mention something that tastes good to rakfisken. Drink: One can not be in doubt. Your favorite beer and one or more snaps is a must. Commercial production: There are several small businesses that manufacture and market rake fish. Among the most famous are the production companies in Valdres, which also markets through the Norwegian Rakefisk Festival. Some have chosen to work and put effort in developing procedures for smooth and high quality of fermented fish. Maturation rate of the displayed fish were: mild, stored and matured. Modern production takes place under very strict cleanliness. Samples are taken of both raw materials and finished rake fish. In the same way as other foods that are not cooked or otherwise sterilized, pregnant women should not eat fermented fish. The same applies to people with weakened immune systems. |
Grilled Redfish with new Danish potatoes and "Grandma" salad
Next Down
Next Up
|
|
1000 g of redfish without scales 1 kg new Danish potatoes 4 tbsp. olive oil 1 bunch lovage 1 bunch basil salt and pepper BBQ dressing for fish Grandmother Salad 2 heads of lettuce (head lettuce or romaine lettuce) 2-3 ripe tomatoes sliced 2 small shallots, thinly sliced Dressing 1 lemon, only juice 2 tbsp. olive oil 1 cup cream 1 to 2 tbsp. sugar salt and pepper 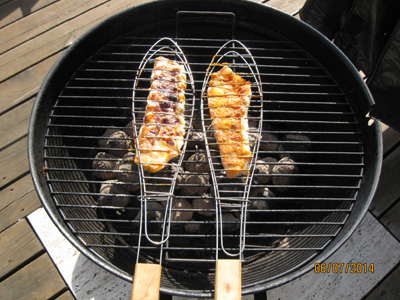
2 red fish fillets on the grill in a practical fish holder Procedure without liability: Start by scraping the skin of the new Danish potatoes with gloves with studs on. You can see a picture under recipe no. 1. New Danish potatoes are cooked only 16 minutes in salted water and some lovage. You can also package the potatoes in aluminum foil with olive oil, lovage, salt and pepper. Wrap the potatoes in portion packs - here 5 pcs. Place the packets on the grill, and turn them often. Depending on the size and heat of the grill must have 40 to 60 minutes. Try looking in a package after 30 minutes, so you can get an idea of the remaining time. Take the potatoes off the grill when they are finished. I used 60 minutes to the shown potatoes.
Redfish fillets are sprinkled with a little salt on both sides 15 minutes before placing on the grill. Brush with BBQ oil on the skin side before placing them on the grill, skin side down. Time will vary between 5 and 7 minutes, again depending on thickness and heat on the grill. The skin should be brown and delicious, but not burned, as it can (should) be eaten. Do you have a fish grill holder, this may be used with advantage, then the fish do not break apart when it turned on the grill. When the skin side have had enough turn the fish and the flesh side is 1-2 minutterr. I used by 6 minutes and 2 minutes to the shown fish. The salad also served on serving plates. Place the tomato slices on plates with thin onion slices. Spread the green pieces chopped salad over. The dressing is poured just before serving. 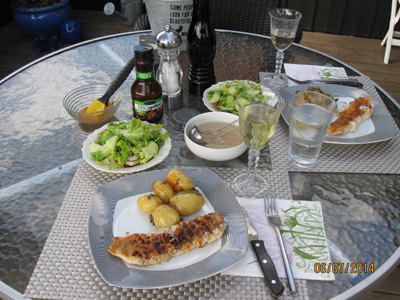
Grilled Redfish with new Danish potatoes and "Grandma" salad Serving: Place the fish with potatoes on a plate and salad on a side plate. Garnish: Basil sprinkled over the potatoes. Drink: A cool and dry white wine fits well here in the summer heat. |
Swedish pike fish cakes with new potatoes and butter sauce
Next Down
Next Up
|
|
3 to 5 kg pike in live weight Gives about 50% fillets 1.5 kg pike fillets 1 onion 2 cloves garlic 3 egg yolks (Plain from 2 eggs stored, see text) 2 tbsp. potato flour 1 to 2 cups cream 1 tsp. salt and ˝ tsp. white pepper 150 butter and 2 tbsp. olive oil 100 g Bacon - see text Accessories: New Danish potatoes Butter Sauce (clarified butter) Lemons remoulade 1 bunch of dill 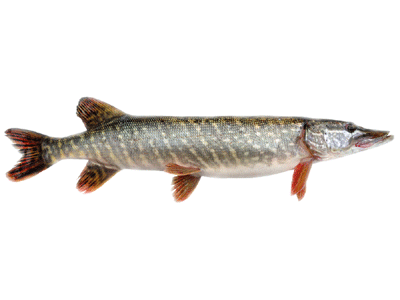
I just need to catch a pike above the minimum size (60 cm) first Procedure without liability: Start by catching a pike, but it must be a pike from stream water or a large, clean lake. Like a brackish water pike, they are the best. A 10 kg pike from a moor must be released as it is not worth eating. In addition, it is important for the moor, as it keeps the water clear because it eats many "trash fish", which eat daphnia, which in turn eats algae.
The pike must be filleted, the large bones and skin removed. There will always be small nerve bones left in the meat, but they are irrelevant as the fish is chopped along with the onion and garlic. (If you want to try the Danish model, add 5% bacon to the fish). Add the mince fish meat salt, pepper, potato flour, egg yolks and while stirring well in the mince fish meat, add cream. Whip 1 to 2 egg whites stiff and turn an appropriate amount gently into the mince fish meat. Find a large suitable pan that can hold all the fish meatballs at once. If you do not have it, just fry the parts twice. Melt well with butter on the pan over low heat. Shape the mince fish meat into small meatballs with a tablespoon and fry them first over low heat for a few minutes. Then turn up the heat so that they turn golden brown. It takes approx. 6 minutes for the first side. Turn down the heat and turn the meatballs. Repeat the same procedure for the other side. It is important that the butter does not "brank", because then the meatballs will not be airy. The mince fish meat should be airy and soft so that it can be shaped into small fish cakes. So, the above amounts are indicative, but just get started because it can not go completely wrong. Serving: Serve fish meatballs with potatoes, butter sauce and remoulase on a plate. Garnish: Sprinkle a little green over the potatoes and serve with lemon wedges. Drink: A cool and dry white wine goes well with it in the summer heat. Hints: The pike is a lean fish, so I like to add 5 to 10% bacon or lard to the pike meat. I chop bacon / lard once before, it is chopped again together with the pike meat. Note: The pike's minimum size 60 cm and protection period 1 April to 15 May both days incl. in Denmark. In Sweden? It is usually the owner, tenant or manager of the fishing water who determines the minimum size and protection times for pike. |
Brown cabbage with smoked bacon, salt pork, bread and mustard
Next Down
Next Up
|
|
1 large cabbage 4 pcs. peeled potatoes 500 grams of bacon or smoked ham 800 grams of salted pork 75 grams of brown sugar 75 grams butter 1 tassel fresh thyme 4 bay leaves 2 leeks and 1 onion 4 cloves garlic 1 red chili pepper 2 dl Porter and 2 dl pork broth Salt and pepper (be careful with salt) 8 slices of dark rye bread Beetroot Dijon mustard 
Brown cabbage with smoked bacon, salt pork, bread and mustard Procedure without liability: Brown cabbage is no fish meal, why is it in here? On 30 September of each year ending our salmon fishing season with a dinner for men: Brown cabbage with smoked bacon, salt pork, bread and mustard and a beer and a bitter schnapps of the homemade. So therefore. This year I was responsible for cooking and here is my recipe.
Wash and cut cabbage, leeks, onions, garlic and chili pepper into suitable pieces. Melt the sugar in the pan and then came the butter in (remember it must be a large saucepan, cabbage take up much space in the beginning). Come cabbage with leeks, onions, garlic and chilli to the pan and brown it until it is golden brown. Turn the vegetable mix to make it become browned all over. Place the bacon, pork and potatoes in the pan and pack the mixture well around the meat. The meat should be completely covered with vegetable mixture. Add the bay leaves and thyme. Come Porter and pork broth through and simmer about 2 hours with the lid on. Make sure it does not boil dry, primed with water, if it happens; but some of the liquid should evaporate as it does not have to be white cabbage soup. This can be done by the lid of the last 15 minutes of the time. The meat is removed when it is tender, and rest at least ˝ hour before the cut. The liquid is vaporized first when the meat is taken from the pot. 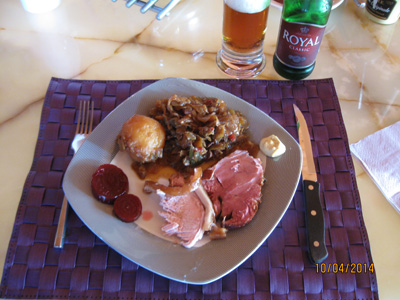
Brown cabbage with smoked bacon, salt pork, bread and mustard Serving: Serve with mustard, beets, rye bread and potatoes cooked with cabbage. Garnish: It could be a fresh sprig of thyme. Drink: A beer and and a bitter schnapps of the homemade is suitable to the meal. Hints: Be careful with the salt as used salted pork and pork broth that contains salt. |
Pigeons fried in pan served with Waldorf Salad
Next Down
Next Up
|
|
4 cleansed wood pigeon 4 tbsp. neutral oil and 75g butter for frying 12 to 16 slices bacon 20 pcs. juniper 20 pcs. coriander seeds 1 tuft fresh thyme 1 tuft of parsley 1 leek or 1 onion chopped 1 clove garlic minced ˝ red chilli pepper chopped 2 cup dry white wine or red wine or chicken stock or 50% of each 2 to 3 dl whipping cream 4 cl schnapps or vodka 2 tsp. salt, 1 tsp. sugar ˝ tsp. pepper ˝ tsp. Roquefort cheese Accessories: Waldorf salad and lingonberry 4 stalks celery into small cubes 1-2 apples (sour) into small cubes 300 g green, ripe grapes seedless and halved 40 g walnuts some crushed 3 dl Creme fraiche 18% 2 tsp. vanilla sugar or honey 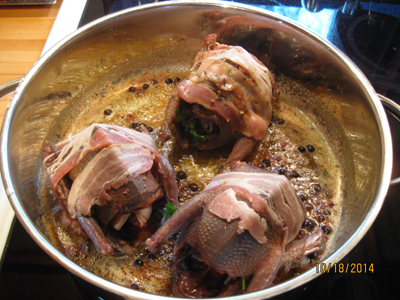
Pigeons for 3 personr fried in pan served with Waldorf Salad First, some facts: In England, hunting season on pigeons throughout the year. The peak season is twice a year. Winter/spring is February and March. The summer/autumn is July, August and September. Until 1994, pigeon hunt in Denmark was from August 1. to December 31. Later changed from September 1. to January 31. In 2007 it was changed from October 1. to January 31. Believe it or not, in 2010 came another change from November 1. to January 31. The reason is that the pigeon is lying on eggs and therefore may not be shot. I've never seen pigeons lie on eggs in October and February. In England the pigeons are not lying on eggs, or do they? It is about time to get a common EU law on hunting?
Procedure without liability: Rub the pigeons inside and outside with salt, sugar and pepper. Unroll some parsley into one or two pieces of bacon and put it into the pigeon. Add a few pieces of bacon around the pigeon. Heat the oil and butter in the saucepan and brown the pigeons on all sides. Getting the cleaned vegetables and spices into the saucepan. Pour the schnapps into the saucepan and immediately come lid on. Let the vapors work for three minutes so the meat will be tender. It is an old hunter trick; if it works, you have to find out for yourself. It does not hurt. When the snaps have evaporated, pour the liquid on with a small piece Roquefort cheese. It provides a magnificent wild sauce. The pigeons simmer slightly under the lid until tender (see hint), make sure the liquid does not evaporate. Additional liquid (water) may be added. After ˝ hour, 1 hour or 2 hours (see tip) take the pigeons up and kept warm under the covers in a wrapping of aluminum foil and tea towels. The sauce sieves and adds the whipped cream constantly whipping until the desired consistency is achieved. You can add a dollop of cold butter under constant whipping. It should not be necessary to add gravy browning to the sauce, but if you think that is too pale, you can simply do this. The pigeons in halves and place on a serving plate with the caramelized potatoes. 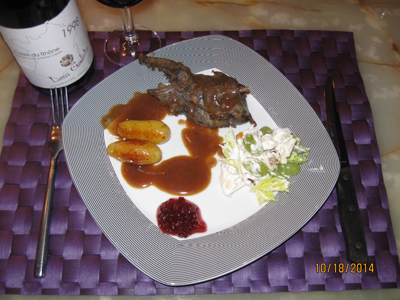
Use the same recipe for Poussins (28-day-old chicks) Serving: Serve with Waldorf salad, cranberries and caramelized potatoes. Garnish: It could be a fresh sprig of parsley or green celery leaves. Drink: A good full-bodied red wine to your taste. Hints: A pigeon is not a pigeon. There are two kinds of pigeons for food: A hunting-pigeon (wild pigeon) and a young pigeon farmed (squab) also called tamed-pigeon. The big difference is in the meat muscle. The hunting-pigeon has flown much before it was shot, why pigeon developed strong muscles, and it is these that make the meat tough. Squab has never flown, as it slaughtered as soon as it has reached an appropriate weight (approximately 500 g) in its aviary/pigeonholes. It takes about 4 weeks to achieve that weight. Therefore, one cannot determine the cooking time exactly before knowing which pigeon you are dealing with: An old hunting-pigeon (2 hours), a young hunting-pigeon (1 hour) or a squab (˝ hours). In the hunting-pigeon you can see bullet holes and find hail. This is not seen in a squab. Another characteristic can be: hunting-pigeon dark meat - Squab white meat. Best viewed while standing with one in each hand. Cooking time for Poussin is about 35 minutes, calculated from browning. Sour cream in Waldorf salad can be replaced by many other milk products, which are more, low-fat, such as: plain yogurt, fromage frais, whipped cream and A38. |
Stirred Tatar for 4 people with homemade Hot, Red Thaimix
Next Down
Next Up
|
|
720 g fresh chopped or scraped beef of the best quality - beef inner thighs 1 pc. medium size, finely chopped shallots 1 tbsp. finely grated horseradish 10 pcs. finely chopped gherkins 2 tbsp. chopped capers 2 tbsp. finely chopped parsley 2 tbsp. finely chopped estragon 2 egg yolks 1 tbsp. mustard (Dijon or wholegrain mustard) 1 tsp. Hot, Red Thaimix or 10 drops of Tabasco. The courageous takes 20 drops 2 tbsp. Lea & Perkins Worcestershire Sauce 2 oz. Cognac Salt and black pepper from the grinder 4 fresh egg yolks for serving Accessories A salad of your choice French fries or butter toasted rye bread or walnut bread (my favorite) 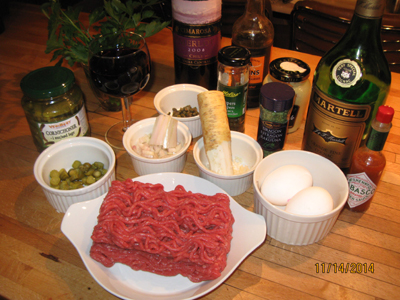
Stirred Tatar for 2 people with homemade Hot, Red Thaimix Procedure without liability: It is important to keep a good kitchen hygiene when using raw meat and egg yolks in cooking. Take a suitably sized bowl, where all the ingredients can be mixed together. I calculate 180 g beef meat per adult person to a Friday "Dinner". The image above shows the ingredients for 2 persons.
Add the minced or scraped beef into a bowl. Finely chop the ingredients as described above and place it in the bowl. Add 2 egg yolks, mustard, Hot, Red Thaimix (or Tabasco), 2 oz. Cognac, salt and pepper. Stir tataren thoroughly with a suitably large spoon. 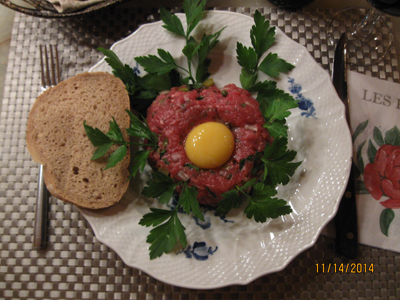
See Hot, Red Thaimix above No. 47 Serving: Take four large plates and garnish them with rinsed and dried lettuce leaves. Distribute tataren into four equal portions and form a flat steak with a central recess. Add another raw egg into the recess sprinkle some chopped parsley over it. Server tartare steaks immediately. Garnish: Finely chopped parsley, possible a bowl green salad tossed in olive oil, tarragon vinegar and a dollop of mustard. Drink: A good, strong (Hot) tartare requires a cold beer and iced vodka. Then you are at home in the Tatar kingdom. Or a good Merlot red wine from 2008. Hints: Server some good french fries or butter toasted rye bread with the meal. I prefer a walnut bread, it works better for that meal. |
Pheasant with apples, dates and Port Wine Sauce
Next Down
Next Up
|
|
2 fresh, skinned pheasants about 600 g each salt, freshly ground pepper and a little dry estragon 4 tbsp. olive oil 4 tbsp. butter 5 cup chicken stock 2 cup port wine 1 onion chopped fine 3 cloves garlic, halved 1 red chili pepper halved 4 dates without stone 1 large apple, diced 1 carrot/parsnip/parsley root 4 sprigs rosemary 2 stalks of celery 1 tsp. honey or syrup 2 tsp. Dana Blue cheese 1 cup whipping cream Accessories Waldorf salad and lingonberry/cowberry 4 stalks celery diced 1-2 apples (sour) into small cubes 300 g green, ripe grapes seedless halved 40 g walnuts some crushed 3 dl creme fraiche 18% 2 tsp. vanilla sugar 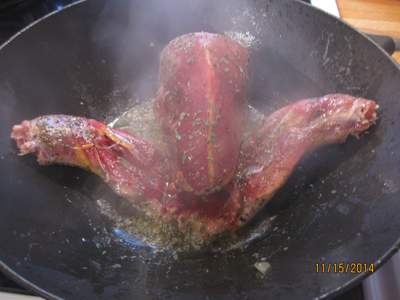
The pheasant is browned here in a cast iron pot with high sides. Only room for one pheasant at a time Fřrst lidt facts: Clean the pheasants well and rinse off any blood in cold water. Dub them dry and rub pheasants in salt and pepper, both inside and outside. Drizzle with honey/syrup and sprinkle a little estragon above. Heat the oil/butter into a frying pan; put one pheasant into the pan with the back down so the thighs are roasted first. See the picture. Turn the pheasant with the breast down. Then turn the pheasant on the side. First on one side, then the other side. The pheasant must have some 4 minutes on each side. Repeat for pheasant number two. Do you have a pan that is large enough for two pheasants, use this.
The Hunter trick: If the pheasants must be especially tender, pour 4 oz. snaps into the pan, and comes a lid on for 3 minutes before you go to the next step. Remember the steam from the snaps are highly flammable, so immediately on with the cover. (Flambéing is done this way) Add onions, garlic, chili pepper, dates, apples, the vegetables and rosemary in the pan and saute the vegetables for a few minutes. Pour in the chicken broth and Port wine. Now the pheasants must simmer for approx. 60 minutes. After half the time, the pheasants are flipped on the other side. The pheasants are taken up and kept warm under aluminum foil while the sauce is sown and cooked with Danablue and whipped cream. You may need to boil the sauce a bit before entering a dab of Danablue and whisk it with whipped cream until a smooth consistency is achieved. Season the sauce with salt and pepper and keep the sauce warm for 5 minutes while halving the pheasants. Usually it is not necessary to use gravy browning in the sauce, but it's up to you. 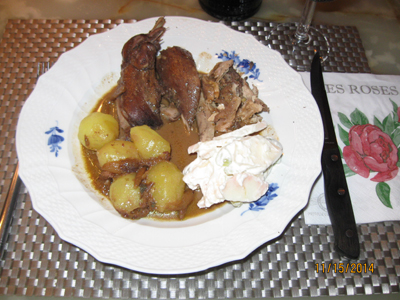
Pheasant in Port Wine Sauce served with small potatoes and Waldorf salad Serving: Place half a pheasant on each plate, with some boiled potatoes. Pour the sauce over, and come Waldorf salad on the plate. Garnish: Lingonberry is well suited for pheasants. Drink: A good Italian Merlot red wine from 2004. Hints: Use the Hunter trick, it works. The meat was tender and juicy. |
Lobscouse with chives and beetroots
Next Down
Next Up
|
|
800 g young cattle in cubes 2x2 cm (Beef lump or beef breast or lamb lump / neck) 1 kg potatoes (King Edward or Bintje) 4 tbsp. rapeseed oil (neutral oil) 2 tbsp. butter 3 onions, diced 3 cloves garlic, diced 10 bay leaves 10 whole peppercorns 2 tsp. salt 5 dl chicken broth (1 cube) 2 dl white wine Accessories Beetroot Chives Rye bread Worchestershire Sauce 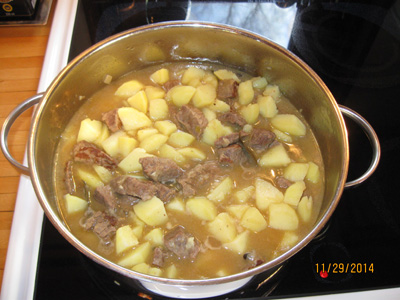
A nice big pot of lobscouse just ready to serve First, some facts: I sat down one evening and saw the pictures from the fishing trips on Řresund, we were on the good ship "MS" TINA, and here I came across a dinner with lobscouse. This dinner, I will therefore bring here.
Procedure without liability: I used the Danish young cattle into cubes, which lay in packs of 300 g to 20.00 kr. per pack (offers). Put oil and butter in a large saucepan appropriate. Fry the meat on all sides for about 10 minutes. Then add onion, garlic, bay leaves salt and pepper to the pan. Let the onions become clear about 5 minutes, then pour the chicken stock and white wine over and give a rehash. Turn down the heat and let it small-simmer for 1 hour with the lid on. Meanwhile, prepare the potatoes. Peel the potatoes and cut into cubes. Boil the potatoes for a maximum 5 minutes in as little water as possible. Drain and save it for later use, if needed. Place the potatoes in the pot to the meat and give a rehash. Turn down and simmer for 20 to 30 minutes with the lid on. Now you need to assess whether there is too little or too much water in the saucepan. If there is too little, add more potato water. If there is too much, you take the lid off and let it evaporate in the last 20 to 30 minutes. Be aware that it does not burn on the bottom of the pan, if there is too little liquid. Stir often in the pan. Total cooking time is about 2 hours for the meat used. A little about potatoes: You need potatoes, which can easily overcook. It is the potatoes, which are normally used for mashed potatoes. In Sweden, which is known for a good mashed potatoes, hence the King Edward. Here in Denmark is often used Bintje, but you must of course make a choice, according to the varieties that you can buy. But note that if the potatoes are boiled with salt, the potatoes are not so easily overcook, and if you put them in boiling water, the potatoes are not so easily overcook. Therefore I precooked potatoes for 5 minutes before I got them up in the pan to the meat. 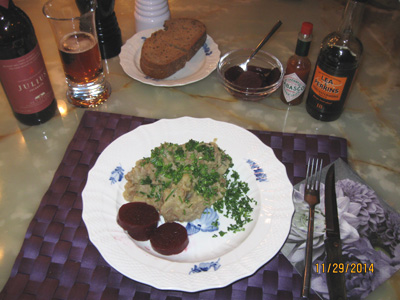
Lobscouse with chives and beetroots Serving: Distribute lobscouse on 4 plates with pickled beetroot and rye bread. Place salt and pepper mill on the table along with a Worchestershire Sauce and Tabasco sauce. Garnish: Sprinkle with plenty of chopped chives. Some prefer parsley. Drink: A good ship's beer, and a dram is suitable. This Christmas I drank a Julius Christmas brew. |
Oriental or Danish fish stew
Next Down
Next Up
|
|
800 g of fish fillets of light and solid lean fish such as: Cod, pollack, ling, catfish or hake 20 pcs. cleaned tiger prawns 4 cloves garlic, minced 1 pc. Onion, minced 4 pcs. spring onions into small slices 1 pc. red bell pepper into strips 1 pc. yellow bell peppers into strips 1 pc. red hot chili into small slices 4 pcs. ripe tomatoes, sliced 16 pcs. black olives without stones 1 level tsp. turmeric 1 tsp. salt and ˝ tsp. white pepper Accessories 3 dl rice cooked according to the recipe on the bag Add the rice: 1 whole onion, 2 whole cloves of garlic, 4 cloves 1 cm whole ginger, 4 bay leaves or lime leaves Or a good part of saffron Oriental: 2 cm grated ginger 1 tsp. hot paprika 1 bunch cilantro 2 ˝ dl coconut milk 4 tbsp. palm oil 2 limes Danish: 2 cm grated horseradish 1 tsp. sweet paprika 1 bunch parsley 2 ˝ dl whipping cream 4 tbsp. olive oil 2 lemons 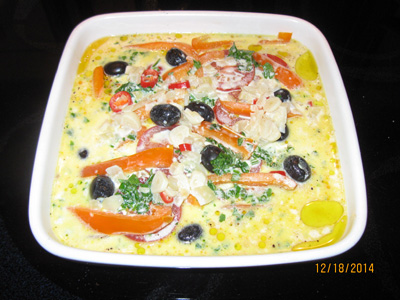
Oriental or Danish fish stew. The meals look similar, but tastes differently First, some facts: Fish stew can be made in many ways, but I have chosen an Oriental and Danish fish stew, which is very tasty. Use the fish that you like best or which can be obtained after the season. The spices are added, depending on whether the dish is to be Oriental or Danish.
Procedure without liability: Begin spicing the fish fillets. Place the fish fillets in a large, ovenproof dish and sprinkle salt and white pepper over. Drip lime/lemon over. Sprinkle grated ginger/horseradish on. Place the pan aside while you make the basic sauce. Come palm oil/olive oil in a pan and switch the raw tiger prawns a few minutes until they have taken color. Take them out and set them aside. Add more palm oil/olive oil if necessary, switch, turmeric, hot/sweet paprika, garlic, onion, scallions, chili pepper, yellow and red bell pepper for 5 minutes, shall not browned. Add the coconut milk/cream and bring to the boil, then turn off the pan. The basic sauce poured over the fish, garnish with tomatoes, black olives and cilantro/parsley. The dish is covered with aluminum foil and placed in a 180°C preheated oven for 30 minutes. Take the dish out and come tiger prawns on. Baking even further 15 minutes to 30 minutes without aluminum foil look for when the sauce begins to bubble, then the meal is finish. 
Oriental or Danish fish stew. The meals look similar, but tastes differently Serving: Place the dish on the table and serve the cooked rice. Garnish: Sprinkle with plenty of chopped cilantro/parsley and lime / lemon wedges. Drink: A good chilled white wine fits the meal. Hints: Rice can also be cooked with a good portion of saffron, but it costs the box. |
Bread from the skerries a'la Raija and Erik from Finland
Next Down
Next Up
|
|
The recipe provides 2 loaves 1 L of buttermilk 50 g yeast 1.5 dl syrup (light or dark as desired) 3 dl Tuoppi Crushed Rye Malt about 280 g Rye Malt - Beer malt - try a local brewery. It is roasted malt 3 dl wheat bran (fiber) about 150 g 3 dl wholemeal about 270 g 10 plain flour about 690 g 1 tbsp. sea salt or smoked salt 2 tbsp. butter flakes or olive oil Option: 1 tsp. Karlsens Licorice Granules 50 g sesame seeds Syrup water for brushing: 1 cup warm Wiiebroe Porter 1/2 cup hot syrup mix well 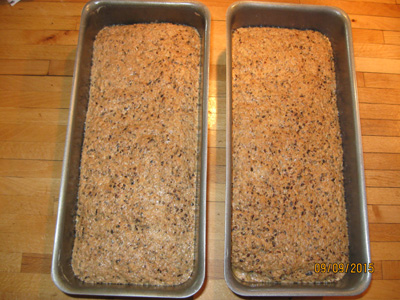
Bread from the skerries a'la Raija and Erik from Finland First, some facts: Erik and Raija I have known for many years. Erik and I fished together several times. Erik lives half in Denmark and half in Finland, from where the recipe comes. Beer malt - Rye Malt - also comes from Finland. One use the beer malt to produce a light beer - almost without alcohol - but read even more about this on the website.
Procedure without liability: Warm buttermilk to 28 degrees in a saucepan or in the microwave. Pour the buttermilk into a large bowl. Crumble the yeast and mix well. Add the remaining ingredients: salt, syrup, beer malt, wheat bran, rye flour and wheat flour, stirring with a heavy wooden spoon. The dough should only knead gently together. It is slightly sticky. Save a little flour to sprinkle on the kitchen table. Roll out the dough on the kitchen table and form a short and thick sausage. Divide the dough in two and then roll two sausages and put them into two 2-liter molds greased with butter or olive oil. Brush well with water syrup. Cover with a tea towel and leave to rise for 1˝ to 2 hours at room temperature. Prick with fork holes in two rows along the surface of the bread. Preheat oven to 175 degrees. Bake loaves in middle of oven on a rack for about 2 hours. When the loaves are baked about 1˝ hours, brush the loaves with syrup water and continue baking for about another 30 minutes. Let the loaves be cool overnight, only covered in a clean tea towel. Cut best the day after with a good bread knife. Cold store the loaves. Can vacuum packed and frozen. 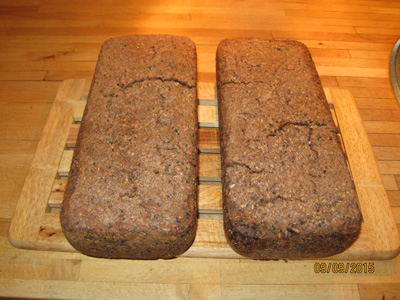
Bread from the skerries a'la Raija and Erik from Finland Serving: Used as plain rye bread, but has a different taste because of beer malt. Garnish: Yes! what garnish one rye bread with? Make yourself your own experience. Drink: It depends on when you eat rye bread - breakfast - dinner - or evening. Tips: I could not wait for the day after, so I buttered me a piece of bread with a hot fish fillet, remulade and lemon garnished with cress. It was just the thing for a lunch. The option of licorice granules can be recommended for cheese sandwiches with jam. I have unfortunately lost my good work colleague and fishing buddy. He passed away a few years ago and his wife Raija moved back to Finland. Honor be his memory. |
Homemade bacon
Next Down
Next Up
|
|
The recipe gives 12 pieces of bacon of approx. 600 g 3 pieces. Rib step at 4 kg / each. with rinds and bones give: 10 kg real meat Vacuum salting 360 g Salt distributed as follows if you want to use nitrite salt 180 g table salt, fine 180 g Nitrite salt 0.6% 100 g Brown sugar 30 g Black pepper, powder 20 g Cayenne hot pepper, powder 30 g Garlic powder / granules 30 g Hungarian paprika, sweet 20 g Juniper, crushed 20 g Allspice, powder 20 g Thyme, dried 5 g Sodium ascorbate E301, See Tip Read about the use of nitritsalt If you follow the recipe, you will get a 3.6% salting degree and a maximum limit value for nitrite of 108 mg / kg meat For the smoke oven 90% beech smoke dust for 3 to 4 times cold smoke 10% juniper smoke for 3 to 4 times cold smoke Smoke 3 to 4 times of at least 12 hours duration The temperature should be between 18 ° C and 22 ° C but must not exceed 27 ° C To the vacuum packer 2 rolls of groove bags 28 cm wide and 5 m long 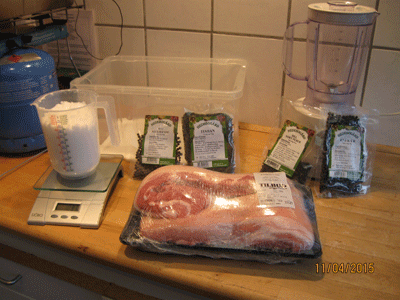
Ribs ready for salting 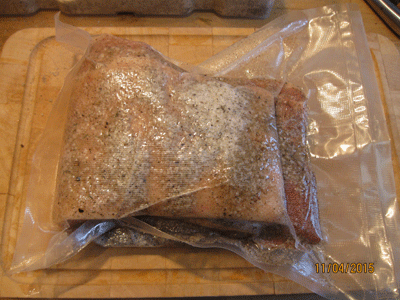
Ribs are now vacuumed 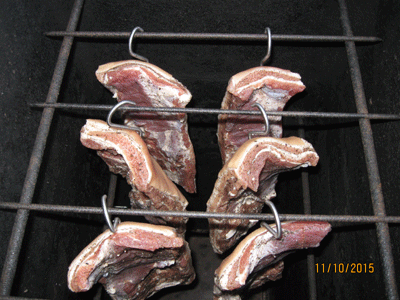
Ribs are hung in the smoke oven 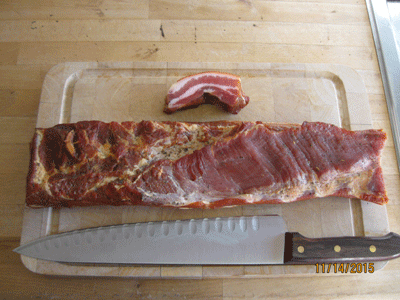
Ribs are ready to be smoked and ready to be cut First a few facts: This recipe is based on dry salting in vacuum bags, so you should get a vacuum packer. I bought a Andersson vaccum sealer VMS 2.0 in NetOnNet, last time I was in Sweden, for 499 SEK. It's just amazingly good, you put an empty beer can in and vacuum it, it becomes flat like a pancake. In Denmark you can buy extra bags in Grillbutikken. The bags are available in several widths 28 cm, 20 cm and 12 cm, all in rolls of 5 meters. Remember that it must be grooved bags. I mention this because NetOnNet does not sell outside Sweden. Postscript: The bags can now be bought in many places in Denmark. Grooved bags have taken over the smooth bags because the vacuum packs - with proboscis - that used smooth bags were useless.
Procedure without liability: I bought 3 large pieces of rib roast of approx. 4 kg per piece. The roasts were not scratched but had little bone at one end. When the bones were cut off, I had 10 kg of real meat left. Now the meat needs to be salted and seasoned. Whether to use nitrite salt is up to you. The taste is no different if you only use ordinary fine table salt, but the color of the meat becomes pale without nitrite salt. The durability is also less without nitrite salt. The spices must be dried spices so as not to contain soil bacteria. The amount per kg of meat of all ingredients can be seen in my Spreadsheet. Start by mixing all the spices and mix it with salt and sugar in a suitable plastic container intended for food. The pieces of meat are now added - one at a time - to the mixture and rubbed well into the salt, sugar and spices. Get into all the folds and cavities. Place the meat in a bag that has been welded twice at one end. The indicated amount of the mixture must be distributed on all pieces of meat and the entire amount must be in the bags. The bag must be clean and dry where it is to be welded. Wipe with paper from a paper towel. I welded the bag once more after it was vacuumed. Therefore, make sure that the bag is long enough for double welding at both ends. Repeat the procedure for all pieces of meat. I just have to mention here that my rib roasts were in double length as seen in the top picture. All were just over 40 cm long. The bottom picture shows the roast folded, salted and vacuumed. Now put all the bags in the fridge, where they will be salted for the next 10 days. I turned the bags once every day so that the salt in the meat would be uniform. After 10 days, the bag is cut open and the meat is taken out and rinsed well under the cold tap. All bags of liquid were weighed to see how much liquid was extracted from the meat. I started with 10 kg of meat, added 0.675 kg of salt and spices. The liquid weighed 2 kg, ie now 8.675 kg of salted meat. An important part of the process now is to air dry the pieces of meat for at least 2 days, because otherwise the meat will not receive the golden color when it is to be smoked. Use some good meat hooks to hang the pieces of meat in. They can be bought in Silvan for DKK 35.95, but I have also seen them in BilTema for DKK 29.00. Both places for 2 pcs. Prepare your smoke oven for cold smoking for the next 12 hours or more. I use my maze tray it lasts at least 18 hours before it needs to be cleaned and refilled for the next time smoke. In the period from Tuesday evening to Saturday morning, the meat was cold-smoked at approx. 22 ° C four times. It is the case that the temperature in my smoke oven during cold smoking is between 8 ° C and 10 ° C above the ambient temperature. My smoke oven is otherwise electronically controlled, but I do not use it for cold smoking. I always use beech smoke soil and a little juniper smoke soil for cold smoking of fish and meat. Remember good draft in the smoke oven so that acid smoke does not form. Now the meat has turned into salted and smoked bacon and is ready to mature before being eaten. Hang the meat in a suitable refrigerator for a few weeks. Some water also shrinks during drying and cold smoking, so weigh your finished bacon. There should be approx. 30% shrinkage for long-term durability. You can buy DRY AGING BAGS - costs a "Farm" - to mature your meat in. I have tried these bags and they seem to work. Serving: Of course, I can not name all the good dishes that bacon is suitable for. So therefore just a few. Bacon with onion (recipe no. 106) and lunch omelette with bacon (recipe no. 83) and of course on a piece of homemade liver pate (recipe no. 72). Garnish: Many dishes can be decorated with something green. Drink: The dishes I have mentioned go well with a cold beer and a dram. Tip: Try brown cabbage or yellow pea soup with a slice of homemade bacon. When you fry this bacon, you will find that it does not "squirt" on the pan, as the purchased bacon does. This is because it is not sprayed with salt water, but instead the water is extracted from the meat. Fry the bacon over medium heat on both sides so that it turns golden brown but not branked. The shelf life of this vacuum bacon in the freezer is assumed to be 6 months. Unopened in refrigerator 2 months. It is optional to add E301 Sodium ascorbate = E300 Askorbic acid. It is an antioxidant. On the plus side, Sodium ascorbate makes the meat more red and reduces over time the residual nitrite content in the finished product product. Both ascorbic acid and sodium corbate are forms of vitamin C and are common food additives where more specifically sodium ascorbate falls into the category of mineral salts. Although ascorbic acid is the pure form of vitamin C, sodium ascorbate is the sodium salt of ascorbic acid. |
Delightful apple pork with onions and homemade bacon
Next Down
Next Up
|
|
8 apples, peeled and cored 2 large red onions 16 slices of homemade bacon 1 tbsp. sugar 1 tbsp. Cider vinegar A little salt - depends on how salty you made your bacon 4-8 slices of rye bread 1 glass of beetroot I used 'Red Ingrid Marie' apple a little apple cider vinegar, but no salt 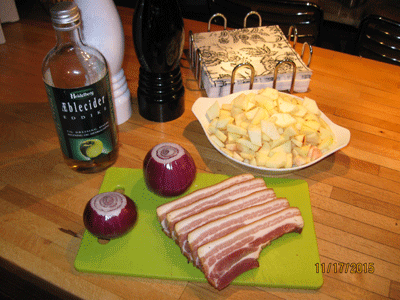
Ingredients for apple pork with red onion and homemade bacon for 2 people Procedure without liability: Cut your homemade bacon for about 6 to 8 mm thick slices and places them on the frying pan. You may need to do this in 2 rounds, not to get too many pieces, so they stick together during cooking. If you believe to be sprinkled with a little salt, you do it. Fry them in the pan over medium heat on both sides, so they get a good color but without being burned.
In the meantime, the onions peeled and cut into slices. The apples are peeled and cut into quarters, apple cored are cut away. Share apple into 1/8 parts. When the bacon is done remove it from the pan and place on paper towel to drain. Frying fat remains in the pan. Fry the onions first until they are glassy then put the apples in the pan and cook all for about 15 minutes under a lid. But remember to stir once in a while. Fry and stir until you have found the right consistency. Add sugar to taste, if you want a sweeter taste, or if the apples were sour. Is there too little liquid, you can add apple juice, white wine or maybe apple cider vinegar of the good kind, as shown in the picture above. 
Delightful apple pork with red onion and homemade bacon for 2 people Serving: Apple pork served on a piece of rye bread sprinkled with chives or soft thyme branches. Garnish: Many meals can be decorated with something green. Drink: A companion will be a cold beer and a dram. Hints: Do you use bacon from the recipe above, you will see that it is not "sizzling" in the pan, as it is salted and long-term cold-smoked. Bacon pieces do not stick together, which bought bacon does. My wife was delighted; the cooker should not be cleaned for frying fat. I may do it again in her kitchen, she said. |
Sous Vide with loin of veal
Next Down
Next Up
|
|
800 g loin of veal 1 tbsp. sea salt Dried spices 1 tbsp. whole black pepper 1 tbsp. whole allspice 1 tbsp. whole coriander 1 tbsp. thyme Blend together with coarse sea salt Equipment Vacuum packages with grooved bags Sous Vide Tank 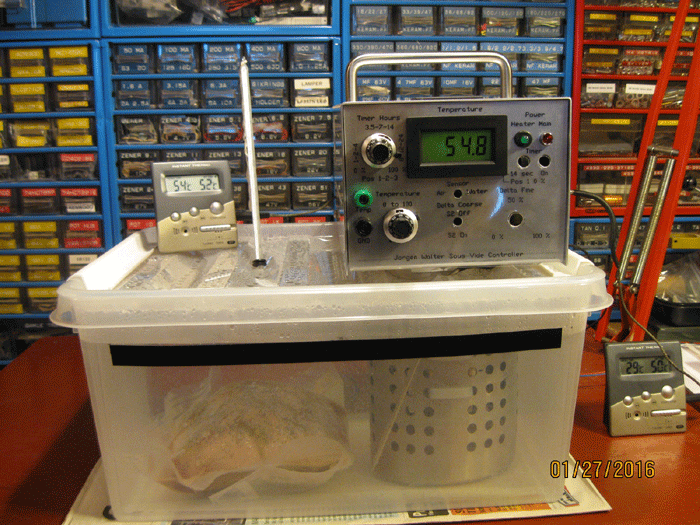
Homemade Sous Vide tub is tested with veal culotte First, some facts: Let it be said at once, meat preparations "under a vacuum" = "Sous Vide" is a great mouthful to put teeth in. The meat is so tender that you can chew it between the eyebrows. However, it takes some time, between 6 hours and 12 hours is not uncommon for 1 kg of beef at 55°C. Moreover, it also requires expensive equipment to cook the meat. You will need a vacuum packages with accessories as well as a "Sous Vide Tank" at least 10 liters. I bought a vacuum packages in Sweden at a reasonable price, so I decided that my winter project would be a "Sous Vide Tank". Later I have seen deals on these to 1,500.00 DKK, but they were all only 8 liters. It can go for a roast rump of 1 kg, but how accurately it keeps the temperature is uncertain. I would refer to my homemade Sous Vide Tank for long cooking meat, you can even read more, and judge if this is something for you.
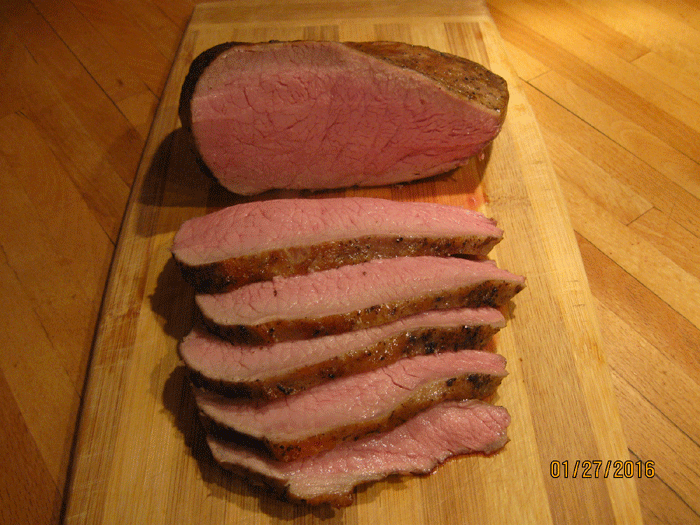
Sous Vide veal culottes Procedure without liability: I am a novice in terms of Sous Vide cooking, so I only go with the successful recipes that I have made. "Buy 3 and pay only for the most expensive one", it was a slogan in Brugsen up for Christmas for 3 culotte roast. So it was my choice for the first experiment. Clean the roast for tendons, but let the fat be on. Give the meat a frying crust on all sides in hot oil, max. 1 minute on each side. To 1 kg of meat used above mixture of salt / spices. Rub it well into the meat after it is browned. Place the meat in the vacuum bag and suck the air out. Place the bag in the refrigerator overnight. The next day the Sous Vide tank is ready at 10:00 (55°C), and the meat is placed in the tank. Exactly 17:00 - that is seven hours after - take the meat up. Is then placed under a hot grill for 10 to 15 minutes. The meat can be cut immediately afterwards, and you get a piece of meat as shown in the picture above. Note: Some cooks give first a rose crust after the meat has been in "Hot Tank". You can of course decide for yourselves. I do it before, because of health reasons. I mean to reduce undesirable surface bacteria in this way. For all Sous Vide recipes I will only come up with the recipe for cooking of the meat / fish. The accessories you'll find out for yourself. |
Sous Vide with beef cuvette
Next Down
Next Up
|
|
1000 g beef cuvette 1 tbsp. sea salt Dried spices 1 tbsp. whole black pepper 1 tbsp. whole allspice 1 tbsp. whole coriander 1 tbsp. thyme Blend together with coarse sea salt Equipment Vacuum packages with grooved bags Sous Vide Tank 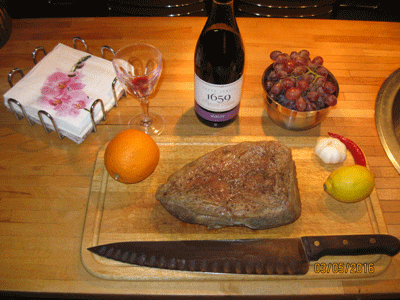
Sous Vide with beef cuvette Procedure without liability: The successful experiment with a loin of veal - see above - should be tested with beef cuvette of 1000 g that I found on sales for 68.00 kr. According recipes online, such an "guy" must have 12 hours at 54°C.
Clean roast for tendons, but let the fat be on. Give the meat a frying crust on all sides in hot oil, max. 1 minute on each side. To 1 kg of meat used above mixture of salt / spices. Rub it well into the meat after it is browned. Place the meat in the vacuum bag and suck the air out. Place the bag in the refrigerator overnight. The next day the Sous Vide tank is ready at 05:00 (54°C), and the meat is put in. Exactly 17:00 - that is 12 hours after - take the meat up. Is then placed under a hot grill for 10 to 15 minutes. The meat can be cut immediately afterwards, and you get a piece of meat as shown in the picture above. Note: Some cooks give first a rose crust after the meat has been in "Hot Tank". You can of course decide for yourselves. I do it before, because of health reasons. I think to reduce undesirable surface bacteria in this way. 
Sous Vide with beef cuvette There was a big difference in the tenderness of the two pieces of meat, loin of veal was 100% tender, but beef cuvette was less tender - only 50% - if one can measure the tenderness in this way. About this difference lies in the quality of meat, or whether beef cuvette must have 16 hours is uncertain. I will try next time, I bought two beef cuvette. |
Italian beef casserole with beef cuvette and chorizo sausage
Next Down
Next Up
|
|
800 g beef cuvette 4 Chorizo sausage 150 g smoked bacon, diced 4 carrots 1 leek 1 onion 4 cloves garlic 2 sticks celery 1 large can tomato puree 1 cube chicken stock 1 hot chili pepper (Hot Carrot) 3 tbsp. mild paprika 2 tbsp. wheat flour 1 fl. Wiibroe Porter 4 tbsp. Extra Virgin Olive Oil 100 g butter 1 teaspoon. sea salt Mashed potatoes 8 large potatoes 50 g of butter 2 dl. whipping cream 1 bunch lovage Season with salt and white pepper 
Italian beef casserole with beef cuvette and chorizo sausage Procedure without liability: In these times when beef coulotte / cuvette roast is cheap, you should try different recipes with them. I will make an Italian stew with chorizo sausage and some smoked bacon, and a lot of vegetables. It is of course up to you which and how many vegetables you choose. I give above my idea of a good composition.
Clean roast for tendons, but let the fat be on. Cut into 1 cm thick slices from the thin end. The pieces are divided into 2 or 3 pieces, so you get bite-sized chunks. In a plastic bag executed wheat flour and mild paprika, meat lumps empty into the plastic bag and the bag is shaken well. A large heavy-based saucepan with oil and butter put the heat. When the fat is good hot, put the meat on the the saucepan and browned on all sides. Is the saucepan small, one must do it in two stages, the meat must be in one layer on the bottom of the saucepan. The meat should be taken up and bacon switches in the saucepan. All vegetables are cleaned and sliced / diced. Getting them to the saucepan and mix them with bacon and browned meat. Come tomato puree, chicken stock and a bottle of porter in. Stir in the pot and season with salt. I used 2 "Hot Carrot Chili Pepper" strength 7 - homegrown. It was just "Hot" enough for the lady of the house. So remember yourself to try the strength of your chili pepper. Turn down the heat and let it simmer for 90 minutes, look after the liquid does not evaporate, add water, if necessary. I added 1 cup whipping cream in right before serving to take some of the "hot" taste. The potatoes are peeled and cut into large cubes, put on the heat and simmering for 20 minutes with a bunch lovage, but without salt. Pour off the water and lovage removed. The potatoes are mashed with a little butter and cream, season with salt. (Normally also with white pepper, but here was the meal enough "Hot"). 
Italian beef casserole with beef cuvette and chorizo sausage Serving: The meal served with mashed potatoes and pickled gherkins and cucumbers. Garnish: Mashed potatoes can be decorated with something green - chives or watercress. Drink: A cold Porter that came in the food will be great. Hints: Do you use bacon from the recipe above, you will see that it is not "sizzling" in the pan, as it is salted and long-term cold-smoked. Bacon pieces do not stick together, which bought bacon does. But be scanty with getting salt in the food, as this bacon is very salty. |
Sous Vide Pork Roast with crispy pork rinds
Next Down
Next Up
|
|
1.5 kg pork loin with rind 2 tbsp. fine salt 1 tbsp. cane sugar 2 tsp. all kinds of broken 1 tsp. pepper from the mill 6 pieces. bay leaves 2 cloves of garlic 6 pieces. cloves whole 1 - 2 tbsp. olive oil Equipment Vacuum packages with ribbed bags Sous vide vessel Sauce 4 power legs approx. 1 kg, 3 l water, ˝ fl. red wine and 4 tbsp. olive oil. Root vegetables: 2 carrots, 2 parsnips, 2 parsnips, 1 small celery. 2 leeks, 2 onions, 1 whole garlic, 1 sprig of thyme, bay leaves and 1 red chilli. Season with salt and pepper from the mill
Sous Vide roast pork with crispy crust Procedure without liability: I want to try something new: A good pork roast with crispy pork rinds by Sous Vide method. I only write about how pork roast and sauce to be cooked. All accessories are up to you to cook to your taste.
Roast: It is important to cut all rinds individually all the way down to the meat, but no further. Mix salt, sugar, allspice and pepper, rub the mixture well into the meat and rind. Place the roast in a vacuum bag along with bay leaves and a few cloves of garlic over the rinds. If you want a Christmas flavor, drop some cloves between the grooves on the rind. Vacuum seal the bag and seal it twice at each end. Set the Sous Vide vessel to 58°C and 8 hours for 1 kg roast - 9 hours for 1.5 kg - 10 hours for 2 kg. After the time is up, take the roast out of the bag and place it on a rack in the roasting pan. If there is any liquid in the bag, use it for the sauce - but be careful, it is very salty. Beforehand, the spices (bay leaves, garlic and cloves) are removed and the rind is wiped dry. Grease the rind with a little olive oil. The pan must lie "horizontally" in the oven, so that you can block it up with tinfoil. Place the roast in a preheated oven at 220°C for approx. 10 minutes. Then switch on the grill elements and give another 10 minutes - maybe more - under the grill. The core temperature of a pork roast should be 65 °C, remove and rest for 30 minutes wrapped on the sides in tin foil. 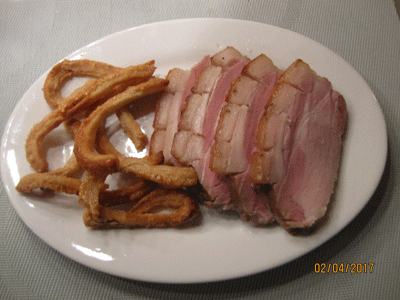
Fantastically tender and juicy roast pork Note: The time can vary greatly from oven to oven, so sit down in front of the oven and keep an eye on the rind. When they pop up and turn golden, the rind is done. Remove the roast and let it rest for 20 to 30 minutes before slicing. Mine took 20 minutes as described. It should have 5 to 10 more minutes to crisp up the rind. The loose rinds on the plate are made separately: boiled for 20 minutes in salted water with a little sugar, 30 minutes under the grill at 220°C. If there is any liquid in the roasting pan, it is also used for the sauce. Sauce: Making the sauce is a long-term project, as you don't get much liquid with the Sous Vide method. There will be some liquid in the bag which can be used. Brown the kraft bone in a large pot in a little olive oil. All root vegetables are cleaned and cut into small pieces and put in the pot. Pour water over to cover - approx. 3 liters. Boil and skim the surface for "impurities", add red wine and a little salt to the pan. Cook covered at low heat (97°C) for 4 to 5 hours. After cooking, strain the soup and discard the pulp and root vegetables. The soup is measured to approx. 3 liters. The soup can now be divided into 6 portions of ˝ liter and frozen for many good dinner dishes. For my roast, I used ˝ liter of soup and made the sauce "thick" with Fresh cream 30% from Arla. I have heard that it is sold out or no longer made. Use whipping cream and a little creme fraiche, flavored with coarse pepper from the mill. If the sauce is to be colored more brown, you can use a little food coloring. |
Heavy and Hot Oxtail Soup
Next Down
Next Up
|
|
1,2 kg oxtail cut off in the joints 3 tbsp. olive oil and 20 g butter 1 tbsp. hot paprika 2 beef cube dice Black pepper from the mill 2,5 liters of water and 1/4 bottle of red wine Soup-green 2 big twigs thyme 4 stalk parsley 4 bay leaves 1 to 2 red hot chili pepper Vegetables 2 onions 2 leeks 1 whole garlic 2 carrots 2 parsley seeds 2 pastasacks 1 small celeriac 1 tin concentrated tomato sauce 1 can of peeled tomatoes with chili For serving 1 dl Madeira 4 eggs cooked smiling 5 to 6 minutes Garlic flute Taste with salt and pepper from the mill 1 can / pack of cocktail sausages I've got a new camera so the picture format has changed 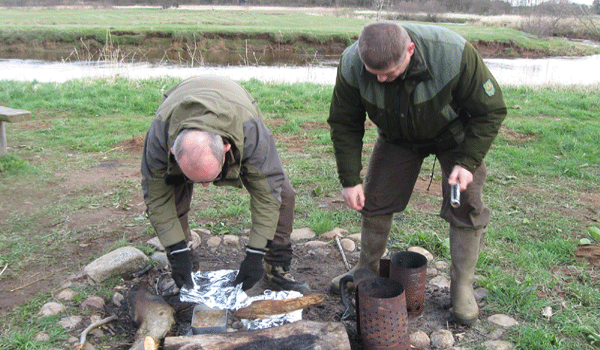
First day Chicken soup meat and flour dumplings made by Bent - by the river bank Procedure without liability: In Easter 2017 I will go to Varde Creek and try the fish luck for the fourth time. This year I think it's getting cold, so I'll surprise my fishing friends with a Hot Oxtail Soup.
1. Step: Warm the oil and butter in a large pot. Spice the beef tails with hot paprika. Now, the beef tails came into the pot and roast from all sides briefly but heavily. Get half of the cleaned and finely chopped vegetables in the pot together with soup-green. Roast at high temperature just until the onions are light brown. Pour water and red wine and cook again. Then the heat is set to medium temperature. Season with beef broth, tomato puree, peeled tomatoes, pepper and salt to taste. 2. Step: Now the beef tails simmer 2 to 3 hours in the soup until the meat can loosen from the legs. Take the beef tails out of the soup. The meat is cut into cubes and freed as much as possible for fat and tendons. Pour the soup through a sieve without the vegetables coming into the pot and throwing the vegetables. The rest of the cleaned and finely chopped vegetables are placed in the pot and boiled for 20 minutes, after which the meat is put into the pot and heated again. Taste with salt, pepper and Madeira. 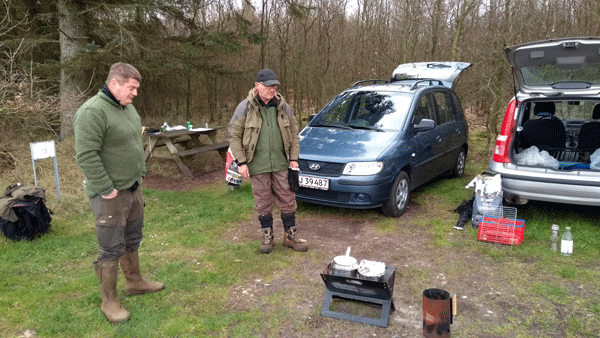
Second day powerful and Hot Beef Tail Soup that I made - in the woods Serving: Half smiling eggs and garlic cloves go well to the soup. Hints: If the soup is cooked the day before, you can cool it completely, making it easier to remove the grease. Boil meat and vegetables tenderly and sieve the soup. Pour the meat from the legs and put it in the fridge. Foam the soup the next day before it is warmed up with meat and the fresh vegetables and boil well. Here I recommend to add a can of packed cocktail sausages if you want more filling to the fishing trip. I used the light smoked from Rema, which was randomly on offer this day. |
Chili con carne
Next Down
Next Up
|
|
1 kg of beef bow or tenderloin in cubes 4 tbsp. Olive oil 1 tbsp. Hot pepper / cayenne pepper 1 tbsp. Flour 2 onion in cubes 4 garlic in in cubes 2 red peppers (pepper) in cubes 2 red chili peppers in cubes 1 small bunch of coriander 2 cans of peeled tomatoes 1 small can of tomato sauce 2 pcs. La Costena Chipotles is Red Jalapeno chile, ripened, dried, and smoked 6 pcs. Bay leaves 2 to 3 cans of beans of your choice or 500 g of dried beans of your choice 200 ml beef stock Taste with salt, brown daffodil and black pepper from the mill Dried spices 1 tsp. Cinnamon 1 tsp. Dried coriander 1 tsp. Allspice 1 tsp. Oregano 1 tsp. Cumin For serving Garlic flute or Bohemian semmel knödel Creme Fraiche Grated Cheddar cheese Fresh coriander for decoration 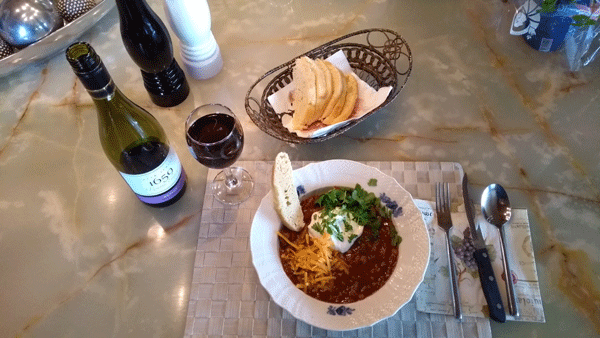
Chili con carne Procedure without liability: I should just mention that the dish can also be made of minced beef meat instead of beef in the cubes. With minced meat it takes about 1 hour and with meat in cubes approx. 2 hours. To those who do not like coriander, decorate with parsley.
Start cleaning the vegetables and cut them into small cubes. Bring half of olive oil into a large pot and switch the vegetables until the onion have become clear but not brown. The meat is cleansed for the tendons and cut into the mouthpiece. Add pepper / cayenne pepper and flour in a plastic bag and shake well. The meat cubes come in the bag, which is shaken even more. The meat is switched on a pan with the rest of the olive oil until it has a good roasted surface. Flour is only used with meat in cubes. Bring the meat to the pan with the vegetables. Add peeled tomatoes, tomato sauce, chopped Chipotles, bay leaves, beef broth and taste with dried spices a little at a time. Bring it all in the boil and immediately turn down the heat. Season with salt, brown daffodil and black pepper from the mill. Let the dishes simmer for approx. 2 hours for meat in cubes and approx. 1 hour for minced meat. Canned beans are added 15 minutes before the dish is cooked. Soaked, dried beans are added 30 minutes before the dish is cooked. Choosing the Beans: It's almost a religious issue that should not be discussed here, just select your own favorites. I would like to use white beans in tomatchilisauce and red kidney beans from canned, one of each to the dish, and one kidney beans in chili sauce. 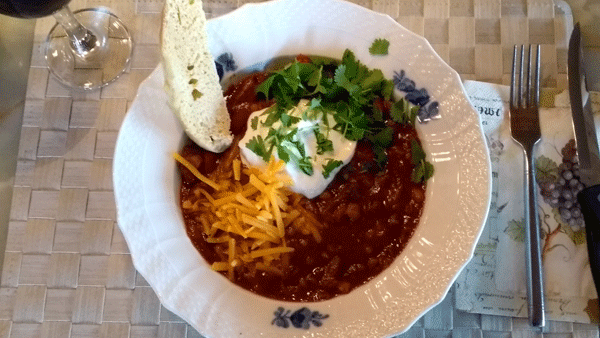
Chili con carne Serving: Serve the dish in deep plates, because there should be a lot of liquid - sauce - to dip the bread. Sprinkle grated cheese over, put a crunch of creme fraiche on top and decorate with a little green of your choice. Drink: A cold Pilsner beer makes good for this "Hotte" dish, or a MERLOT red wine. Hints: If you want to use dried beans, they must be soaked in cold water overnight. Please change water a few times. Boil the beans 30 minutes (white and kidney beans) under lid in fresh water, added 2 red chili pepper, 2 cloves of garlic, 6 bay leaves. The beans are drained in a sieve and the beans that are not used to the dish can be frozen for later use. It is important to soak the beans and boil them with plenty of water to get the poison lectin out of the beans. Be careful not to overcook the beans as they will become floury. |
Oven roasted turbot
Next Down
Next Up
|
|
2 turbot 1 kg per piece 1 organic lemon in slices 2 dl white wine Chardonnay 300 g butter 1 clove of garlic in slices Salt and black pepper from the mill Fresh herbs Dill Oregano Thyme Parsley lovage Basil For serving 1 kg of new Danish potatoes 20 white asparagus Cleared butter 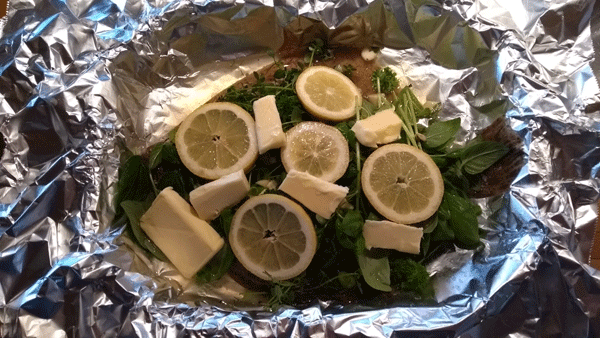
Turbot wrapped in tinfoil with herbs and pats of butter Procedure without liability: This dish should be made in late May or early June, where new Danish potatoes and white asparagus are to buy for "money". The turbot is also fat and delicious and with roe. Clean the turbot guts - let the roe stay in the fish - scratch the top and underside of the mucus. But let the head and all the fins remain on the fish. Make a deep cut on the upper side along the back bone and cut the skin all the way around the head and the fins. I used a scalpel, but a very sharp knife can also be used.
Use the wide and powerful stanniol, which is put in an ovenproof dish. Sprinkle salt and pepper to the bottom, put a turbot over, sprinkle the turbot with salt and pepper. Now spread fresh herbs, lemon slices, garlic slices and butter bumps over the fish. Finally pour approx. 1 dl white wine over the fish. Grab the stanol around the fish and put it in a 180°C pre-heated oven for approx. 40 minutes. If you use a larger turbot - 2 kg, the time must be increased to 60 minutes. New Danish potatoes - freshly excavated - cleaned with gloves with knobs, see recipe No. 1 and hover over the image. Boil the potatoes in boiling lightly salted water and boil them for 16 minutes. White asparagus peel deeply and cut 3 cm of the bottom. Bring asparagus into boiling lightly salted water and boil for 12 minutes. Potatoes and asparagus are drained on a kitchen roll, put on a dish and put on the table. 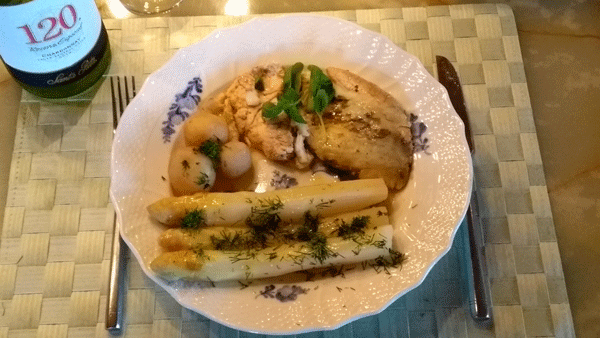
Oven-roasted turbot with white asparagus and small new potatoes Serving: Put the dish on the table and the host cuts the fish, the hostess distributes potatoes and asparagus on the plates. The clarified butter is poured over and it is decorated with green. Drink: The same white wine - Chardonnay - served to the dish. Hints: A large plaice can be made in the same way, but the oven time may vary depending on the size of the fish. |
Osso Buco sous vide cooking
Next Down
Next Up
|
|
2 large Osso Buco 3 to 4 cm thick 1 large onion 2 carrots 1 parsley root 1 parsnip 1 leeks 2 stalks of celery 4 cloves of garlic 5 g salt Pepper from the mill ˝ dl Raps oil 5 dl white wine (Chardonnay) 1 package Chef Ox bouillon 1 can of peeled tomatoes 1 tin concentrated tomato sauce 4 bay leaves preferably fresh Herbs of your choice: Thyme, rosemary, basil, french estragon Accessories: Pasta Gnocchi, Polenta, Mashed Potatoes, Risotto or White Kidney Beans 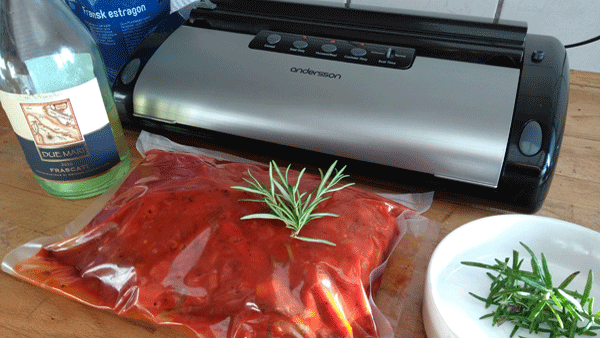
Osso Buco sous vide cooking Procedure without liability:
Prepare the vegetables: Clean and cut the vegetables well in small cubes. Prepare Osso Buco: Season the meat with salt and pepper. Heat a pan with oil (hot) and put Osso Boco on the pan for 2 minutes on each side and all edges until golden brown. Prepare the sauce: Shake the vegetables in oil approx. 20 minutes. Pour white wine on and cook the wine for almost nothing left approx. 40 minutes under lid. Add peeled tomatoes and concentrated tomato sauce, boil for a thick paste approx. 15 minutes without lid. Get it in a bag: When Osso Buco and sauce have cooled down to hand warm, these ingredients come in a solid sous vide bag sealed twice at one end. Add some spices of your choice along with some bay leaves. Suction vacuum seal twice at the other end. Bring the bag to the sous vide tube and let it last for 48 hours at 58 degrees. Make sure that the water in the sous vide tube does not evaporate for the long time cooking. Fill with warm water if it happens. Drink: The same white wine - Chardonnay - served to the dish. (We did not have anymore, so it became a red wine.) Hints: Serve a fresh salad to the dish. I chose rosemary, French estragon and mashed potatoes. 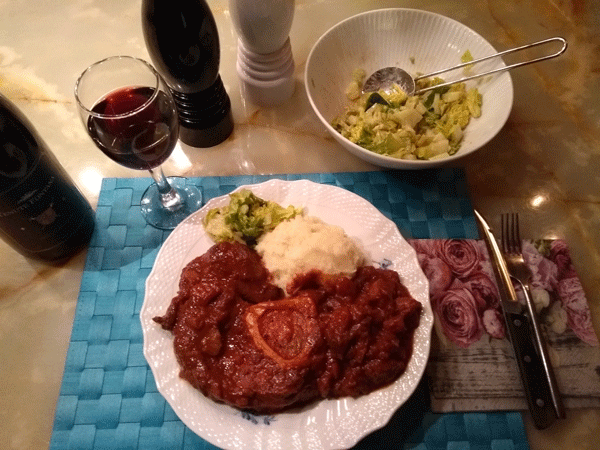
Osso Buco sous vide cooking Postscript: I have read many recipes with different times and temperatures ranging from 12 hours to 72 hours, and temperatures from 55 degrees to 70 degrees. I chose a Golden Midway 48 hours at 58 degrees. The meat was not tender - almost not to chew. An old bull? The vegetables tasted out of all expectation. I may be allowed to cook the vegetables next time, but the lady in the house will probably have to roast the osso buco in the old fashioned way. Explanation: Recipes with the short times and low temperatures originate from America, where the bulls are young meat cattle. Whereas long-term and high-temperature recipes are Danish recipes using old-baked dairy cows. - Ending |
Oven roasted sea trout
Next Down
Next Up
|
|
1 sea trout of approx. 1.5 - 2 kg 4 shallots 2 cloves of garlic 1 fennel 1 parsley root 1/2 celeriac 50 g butter 2 dl white wine (Chardonnay) 4 bay leaves fresh Thyme fresh 5 g of salt Pepper from the mill Accessories: 4 white carrots 2 red carrots 50 g butter 1 dl whip cream Thyme fresh 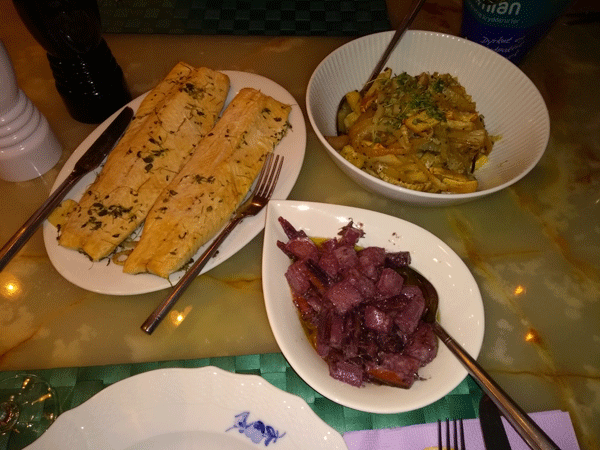
Oven roasted sea trout Procedure without liability:
Prepare the fish: Clean the freshly caught sea trout. Scrape the mucus of the fish from head to tail and scrape the scales of the fish from tail to head. Cut off the head and fill the fish from head to tail. Fine clean the fish for all the side bones. Rinse the fish in cold water and let it drip well before drying in kitchen paper on both sides. Prepare the vegetables for the basis of the fish: Peel the shallots and divide them into 4 longitudinally. Garlic is cleaned of shell and cut into quarters. Fennel is cut into suitable slices. The parsley root is peeled, cut in half and cut into rods. The celery is peeled and cut into smaller rods Prepare accessories and the sauce: Peel the carrots and divide them into half or quarters - depending on size - cut them into 2 to 3 cm length, sprinkle with some thyme. In a roasting pan lined with butter-greased baking paper, all the vegetables are distributed for the fish. Sprinkle salt and pepper from the mill. Put buttercream on and pour some white wine over. Put the baking pan in a cold oven and turn up to 200°C. When the stove has reached the temperature (about 20 minutes), remove the frying pan and the two sea trout fillers are applied with the ski side down. Pour white wine over the fish, sprinkle with a little salt and pepper from the mill. Put buttercream on the fish and put on thyme and bay leaves. Put the baking pan in the oven and cook for approx. 30 to 35 minutes until the fish is finished. The time depends on the thickness of the fish and also on your oven. While the vegetables and fish are baking, the accessories and the sauce are made. The butter is melted on the pan, the carrots and thyme are poured in and lightly roasted for a few minutes, then whipping cream is poured over. Turn down the heat and let it simmer until you think the carrots have the right bite. Season with a little salt and pepper. 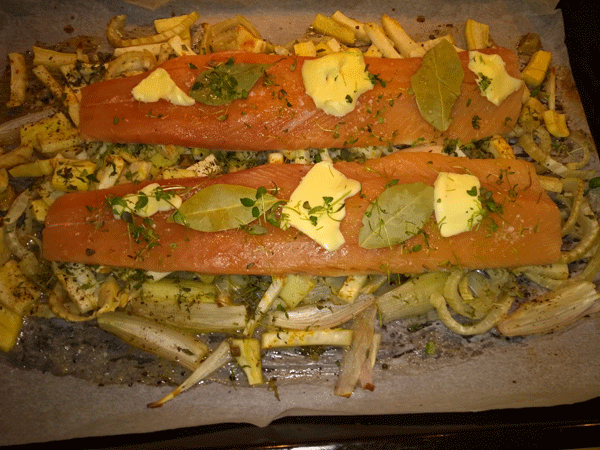
Oven roasted sea trout Appliance: Once the fish has had enough, take it out and put it on a platter along with the vegetables. The flavorful liquid is poured into the carrots. It all decorated with picked thyme. Drinking: The same white wine - Chardonnay - is served chilled to the dish. Hints: If you don't like celeriac, use other root crops. Leeks are also suitable. Perhaps potatoes in small sticks, just remember the potatoes should be well baked. |
Salted and smoked wild boar club
Next Down
Next Up
|
|
1 wild boar club of approx. 2.5 kg
8 liters of brine made from: 6.90 liters of water 2.382 kg coarse salt 100 grams of cane sugar It gives 26% weight of brine or 24 °B Degrees Baume Option Spices: 3 tbsp. Thyme dried 3 tbsp. Whole peppercorns 3 tbsp. Whole juniper 1 pack of bay leaves Equipment: Salt jar of 14 liters Big plate as weight Smoke oven for cold smoke Beech sawdust Juniper sawdust Note: Sugar and spices are not included in calculating the Grade Baume of the brine. One can use "butcher salt", that is nitrite salt 0.6%, which gives the meat the red color. It can be purchased in Denmark online Spice snaps: Take and crush 30 pcs. juniper and cut a red chili pepper in slices, pour in 250 ml of vodka. Allow the spices to soak in vodka during the time you make the club. When the club is smoked and the string removed, the club is brushed off 2 to 3 times the first week of maturation. The pictures below show the procedure for my salted and smoked wild boar club. The whole procedure takes 5 weeks.
Purchased wild boar club 2.5 kg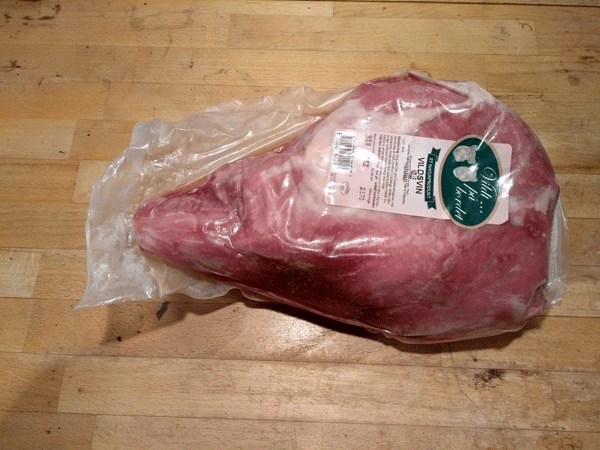
The wild boar club - deep-frozen - weighed 2.5 kg and cost DKK 125.00 on offer in Rema 1000. Ended up with 1.8 kg, shrinkage 0.7 kg or 28%.
The wild boar club boned and submerged in brine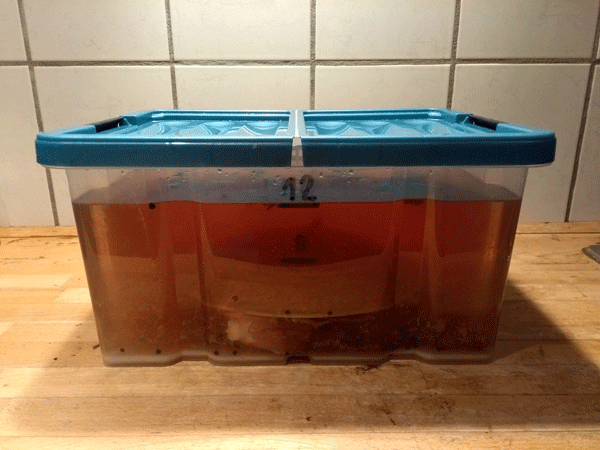
The wild boar club is put in a brine of 26% or 20 °B. Here it should be for 2 weeks. Hold down with a heavy plate. There was room for 2.
The wild boar club washed off for salt and constricted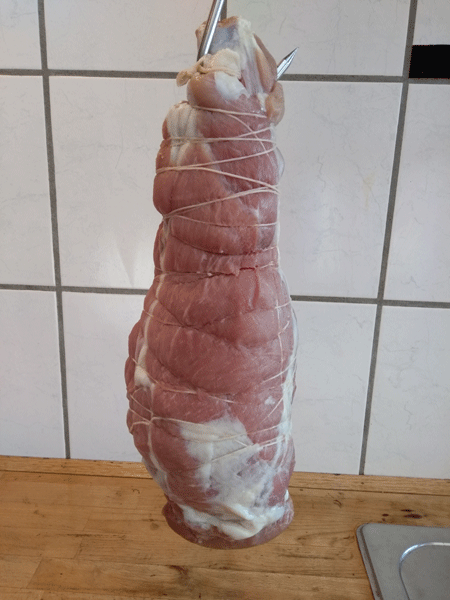
The wild boar club washed off for salt and constricted. I have bought some heavy meat hooks so it does not fall down in the smokig oven.
The wild boar club was hung up for drying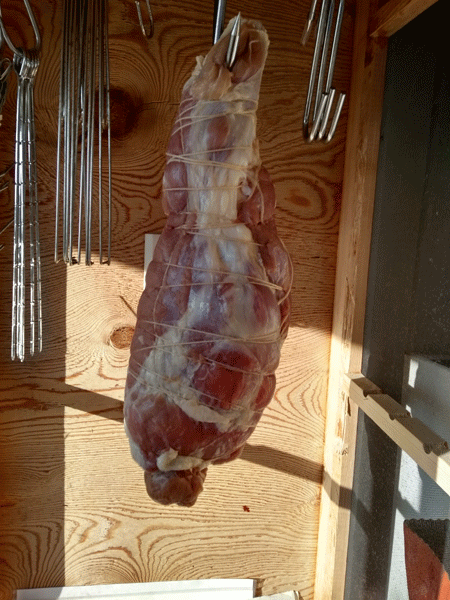
The wild boar club was hung up for drying in my drying cabinet before smoking. Here it should hang some days. The weather was these days between - 2°C and + 4°C. But with sunshine.
Labyrinth sawdust tray prepared for smoke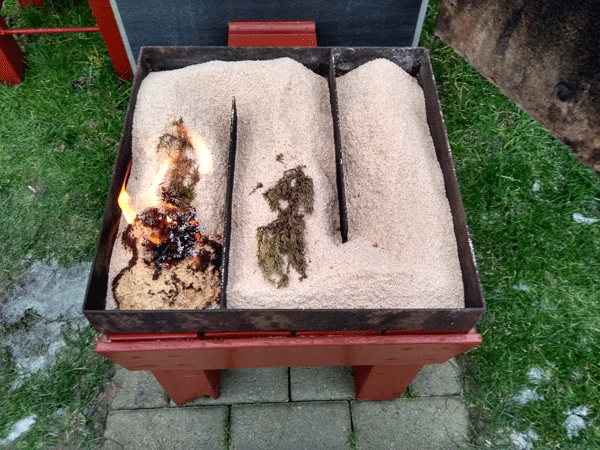
The labyrinth sawdust tray is filled with 8 liters of beech sawdust and a little juniper twigs. There are a few twigs with juniper berries on the surface. These I myself have picked in Sweden at Bjärehalvöen by Hovs Haller. The sawdust is lit with a little alcohol on the left side. Glowing for approx. 24 hours.
The wild boar club was hung up in the smokig oven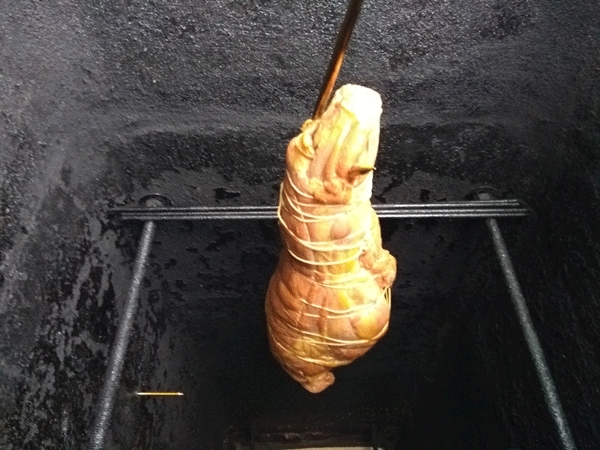
The wild boar club was hung up in the smokig oven and have got the first 24 hours of smoke. In all, it was smoked for 5 days with a few breaks in between. Slightly expensive in sawdust, so I should have 6 pieces in the smokig oven. Or a couple of salmon.
The wild boar club completed the smoke and the string removed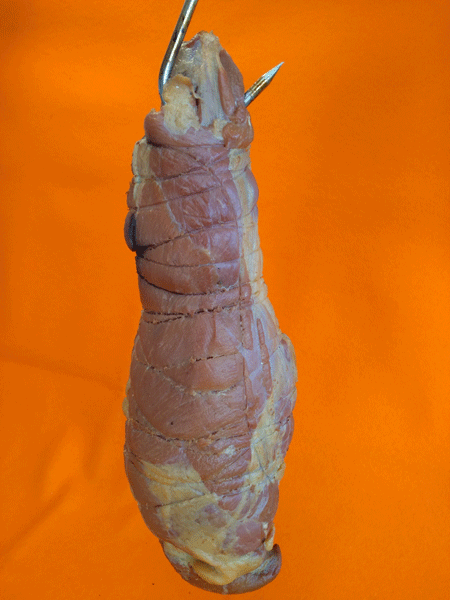
The wild boar club completed the smoke and the string removed. The club is brushed with a spice snap consisting of juniper and chili peppers. This has been done 3 times over a week.
Wild boar club hung inside a ham bag and is ready for maturation
The wild boar club is then hung in a ham bag and has to mature for 2 weeks. I will test the tasting club after 1 week. It will be around February 8, 2019. I thank my neighbor - Jette - for the homemade ham bags.
The wild boar club is ready to be eaten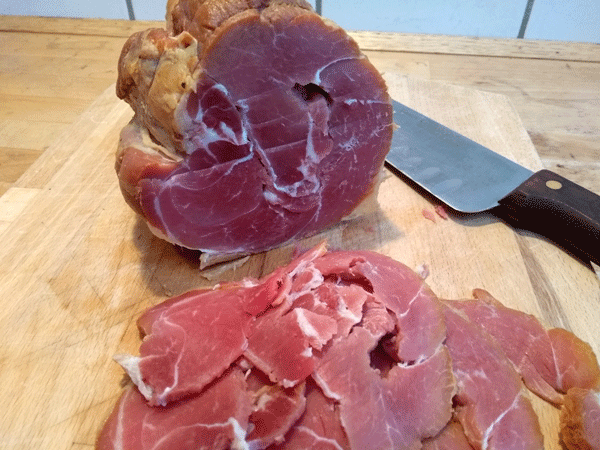
The wild boar club is now ready to be eaten. I've cut some slices off the bottom end that we shall have tonight. I want to make an omelette and use these slices instead of bacon. I've tasted them and they taste great. The lady in the house also likes them, but she thinks they are right on the salty side. The smoke flavor is fantastic, just as comfortable.
Procedure without liability: I assume that an almost saturated brine is made at 4 ° C, where water fills the least. Salinity solubility in water depends on temperature. At 0°C, 357 g of salt per 1 liter of water can be dissolved, at 100°C 398 g of salt can be dissolved per 1 liter of water. In this brine, 2382/6.9 = 345 g of salt are dissolved in 1 liter of water at 4°C. If you want to use other values, you can apply mine Excel Spreadsheets for the calculations. The normal value for salting food is between 10 °B and 16 °B. But here it is a wild boar club that must be long lasting and hard in consistency, therefore I choose 20 °B. When salting, the temperature should be between 5°C and 8°C. I use a refrigerator in my outdoor kitchen designed for this, as well as my cold beer. In addition, the refrigerator can also be used for drying meat and fish waiting to be smoked.
Now we need to get started: Put the water into a large pot and bring the water to a boil. Pour the salt over gradually and stir in the pan. Then add the spices and sugar. Keep the pan boiling for the next few minutes. If the salt comes in cold water, it lies on the bottom while the water boils, and then the salt can "burn" together on the bottom of the pan. I have experienced this myself with my electricity hotplate. The hot brine is cooled overnight. The waiting time can be used to defrost and defecate The wild boar club for the upper leg. The brine is poured into the salt jar and the wild boar club is put in. A large, heavy plate is placed on top so that the wild boar club is completely covered with brine. The salt jar is now set to cool - between 5°C and 8°C - and the wild boar club is salted for 2 weeks, if boned. If the wild boar club is put in with bone it must have between 3 and 4 weeks. A rule of thumb says 1 week per kg of meat without bone. With bone double up. After 2 weeks, remove the club and rinse well in running cold water. May be put in clean, cold water overnight. We want the surface free of any salt, as it can give a white color to the meat when it becomes dry. The club is dipped dry in paper towel and must now be tied together with meat cord. A loop must be made on the club at the pointed end so that it can be hung up for drying. A suitable meat hook can also be used, can be purchased in Biltema. Drying can take place in a refrigerator at 5°C to 8°C. But remember to ventilate the refrigerator so that the humidity does not get too high. It takes 2 to 4 days to dry the club. Try with a finger, your finger must not stick to the meat. If you have a drying cupboard closed with an insect gauze, it can also be used during the winter period in the carport. I have heard of "ham bags" that they use in Norway. Try searching the web. I have purchased material so I can make these ham bags myself. More about these comes when they are finished. When you think the club is dry enough, it should be cold smoked. The temperature should be kept below 27°C throughout the period. It should not be a problem during the winter period. The temperature in my smokig oven rises by 10°C compared to ambient temperature. I use a labyrinth sawdust tray, so there is not too much glow at a time. I use beech sawdust added with 5% juniper sawdust, which gives a good taste - both in meat and fish (Eel). The labyrinth sawdust tray can contain 8 liters of sawdust, which is poured loosely so that the embers can catch. Light fire in the front left corner with either a little alcohol or a weed burner. The club is suspended in the smokig oven when the alcohol has burned out (no flames). My sawdust tray can glow for 16 to 24 hours depending on how much it blows - pull in the smokig oven. I expect to smoke the club for 4 days, so it must be replenished with sawdust sometimes, followed by breaks of 6 hours. I am now ready to smoke my wild boar club and it is January with temperatures between minus 5°C and plus 5°C, so it is exciting to see what the temperature in the smokig oven will be. The days and nights with minus 5°C became the temperature only plus 5°C, but set fire to all 3 channels the temperature reached 24°C. Then I also tried this. I smoked the wild boar club for 5 days with an average temperature of 15°C. Now the club hangs and matures in my drying cabinet in the outdoor kitchen, where the day temperature is at 4°C and the night temperature goes in minus. I mature for 2 weeks. The club is brushed with a spice snap consisting of juniper and chili peppers. This has been done 3 times over a week. I got a couple of "ham bags" with the help of our good neighbor who is firm with a sewing machine. The bags were made from the old-fashioned cotton diapers purchased in Jysk, 12 pcs. DKK 120.00 They just need to be cooked well before use, as the fabric is bleached with chlorine. |
Pljeskavica en Serbisk Hamburger med Shopska salat
Next Down
Next Up
|
|
Pljeskavica 400 g Beef minced min 12% fat 400 g Lamb minced min 12% fat 2 Onions finely chopped 2 cloves garlic pressed 1 tbsp. Paprika smoked 1 tbsp. Paprika sweet 1 tsp. Cumin whole, bumped Pepper whole from the mill 1 tsp. Salt 1 Chili pepper, finely chopped red 1 tbsp. Coriander seeds whole or 1 Coriander leaves finely chopped 1 Parsley leaves finely chopped 1 to 2 tbsp. Olive oil for frying A good bread of your choice 
Pljeskavica is a Serbian Hamburger Cevapcici The same minced meat is used for Cevapcici, but then mix an egg into the minced meat. Gives crispiness and gathers the mince. Form finger-shaped sausages and fry them on the grill or on the pan. The same lovely salad and bread are served.
The meat is brushed with olive oil when turned on the grill. 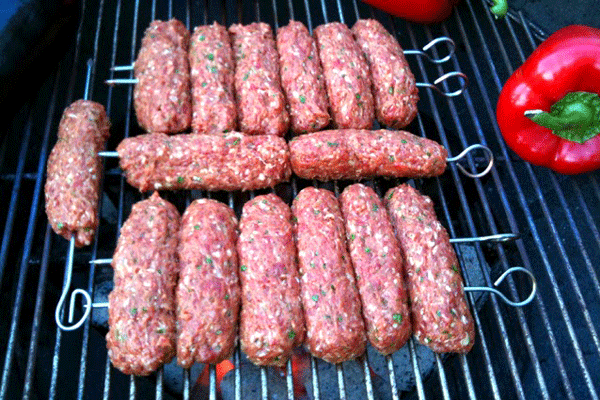
Cevapcici on the gril Accessories Shopska Salad: 4 sun-ripened spicy tomatoes on stalk 1 large cucumber or 4 school cucumbers (the little cucumbers) 4 spring onions 1 to 2 main salad (iceberg or Romanian salad) 1 red chili pepper 1 green chili pepper 16 green or black olives 1 can Feta cheese diced or 1 dry Feta cheese for grater 1 bunch chopped parsley Dressing: 3 parts olive oil and 1 part Heidelberg apple cider- vinegar, salt and freshly ground black pepper 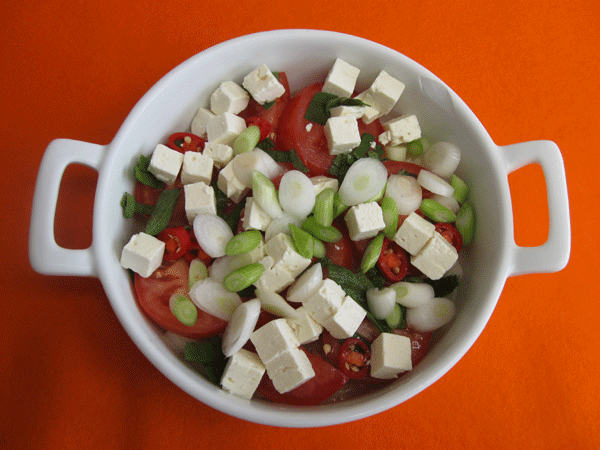
Shopska salad is a Bulgarian salad Parsley, grated cheese, salt, pepper and dressing are served when serving Procedure without liability: If whole coriander, cumin and pepper are used, these should be finely grounded in a mortar before mixing with paprika and salt.
Beef and lamb are mixed in a suitable large bowl with the spices and onions and garlic. If you like the taste of fresh coriander, do not use whole coriander seeds. Mix instead fresh parsley and fresh coriander (a small handful), chop it very fine and mix it with the meat. Make it in the morning and place the dish in the refrigerator for the evening, where the steaks are shaped and grilled. Form 4 steaks of 800 g of meat so that each person gets a juicy steak of 200 g. Grilled by indirect heat over grill briquettes 4 to 5 minutes on each side. Brush the steaks with olive oil when turned. I will return with the time that I used in my grill. 4 minutes on each side. Shopska Salad: Cut the tomatoes into quarters. Peel the cucumber and cut it into cubes. The spring onions are cut into small slices and the salad is cut into smaller strips. Chili peppers and olives are cut into very small slices. Parsley minced. The feta cheese can be bought in cubes or whole pieces which are then torn over the salad. Serve either in a large bowl or portioned. Olive oil, cider vinegar and salt are poured / sprinkled first on serving. Adjust how strong you want to make the salad with chili peppers, take out the kernels and the salad will not be too hot (hot). Serving: Out in the open air around the grill a late evening hours. Garnish: There is hardly anything other than chopped parsley, that makes it. Pour well with dressing on the salad and deep the bread in it. Drink: A good red wine is the case. I found a French red wine Cabernet-Syrah in the Supermarket. Hints: If you don't have a barbecue ready, you can successfully cook the steaks on the pan in olive oil and butter. |
Pig jaws braised in Madeira with mashed potatoes
Next Down
Next Up
|
|
600 g to 800 g Pork Jaws 1 Chorizo sausage or 200 g Bacon in cubes 2 Onions coarsely chopped 4 cloves of garlic coarsely chopped 1 Red chili pepper finely chopped 1 Red Pepper fruit in strips 1 tbsp. Paprika smoked 1 tbsp. Paprika Sweet 1 tsp. Cumin bumped 2 dl Madeira 4 dl of Broth or Stock 1 Canned chopped tomatoes 2 tbsp. butter and 3 tbsp. Olive oil for frying Coarse pepper from the mill and salt Accessories: Boil some carrots, parsley root and parsnip in the dish for the last hour. Make a mashed potatoes with butter, whipped cream, salt and pepper 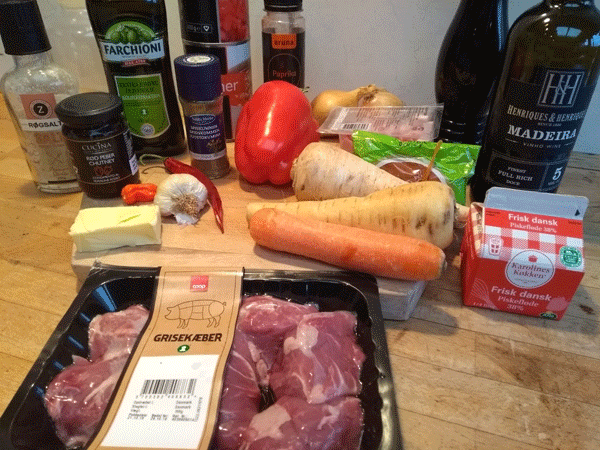
Ingredients for pork jaws braised in Madeira with mashed potatoes Procedure without liability: Now that the fall has come and it gets darker and colder as the days go on, it will be great with "Hot" simmer food. I was inspired by some pig jaws that I saw in the fridge the day I was in town shopping.
If you use diced bacon instead of Chorizo sausage, bacon should first be slightly browned before the pork jaws. The pork jaws are browned in a thick bottom pan. After 5 to 10 minutes, add coarsely chopped onion and garlic as well as chili pepper, paprika and cumin. When the onions have taken a little color and become clear, add Madeira and the broth / foundation and simmer for 1 hour and 30 minutes under lid. Maybe a "splash" whipped cream. Remember to make sure it does not boil dry. Choose your own broth or make it yourself. I used a beef stock, which I made myself. Prepare the pepper fruit and drain the chopped tomatoes (just a little). Cut the chorizo sausage into bite-sized pieces. Put the pepper, tomatoes and sausage into the pan and simmer for approx. 1 hour under low heat. Eventually, the dish is season with salt and pepper from the mill. If you want some root vegetables as an accessory, now it is time to put them in the pot and simmer with the other things for the last hour. 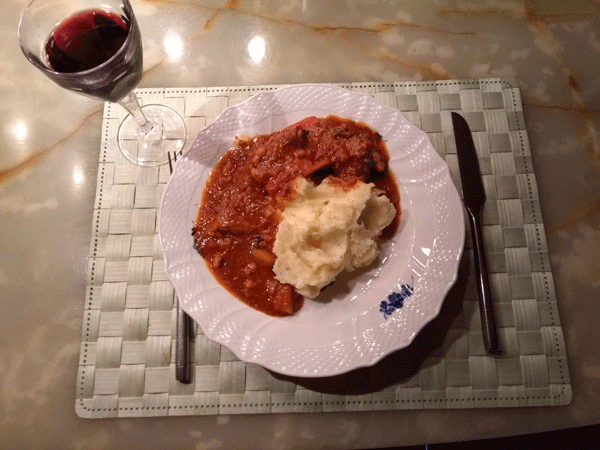
Pig jaws braised in Madeira with mashed potatoes Serving: I prefer a well-made mashed potato with butter, whipped cream, salt and pepper. However, not too thin in texture. Garnish: with some greenery - oregano or basil. Drink: A good red wine is the thing. Note: Now that you have whipped cream for the mashed potatoes, you should come a "splash" in the sauce. |
Beer Can Chicken
Next Down
Next Up
|
|
1 Chicken like 1.5 kg 1 Can of beer like Porter/Stout 2 tbsp. Olive oil 1 tbsp. Coarse kitchen salt Spices for a RUB: 2 tbsp. Brown powdered sugar 1 tbsp. Coarse kitchen salt 1 tbsp. Peppers mild 1 tbsp. Paprika smoked 1 tsp. Pepper Hot 1 tsp. Pepper coarsely from the mill There is also used for the grill: 1/2 liter Smoke Mold 1 Rosemary, fresh twig 1 Thyme, fresh twig Vertical Chicken Roaster (Option) Or use the beer can 3/4 full of beer Shopska salat Romaine Salad, tomato, cucumber, onion/spring onion, Red Pepper, Chili Pepper, Parsley, Feta Cheese, sunflower oil/olive oil, green/black olives, wine vinegar, salt and pepper 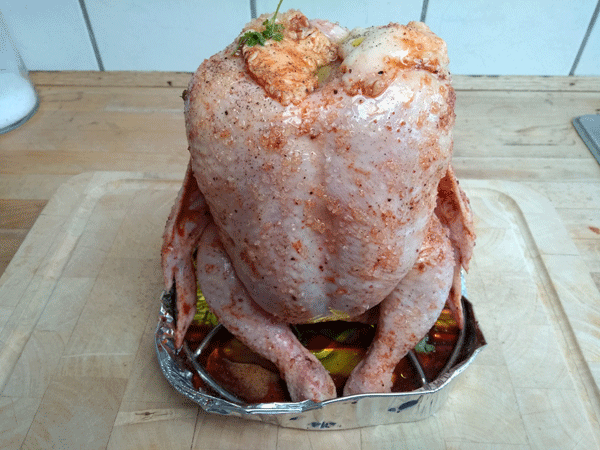
The beer can chicken is rubbed with the RUB and ready for the grill Procedure without liability: The chicken is cleaned and rinsed under running cold water and dipped with a clean towel or paper towel. The chicken is well salted inside.
Stir the spices together into a "RUB", because now the chicken has to be rubbed externally in this spice mix. The mixture should be slightly moist so it adheres to the chicken. It can be done with a little olive oil or beer. Place the beer can in the rump of the chicken and pull the legs out to the side and forward to form a tripod. The chicken is put in a refractory dish or a strong aluminum tray with a little water at the bottom. Make sure that everything does not fall over during grilling. The chicken is first browned by indirect heat in a 225°C hot grill for approx. 30 minutes. Thereafter, the heat is adjusted down to 180°C for approx. 65 minutes. Just remember, poultry must be well cooked, the fluid must be clear and the bone must detach easily from the body as it rotates. Core temperature min. 78°C and max. 80°C. The heat in the grill can be regulated by adding a little damp smoke mold to the coals. Rosemary and thyme can also be moistened and placed on the coals. Both parts also give a nice smoky taste. Once you are sure the chicken is cooked, remove it from the grill and stand and rest for 15 minutes before cutting into 4 pieces. 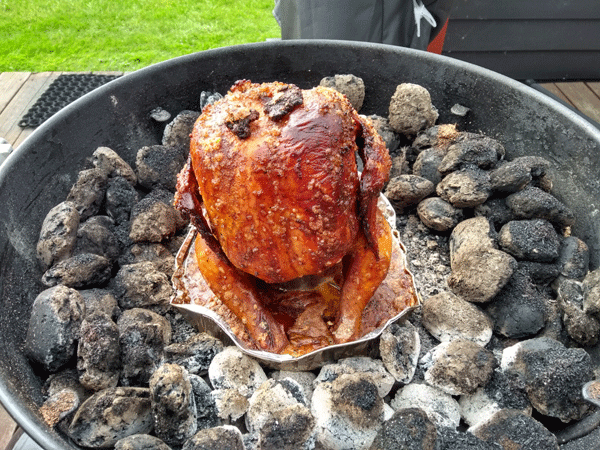
The beer can chicken of 1.5 kg were given 95 minutes on my grill at 180 ° C Serving: I would recommend finding a good salad yourself - maybe Shopska salad - and a good bread. In the summer heat you could also serve a good cold potato salad, made on new potatoes. Garnish: For potato salad, chives and tomatoes are used as well as cucumber slices. Drinking: I will continue with the type of beer that came up in the a.. rump on the chicken. Postscript: There may be a risk that beer cans will release "substances" when heated to 200°C. If you just try the method once on a fishing trip, I would have no qualms about eating the chicken. But if I grill chicken everyday in the garden, I'll probably buy an approved holder that works just like the beer can. (Of course I did). |
Stuffed eggplant with clams and quinoa with tomato salad
Next Down
Next Up
|
|
1 Canned Mussels 200 g natural 2 pcs. Eggplant large 340 g 1 piece. Baked potato large 300 g 1 dl Quinoa black/red/white choose yourself 2 pcs. Tomatoes large and ripe 1 piece. Red onion large 4 cloves of Garlic ˝ pcs. Red chili pepper mild 2 Twigs Rosemary/Thyme 4 to 6 tbsp. Virgin olive oil 2 tbsp. Oyster Sauce Coarse salt and pepper from the mill The tomato salad 8 pcs. Cherry tomatoes 1 piece. Red onion large ˝ pcs. Red chili pepper mild 1 Bunch Basil 100 g Feta cheese 1 tbsp. Balsamic Glace homemade 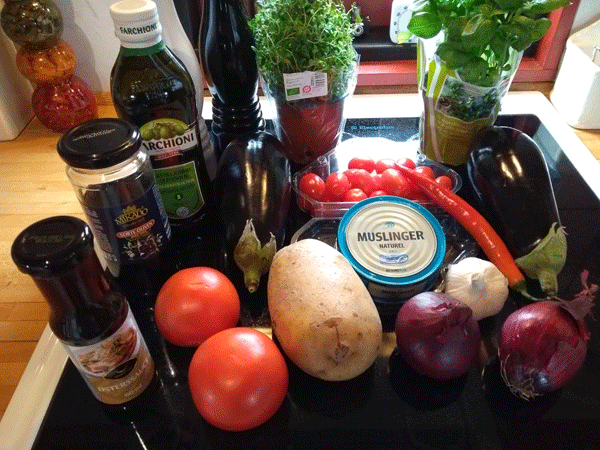
The ingredients for the dish. Quinoa is missing, however Procedure without liability: Eggplant halves longitudinally and bake for 15 to 20 minutes in oven at 225 ° C. Hollow out the eggplant and chop the pulp. It should be mixed with potato, quinoa, tomatoes, onions, garlic, chili pepper, rosemary and seasoned with salt and pepper afterwards.
The baking potato is peeled and cut into small cubes and cooked tender for approx. 15 minutes. Quinoa is cooked according to the instructions on the bag. Finely chop the ripe tomatoes in diced and chop onion, garlic and chili pepper. Fry onions, garlic and chili pepper on the pan in virgin olive oil until they become clear. Turn the cooked potato tents in and turn off the heat. Now it should all be mixed with rosemary and seasoned with salt and pepper. The filling is mixed with the mussels and distributed in the 4 hollowed-out eggplant shells, which are baked in the 225 ° C hot oven for 10 to 15 minutes. Tomato salad: Cut the cherry tomatoes and red onion into boats, pick basil leaves and crumbled feta cheese over. The tomato salad is dripped with the homemade Balsamic Glace at the table. Homemade Balsamic Glace: One bottle of red balsamic vinegar is reduced in half by boiling the vinegar in a saucepan with a large surface and without lids. It can take up to 30 minutes and it "tears" in the nose. I use my outdoor kitchen, so here are no problems. Pour the glace onto a scalded glass and cool it down. Store in the refrigerator. 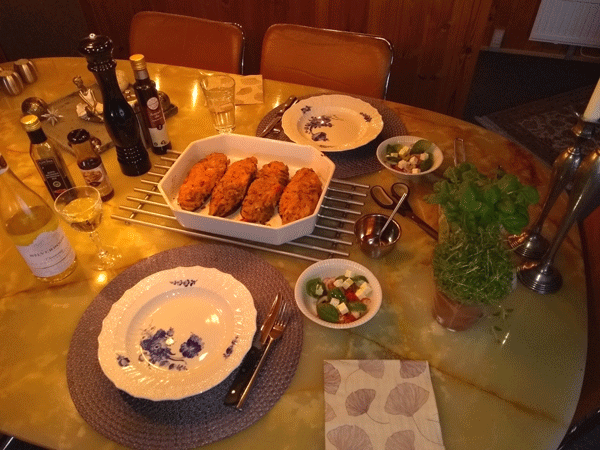
Stuffed eggplant with clams and quinoa with tomato salad Serving: Serve as shown in the picture above and even distribute Balsamic Glace over the tomato salad and oyster sauce over the main course. Garnish: A little fresh basil leaves will benefit. Drinking: A cold white wine will do wonders in the hot summer time. |
Thai salmon fishballs
Next Down
Next Up
|
|
700 g salmon fillet without skins and bones 200g cod fillet without skins and bones You can also use: pollack, saith, ling or other white fish from the sea 2 pcs. spring onions finely cut 1/4 pots of coriander. Alternative parsley 2 tsp. curry mild 1/2 tsp. dried chili flakes hot 2 tbsp. soy sauce 2 tbsp. fish sauce 1 egg 1 tbsp. wheat flour Ground salt and pepper from the grinder Rapeseed oil and butter for frying Accessories 1 kg of new Danish potatoes 2 dl remoulade sauce seasoned with hot chili 1 lemon - the juice 1 cucumber cut into spells. Alternative white asparagus 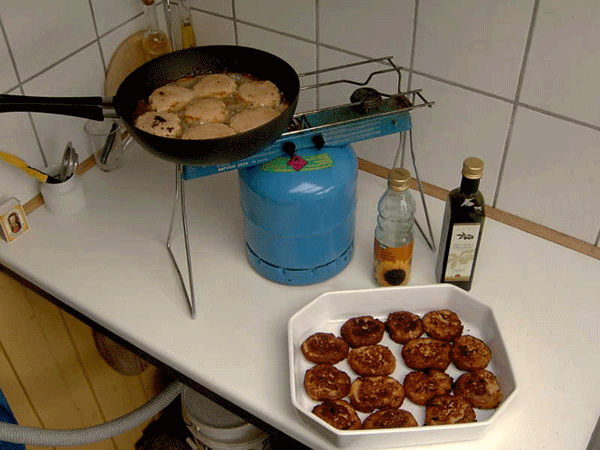
I fry the first sample of Thai Salmon Meatballs in my outdoor kitchen Procedure without liability: Salmon and cod are roughly chopped with a sharp knife. Then it is run through a meat chopper, food processor or hand blender. The chopped fish meat is stirred (whipped) with salt for 2 to 3 minutes. Spring onions and coriander leaves are finely chopped and added to the fish meat together with the other ingredients, which are thoroughly stirred into the fish meat. Put the bowl of the finished fish meat in the refrigerator for at least 2 hours - preferably more so that the taste spreads in the fish meat. Shape the fishballs by hand and a tablespoon and fry them on the pan in refined rapeseed oil and butter in medium heat. I use refined rapeseed oil, as it is more neutral in taste.
Homemade remoulade sauce: 2 tbsp. mayonnaise 1 dl yogurt natural 4 tbsp. pickles 1 tsp. curry hot Some Sprinkles Tabasco Sauce Salt and pepper from the mill Mix all ingredients well in a bowl and season to taste. Can be decorated with different herbs and cress. If the purchased pickles are too coarse, you can give it a little with the hand blender. 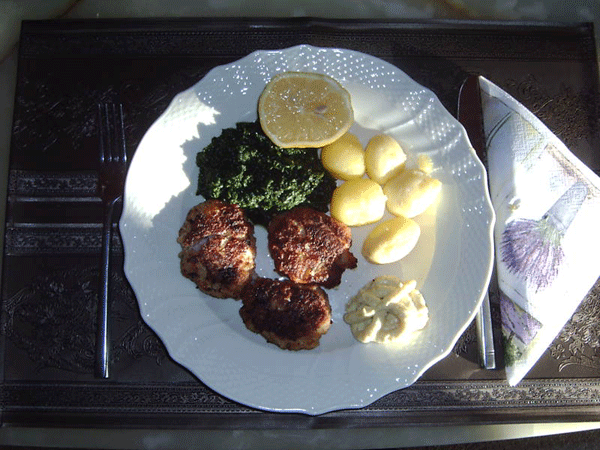
Thai salmon fishballs Serving: New Danish potatoes are a "must", perhaps flanked by white asparagus. It's a May / June dish. If asparagus fails the cucumber. Garnish: A little fresh coriander leaves will benefit. Drinking: A cold beer will do wonders in the hot summer time. Hints: Either you hate coriander or you love coriander. If you hate coriander, simply replace it with parsley. |
Almond leek pie with smoked salmon
Next Down
Next Up
|
|
Pie bottom: 180 g wheat flour 1/2 tsp. salt 100 g butter 1 egg yolk 2 tbsp. cold water Alternative: Buy ready-made pie dough Fill: 100 g soft butter 50 g cane sugar 3 eggs 25 g wheat flour 150 g almond flour 3 pieces leeks 50 g almond flakes Smoked salmon You can choose between cold smoked salmon or hot smoked salmon.
Use approx. 100 g salmon per person. Use cold smoked salmon, add
the slices over the leek pie when it is to be served so that the salmon does not
gets hot. Use hot smoked salmon - and has it become cold -
put it over the leek pie for the last 5 minutes in the oven.
Accessories: Fromage frais and fresh dill 
Almond leek pie with cold smoked salmon Procedure without liability: It is a fantastic dish that is suitable for a starter for 4 people, or a good dinner dish for 2 people. You can also choose whether you want to season the leek pie with cold or hot smoked salmon. But first the pie base needs to be made.
Pie base: Put wheat flour, salt and butter in a bowl and mix the ingredients until it looks like moist grater. Add the egg yolk and cold water. Mix until the dough has just gathered. Take the dough out of the bowl and form a ball. Let the dough rest for a few hours in the fridge. I used my El. whipping machine. Take the dough out of the fridge and roll it out on a floured table in the size that fits the pie tin - here Ř 22 cm and the edge 3 cm high. Press the dough out into the pie form and up the edge. Punch small holes in the bottom with a fork and put it in a 180°C preheated oven and bake the bottom for 10 to 15 minutes. Fill: Whisk butter, cane sugar and eggs together to a creamy consistency. Add wheat flour and almond flour and whisk it to a smooth mass. The mass is spread over the bottom of the pie in an even layer. The cleaned leeks are cut into 1 cm thick rings and given a boil in lightly salted water for 4 minutes before spreading over the filling. Remember to pour the leeks into a sieve and let them drain well before placing them on the pie. Melt a little butter and brush the pores. Sprinkle with almond flakes before placing the pie in a 180°C preheated oven and baking for 20 to 30 minutes. 
Almond leek pie with cold smoked salmon Serving: With smoked salmon. See above: cold or hot smoked. Serve with fromage frais stirred up with freshly cut dill. Garnish: Again dill and pepper from the mill. Drinking: A cold beer / white wine will do wonders. Hints: The pie filling can be varied as desired. Eggs can be replaced with sour cream or cottage cheese and leeks can be replaced with spinach. Well! try for yourself. |
Corned beef brisket with root vegetables and horseradish sauce
Next Down
Next Up
|
|
1 kg beef brisket 1 liter of beef soup - ready made 2 carrots 2 parsley roots 2 parsnips 2 leeks 1 onion 4 cloves garlic Spice bouquet of thyme, larch, parsley and bay leaves Asparagus potatoes as an accompaniment Sauces: 7 dl siet soup 3 tbsp. wheat flour - 75 to 100 g 3 tbsp. butter - 75 to 100 g 3 tbsp. white wine vinegar 3 tsp. cane sugar 1 dl whipping cream 5 to 7 cm fresh horseradish - coarsely grated Salted a day in the fridge: 125 g fine *table salt per kg beef breast 25 g fine sugar per kg beef breast 1 tbsp. whole grains of each: Black pepper, allspice and juniper 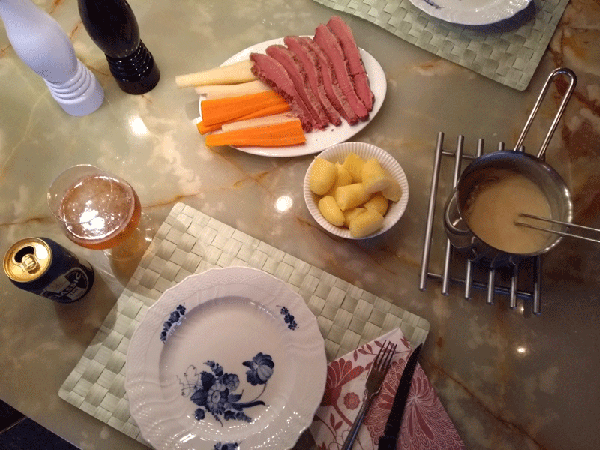
Corned beef brisket with root vegetables and horseradish sauce Procedure without liability: Start salting the beef brisket the day before. Thoroughly cleanse the flesh of tendons, but leave the good fat on the breast. If the fat layer is thick, then cut some stripes crosswise. Mix *table salt and sugar with the crushed spices. Rub the beef brisket with this RUB and put the meat in a freezer bag - the whole mixture must be used - tie for the freezer bag and put it in the fridge. Turn the freezer bag every 6 hours for the next 24 hours. Then the meat is ready to be cooked for 2˝ hours over very low heat. The purchased soup is put in the fridge at the same time, to thaw until the next day.
*Table salt: If you are into nitrite salt once in a while, use half table salt and half nitrite salt. I did that - red meat. The next day, all the vegetables are cleaned, and those that are two of them are cut one by one into smaller pieces. They are to be used for the soup, where in the meat small boils. The others that are whole are boiled with the last half hour. The meat is taken out of the freezer bag and rinsed under cold water to get rid of the excess salt. Put some herbs in the bottom of the pan. Place the meat on top and spread the rest of the herbs over the meat. Bring it all to a boil and turn down the heat when it boils. Then cook the meat over low heat for 2˝ hours. Just remember that the whole vegetables should be cooked with the last half hour. Take the meat and the whole vegetables up and strain the soup. Skim the soup for fat if there is too much, and use the soup for the sauce. The butter is placed in a thick-bottomed pan, and when it has melted, the flour is baked in it. The soup is added with vigorous stirring to the pan. Find a suitable consistency and flavor with vinegar and sugar. Finally, cream the sauce with whipped cream and season with freshly grated horseradish. Once the horseradish is added to the sauce, it must not boil any more. 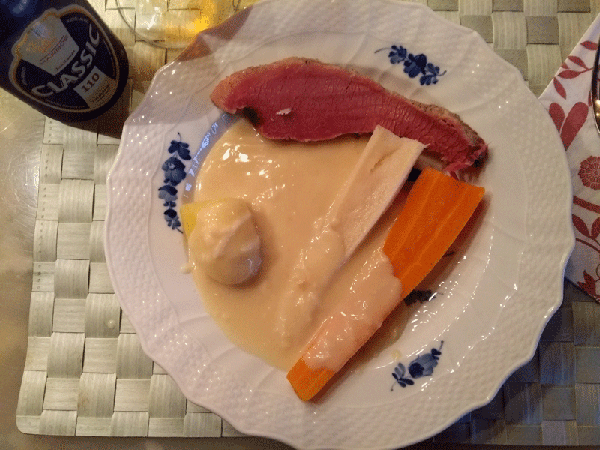
Corned beef brisket with root vegetables and horseradish sauce Serving: The whole vegetables are served with the meat together with boiled asparagus potatoes. Garnish: Unfortunately I had no greens to garnish the dish with, but I would think that dill, chives or parsley would be suitable for this. Drink: A cold beer will work wonders for the strong horseradish sauce. Hints: Feel free to buy the ready-made 1 liter soups in the freezer when meat is to be cooked in a soup. It is easy, cheap and good. |
Shrimp in coconut milk
Next Down
Next Up
|
|
600 g fresh, boiled shrimp peeled or bought shrimp in brine 2 ds. 400 ml Coconut milk 2 dl Vegetable broth 4 dl White wine 4 cloves garlic, finely chopped 1 Red pepper, finely chopped 1 bdt. Spring onion, finely chopped or 1 onion or 1 pore 4 cm Ginger, peeled and diced 1 Carrot, peeled and diced 1 - 2 tbsp. Sambal Oelek Chili 1 tbsp. Fish sauce 1 tbsp. Soy sauce 2 tbsp. Lime juice 2 tbsp. Extra virgin olive oil Salt and pepper from the mill Accessories / Decorations of your choice: Coriander, parsley, chervil, basil or chives A good wholemeal bread is suitable 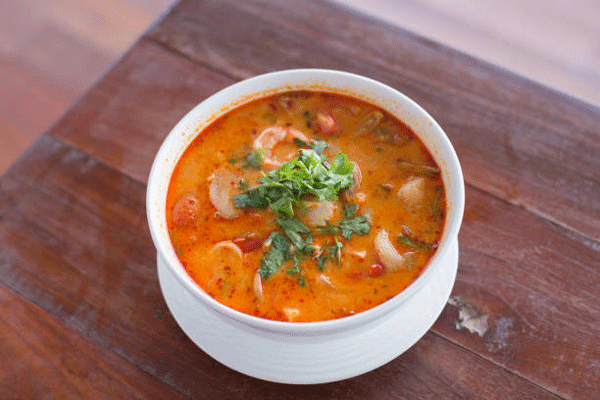
Shrimp in coconut milk - The picture is coming soon Procedure without liability: Start by reducing the white wine by half while the prawns are peeling or the prawns in the layer are dripping off. The vegetables are cleaned and cut as written above.
Then add coconut milk and vegetable broth up to the white wine in the pan and add the Sambal Oelek Chili and simmer for 2 to 5 minutes while the vegetables are sautéing in the oil. Put the vegetables in the pan and simmer for 5 minutes. Remove the pan from the heat and add the prawns. Season with fish sauce, soy sauce, lime juice, salt and pepper. The prawns must not be boiled because then they will become tough. Serving: Find a good wholemeal bread to your liking and serve it to the dish. Garnish: Sprinkle with the herbs you like best. Drink: Feel free to use the same white wine that was boiled in. Hints: If you can not find Sambal Oelek Chili, then use dried chili flakes and a little tomato puree for the sake of color. If you cook fresh prawns yourself and peel them, boil the shells for 5 minutes in 2.5 dl of water. The water is strained and used for the vegetable broth. |
Red fish in dish with vegetables
Next Down
Next Up
|
|
800 g Redfish fillets 2 pk. frost from Netto 4 Peeled potatoes 4 Carrots 1 Parsley root 1 Pastinak 1 Bunch of spring onion or 1 to 2 Leeks 4 tsp. Fish sauce 4 tsp. Oyster sauce 2 dl. White wine 2 dl. Whipped cream Garlic olive oil/grape seed oil for frying the fish 1 Small bunch of fresh thyme Salt and pepper from the mill Accessories: A good bread to your own taste is suitable for dipping in the sauce 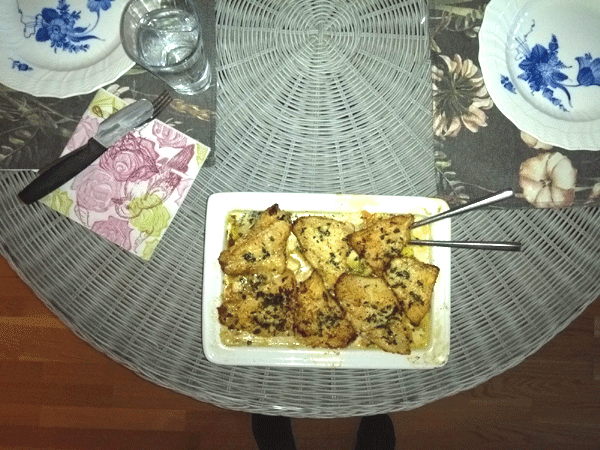
Red fish cooked in a dish with vegetables Procedure without liability: The redfish are thawed in the package overnight in the refrigerator and taken out only 1 hour before cooking. Place on a platter with the skin side down and sprinkle with a little salt and pepper from the mill.
All vegetables are cleaned and peeled, the potatoes are cut into thin slices, carrots, parsley and parsnips into thin sticks. Spring onions or leeks are cut obliquely into slightly wider slices. An ovenproof dish is greased well with garlic olive oil and all vegetables are distributed in it with the potatoes at the bottom, which have just been given a little salt. Pour on fish sauce, oyster sauce, white wine and whipped cream. Place in a preheated oven at 180°C for approx. 1 hour. Now cook the fish on the frying pan in olive oil or grape seed oil. Place the fish skin side down in the hot oil and fry for approx. 5 minutes and then turn down the heat. Hold the fish down with a palette knife so that there is good contact with the frying pan. Then the skin becomes crispy. When the meat is white, the fish is fried. The fish is turned and fried for only 10 seconds on the meat side. Then place the fish on top of the vegetables with the skin side down. Sprinkle with finely chopped thyme. Put it all back in the hot oven for approx. 10 minutes. Taken out and ready for serving. 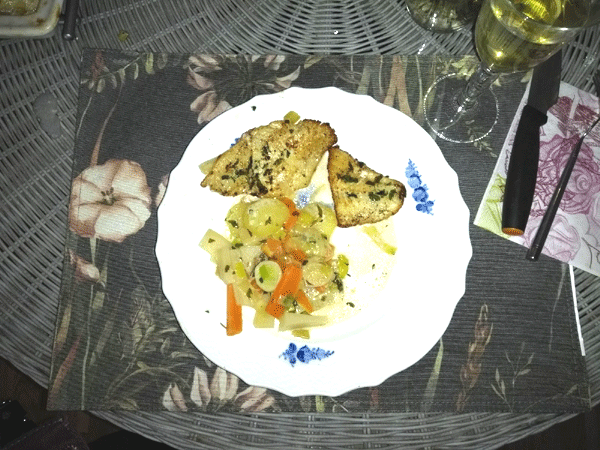
Red fish with vegetables served on a plate Serving: Find a good bread to your liking and serve it to the dish. Garnish: Sprinkle with a little finer chopped thyme. Drinking: Feel free to use the same white wine that was used for the fish. Hints: If you do not have the oil with garlic, then add a few chopped cloves of garlic to the dish. |
Large tiger prawns with white asparagus
Next Down
Next Up
|
|
600 g large tiger prawns 20 pcs. thick, white asparagus 3 to 4 tbsp. lemon olive oil 1 bag of almond flakes Salt and pepper from the mill Lemon Herbs: Parsley and / or Thyme and / or Dill and / or Basil and / or Coriander (Thai recipe) Use your favorite herb Accessories: A good bread to your own taste is suitable 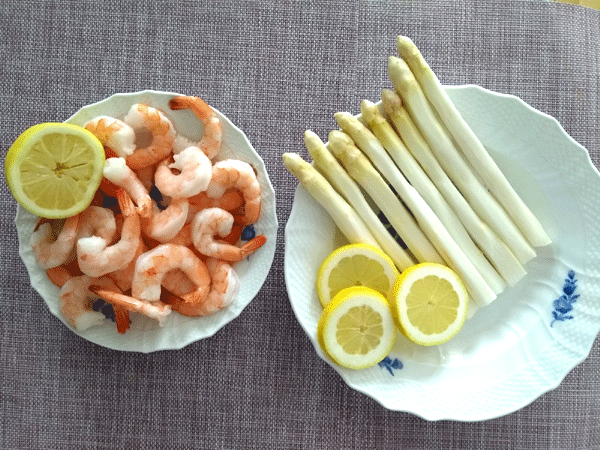
Large tiger prawns with white asparagus. Here made for 2 adults Procedure without liability: Start by preparing the asparagus. They are peeled from 2 cm below the top (the head is not peeled) to the bottom with a suitable peeling knife. I use a good potato peeler. The bottom is cut from approx. 1 to 2 cm up. Then cut each asparagus diagonally into 3 to 4 pieces. Put them in very cold water dripped with a little lemon juice while cleaning the prawns.
The tiger prawns are peeled but let the tail fan sit. Fry the prawns for 2 to 3 minutes in lemon olive oil. In the absence of lemon olive oil, olive oil can be used, but then add a little lemon juice during frying. Set the prawns aside while the asparagus is cooking. Fry the asparagus in the same oil for 3 to 4 minutes. They must have "bites". Add the almond flakes and tiger prawns and fry for another brief moment. Season with salt and pepper and maybe a little more lemon juice. Now you choose the herb that you like best, chop it finely and sprinkle it over the dish just before serving. 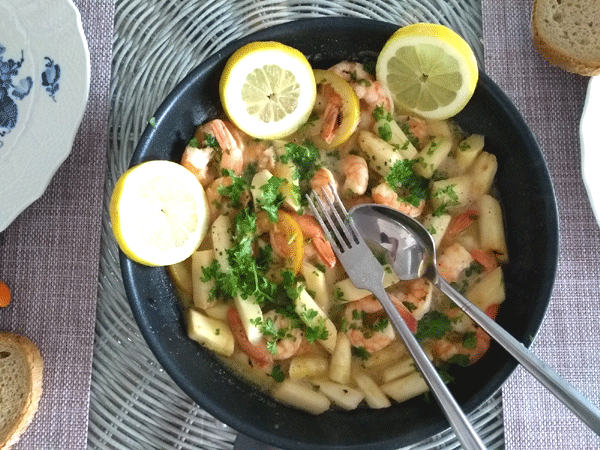
Large tiger prawns with white asparagus. Here made for 2 adults Serving: Find a good bread to your liking and serve it to the dish. Garnish: See above. Drinking: A cool white wine is very suitable in the summer heat. Hints: If you do not have the oil with lemon, put a couple of lemon slices in the dish during frying. If you can't get the big raw tiger prawns, use ready-cooked giant prawns. It facilitates cooking as they just need to be in the asparagus for a few minutes. |
Warm homemade liver pate with cream stewed chanterelles
Next Down
Next Up
|
|
200 g liver pate 40 g chanterelles, dried or 200 g chanterelles, fresh 4 to 6 tbsp. whipped cream 1 small shallot, finely chopped 1 clove garlic, finely chopped 1 tbsp. Soy sauce 1 tsp. Fish sauce 20 to 40 g butter 2 slices walnut bread, thickly sliced Salt and pepper from the mill Accessories: 4 slices of toasted bacon 
Dried vacuum packed chanterelles 47 grams. Fills only a little First a few facts: My fishing buddy Bent and I were in the woods yesterday - early October - to find chanterelles. We visited our "secret" place, far from the main road. What a sight - finally the forest floor was filled with small and large chanterelles. We got a good portion to take home approx. 1500 grams. Hence this recipe.
I got 800 grams of cleaned chanterelles. They were air dried in the oven at 45°C for 4 hours and 30 minutes. Dried weight was 180 grams, a shrinkage of 620 grams or 78%. The chanterelles that are not eaten now and here are air dried, vacuum packed and put in the freezer for later use. Procedure without liability: The dried and thawed chanterelles are put in water 1 hour before they are to be used for the dish. Put the sliced onions and garlic on the pan with a little butter. Fry them briefly - until they are clear - put the drained chanterelles on the pan and fry it all for a few minutes. Pour whipping cream by in appropriate amount 4 to 6 tablespoons. Stir around the pan while the whipped cream "bubbles" and thickens / shrinks to a suitable creamy consistency. Now taste the cream stewed chanterelles with Soy sauce, fish sauce, salt and pepper from the mill. Keep it warm until the bread with liver pate is done. Two slices of good bread - here walnut bread - are coated with a thick slice of homemade liver pate. In a clean pan, add a little butter, in which the bread - with the liver pate facing up - is lightly fried until the liver pate is warm and the bread has not been branked underneath. 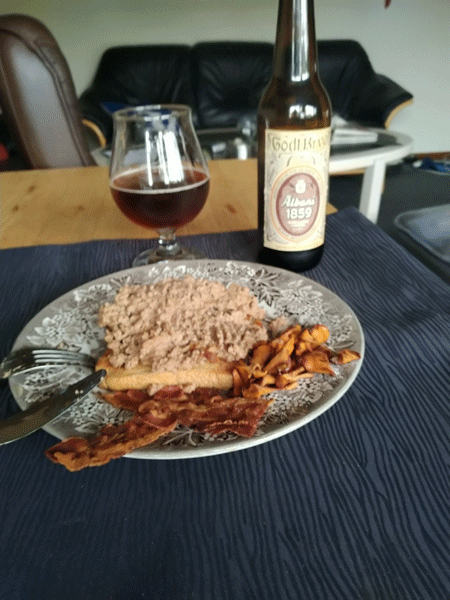
Warm homemade liver pate with cream stewed chanterelles Photo: Bent & Walter Text: Walter Serving: The bread is placed on a lunch plate and the cream stewed chanterelles are spread over the two loaves with liver pate. Decorate: Can be decorated with a little green: Cress, basil or dill. (We had nothing this day). Drink: Try an Albani 1859. It is wonderfully good for the dish. We found some bottles on offer - DKK 10 each. Tip: A few slices of bacon can also be used as a garnish / accessory. |
Bacalao Casserole ŕ la Walter-Angler
Next Down
Next Up
|
|
600 g cliff-fish, thick, salted and fresh 4 pieces. large potatoes, approx. 600g 1 dl virgin olive oil, cold pressed 1 large onion, chopped 2 cloves garlic, chopped 1 piece. red pepper, in strips 1 piece. red chili, with / without seeds 3 pieces. spring onion, the green for garnish 1 small can of tomato paste, 60 g 1 can chopped tomatoes, 400g ˝ dl water ˝ dl Fino Sherry 1 tsk. paprika, smoked The Peber Mřllen is put on the table Accessories and decorations: A good bread to your own taste is suitable for the dish Finely chopped spring onion, the green part Black olives, without stones 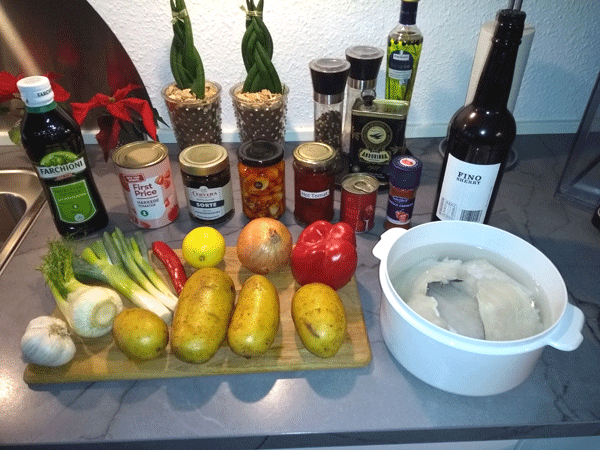
Ingredients for the dish Procedure without liability: Start by preparing the dried and salted cod called cliff-fish in Danish. Preferably buy the thick pieces closest to the head. Divide the piece into 4 parts and place them in a bowl with plenty of cold water. A bowl with a lid is preferable for the sake of the "scent". Place the bowl in the refrigerator for 24 hours. Change the water after 24 hours and put the bowl back in the fridge for 24 hours. After 48 hours, the fish must be cleaned of skin and bones, cut into 3 cm wide strips 6 cm long. Dub the fish for liquid and put it in the fridge while the rest is being cooked.
Prepare all vegetables so they are ready to get in the hot oil. The potatoes are peeled and cut into very thin slices. I used my grater for cucumbers. Onions and garlic are chopped, red pepper and red chili are cut into strips. Decide for yourself whether the kernels in the chili should be included. With kernels, the dish becomes "HOT", without less "HOT". I took half of the kernels in the dish and it was convenient for me, but not for the Lady - too "HOT". The white of the spring onions is finely chopped for the dish, the green is cut for garnish. The oil is heated in a suitably large pan, where the onion and garlic are just switched for a minute. Add tomato puree and switch again for a minute. Add chopped tomatoes, red pepper, red chili, spring onion, smoked paprika, water and sherry. Bring the sauce almost to a boil and put the sliced potatoes in the pan. Stir well in the pan so that the "things" mix. After 15 minutes, place the fish pieces in the pan and carefully turn the "things" over the fish pieces. Turn down the heat and let it simmer for 50 minutes under a lid. After this, do not stir in the pan, because then it becomes "Pickfish". Make sure there is enough liquid. Dilute with water / sherry if necessary. During cooking, the potatoes give off so much liquid that the dish is suitable to be served in bowls or deep plates. The dish is suitable for a good bread that can be dipped in the sauce. 
Bacalao served in deep plates with a cold Porter Serving: Find a good bread to your liking and serve it to the dish. Decorate: Use the green from the spring onions. Cut it nicely over the dish. Top with black olives. Drink: A cold Porter goes well with the dish. Tip: Be careful with salt, because it comes from the cliff-fish. |
| Go to a printer friendly printout of the recipe. |
Hot smoked duck breast with a great taste
Next Down
Next Up
|
|
WET SALTING 6 pieces. duck breast at 300 g Brine for 6 pcs. duck breast at 300 g 6 liters of water 900 g salt 2 onions, chopped 2 cloves garlic, chopped 6 pieces. bay leaves 10 pcs. white peppercorns 10 pcs. juniper, whole 3 pieces. star anise 6 pieces. cloves, whole Accessories and decorations: A good rye bread to your own taste is suitable Egg yolk, tomato and chives Salt and Pepper from the mill 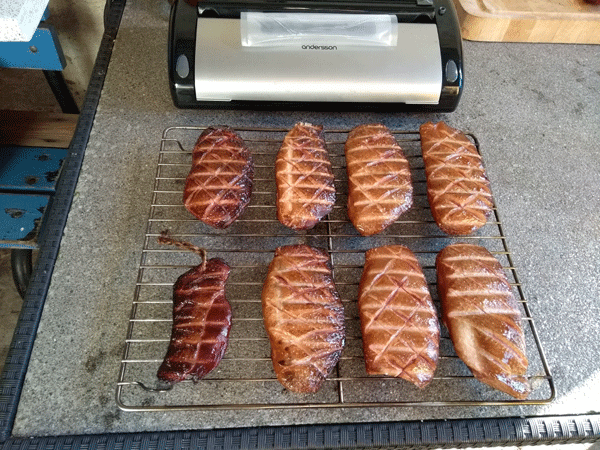
7 pcs. duck breast according to the recipe, but the small one, front to left is dry salted Procedure without liability: Start 2 days before the duck breasts are to be smoked by making a brine of 13%. Calculate the strength of a brine and read about Gourmet Salting on my Excel Spreadsheet. Use per duck breast a 300 g the following: 1 liter of water and 150 g of salt. The spices are after "Gefühl". Put water, salt and all spices in a large steel pan, bring to a boil and stir until all the salt has dissolved and the spices have given off their good taste. The pot is set to cool in the open air. Then refrigerate overnight at 5°C. The duck breasts are now placed in the cold brine and placed in the refrigerator at 5°C for 24 hours. Make sure they are completely covered by the brine. Keep them if necessary; down in the layer with a plate.
After 24 hours have passed, it is time to start your smoke oven to 80 til 90°C. While it is getting hot, you can take the duck breasts out off the brine and rinse them well in clean cold water. They are dabbed dry with kitchen paper or a clean tea towel. Scratch the duck breasts in the Harlequin pattern on the skin side. Then hot smoke from 80 til 90°C for approx. 2 hours, until the meat is tender. The core temperature in the chest should be approx. 67°C, go for this instead of the time. Let the duck breast stay in the smoke oven while it cools down, so that the smoke taste can become more intense. The duck breasts can be vacuum packed and frozen for several months - max 6 months. When they are to be eaten, you can heat them in a microwave, ordinary oven or on a pan with skin side down. It promotes the taste of smoke. 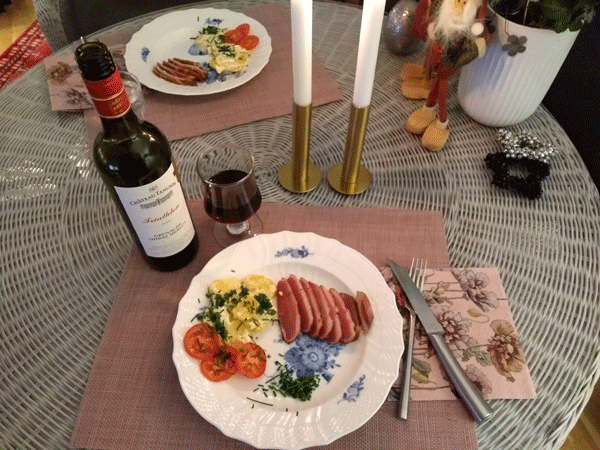
Duck breast served with creamed potatoes, tomato and chives Serving: Find a good rye bread and place thin slices of breast over. Garnish: Egg yolk, tomato slices and a sprinkle of chives. Drinking: Due to the smoky taste, I would prefer a good lager beer. Maybe a German Rauchbier from Bamberg, it's a dark lager beer with a smoky taste. Note: A steel pot is mentioned. This is because water and salt are aggressive towards metal - iron. The 7 duck breasts shown were given 2 hours and 15 minutes between 80 to 90°C. Tender and very juicy. The small one (180 g) was vacuum salted for 12 hours and became even more tender than the large duck breasts. The amount of spices can be set a little higher without it being too much. See recipe no. 141, where I vacuum salt duck breasts. End results produce more tender duck breasts. |
Homemade kippers in spice oil
Next Down
Next Up
|
|
6 pieces. nice fresh herring or 6 pieces. herring fillets from frost 0.3 g to 1 g fine salt per herring 0.2 g to 0.6 g of sugar per herring Pepper from the mill 500 ml rapeseed oil 1 red onion, finely chopped 2 cloves garlic, finely chopped 6 pieces. bay leaves 10 pcs. white peppercorns For Christmas use: 10 pcs. juniper 1 piece. star anise 4 pieces. cloves, whole ˝ tsk. allspice The spices are easily crushed in a Mortar Accessories and decorations for breakfast: A good buttered rye bread to your liking Lettuce leaf for each piece. bread 1 to 2 red onions cut into rings Chives finely chopped for sprinkling 6 pieces. land eggs Salt and Pepper from the mill 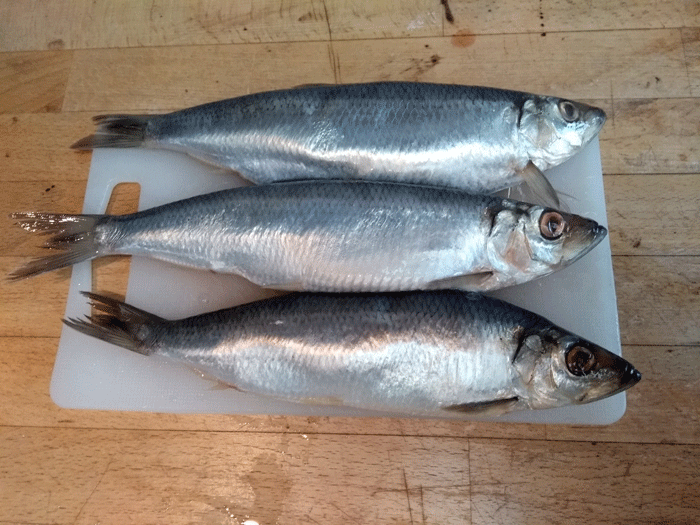
3 fatty peeled herring to be made for "Homemade kippers in spice oil" Procedure without liability: If you catch your herrings yourself, you should peel them on the boat and when you get home, they must be cleaned and filleted. Cut off the head, tail and dorsal fin, splash the herring up into the belly and take out the entrails. The kidney blood in the back is rinsed away under running cold water. Dub the herrings dry and put them in a bag. They should be in the freezer for 48 hours before being cold smoked. Why? Well! there is something called Ascaris suum (Roundworm) that can go in fish. Therefore, all fish that are not heat treated must be frozen for 48 hours first. A regulatory requirement.
Another option is to buy a package with 6 pcs. deep-frozen herring, which is almost ready to use. The dorsal fin is cut off and see if any kidney blood has been removed. Usually the 2 fillets hang together in the back, so now decide if you want to go on with 1 whole herring or 2 half herring. I prefer 2 half herring. Now the thawed herring should be "Gourmentsaltes" with a mixture of salt, sugar and pepper from the mill. A cleaned herring weighs approx. 100 g and it gives for 6 herring 1.2 g til 6 g salt and 1.2 g til 3.6 g sugar as well as a sprinkle of pepper from the mill. If you think it sounds complicated, then just think that it's like getting salt, sugar and pepper on a large tomato and egg sandwiches. Calculate the strength of a brine and read about Gourmet Salting on my Excel Spreadsheet under the "Ligevćgt = Equilibrium" tab. The herrings are placed in a dish and refrigerated overnight - 12 hours. They have, of course, given off some liquid, so they are dubbed dry before being cold-smoked. Light up the smoke oven and make sure that the temperature does not exceed 20°C. The time depends on your smoke oven - how much smoke it develops - but continuous smoking for 24 to 36 hours could be a good bet. While the herrings are being smoked, you can prepare a spice oil mixture: 500 ml of rapeseed oil is mixed with the mentioned spices. For Christmas, you can mix in a little Christmas flavor. When the herrings have finished smoking, take them out and put them in the rapeseed oil mixture, which has just been heated to 57°C. The fillets must now be immediately matured in the refrigerator for 2 to 3 weeks, so that they become "Kippers". Put them in a suitable container - box with lid - so that there is as little air as possible around oil and herring. I have a vacuum packer that can also suck the air out of the special boxes that belong to it. But mine is broken because it got in the freezer, which they can not stand. The plastic cracks and then no vacuum can form. 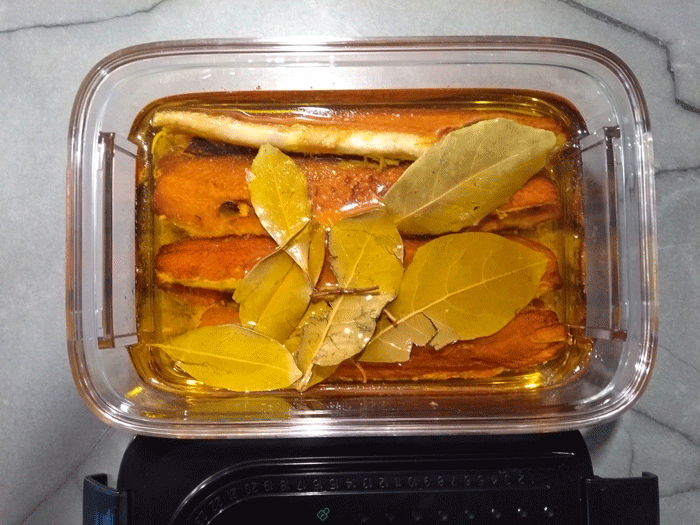
Here is the new picture where you can see that the 3 kippers are in spice oil Serving: Butter a good rye bread with butter and place a salad leaf with a kipper on top. Spread some whole onion rings on the kipper so you can put an egg yolk on. Another option is a poached egg. Try it, see the recipe below under tips. Garnish: Finely chopped chives are sprinkled over. Salt and Pepper from the mill. Drink: A good Danish lager beer is the thing with a dram. Tip: Poached egg is made as follows: Take a nice large pot, which is half filled with water, added 2 tbsp. apple cider vinegar or white wine vinegar. Bring the pan to a boil for a few minutes. Beat an egg into a cup. Whisk in the pan to form a vortex in the water, turn down the heat. Now carefully pour the egg into the center and with a spoon, you can help the egg to collect while the white coagulates and becomes firm around the yolk. After 3 minutes, pick up the poached egg with a slotted spoon and place on a paper towel to drain while the remaining eggs are poached. |
Red deer club in net with Waldorf salad
Next Down
Next Up
|
|
1 red deer club in net 800 g 1 small red onion, finely chopped 1 clove garlic, finely chopped 150 g mushroom mix (Oyster hats, Brown mushrooms) 150 g green grapes without stones 150 g fresh cranberries 3 tbsp. rapeseed oil or olive oil 2 tbsp. butter 4 cl Cognac or Whiskey 2 cl Fino Sherry 2 to 3 dl broth (chicken stock) 2 to 3 dl whipping cream Sugar, Salt and Pepper from the mill Accessories: Waldorf salad and cranberries 4 stalks celery leaves in small cubes 1 large Belle de Boskoop apples in small cubes or 2 sour apples from the garden 200 g green, ripe grapes without seeds halved 100 g walnut kernels some crushed 2.5 dl sour cream 38% 2 tsp. vanilla sugar or honey 1 pinch salt 
Ingredients for Red deer club in nets and Procedure without liability: Thaw the red deer club, rinse under running cold water, wipe well in a tea towel and pour the club over with a small glass of Sherry lying on the fireproof dish. Then rub the red deer club with salt, sugar and pepper. Heat rapeseed oil and butter in the frying pan and brown the club on all sides. Put onions, garlic, grapes, cranberries and the dry-roasted mushrooms in the pan. Pour Cognac or Whiskey into the pan and put a lid on immediately. Let the steamers work for three minutes so that the meat is tender. It's an old hunter trick, whether it works, you have to find out for yourself. It does not hurt.
Meanwhile, the oven has been heated to 180°C. Put the club on a fireproof dish and fry the club finished in the oven for approx. 35 to 40 minutes or to a core temperature of 62°C. The casserole with the fruits is made into a good sauce with a little broth (chicken stock), whipped cream and sherry. And taste with Salt and Pepper from the mill and maybe a little Sherry wine vinegar / sugar. 
Red deer club in net with Waldorf salad Serving: Served with Waldorf salad, cranberries and white potatoes. Garnish: Waldorf salad and cranberries: Waldorf salad is made in several ways, but then it is called by a different name. My recipe is the original from 1896 at the Waldorf Hotel in New York. At that time, you were happy to mix whipped cream and sour cream to get a less low-fat dressing. Drink: I have chosen an Italian red wine Valpolicella Superiore Ripasso 2019, which Fřtex had on offer here until Christmas, 6 bottles for DKK 300.00. It goes well with Christmas duck and / or pork roast. Just open the bottle the day before and give it oxygen. |
Homemade smoked hamburger back with kale and browned potatoes
Next Down
Next Up
|
|
Hamburger back: 2 kg pork loin / pork back 1 onion, divided into 4 2 cloves garlic, divided into 2 2 carrots coarsely chopped 4 bay leaves 15 peppercorns 15 juniper grains Accessories Kale: 800 g kale fresh without stalk or frozen thawed and twisted 1 large onion, finely chopped 100 g butter 100 g wheat flour ˝ l boiling water from the Hamburger back ˝ l whipped cream Grated nutmeg 2 to 4 tsp. sugar Lemon juice White pepper from the mill Salt maybe Accessories browned potatoes: 2 kg small firm potatoes 2 dl sugar 50 g butter 1 tbsp. salt in the boiling water 1 kg peeled potatoes (can be omitted) 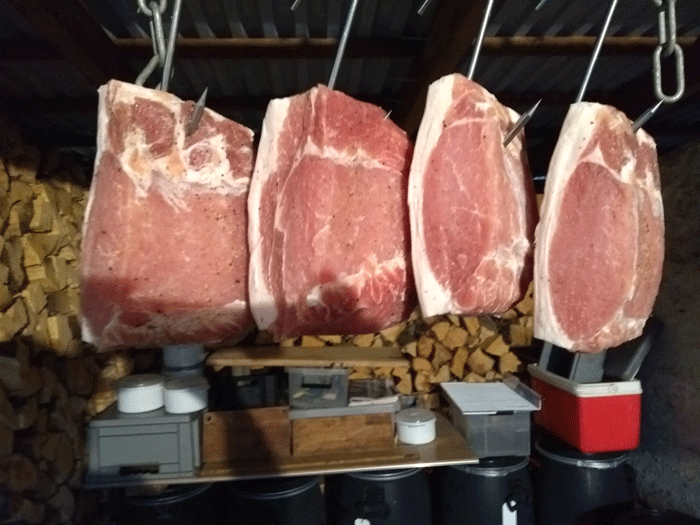
Homemade smoked hamburger back with kale and browned potatoes At the time of writing, I am preparing "The Bacon" for smoking Here is the "Pork" salted for 3 days, must be hung for drying for 3 days The recipe is under construction. Finished at the beginning of January 2022 Procedure without liability: This recipe was a family tradition on January 1st, when a family member had birthday on this day and the whole family was invited. As it goes, the family is scattered for all winds or die out, the new generation does not have time to carry on the old virtues and traditions and make proper dinner dishes.
I just want to mention that a Hamburger back can be made in 2 ways: The usual way or Sous Vide way. Here I will come up with the usual way. In addition, you can buy a ready-made hamburger back or smoke it yourself. I use my self-smoked hamburger back, but that shouldn’t stop you from making this perfect dish. Then we start. Insert the sensor from the thermometer into the core of the meat and place the hamburger back in a suitably large saucepan and pour cold water in until it covers. All herbs and spices come up in the pot. Put the lid on and bring the pot to a boil. From the time it boils, the pan should only simmer until the core temperature shows 60°C. Then remove the pan from the heat, stand and cool with the meat in until the core temperature shows 75°C. The whole procedure takes anywhere from 45 min. to 1 hour. Kale: Can be made with either fresh kale or frozen kale. I would think that most people will probably use frozen kale as it is time saving and can be obtained all year round. I even prefer fresh kale when it can be bought and it always can around New Year. The procedure is pretty much the same, but frozen kale should thaw and the water should be squeezed well out of the kale. Fresh kale is sipped from the stem and blanched for 3 minutes in boiling water from the hamburger back. Drip off in a sieve and cut / chop into smaller pieces. Then the recipe is the same. White sauce: Dear child has many names, you can also call it Bechamel sauce. It is this sauce that I want to use for my kale. Then we start. Put butter in a saucepan and let it simmer. Add the finely chopped onion and let the onion take on a little color. Sprinkle flour while stirring until a "Flour Ball" appears. Now dilute with boiling water from the hamburger back with vigorous stirring until a suitable soft consistency of the sauce is achieved. Then add cream / whipping cream in a thin stream while stirring. Boil the sauce for at least 3 minutes and season with salt, sugar, lemon juice, nutmeg and white pepper. You should end up with at least 1 liter of white sauce. Last step for kale: Add the squeezed frozen kale or blanched fresh chopped kale to the white sauce and cook for approx. 5 minutes. Taste for the last time, but pay attention to salt as the hamburger back releases salt to the boiling water. Brown potatoes: Boil and peel the potatoes the day before and try this recipe for perfect sugar brown potatoes. Put a suitably large frying pan on the stove where all the potatoes can lie in one layer. Spread the sugar on the pan in an even layer, turn up the heat for a few minutes until the sugar melts without stirring. Turn down to even heat and add butter while stirring. Put the potatoes on the pan and turn up to high heat. Brown the potatoes for 5 to 10 minutes over high heat while gently turning them on the pan. If the potatoes get a little dry, add a little butter / water. 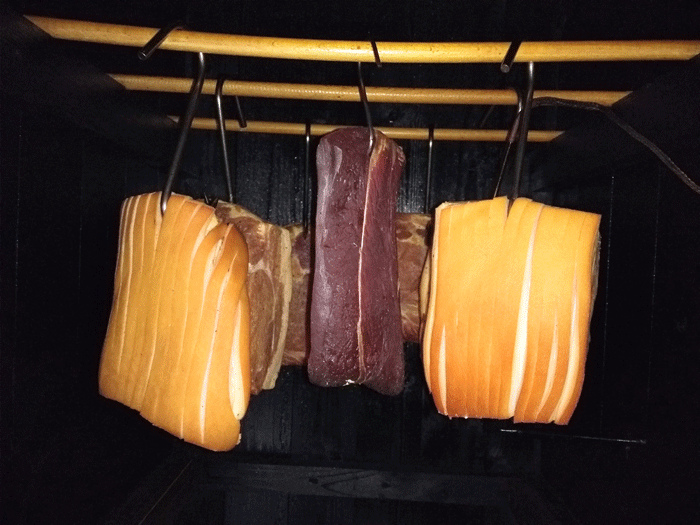
Here the Pork is seen cold-smoked for 3 days, must be hung to ripen for 3 days The recipe is under construction. Finished at the beginning of January 2022 Serving: In Jutland there are many ways to serve kale. The The North Jutlanders have their way and the Southern Jutlanders have their way. Maybe the West Jutlanders have their own way too. This recipe is from West Jutland and was also served with white potatoes. Drinking: In West Jutland, beer and schnapps were drunk for kale and they continued with a "Coffee Punch" and a 10 řre. Do you know this trick? Tip: Most Hamburger backs you buy are either in net or plastic. Both types of wrapping are meant to cook with. I myself will choose a hamburger back in net and then remove the net when the hamburger back has cooled. |
Basturma Armenian Style with Pork tenderloin
Next Down
Next Up
|
|
Pork Basturma is dry-salted for 3 days in the fridge 3 pieces. Pork tenderloin min. 600 g / pc. Preferably 2 kg in total 1 kg coarse salt 50 g cane sugar Vacuum salting is coming up Chaimen: Armenian RUB spice for 1 kg of meat 14 g = 1 tbsp. Salt, fine 43 g = 3 tbsp. Fenugreek powder 43 g = 4 tbsp. Hungarian paprika, sweet 14 g = 1 tbsp. Black pepper 14 g = 2 tbsp. Cumin powder 7 g = 1 tbsp. Cayenne pepper hot 14 g = 2 tbsp. Allspice 14 g = 1˝ tbsp. Garlic powder / granules 70 g = 2 tbsp. Red pepper pasta 3 dl ca. Warm water - see later under Chaimen hot RUB sauce Materials needed to make Basturma A suitable salt vessel for the meat. A refrigerator where the meat can be matured for up to 4 weeks. The environment must be cold and slightly humid. Temperature below 10 ° C and RH 60% humidity. A suitable bowl in which you can mix the RUB. Cheese canvas, gauze or the old-fashioned cotton nappies bought in Jysk, Items no. 4914800. 12 pcs. DKK 125.00. They just need to be boiled well before use, as the fabric is bleached with chlorine. Meat cord and hooks for hanging the meat in the fridge. Option a smoke oven if you want to add a smoky taste. Notice: I have made an Excel spreadsheet for calculating salt, sugar and spices. Available only on the PC version of "Recipes". Recipe No. 133 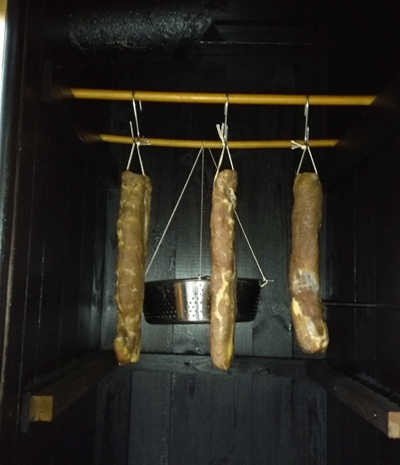
Homemade Pork Basturma is now ready for the RUB The 3 pork tenderloins have been given 2 x 14 hours of cold smoke First a few facts: Basturma or Pastirma is a spicy, air-dried and hardened piece of meat, which was cooked in the Ottoman Empire in the fall. Maybe even smoked over horse manure. It was originally the method the Ottomans used to preserve their meat. However, the method is widespread from Bulgaria, Macedonia, Greece, Egypt, Turkey, Ukraine, Syria, Armenia and Uzbekistan (Tashkent - Samarkand), perhaps further east, but my journey ended in Tashkent.
Many kinds of animals (meat) were used depending on where one was in this part of the world. Water buffalo, beef, lamb, goat, camel, horse, cow and even pig. In addition, various spices were also used that characterized the country where these spices grew. In Turkey, I got to know the court in small, cunning places where you could get a cold beer with a "dry snack". When I was around Uzbekistan with a team of Danish businessmen, we paused far from the "Civilization" in a small village where we were to have lunch. We got some heavily dried meat the size of elephant ears, which was dipped in boiling oil in a pan the size of a "Danish Grue kettle". There were only three things we could choose to drink with the food, water, green tea and home-made cognac. When we did not dare to drink the water, it turned into green tea with cognac. A memorable trip with a little headache the next day (Well, a bottle of cognac cost 25.00 DKK.) Procedure without liability: Since this is the first time I start this task, I have decided to use 3 pieces. fresh pork tenderloin not less than 600 g / pc. Preferably 800 g. Trim the meat. Make sure that tendons and obstructions are removed before you start. Maintain good kitchen hygiene - wash hands and wear gloves when rubbing the RUB. 1. Step: Cover the bottom of the salt vessel with a nice layer of salt. Place pork tenderloin - one at a time - on the salt and sprinkle well with salt. Remember on all sides and the end pieces. Repeat for the next two pork tenderloins. If you want to add some sugar, mix salt and sugar before sprinkling it on the meat. Put the salt vessel in the refrigerator for 3 days at 7 ° C. 2. Step: During these days, the meat forms a lot of liquid. Carefully pour it out every day so that the meat does not soak in the liquid, but avoid pouring out the salt. Feel free to turn the meat every day, if there is a little salt on the top of the meat, take something from the bottom of the salt vessel and sprinkle it on. 3. Step: Take up the meat, rinse it off for salt in cold water. Leave it in cold water for 30 to 60 minutes. Take the meat up and dry it thoroughly for water. Wrap the meat in cheese canvas, gauze or cotton cloth as I have described above. Put the meat under pressure for the next 2 to 3 days. Change the cheese canvas if it gets too wet. 4. Step: Unpack the meat and hang it on hooks in the fridge for the next 4 to 7 days. The meat should be completely dry and "stiff" like a board. Now the RUB can be mixed and rested in the refrigerator overnight. If you want to add a smoky taste, then it is now the meat must be Cold smoked. 5. Step: Rub the meat on all sides with Chaimen hot RUB sauce. Wear gloves for the sake of your fingers and for the sake of your guests, they must help to taste the product. Once all the meat is covered, hang the meat to dry in a cool place for 2 to 3 weeks. A refrigerator is suitable. 6. Step: From the finished Basturma, remove the excess and loose spices, then cut into thin pieces and serve. Chaimen hot RUB sauce: Combine all the above ingredients together. Add enough water, a little at a time to make the mixture as thick as waffle dough. Blend well to avoid lumps. This mixture may be kept in the refrigerator for several weeks. 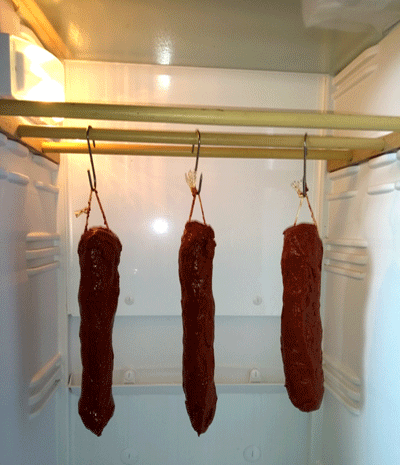
Has now got RUB and must hang at least 4 weeks in the fridge The temperature is 6°C and RH 84% humidity Serving: I know it as a "dry snack" for a cold beer, so you should try it too. Tip: Try it for breakfast instead of bacon, fried eggs with Basturma. |
Pastirma Egyptian Style with rib eye steak
Next Down
Nćste op
|
|
Ribeye Pastirma is dry-salted for 3 days in the fridge 2 kg Ribeye steak 1 kg coarse salt 50 g cane sugar Vacuum salting is coming up Chaimen: Armenian RUB spice for 1 kg of meat 14 g = 1 tbsp. Salt, fine 43 g = 3 tbsp. Fenugreek powder 43 g = 4 tbsp. Hungarian sweet pepper 7 g = 1 tbsp. Black pepper 14 g = 1 tbsp. Cumin powder 7 g = 1 tbsp. Cayenne pepper hot 7 g = 1 tbsp. Allspice 10 g = 1 tbsp. Garlic powder / granules 35 g = 1 tbsp. Red pepper pasta 2 dl ca. hot water - see later under Chaimen hot RUB sauce 1 tsp. is 5 ml and 1 tbsp. is 15 ml. Materials needed to make Basturma A suitable salt vessel for the meat. A refrigerator where the meat can be matured for up to 4 weeks. The environment must be cold and slightly humid. Temperature below 10 ° C and RH 60% humidity. A suitable bowl in which you can mix the RUB. Cheese canvas, gauze or the old-fashioned cotton nappies bought in Jysk, Items no. 4914800. 12 pcs. DKK 125.00. They just need to be boiled well before use, as the fabric is bleached with chlorine. Meat cord and hooks for hanging the meat in the fridge. Option a smoke oven if you want to add a smoky taste. Note: I have made an Excel spreadsheets for calculating salt, sugar and spices. But it is only for vacuum salting. 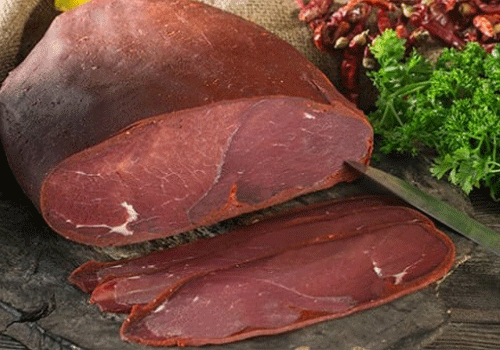
Homemade Pastirma Egyptian Style First a few facts: Pastirma is a spicy, air-dried and hardened piece of meat, which was cooked in the Ottoman Empire in the fall. Maybe even smoked over horse manure. It was originally the method the Ottomans used to preserve their meat. However, the method is widespread from Bulgaria, Macedonia, Greece, Egypt, Turkey, Ukraine, Syria, Armenia and Uzbekistan (Tashkent - Samarkand), perhaps further east, but my journey ended in Tashkent.
Procedure without liability: I have now tried to make Basturma with 3 pork tenderloins of 700 g / each. So now I want to try Pastirma Egyptian Style with rib eye steak. Trim the meat. Make sure that tendons and obstructions are removed before you start. Maintain good kitchen hygiene - wash hands and wear gloves when rubbing the RUB. 1. Step: Cover the bottom of the salt vessel with a nice layer of salt. Place the Ribeye steak on the salt and sprinkle well with salt on the meat. Remember on all sides and end the pieces. If you want to add some sugar, mix salt and sugar before sprinkling it on the meat. Put the salt vessel in the refrigerator for 3 days at 7 ° C. 2. Step: During these days, the meat forms a lot of liquid. Carefully pour it out every day so that the meat does not soak in the liquid, but avoid pouring out the salt. Feel free to turn the meat every day, if there is a little salt on the top of the meat, take something from the bottom of the salt vessel and sprinkle it on. 3. Step: Take up the meat, rinse it off for salt in cold water. Leave it in cold water for 30 to 60 minutes. Take the meat up and dry it thoroughly for water. Wrap the meat in cheesecloth, gauze or cotton cloth as I have described above. Put the meat under pressure for the next 2 to 3 days. Change the dressing if it gets too wet. 4. Step: Unpack the meat and hang it on hooks in the fridge for the next 4 to 7 days. The meat must be completely dry and hard. Now the RUB can be mixed and rested in the refrigerator overnight. If you want to add a smoky taste, then it is now the meat must be Cold smoked. 5. Step: Rub the meat on all sides with Chaimen hot RUB sauce. Wear gloves for the sake of your fingers and for the sake of your guests, they must help to taste the product. Once all the meat is covered, hang the meat to dry in a cool place for 2 to 3 weeks. A refrigerator is suitable. 6. Step: From the finished Pastirma, remove the excess and loose spices, then cut into thin pieces and serve. Chaimen hot RUB sauce: Mix all the above ingredients together. Add enough hot water, a little at a time to make the mixture as thick as waffle dough. Blend well to avoid lumps. This mixture can be stored in the refrigerator for several weeks. 
Homemade Pastirma Egyptian Style is now ready to be eaten Serving: I know it as a "dry snack" for a cold beer, so you should try it too. Try it for breakfast instead of bacon, fried eggs with Pastirma. |
Pancetta Italian Bacon
Next Down
Next Up
|
|
Pork Pancetta Italian Bacon is salted 5 to 7 days in the fridge 1 to 1.5 kg Pork Belly, kind of pork between ribs and loin 1st time RUB per 1 kg of meat is used 40 g Salt 20 g Brown sugar 5 g = 1 tsp. Pepper, black 3 g = ˝ tsk. Chili pepper, Cayenne pepper hot 2nd time RUB per 1 kg of meat is used 14 g = 1 tbsp. Salt, fine 7 g = ˝ tbsp. Brown sugar 10 g = 2 tsp. Black pepper 5 g = 1 tsp. Hungarian paprika, sweet 5 g = 1 tsp. Nutmeg 5 g = 1 tsp. Chili pepper, Cayenne pepper hot 5 g = 1 tsp. Garlic powder 2 pcs. Bay leaves, finely cut Alternative spices for Panacetta 2nd time RUB 5 g = 1 tsp. Thyme, dried 5 g = 1 tsp. Juniper, crushed 5 g = 1 tsp. Fennel seeds, crushed 5 g = 1 tsp. Coriander seeds, crushed 5 g = 1 tsp. Paprika, smoked 5 g = 1 tsp. Fenugreek powder Notice: I have made an Excel spreadsheet for calculating salt, sugar and spices. Available only on the PC version of "Recipes". Recipe No. 135 
Pork Belly for Pancetta Italian Bacon approx. 1.5 kg First a few facts: Pancetta is a spicy, air-dried and hardened piece of meat that the Italians make and which we will call bacon. There is the difference that pancetta is not smoked, however I have heard of smoked pancetta, so maybe one should try this next time. Pancetta can be eaten uncooked in thin slices on bread and with beer or wine. Pancetta is actually made in two ways: Flat as we know our bacon with rind on or as a roulade that is rolled and tied but without rind on. (I did that then 12 to 14 hours of cold smoke. Only getting better from it.)
Procedure without responsibility: Buy a good piece of pork without bones - pork breast or rib roast without scratches in the rind, where the distribution of meat and fat is in favor of meat. Weight not less than 1 kg and not more than 2 kg. You have to keep it in your fridge for almost a month, because that's the time it takes to ripen a good Pancetta. Start here: 1. Step: The first time RUB is rubbed well into the meat, which is placed on a cutting board which is placed obliquely in the refrigerator for 5 to 7 days for draining. Start by laying the meat side up and turn the cutting board 180 degrees every day. Every other day, the meat is turned over so that the meat side comes down. The liquid is removed every day. 2. Step: After 7 days, remove the meat and brush off excess salt. Carefully wash the meat with wine vinegar / beer / wine - ˝ glass - is suitable for 1 to 1.5 kg of meat. Make a hole in one corner and pull a string through to hang in the fridge. Wipe the meat well and go to the next step. 3. Step: The 2nd time RUB is rubbed well into the meat and the Pancetta is hung up at room temperature for 24 to 48 hours. Then go to the next step. 4. Step: The pancetta is now hung in the fridge at approx. 5 to 7 ° C and RH approx. 70% over the next 21 days. Then go to the next step. 5. Step: The pancetta is now ready to be eaten in thin slices. 
Ready-made Pancetta Italian Bacon with a single cold smoke Serving: Like a "dry snack" for a cold beer. Try it for breakfast instead of bacon, fried eggs and Pancetta. |
Schwarz-Walter-Schinken
Next Down
Next Up
|
|
For 1 kg of boned pork from the ham, use the following:
7 g Ordinary table salt 17 g Nitrite salt, 0.6% nitrite content, See under Tip 3 g Juniper, crushed 3 g Coriander, crushed 3 g Allspice, crushed 1 g Bay leaves, finely cut, 4 to 6 large one 3 g Kampot black pepper, Cambodia 3 g Szechuan pepper, China 1 g Cayenne pepper hot, powder 3 g Garlic powder 3 g Cumin, powder 5 g Brown Farin 3 g Mustard seeds yellow, crushed 1 g Sodium ascorbate E301, See Tip For cold smoking, use the following: Beech sawdust Juniper bush granules Or dried and crushed: Spruce cones (only a few) Branch of spruce (only a little) Branch from grape NB: A ham of only 1 kg is not much. But you just need to scale up the amount on the underlying additives. Do you come to grams with many decimals - 6.6704 grams - round fresh and cheerful up to 7 g. I have made a Excel spreadsheet for calculating salt, sugar and spices. Available only on the PC version of "Recipes", and it is only for vacuum salting. If you follow the amount of salt, you get a degree of salting of 2.4 % and a nitrite content of 100 mg per kg of meat.
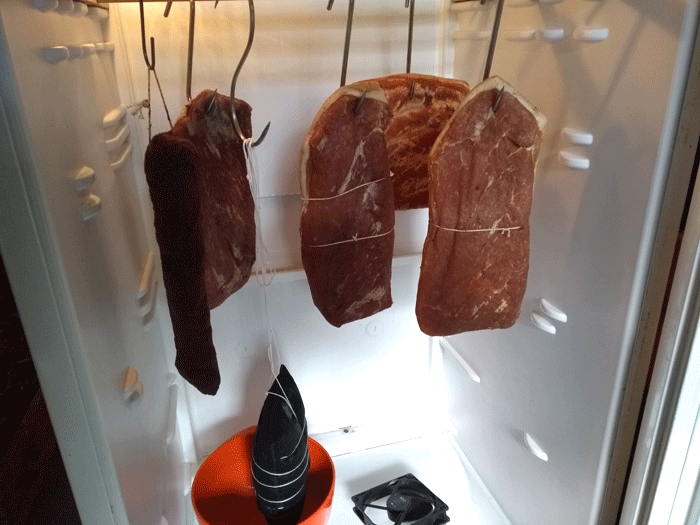
Schwarz-Walter-Schinken for maturation in the refrigerator First a few facts: If this recipe for Schwarz-Walter-Schinken reminds you of something you've tasted in Germany on your travels, you're not entirely mistaken. I was even on my way to Basel by car, and came through several cities in the Schwarzwald, where we did stay. For breakfast we got Schwarzwaldschinke with (egg stand / scrambled eggs) as far as I remember. Schwarzwaldschinke is a well-known and popular product. The term "Schwarzwaldschinke" is a protected name, so only hams produced in the Schwarzwald may be called Schwarzwaldschinke. The surface of the "Old Ham" was black, which was created by dipping the hams in beef blood before smoking. It is not something that is used more than a few manufacturers. In the past, the pig was also supposed to come from the Schwarzwald, but this condition has been lifted. The rule only applies in the EU.
Procedure without responsibility: Then we must start, but adhere to good kitchen hygiene, wash hands so that no bacteria enter the meat, which later leads to spoilage. After all, a Schwarz-Walter-Schinken is four months in the making before it can be eaten. 1. Step: Clean the flesh of tendons and skins and make sure there are no deep pockets and "flaps" hanging loose. The meat should be as smooth as possible. Of course, the rind is kept on the ham. My opinion, but you can do as it suits you best. You may save 1 week of salting time. 2. Step: All spices that are seeds are crushed first in a mortar or grinder. Weigh all spices and mix these well with salt and sugar before rubbing the mixture well and thoroughly into the meat. Put the meat in a vacuum bag and make sure the whole mixture comes in the bag. Vacuum the bag and make sure there is no salt and other things where the weld seam should be. This results in poor welding and the risk of air penetrating the bag. I normally give two welds at both ends. 3. Step: Lay the vacuum pack flat on the table and measure the pack in the thickest place. Calculate a salting time in the refrigerator at 5°C to 7°C of 3 days per cm when the ham is thickest. If you measure 10 cm, the time is at least 30 days or 4 to 5 weeks. Remember to turn the package in the fridge every day so that the ham is evenly salted. If you remove the rind, you can settle for 2 days per cm. 4. Step: After the 4 to 5 weeks, take the package out of the fridge and rinse the ham under running, cold water free of spices, salt and sugar. Wipe well in a clean tea towel and now hang freely in the refrigerator again at the same temperature as before. The time here is called the curing time and it takes in the fridge 1/2 day per cm. The ham above 10 cm thus takes 5 days in a cool environment. 5. Step: The ham must now dry completely before being smoked. Take the ham out in a warmer environment 12°C to 18°C and RH of 40 % to 50 % humidity for a maximum of 2 days. However, a moderate air circulation around the ham is required so as not to form mold. Also not in strong air draft because then a dry crust is formed. When the surface is felt dry, the ham can be cold smoked. 6. Step: Use a smoke coil or a maze of rams and make sure the material is crisp and finely chopped. My smoke coil lasts an average of 14 hours and the temperature in the smoke oven comes approx. 10°C above ambient temperatures. There must be max. be 27°C in the smoke oven. So at high daytime temperatures you can smoke at night. Feel free to take breaks between each smoking. I would recommend - with what I have written about my smoke oven - to smoke between 4 to 5 times in the night. Then there is a break during the day. 7. Step: After smoking, the ham should be matured for a few weeks in the refrigerator at 5°C to 7°C and RH at 30 % to 40 % humidity. The ham should (must) hang freely in the refrigerator so that the water content evaporates. It is highly recommended to weigh the ham before salting and when the finished ham has matured. There should be a weight loss of approx. 30 % to achieve max. durability. If you have several hams and want to store these, it is recommended that they be packed in DRY AGING BAGS and placed in the refrigerator. They mature in the bags, then they can be taken out and cut into thin slices and eaten with great pleasure. 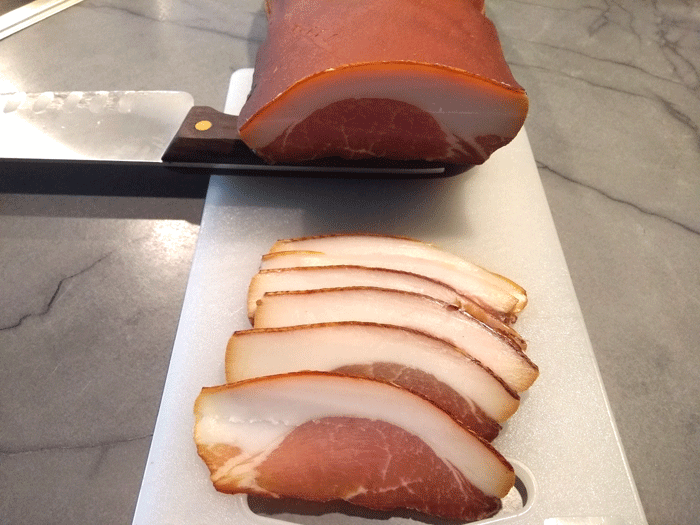
My Schwarz-Walter-Schinken after 3 months. 30.3% weight loss right after the book Serving: Eat it "Free". It is a term that I use when I eat meat alone, ie without accessories (bread and potatoes). But I think I will create a Pizza when my friend Thomas gets to set up his 800 kg Pizza Oven next to the smoke oven. I will promise that a picture will come at that time. But otherwise I will also serve the ham white asparagus with melted, clarified butter and grated parmesan cheese. A specialty in northern Germany until May. Tip: It is optional to add E301 Sodium ascorbate or E300 Askorbic acid. It is an antioxidant. On the plus side, Sodium ascorbate makes the meat more red and over time reduces the residual nitrite content in it Finished product. Both ascorbic acid and Sodium ascorbate are forms of vitamin C and are common food additives where more specifically Sodium ascorbate falls into the category of mineral salts. Although ascorbic acid is the pure form of vitamin C, Sodium ascorbate is the sodium salt of ascorbic acid. I've seen the Austrians use Chrisale salt, which contains 0.4 % to 0.5% nitrite in the individual salt crystals. It should cause a better taste and color in the meat, since the nitrite precipitates more slowly in the process, in contrast to ordinary. salt to which the nitrite has been added artificially. |
Rainbow trout freshly caught and hot smoked
Next Down
Next Up
|
|
2 pcs. freshly caught rainbow trout of approx. 1.5 kg 500 g fine table salt 50 g cane sugar 3 tsp. black pepper, crushed 3 tsp. onion powder 3 tsp. garlic powder/salt 3 tsp. chili flakes Accessories: 1 cauliflower head 800 g new potatoes 1 lemon parsley Melted and clarified butter 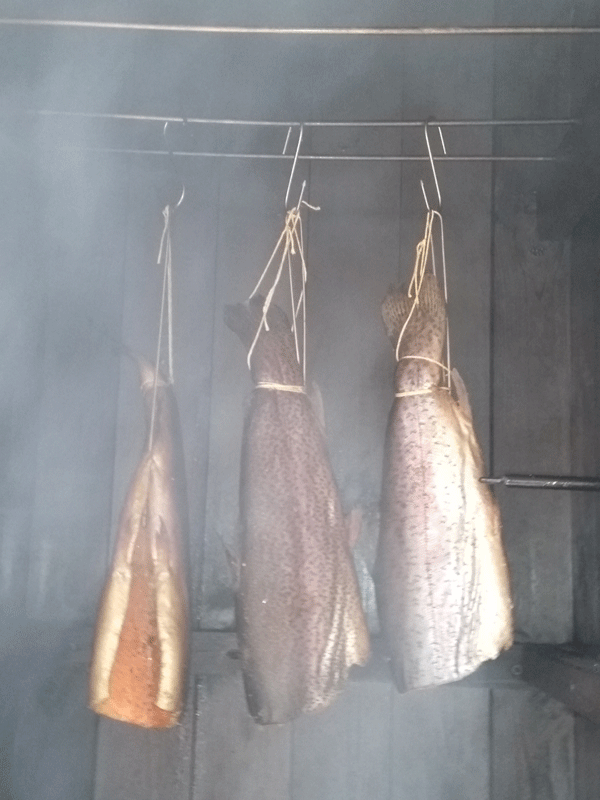
Rainbow trout freshly caught and hot smoked First a few facts: At the end of March 2022 we had a fantastic weather with sunshine and warm weather, so it pulled tremendously in the "fishing rod" to get out and swing this rod. As the protection of the river had not yet ceased, it had to become a Put & Take lake nearby. I was lucky to get to a fishing lake where trout had been put out the day before, so I had 10 bites, but the 6 did not come up. Four good rainbow trout of 1.5 kg were the catch of the day. The three are seen in the picture, which is getting hot-smoked. The fourth is to be boiled and served with new potatoes and Hollandaise sauce on a later occasion.
Procedure without liability: The rainbow trout are cleaned and prepared for hot smoking, which is described under Salmon and trout. However, I have chosen to dry salt them, because they had to be hot-smoked the next day. They came in a salt tub suitable for 3 to 4 fish of this size, were sprinkled with 500 g of fine salt and 50 g of cane sugar. Lie in this salt/sugar mixture for 18 hours and while the smoke oven was getting ready, I filled cold water in the tub. Then the fish was dried well in a kitchen roll and a clean tea towel. The 4 spices were sprinkled into the belly of the fish and they were then hung into the smoke oven. The evolution of smoke had not yet begun and the temperature was approx. 90°C. The fish hung in the smoke oven for 45 minutes with good drafts at approx. 80°C. Then smoke dust came on the flames so that they went out and the embers with smoke dust began a strong smoke development. The temperature dropped to approx. 70°C and this was kept for the next 3 hours. I use a mixture of 80 % beech sawdust and 20 % juniper granules, which gives an excellent taste. Can be bought in bags of 30 liters for DKK 500. After 4 hours, the temperature had dropped to approx. 30°C and the evolution of smoke decreases. It had also become evening, so the fish were allowed to spend the night in the smoke oven until the next day. One fish was vacuum packed and put in the freezer for later use, the other 2 were eaten the same evening. A wonderful meal with side dishes, as described above. 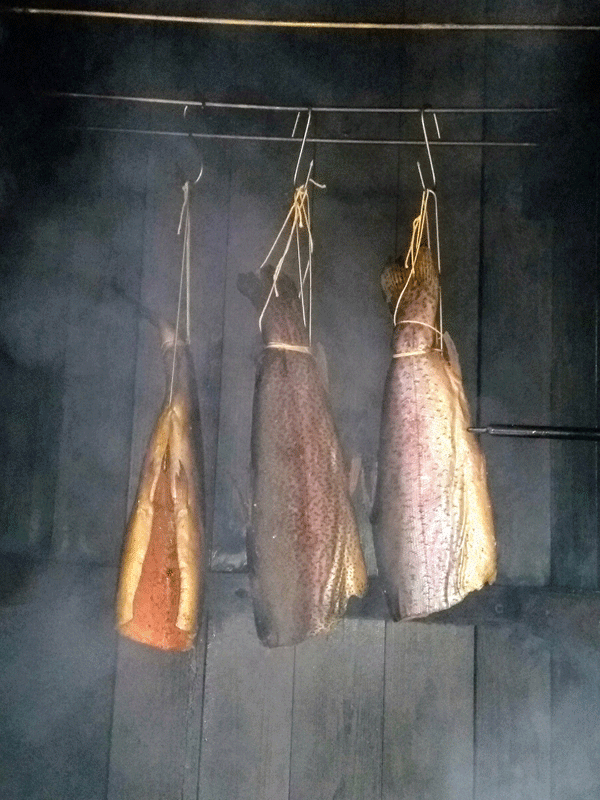
Rainbow trout freshly caught and hot smoked Serving: I peel the fish free of skin and bones (also the brown fish fat on the sides) for my guests so it's ready to eat. Got a lot of praise for the taste. Garnish: Can be garnished with a little green: Parsley, basil or dill. Drink: We chose a good red wine, because it goes well with smoked trout. Tip: If you catch mackerel, try to smoke them in the same way. For large mackerel, the time is probably the same, but small mackerel a little less time. But a good thing is: Accommodation in a smoke oven. |
Asparagus Fricassee with smoked Hamburger Back and mashed potatoes
Next Down
Next Up
|
|
1 kg Hamburger back 1 bunch of white asparagus 250 g 1 bunch of green asparagus 250 g 500 g green peas in pods or 200 g fine peas on frost 1.5 liters of vegetable broth 1 bunch of dill 1 piece onion 1 clove of garlic Salt and White Pepper Sauce: 30 g of butter 30 g of wheat flour Boiling water from the meat Whipped cream/Cream 1 lemon, organic. dill Salt and White Pepper Mashed potatoes: 1000 g potatoes, peeled A little butter Whipped cream/Cream Salt and White Pepper Grated nutmeg Dill 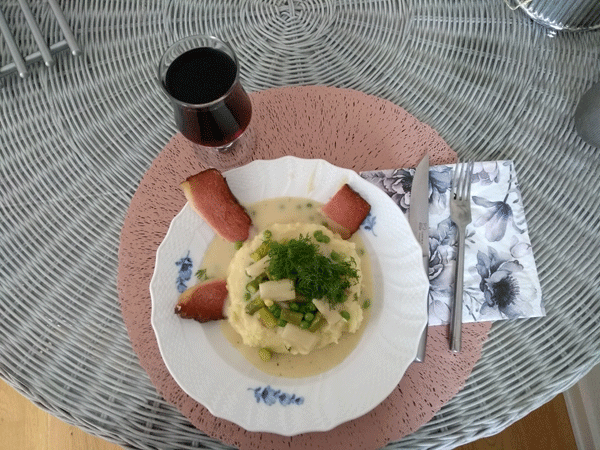
Asparagus Frikasse with smoked Hamburgerback and mashed potatoes First some facts: I made the dish with half of the homemade Schwarz-Walter-Schinke in Recipe No. 136. But for others who cannot smoke at home, I have chosen the recipe with a good hamburger back. I "invented" the dish when it was time to eat the rest of the "Ham" - not because it had gone bad, but after half a year in Dry age bag, it had become rock hard and could (almost) not be cut with a knife. Therefore, the ham was also "cooked" - prepared in its own way. It was placed in cold water overnight in the refrigerator. The same water (1.5 l) the ham was "cooked" the next day, but in a special way. The water did not get above 85°C, I had a thermometer in the water and by regulating my small hotplate I could maintain an - almost - constant temperature around 80°C for 90 minutes. After this, the pot was taken off the heat and the ham was left in the hot water until it became cold. Save the cooking water, it will be used later for a vegetable broth. A purchased hamburger back is "cooked" in the same way for 60 minutes, but does not need to be in cold water overnight in the refrigerator. I put some peppercorns, juniper berries, some bay leaves, a small onion and a clove of garlic in the boiling water. See "Postscript" at the end.
Procedure without liability: Start by preparing the potatoes for the mashed potatoes. Peel them and cut them into suitable pieces so that they will be easy to mash after they have been cooked. Remember no salt in the water when they are to be made into mashed potatoes. Peel the white asparagus and cut off the base approx. 3 cm up. Save peel and bottom. The green asparagus is cut just a little from the bottom. Save bottom. The peas are podded. Save the pods. Measure out the cooking water from the ham (hamburger back) - 1 liter - and add a vegetable stock as well as the peel, bottom and pods. If there are dill stalks, cook them as well. Let it simmer for 20 minutes. Then strain it all and discard the peel, bottom and pods. The white and green asparagus are cut into 3 cm pieces and now boiled for 5 minutes in vegetable broth, after which they are taken up and put aside, as they need to be in the sauce when it is ready. Put the butter in a sauce pan and, when it has finished bubbling, add the flour while stirring constantly for 3 to 4 minutes. Pour in the vegetable broth little by little and stir/beat well so that the sauce is uniform and without lumps of flour. Pour in some whipping cream/cream and stir. Add the asparagus and let the sauce simmer for 5 to 10 minutes. Season with grated lemon peel, a little juice, salt and white pepper. Add the fresh peas and stir the pan. Garnish the sauce with picked dill. (If you can't get pod peas, add the frozen - but thawed peas together with the asparagus.) Boil the potatoes for 20 minutes and drain the water. Mash with a Potato masher with spring. Stir the mash with a little butter and whipping cream, season with salt, white pepper and grated nutmeg. Garnish with grated dill. 
The next day with tartlets. See postscript Serving: Put the mashed potatoes in the center of a plate with a depression in the middle. Add the asparagus fricassee and place 4 slices of ham (Hamburgerback) around it. Garnish: Garnish with a little picked dill. (Save the stems for the vegetable stock) Drink: We chose a good red wine, because it goes well with asparagus and Hamburger back. But a cold Wheat beer could also go to the dish. Tip: By preparing a hamburger back as described above, you can be sure that it will not become dry. Only cook for 1 hour. Postscript: The attempt to make the rock-hard Schwarz-Walter-Schinke edible did not work. It was only roughly - with good will - edible. But the asparagus fricassee turned out fantastically well, so I can therefore recommend making it for: Chicken in asparagus with tartlets. Skip the mashed potatoes and cook a chicken, pick the meat from the bones and put it in the asparagus fricassee. Buy one or two packages Luxus Tarteletter and you have a real good dish. |
Spaghetti Bolognese
Next Down
Next Up
|
|
500 g minced beef preferably 12% fat 2 tbsp. olive oil 2 large onions 4 cloves of garlic 2 stalks of celery 1 large red pepper 1 1/2 dl dry red wine (the one you want to drink with the meal) 2 beef stock cubes 4 large, ripe, chopped tomatoes 2 dl tomato paste sauce with chilli 2 tbsp. tomato paste 2 tbsp. Oyster Sauce or 2 tbsp. Worcestershire Sauce 2 pcs. bay leaves 1 tbsp. oregano, dried 1 tbsp. basil, dried 240 g spaghetti pasta, dry weight 60 grams of spaghetti are used per person 2.4 liters of boiling water 1 liter of water is used per 100 g of spaghetti 24 g Salt for the boiling water 10 g of salt is used per 1 liter of water Save 1 cup of the cooking water from the spaghetti for adjustment of the dish at the end Salt and White Pepper? Be careful with salt! There is salt in bouillon cubes 
Spaghetti Bolognese - Picture coming soon Procedure without liability: Start by cleaning and cooking all the vegetables. Chop the onion, garlic, celery and red pepper into small cubes. Put olive oil in a pan and heat up to a good heat and then add the vegetables. Fry them until the onions have become clear - it takes approx. 3 minutes. The meat is then picked into small pieces from the package and added to the pan. Brown the meat and divide it with a ladle into smaller pieces while it roasts - it takes approx. 8 minutes.
Now add some liquid and spices to the vegetables and meat. Pour the wine, beef bouillon cubes, chopped tomatoes, tomato paste sauce, tomato paste, Oyster Sauce, (or Worcestershire Sauce), bay leaves, oregano and basil into the pan and distribute the spices well in the dish. Check that there is enough liquid to simmer covered for approx. 30 minutes, if not add some water. For the last 10 minutes, simmer the dish uncovered, this is when the spaghetti is cooked. 2.4 liters of water are measured and brought to the boil in a large pot. When the water boils, add 24 grams of salt to the water - 1 large tablespoon coarse salt is 24 g - and then the measured spaghetti. Read on the package how long it should boil. The one I used had to boil for 9 minutes. Pour the spaghetti into a strainer, but remember to save 1 cup of the cooking water for later use. Mix the cooked and drained spaghetti into the Bolognese sauce. Mix well and assess whether the consistency is too dry, because now is the time to add a little boiling water from the spaghetti. Remember that both beef bouillon cubes and cooking water contain salt, so do not add any extra salt. Serving: In deep plates with spoon and fork. Garnish: Garnish with grated cheese and a little freshly picked basil to taste. Drinking: Use the same red wine that came in the dish. Tip: The recipe says spaghetti, but you can also use pasta. Just read on the package how long the cooking time is for al dente pasta. |
Eel in jelly for a lunch
Next Down
Next Up
|
|
1 nice, large silver eel of 800 grams live weight
Cooking stock: 1 l water 1 dl wine vinegar 2 dl dry white wine 1 large carrot 1 parsley root 1 leek 4 cm fresh ginger 1 onion 2 cloves of garlic 8 bay leaves 1 stalk thyme 1 red chili pepper 14 whole peppercorns 10 all spice 1 stalk of lovage or Maggiurt 1 tbsp. salt (20 g) 12 leaves gelatin Decoration 1 bunch of dill 1 sliced organic lemon 
Eel in jelly for a lunch from 1 large eel yields 7 pieces of 7 cm Here is Cooked, cold trout in jelly No. 22 Procedure without liability: Start by preparing the eel for cooking. Cut the abdomen from the gat to the head and take out the guts, clean with a stiff brush down through the backbone for kidney blood. Lay the eel on its back and cut off the head - not completely, it should hang on to the eel skin on the neck. You grab the head and pull it backwards down towards the tail to pull off the skin. Help with a thumb to loosen the skin the first part around the head. If you can't do it yourself, ask your fisherman to do it. After this, the eel must be polished for the stiff fins on the back and belly with scissors, also check if there is more blood in the belly. The eel is cut into suitable lengths - from 6 cm to 8 cm will be optimal for an 800 gram eel.
Cooking stock: Prepare the cooking stock - boil water, wine and vinegar with the cleaned vegetables, spices and salt. The large vegetables are cut into slices. Let it simmer for 20 minutes with the lid on. The cleaned eel pieces are then placed in the pot and simmered for 10 to 15 minutes at low heat (95°C) with the lid on. The time depends on the thickness of the eel, the eel I used weighed 490 grams in cleaned weight and took 20 minutes. Let the eel pieces rest for a few minutes in the cooking stock. The eel pieces are removed from the cooking stock and left to drain and cool. The cooking stock is first strained through a strainer for the large pieces of vegetables and then through a boiled cloth for the "floating particles". I have previously used the same strainer lined with 3 pieces of coffee filter and got a good result. If you are a geek, make the soup with 2 egg whites and the crushed eggshells. Clarification of soup with egg whites: Measure out your cooking stock, it must be 1 litre, if necessary top up with water and white wine. Beat two egg whites - absolutely no yolk - crush the 2 egg shells and add them to the egg whites, which are whipped together easily without the mass becoming white and stiff. Add the egg mixture to the cooking stock and whisk thoroughly while it slowly boils. When the egg mass rises to the surface, remove the pan from the heat, where it stands for fifteen minutes. Pour the cooking stock through a boiled cloth, as described above. The cooking stock (soup) can be frozen and used later. Note: use a 3 liter pot, otherwise it will boil over. You can skip preparing the cooking stock with egg whites and egg shells, but perhaps the jelly will not be transparent. Eel and jelly are prepared: When the eel pieces are finger warm, split them lengthwise with a very sharp knife and carefully remove the bone. Now is the time to see if the eel is cooked to perfection. If the leg comes off without any problems, the eel is cooked perfectly. 12 leaves gelatin soak in cold water for 10 minutes. Read on the package how many you need per liter of cooking stock. 12 pcs. per liter of soup makes a perfect jelly in my opinion. Place the split eel pieces in a nice dish with high sides, so that there is room for 1 liter of cooking stock. The perfectly clarified cooking stock is brought to a boil and the pan is removed from the heat. Add the soaked gelatin one at a time while stirring vigorously to avoid lumps. Add a little garnish, 4 nice bay leaves, 2 lemon slices and 4 to 6 stalks of dill to the warm jelly. The jelly is now poured over the eel pieces and the garnish is distributed neatly in the dish. Place the dish in the cold until the jelly has set. Preferably in the fridge overnight. When the jelly has set, it can be filmed. Cover with film. 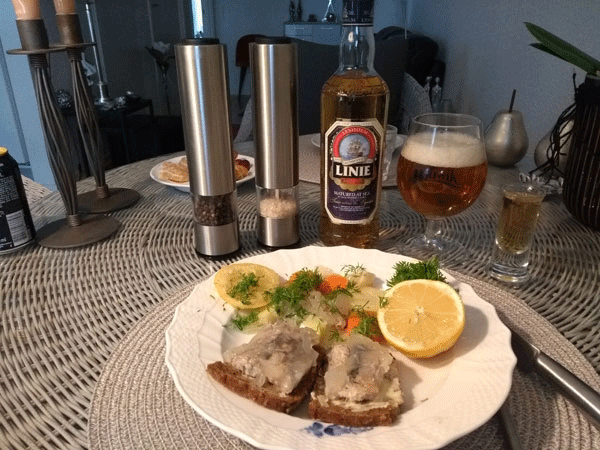
Eel in jelly for a lunch from 1 large eel yields 7 pieces of 7 cm Serving: Serve with a good piece of rye bread and cold butter. Garnish: Fresh dill and lemon slices when serving. Drinking: A cold lager is suitable for the dish, naturally followed by a Linie Akvavit. Did I forget to say per eel. Tip: If you are making this dish for the wife and yourself, arrange it on two plates, which are then decorated. The rest of the eel in jelly is immediately put back in the fridge, and it can keep there for 3 to 4 days at a temperature below 5°C. |
Vacuum salted and smoked duck breast
Next Down
Next Up
|
|
DRY SALTING 4 pieces. Duck breast a 300 g Seasoning salt mixture for 4 pcs. Duck breast 24 g fine table salt 12 g nitrite salt 0.6% 6 g brown sugar 4 g onion powder granules 4 g garlic powder granules 4 g black pepper from the mill 4 g paprika sweet ground 2 g cayenne pepper hot ground 2 g crushed cloves 1 g Sodium ascorbate powder E301 12 bay leaves whole Vacuum packs Vacuum bags or 28x600 cm rolls A duck breast measures approx. 20 x 10 x 3 cm See under Tip: 36 g of salt for 1200 g of meat gives a degree of salinity of 3% 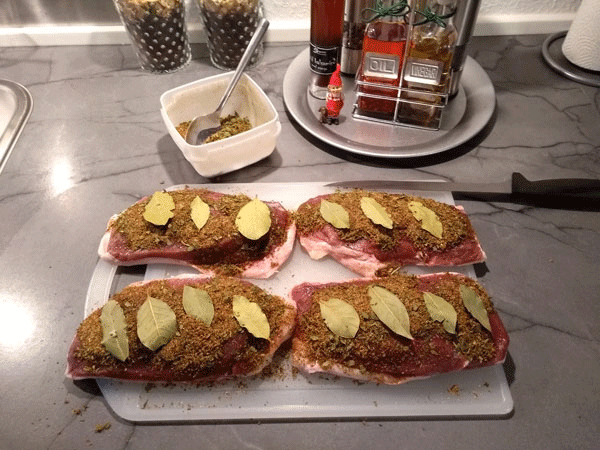
Seasoned duck breast ready for vacuuming and then smoking Procedure without liability: 4 pieces. 300 g duck breasts are prepared for dry salting in vacuum bags. Take them out of the freezer 24 hours before they are to be salted and dry in the fridge. Trim the duck breasts for tendons and blood before salting. Dry them in a clean tea towel so that they are ready for the seasoning salt mixture.
Prepare Seasoning salt mixture: Start by weighing out salt and all the spices and mix it well in a bowl. Wait with the bay leaves, they are placed on the breasts just before they are put in the vacuum bag. For those people who absolutely do not want to use nitrite salt, just use 36 g of fine table salt, so that the salting level of 3% is maintained. I can inform you that with 0.6% nitrite salt, a maximum of 60 mg nitrite per kg of meat is obtained. Dry salting: All duck breasts are rubbed well and thoroughly in a whole seasoning salt mixture and 2 whole bay leaves are placed on the skin side. Prepare a large vacuum bag for 4 duck breasts by welding one end, I usually weld 2 times with 5mm distance so the welding holds better. Place the 4 duck breasts in the bag with the meat side up, if there is any seasoning salt left in the bowl, distribute it over the duck breasts. The bag is vacuumed and welded in the same process - remember to weld an extra time. The vacuum bag is placed in the refrigerator for 48 hours and turned twice a day. Longer time gives a more salty taste and turning the bag several times gives a more uniform salting. I usually give full "Power" - 48 hours and 4 turnovers per day and of course Nitrite salt to achieve the beautiful red color in the meat. In addition, nitrite salt also gives meat a slightly longer shelf life. Hot smoking: When the time is up, take the duck breasts out of the fridge and brush/rinse under running cold water to remove excess salt and seasoning. Wipe the duck breasts with a clean tea towel and place them on a rack to dry while the smoker is being prepared. Scratch the skin crosswise in a fine pattern: Harlequin pattern. The smoking oven is heated to 80°C - 90°C. When the temperature has been reached, place the duck breasts on a rack with the skin side down and place the rack in the smoking oven on the top shelf. Give them approx. 1 hour without too much smoke. After that, a lot of smoke sawdust came over the embers, so that the smoke development can begin. With a duck breast of 300 g, they must be smoked for approx. 2 hours at a temperature between 70°C - 80°C. In total approx. 3 hours. The core temperature in the chest should be approx. 67°C, go by the temperature rather than the time. I smoke with 90% beech sawdust and 10% juniper granules. Leave the duck breast overnight in the smoker while it cools down, so the smoke flavor can become more intense. Packaging: The duck breasts can be vacuum packed and frozen for several months - maximum 6 months. When they are to be eaten, you can heat them in a microwave, normal oven or on a pan with the skin side down. It promotes the smoke flavor. 
A particularly good red wine Dingac Roso can be recommended Serving: The smoked duck breasts can be served warm as a dinner dish with red cabbage, white/brown potatoes and a purchased duck sauce. Sour and sweet side dishes - understood. A good idea here at Christmas time. As a lunch dish with rye bread and butter, cut the duck breast into thin slices on the narrow joint. Served with: See under Garnish. Garnish: Egg stand, tomato slices and a sprinkling of chives. Salt? and Pepper from the mill. Drinking: As a dinner dish, I would recommend a dark and strong red wine, such as Dingac Roso from "Old Yugoslavia" specifically Croatia on the Peljesac peninsula, which is just north of Dubrovnik. The darkest, strongest and highest (alcohol 15.5%) red wine in the world. From my own experience, I can tell you that because of more than 15 notes in this wine, you don't feel the alcohol in the wine at all - BEFORE you get up. For lunch maybe a German Rauchbier from Bamberg, it is a dark lager with a smoky taste. Another option is a beer from Warwick Brewery in Varde. A "Krć Riwer" which is a Porter with licorice flavor and 8% alcohol. Hint: I have created an Excel spreadsheet for calculating salt, nitrite salt, sugar and spices for any amount of meat and meat of any kind. But that's only for vacuum salting. I always hot smoke duck breasts because of the salmonella risk. |
Confit duck leg layered on herbs and root vegetables
Next Down
Next Up
|
|
4 pieces. Duck leg a 200 g
1 kg Duck fat (1 bucket can be bought in Fřtex) Seasoning salt mixture for 4 pcs. Duck leg 16 g fine table salt 8 g nitrite salt 0.6% 4 g brown sugar 2 g onion powder granules 2 g garlic powder granules 2 g black pepper from the mill 4 sprigs of thyme Vacuum packs Vacuum bags or 28x600 cm rolls A duck leg measures approx. 17 x 9 x 3 cm See under Tip: 24 g of salt for 800 g of meat gives a degree of salinity of 3% With this recipe for confit duck leg, it is not intended to provide a complete recipe for a dish that includes confit duck leg. I have mentioned under "Serving" a dinner dish with herbs on a base of root vegetables and a good lunch dish with rye bread and "tooth butter" sprinkled with Kosher salt. 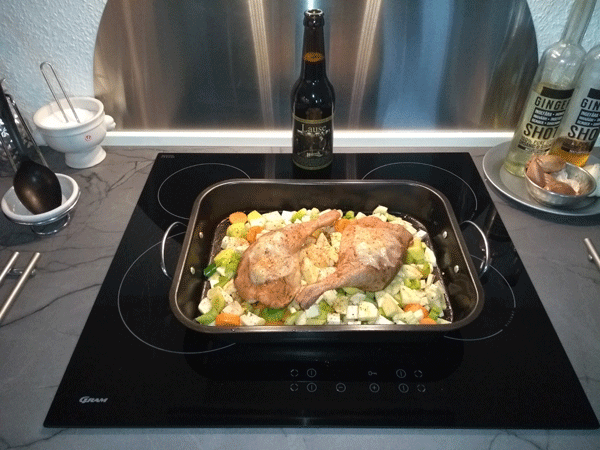
Confit duck leg layered on herbs and root vegetables ready for the oven Procedure without liability: 4 pieces. duck legs of 200 g are prepared for dry salting in vacuum bags. Take them out of the freezer 24 hours before they are to be salted and thaw them in the fridge. Finely grind the duck legs for tendons and blood before salting. Wipe them off with a clean tea towel so that they are ready for a one-time seasoning salt mixture. Prepare Seasoning salt mixture: Start by weighing out salt and all the spices and mix it well in a bowl. For those people who absolutely do not want to use nitrite salt, just use 24 g of fine table salt, so that the salting level of 3% is maintained. I can inform you that with 0.6% nitrite salt, a maximum of 60 mg nitrite per kg of meat is obtained. Dry salting: All duck legs are well and thoroughly rubbed into the whole seasoning salt mixture. Prepare a large vacuum bag for 4 duck legs by welding one end, I usually weld 2 times at 5mm distance, the welding holds better. Place the 4 duck legs in the bag with the skin side down, if there is any seasoning salt left in the bowl, distribute it over the duck legs. The bag is vacuumed and welded in the same process - remember to weld an extra time. The vacuum bag is placed in the refrigerator for 48 hours and turned twice a day. Longer time gives a more salty taste and turning the bag several times gives a more uniform salting. I usually give full "Power" - 48 hours and 4 turns per day and of course Nitrite salt to achieve the beautiful red color in the meat. In addition, nitrite salt also gives meat a slightly longer shelf life. Confiting: When the time is up, take the duck legs out of the fridge and brush/rinse under running cold water to remove excess salt and the seasoning. Dry the duck legs with a clean tea towel and place them to dry on a wire rack while the ingredients are prepared for the confit. Find a suitable pot for 4 duck legs and the amount of duck fat that is needed so that the duck legs can lie completely under the melted duck fat. If the pot is too big, too much duck fat is used. Too small, it may bubble over. Add 1 kg of duck fat to the pot and turn on the heat. When all the fat has just melted, place the duck legs in the pot and place the frying thermometer in the pot - without touching the bottom of the pot - and monitor the temperature closely - without the lid on the pot. The temperature must only be 90°C and must be maintained at this temperature for the next 3 to 4 hours. I have done the exercise on my own stove by filling a pot halfway with water and a fixed temperature of 90°C. On the smallest plate, the position should be 3 when the 90°C had been reached. However, there was a minor fluctuation of +- 1°C. Have fun and look forward to the taste. NB: I used 3/4 kg of duck fat and 1/4 kg of lard, as I had used some duck fat previously. When the duck legs have become completely tender, remove the pot from the heat and cool the pot uncovered as quickly as possible to room temperature with the thighs in the pot. You can see the legs when the meat is tender, because then the skin pulls away from the bottom of the lower thigh. When the pot has cooled, put the lid back on and put the pot in the fridge. The thighs must be covered in duck fat throughout the process and confit duck leg can last up to 1 month in the fridge. If the meat is not covered with duck fat, oxygen can get into the meat and oxidation - oxygenation - begins and the meat begins a "Randinize". proces. I have some special vacuum container for my vacuum packer, which sucks the air out of the box. I will try these next time to see the effect on flavor when frozen. Packing: Duck legs can be vacuum packed with some of the duck fat when it has become cold and frozen for a few months. When they are to be eaten, you can heat them in a microwave, normal. oven or on a pan. It promotes the flavor and tenderness of the meat. 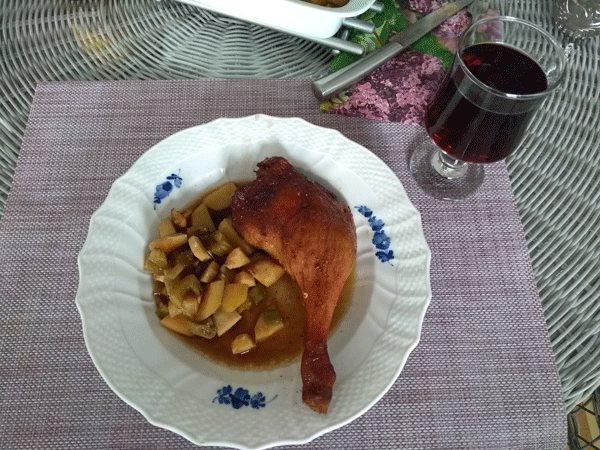
Confit duck leg layered on herbs and root vegetables Serving: The confit duck legs can be served warm on a bed of herbs and root vegetables with Hasselback potatoes and a "gravy sauce" from the dish. As a lunch dish with rye bread and butter. You may eat the duck legs with your fingers and "gnaw" on a piece of rye bread. Garnish: Tomato slices and a sprinkling of chives. Salt? and pepper from the mill. Drinking: As a dinner dish, I would recommend a light red wine. Maybe a Pinot Noir. It is also good with cheese afterwards. For lunch, perhaps a beer from Warwik Brewhouse in Varde. A Lause is a bottom-fermented Schwarzbier from Thuringia with muted bitterness. Hint: I have created an Excel spreadsheet for calculating salt, nitrite salt, sugar and spices for any amount meat and meat of any kind. But that's only for vacuum salting. The duck fat from the confit can be reused up to 3 times, after which it becomes too salty. But see below. Regeneration method of duck fat: Take a suitable large pot for the duck fat that you want to regenerate. Put it in the pot along with half the water. Bring it up to 95°C and stir the pot for 3 minutes. Turn off the heat and leave the pot to cool. The next day, the duck fat has solidified and lies on top of the water. Carefully remove the duck fat, put it in a container and freeze it until next time. The explanation is that salt does not dissolve in fat but only in water. Impurities become bound to the water and settle on the bottom of the pot. |
Homemade pizza in our own stone oven
Next Down
Next Up
|
|
Cold-risen Pizza dough for the base
500 g Wheat flour with a high content of Gluten For example: Tipo 00 wheat flour, Amo Manitoba wheat flour or Durum wheat flour 330 g Lukewarm water (330 ml) 10 g Yeast 1 tsp. Sugar 1 tbsp. Olive oil 1 tbsp. Oregano (dried) 10 g Kosher salt or Lćsř salt Pizza ingredients Tomato sauce: 1 can Chopped tomatoes 1 dl Olive oil 1 Handful of fresh basil with stems 1 tbsp. Oregano (dried) 1 tbsp. Tomato puree 2 cloves of garlic 1 tsp. Sugar 1 tsp. White wine vinegar 1 tsp. Kosher salt or Lćsř salt Fill: Salsiccia a good spicy and juicy Italian pork sausage Pancetta an Italian salted and seasoned fresh bacon Guanciale an Italian pork jowl bacon Mozzarella Cheese: Buffalo milk mozzarella in water is the best for pizza If you can't get it, use: Cow's milk mozzarella in water DO NOT use topping cheese from a bag, it will burn 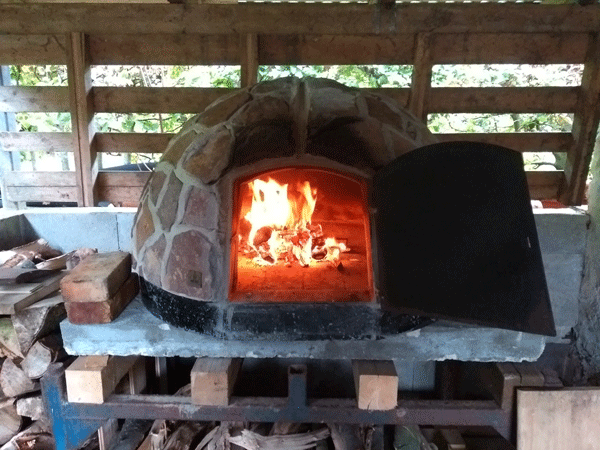
The pizza oven is heated to bake pizza for our lunch when we smoke eel You get approx. 900 g of pizza dough out of the amount stated opposite. It is divided into 4 equal-sized "buns" of 225 g. You get approx. 500 g of tomato sauce out of the quantity stated opposite. What is not used now and then is frozen in portions. Blend all ingredients for the tomato sauce into a smooth mass without lumps. Procedure without liability: Prepare the dough 2 days before it is to be used. Start by weighing all the ingredients. Pour the water into a bowl and add the yeast with sugar, olive oil and oregano. Stir well until the yeast and sugar are dissolved. The salt can now be added while stirring. The mentioned salts dissolve quickly. Then add the flour a little at a time, stirring constantly with a dough hook. Knead well until the dough is flexible and not too sticky. Therefore, you may need to use more or less flour than described above.
Cold-rising: When the dough is ready, place it in a clean bowl with a little sprinkled flour and a damp tea towel on top. Put in the fridge and chill for 36 to 48 hours. When the dough is to be used, take it out of the refrigerator 4 hours before. Preparation: The pizza dough is divided into 4 portions, folded a few times and kneaded a little and flattened with the palm of the hand - WITHOUT using a rolling pin because then the air is pressed out of the dough and it will not be airy and crispy - practice swing it around in the air, as you've probably seen the professional chefs in Italy do. Flat as a baked pancake - Without holes - assemble the pizza dough with the filling: First spread a thin layer of Tomato sauce, then a suitable layer of the selected Meats and finally the good Mozzarella Cheese. Baking: The pizza is placed on a "Pizza Stone" and with a "Pizza Spade" it is taken into the oven and baked until it is baked. It is now that you have to keep an eye on it, because it has to be turned around several times so that it is baked all the way around. I should say hello from Thomas - owner of the Pizza oven - and say that Practice makes perfect. The heat in the oven is approx. xxx°C and it takes approx. y minutes. I will return with data. 
The two small pizzas are made by the children from leftovers Garnish: With fresh basil leaves. You could also put some green and black olives on the plate along with a few pickled green and strong jalapenos. Remember it must be the real black olives and not green olives, which are dyed black. CHEATING. Drinking: A good Italian red wine such as Chianti and Amarone, which is worth paying for. Brunello and Barolo are on the expensive side, but go well with a super delicious homemade pizza. But the choice is yours. Tip: Salt kills the yeast, so you must use lukewarm water and add the yeast with sugar, olive oil and oregano first. Let the yeast dissolve and stir until the sugar is dissolved and wait 5 minutes before adding the salt. Then add the flour a little at a time while constantly stirring with a dough hook. Stir at least 5 to 10 minutes to make the dough pliable. There are many types of flour for pizza dough and at many prices. A product like CAPUTO has three types: Nuvola Super pizza flour (purple bag), Pizzeria Blue pizza flour (blue bag) and Cuoco Red pizza flour (red bag). Not always easy to find in supermarkets. I used Durum wheat flour and got some crispy bases, as well as praise from the lady of the house. |
Brills fillets steamed over root vegetables on the pan
Next Down
Next Up
|
|
2 Brills fillets without skin and bones 200 g Pork rind cut into small pieces 50 g Pork fat and 50 g duck fat/goose fat 1 Onion 3 cloves of garlic and 3 sprigs of rosemary 200 g Chestnuts unshelled and cut into small cubes 100 g Karl Johan mushrooms cut into cubes 4 pcs. Medium-sized shallots, finely chopped 30 g Butter 3/4 dl Vermouth 2 - 3 dl Chicken broth, strong 1/4 lemon juice 1/2 bunch parsley Zanetti cheese: Pecorino for sprinkling. Option Be careful with salt, the cheese is also salty Salt and pepper from the mill Confit pork rind: The pork rind is made in the following way: Cut the pork rind into very small cubes and add them to a pan with a little pork fat and duck fat or goose fat. Roast the rinds in cubes under low heat at approx. 85°C to 90°C for the first hour. The temperature can then be raised to 100°C. The rind must not turn black, so it may well take 3 hours or more. Save them for the dish described below. Confit pork rind can be frozen and used later in sauce for many dishes. I added an onion, 3 cloves of garlic and some sprigs of rosemary after an hour.
Whole brills ready to put over the root vegetables when they are finished roasting. For a kid-friendly dish, use fillets. Procedure without liability: Once you've made the confit pork rind, it's time to start this dish. This can be made the day before or several days before, as they can be kept refrigerated or frozen.
Put a little butter on the pan and fry the shallots until golden. Pour the vermouth over and add the chestnuts to the pan and roast them a little. Then chicken broth and Karl Johan mushrooms are added to the pan. Season with salt and pepper from the mill and a little lemon juice. Turn up the heat a little and place the 2 pieces of fish, skin side down, over the root vegetables. Cover the pan and continue to cook for 6 to 8 minutes until the fish has had enough. Depends on the thickness of the fillet. Cover the pan with a lit and continue to cook for 6 to 8 minutes until the fish has had enough. Depends on the thickness of the fillet. NB: My brillst in the picture are not fillets, but whole fish with bones and belly skin. It's because I can handle eating fish with bones and I think it tastes better. I just want to mention that I fry the fish skin side for a few minutes before putting it on the root vegetables. If it is a child-friendly dish, use fillets. The time here is given for fillets. When the fish fillets have had enough, remove them from the pan. Turn up the heat, add butter and cook. Stir in parsley and sprinkle with cheese (optional). 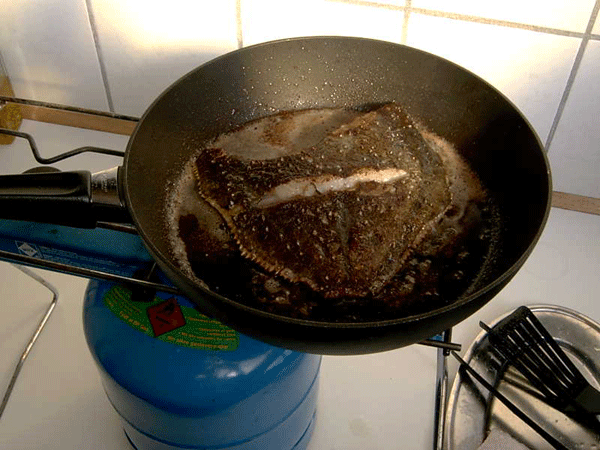
Whole brills ready to put over the root vegetables when they are finished roasting. For a kid-friendly dish, use fillets. Serving: Place a fish fillet on a plate with a portion of root vegetables around it. Garnish: Fresh parsley leaves and a few lemon slices. Drinking: A good white wine from Chile that is suitable for fish could be a Santa Rita 120 Chardonnay vintage 2021. Approx. DKK 60.00 per bottle. Serve well chilled. Tip: "Gourmet Goose Fat from Grĺsten Poultry" 250 g. If you don't use it all, you can make a good seasoning fat with half pork fat and onion. If you cannot get Karl Johan mushrooms, you can use regular mushrooms and add some dried Karl Johan mushrooms. First crush the dried Karl Johan mushrooms in a mortar before adding them. |
Veal tongue in Madeira, beer and olives
Next Down
Next Up
|
|
1 veal tongue Dry salting in a vacuum bag per 1 kg veal tongue 13 g Common table salt 13 g Nitrite salt 0.6% 7 g Cane sugar, Organic 2 g Black pepper, powder 1 g Cayenne pepper hot, powder 2 g Garlic powder 3 g Hungarian paprika, sweet 2 g *Dried thyme, see below 1 g *Laurel leaves, see below 1 Sodium ascorbate E301 Degree of salinity: 2.6% Max Nitrite: 80 mg/kg tongue Salting time in the fridge: 6 days Mix salt, sugar and all spices and rub the veal tongue well into this salt mixture. Put the tongue in a vacuum bag and make sure everything goes in the bag so that the salting percentage is maintained. Vacuum seal the bag and refrigerate for 6 days. The bag is turned daily.
I have created an Excel spreadsheet to calculate salt, nitrite salt, sugar and spices for any amount of meat and meat of any kind. But that's only for vacuum salting. If the weight of your calf's tongue is different, you can use this spreadsheet to your advantage. 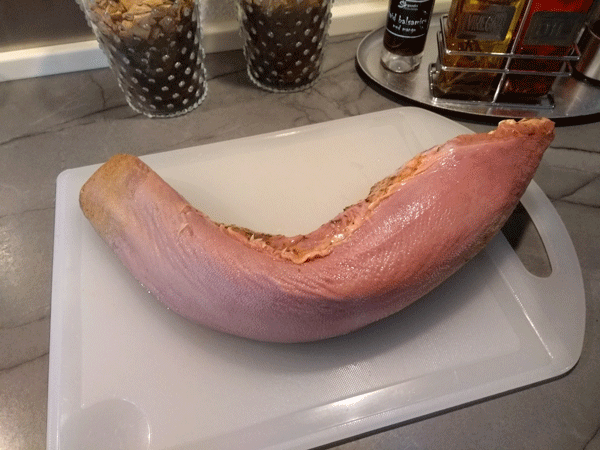
The veal tongue has been gourmet salted, boiled for 2 ˝ hours and skinned Procedure without liability: A tongue is a large bundle of muscle, therefore it must now be boiled tender for a long time at low heat. Put the tongue in a suitably large pot and pour 2 liters of water. The water must cover the tongue completely, otherwise more water will come on. You can advantageously cook the tongue with fresh *thyme stalks and *bay leaves and a few carrots. The veal tongue is quickly brought to the boil and the heat is immediately reduced so that the veal tongue only simmers for the next 2 ˝ hours. Skim the soup for impurities, as it will be used later. Meanwhile, prepare the good Madeira Sauce for the veal tongue.
2 tbsp. Olive oil 2 Red onions, chopped 2 Carrots, peeled and sliced 1 can tomato paste, small 4 cloves of garlic ˝ dl Sherry vinegar 2 dl Madeira wine ˝ KB white ale / Christmas beer 2 tbsp. Maggi Tamarind Sauce 1 tsp. Thyme, dried 1 tsp. Tarragon, dried 16 pcs. Green olives without stone Salt and pepper from mills NB: Be careful with salt, the tongue is salty When the veal tongue is cooked and removed from the soup, the soup is strained and approx. ˝ liter to dilute the sauce with. The rest of the soup can be left to cool and settle. Freeze it in smaller portions and use it as a base for sauce. Or if you make sausage rolls yourself, you can advantageously cook the sausage rolls in the soup. When the tongue has cooled down so that you can hold it without burning your fingers, it is skinned.
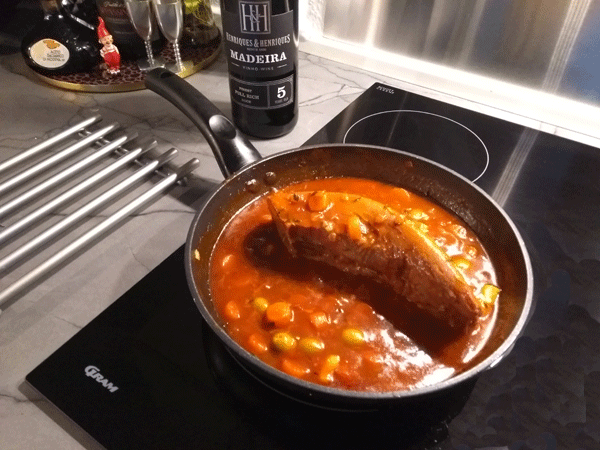
Veal tongue in Madeira, beer and olives Put olive oil in a pan and fry the onion, carrots and tomato puree in it for a few minutes. Add the garlic and a little Sherry vinegar. Bring to a boil then add the Madeira, KB beer, Tamarind Sauce, thyme, tarragon and dilute the sauce with soup until a suitable smooth consistency is achieved. Place the veal tongue in the middle of the pan and pour some sauce over it while the tongue is heated for 15 minutes on low heat. Flip the tongue a few times along the way. Pour the drained green olives into the sauce a few minutes before serving. Pick up the tongue and cut it into 6 to 8 mm thick slices crosswise.
NB: I just want to note that I have split the tongue, so I have cold tongue for cold cuts with horseradish salad or Italian salad. The thickest part is therefore not visible on the pan above. Serving: You can serve the tongue with many different kinds of side dishes: Rice, noodles, spaghetti, potatoes - boiled, mash, rösti, fritters - or my Böhmische semmel knödel Recipe No. 27. Side dishes, which are good at soaking up the tasty sauce, are preferable. We chose small, fine peeled potatoes this time. Next time I will prefer my Böhmische semmel knödel. Garnish: I can only think of fresh thyme sprigs, but I had already used mine in the dish. Drinking: You can drink beer or red wine with the dish. We chose an Italian red wine - Appassinero Appassimento da uve legmentere appassite - it is a red wine made from lightly dried grapes. Advantage: on offer for DKK 42.00 a bottle, Disadvantage: with added sulphites. Tip: If you want to try with tongues for other animals: Pig tongue must cook for 1 ˝ hours, while a Veal tongue must cook for 2 ˝ hours and a Beef tongue must cook for 3 ˝ hours on low heat. Make your own Tamarind Sauce. |
Silver salmon ceviche with homemade tortilla chips
Next Down
Next Up
|
|
Silver salmon ceviche 400 g Salmon without skin and cut into 10 mm cubes 3 - 5 limes, divide the juice. See text 1 Orange, the juice is divided into two 2 cloves of garlic, finely chopped 1 Jalapenos or Fresno pepper, seedless but finely chopped 1 shallot, medium large finely chopped 4 Sherry tomatoes, quartered 1 diced avocado. Drizzle with lemon juice ˝ teaspoon Cumin 2 tbsp. Coriander or parsley, finely chopped Salt and pepper to taste ˝ Teaspoon can sugar maybe? Tortilla chips for serving How to make silver salmon ceviche: In a medium-sized glass bowl, combine the salmon cubes with the juice of half an orange and 3 to 4 limes. The lime and orange juice should cover the salmon cubes. Cover the bowl with cling film and refrigerate for 60 minutes. After the salmon has "cold cooked" for 60 minutes, pour off the lime and orange juice and discard. Mix the rest of the ingredients together with fresh juice of ˝ lime and 3 tbsp. fresh orange juice from the rest of the half orange and season with salt and pepper - maybe a little cane sugar, or 1 tsp. heather honey.
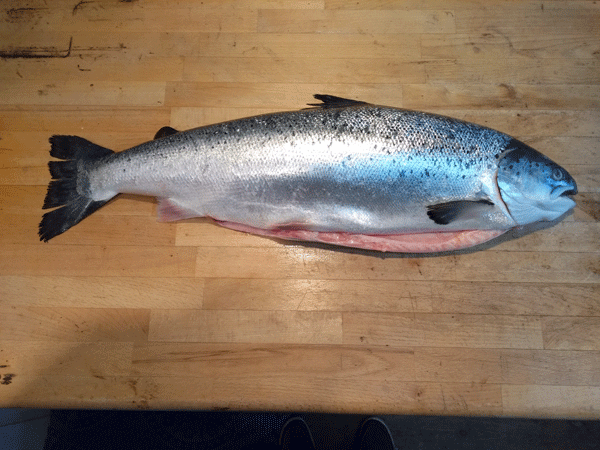
A Norwegian salmon weighing 4 kg has now been cleaned and some will be used for ceviche Procedure without responsibility: Ceviche is raw marinated fish, and therefore it is important to take the precaution of freezing the fish for at least 24 hours at -20°C or for at least 4 days at -18°C before use. Many fishmongers sell fish that are specifically intended to be eaten raw. Ask your fishmonger. Another important thing is good kitchen hygiene.
But what is a silver salmon? The Latin name is Oncorhynchus kisutch and it originates from the North Pacific Ocean and therefore not native to Danish waters. But nevertheless it is caught around Funen because they are bred in Horsens fjord and some escaped from the pond in 2017. Silver salmon is also implanted in Oxriver Put & Take, Ringkřbing. So they can be caught in Denmark. But of course you can also use freshly caught salmon from Danish waters or Norwegian salmon (see the picture above), just observe the freezing rules before use. Tortilla chips for Silver salmon ceviche 4 Tortilla Pancakes (Purchased) 2 tbsp. Neutral cooking oil per pancake 1 salt Tortilla chips for extra dip dried chili paprika Clip or slice the tortilla pancake into triangular pieces and put them in a freezer bag. Pour oil and salt into the bag, shake the bag well so that the contents are distributed evenly on all pieces.
Take the tortilla triangles out of the bag and place them in a single layer on a baking tray lined with baking paper. Bake the triangles in a fan oven at 200°C for 8 to 10 minutes until golden and crispy. Remove the triangles from the oven and cool them before serving. Become even more crispy when cooled. Use only one tortilla pancake per bag, otherwise the oil and salt will not be evenly distributed. You may need to use two baking trays for the four tortilla pancakes, because they must not overlap each other. 
Homemade Tortilla Chips Serving: You can serve the homemade tortilla chips with a dip of guacamole and salsa or a garlic dip and a Happy Holliday dip. Try online and find the recipes.
Garnish: I can only think of a little more fresh cilantro leaves. I would like to say to those who don't like cilantro, use parsley instead. Drinking: You can either drink a cold, over-fermented and unpasteurised wheat beer or a light, acidic white wine with the dish. You choose. Tip: If you want to try other types of fish, I can recommend: sole, tuna, cod, ling, hake, haddock, pollock, halibut, sea bass and from shellfish I can mention: prawns, crabs, lobsters, oysters, clams, scallops, sea snails and squid. |
The best way to cook red sausages
Next Down
Next Up
|
|
Danish red sausages for a child's birthday
8 pcs. red sausages of the best quality 1 piece. onion cut into quarters 3 - 5 cloves of garlic 1 tbsp. vinegar 1 cube of chicken stock 1 tsp. salt 1 tsp. sugar Mustard of your choice Tomato ketchup of your choice Remoulade of your choice Finely chopped onion of your choice Roasted onions of your choice Cucumber salad of your choice Sausage bread for Hot Dogs 
The best way to cook red sausages Here's how you do it: 1. Fill a suitably large pan with water, enough to cover the sausages completely. 2. Cut the onion into quarters and put it in the pan together with the garlic. 3. Add vinegar, chicken broth, salt and sugar. 4. Heat the water to just below the boiling point approx. 90°C. 5. Put the red sausages in the water. Let the sausages soak in the hot water for 15 minutes. 6. Check the sausages before serving that they have been heated through. You can turn it all the way down to the lowest "flame" while the sausages soak for 15 minutes. Finally, remember that the sausages must never boil, because then the skin will crack. The sausage water must be kept at 75°C while the sausages are in the water - just like with the sausage man at the sausage cart. NB: Danish red sausages are "cooked" at 75°C core temperature from the supplier, so you can eat them cold straight from the bag.

A delicious Hot Dog with all the trimmings Serving: Serve the sausages with toasted sausage bread and let the guests choose their own side dishes. Maybe make a good Hot Dog with roasted onions and/or raw onions. Some also choose cucumber salad. Drinking: A big "Fadbamse". For those who don't know the term "Fadbamse". A large draft beer. |
Fried tuna with asparagus and noodles
Next Down
Next Up
|
|
4 pcs. Fresh tuna steaks 250 g Egg noodles (Rema 1000) 300 g Green asparagus 1 tbsp. Taste-neutral oil Dressing 1 piece. Organic lemon 1/2 Bunch of fresh chives 1/4 tray watercress 2 tbsp. Olive oil 1 tbsp. Oyster Sauce 1 tbsp. Fish Sauce Salt and pepper from the mill 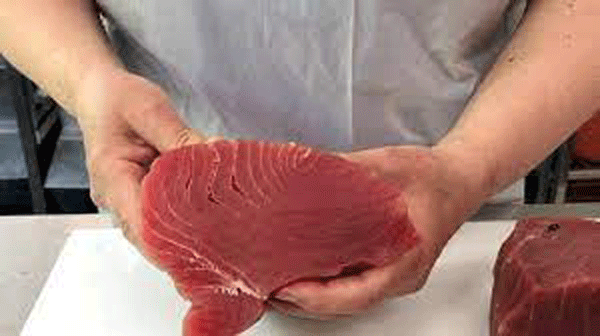
Fried tuna with asparagus and noodles Procedure without liability: Rinse the lemon and finely grate the peel on the grater. Cut off the white skin of the lemon and cut the lemon flesh into triangles or small cubes. Remove any lemon seeds. Finely chop the chives, chop the watercress and mix it with olive oil, lemon zest and lemon dice in a bowl. Season the dressing with Oyster Sauce, Fish Sauce and (perhaps salt) and pepper. (Remember the Fish Sauce is salty).
Cook the egg noodles according to the package instructions and drain the water. Keep the egg noodles warm in the pan with the lid on. Break the bottom of the green asparagus and cook them in lightly salted water for 2 minutes and pour off the water. Keep the asparagus warm in the pot with the lid on. Season the tuna steaks with salt and pepper and fry them in a taste-neutral oil on a very hot pan for 1 minute on each side. Check the time, if you fry them much more they will be dry. Inside, they should be slightly red. 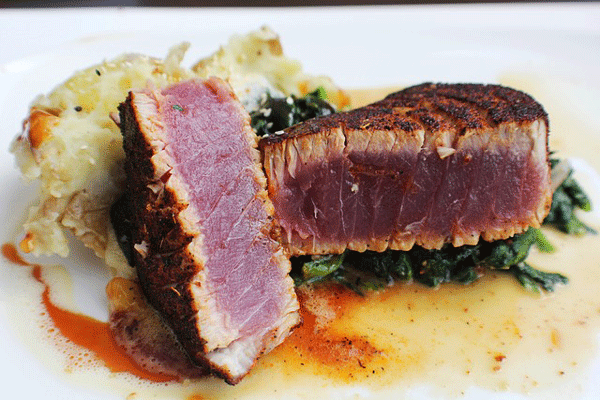
Fried tuna with asparagus and noodles Serving: Toss the egg noodles in the dressing. Distribute the egg noodles on 4 plates together with the green asparagus. Place a tuna steak on top and serve the dish hot immediately. Drinking: |
Tuna tartare with fresh herbs - For a lunch dish
Next Down
Next Up
|
|
400 g *Sushi Tuna 1 bunch of fresh coriander 1 bunch of fresh chives 1 bunch of fresh mint 1 bunch of fresh dill 1 ripe avocado 1 small apple, peeled 2 tbsp. walnuts, lightly crushed 2 limes, only the juice 2 tbsp. walnut oil 1 tbsp. fish sauce Decoration: 1 romaine lettuce 1 to 2 tomatoes 2 tbsp. walnut oil 1 tbsp. white wine vinegar 1 clove of garlic Salt and pepper from the mill are put on the table together with a good walnut bread. 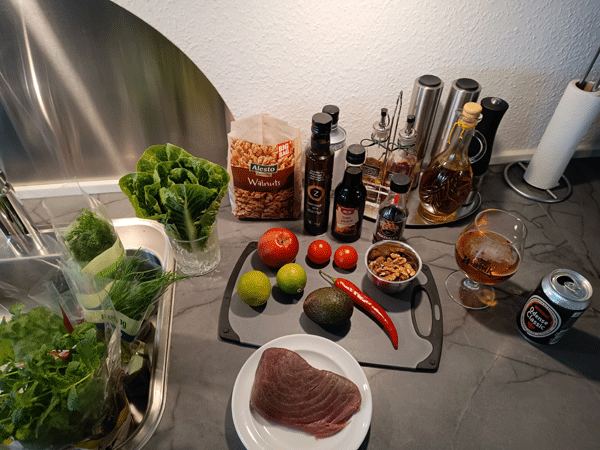
*Sushi Tuna is fresh tuna that has been frozen for at least 2 days at -20°C Procedure without responsibility: Cut tuna into fine cubes. Cut the avocado and apple into fine cubes. Chop coriander, chives and mint. Gently stir together the tuna, avocado, apple, coriander, chives, mint and crushed walnuts. Season with lime juice, walnut oil and fish sauce. (Remember the Fish Sauce is salty). Put salt and pepper mill on the table.
Divide the mass into 4 portion forms and put them in the fridge for a few hours. Or here arranged on two plates. 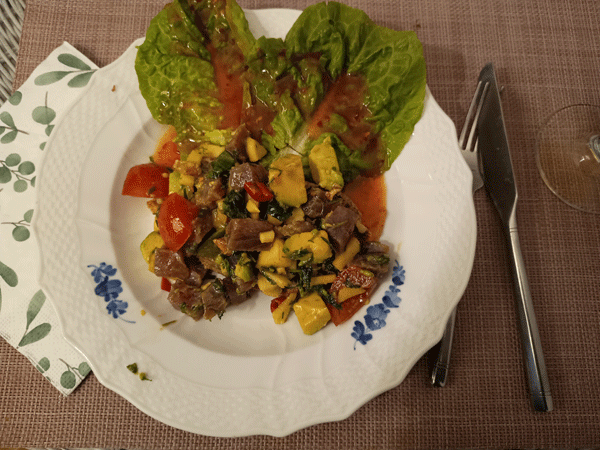
Tuna tartare with fresh herbs. Served on a decorated plate Serving: Turn the portion forms out onto 4 plates and serve with a green salad and a good walnut bread. Drinking: You can either drink a cold, over-fermented and unpasteurized wheat beer or a light, acidic white wine with the dish. You choose. Tip: If you want to try with other types of fish, I can recommend: Salmon, sea trout, cod, ling, hake, haddock, halibut, sea bass and from shellfish we can mention: shrimps, crabs, lobsters, scallops and sea snails. Walnut oil can be difficult to obtain. So use sesame oil and sesame seeds instead. |
Sardine potato egg cake with Gruyere cheese - For a lunch dish
Next Down
Next Up
|
|
2 cans of sardines a 120 g in olive oil - Fřtex has them 3 to 4 nice potatoes are peeled and cut into sticks 1 large onion finely chopped Grate 1 to 2 cloves of garlic 50 g of butter for the pan and for the dish 3 eggs 100 g grated Le Gruyere cheese grated over the dish 1 bunch of chives or parsley 2 sliced tomatoes Salt and pepper from the mill Alternative: Use *Fish Sauce instead of salt in the egg mixture Salt and pepper from the mill are put on the table together with good bread. 
Sardine potato egg cake with Gruyere cheese Procedure without responsibility: Peel the potatoes and cut them into small sticks. Cook them until tender in lightly salted water for approx. 12 to 14 minutes. While the potatoes are cooking, roast the onion and garlic in butter until golden, add a little *salt (Fish Sauce) and pepper. When the potatoes are cooked, remove them from the boiling water and drain in a sieve. Grease an ovenproof dish with plenty of butter on the bottom and sides. Place half of the potatoes in the dish. Spread the roasted onions and garlic over the potatoes.
Open two cans of sardines in olive oil and mash the sardines in a bowl with a fork and spread over the potatoes, onion and garlic. Spread the rest of the potatoes evenly over the sardines. Break 3 eggs into a bowl, add a cup of whipping cream along with *salt (Fish Sauce) and pepper. Whip the filling and pour it into the dish. Grate 100 g of Swiss cheese - Gruyere cheese - over the filling. Place the dish in a 200°C preheated oven for approx. 20 minutes, turn down the heat to 180°C and bake for approx. 20 minutes. 
Sardine potato egg cake with Gruyere cheese Serving: Garnish with chives or parsley and a few slices of tomato before serving. Drinking: Add a cold beer with a good Porse Snaps. Tip: Choose the best sardines in a good olive oil and use as much of the olive oil from the cans in the dish as you like. |
Sweet Chili Sauce, Plum Chutney and Pickled Pepper-Onion Relish
Next Down
Next Up
|
|
Sweet Chili Sauce Hot 400 g white sugar 3.5 dl pineapple juice 1.2 dl rice vinegar or apple cider vinegar 1 tsp salt 1 - 2 tbsp red chili flakes, I used 2, very hot 5 cloves minced garlic 1 tbsp tomato ketchup Thickener 2 tbsp cornflour 4 tbsp water, cold 
Sweet Chili Sauce Hot Plum Chutney Hot 1 kg plums 2 dl raisins, light dried 1 onion, large, chopped 100 g ginger, fresh 1 - 2 red chilies, fresh or 1 - 2 tbsp. red chili flakes 300 to 400 g sugar (taste like a plum, sweet or sour) 2 dl apple cider vinegar 2 dl red wine 1 dl apple juice 1 - 2 - 3 cinnamon sticks (choose number according to glass, one in each glass) 1 tbsp. coriander seeds, whole 2 tbsp. sliced ??liquorice root 2 tbsp. brown mustard, whole 2 tsp. nutmeg, ground 1 tsp. cloves, ground 6 pcs. pepper, long 4 pcs. star anise 2 tsp. salt 
Plum Chutney Hot Pickled Pepper-Onion Relish 900 g mixed peppers, thinly sliced ?? 2 large white onions, thinly sliced ?? 2.4 dl white vinegar 2.4 dl apple cider vinegar 250 g granulated sugar 1 tbsp mustard seeds 1 tsp celery seeds 1 tsp turmeric powder 1 tsp salt 1/2 tsp ground black pepper 1/2 tsp chili flakes 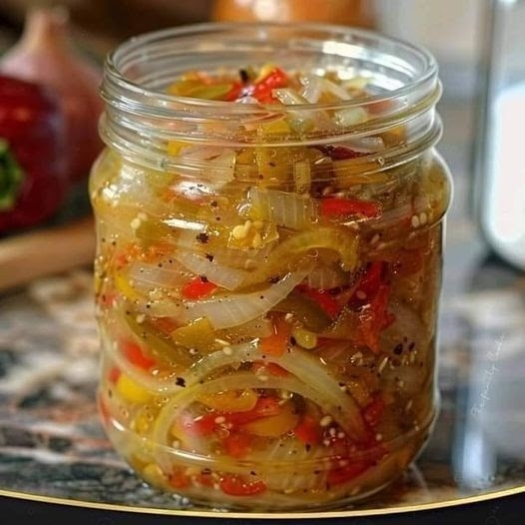
Pickled Pepper-Onion Relish Procedure for Sweet Chili Sauce without responsibility: Add sugar, pineapple juice, vinegar and salt. Bring the mixture to a boil. Add chili, garlic and tomato ketchup. Cook for about 5 minutes over medium heat. Mix cornflour and water and stir well without lumps. Lower the heat of the chili sauce and mix in the mixture while stirring constantly. Stir constantly over low heat until the chili sauce thickens. Stop when the desired consistency is achieved, but remember that the chili sauce will thicken when it cools. Pour the sauce into sterile bottles and store in the refrigerator. Fills about 700 ml.
Sweet Chili Sauce Hot Procedure for Plum Chutney Hot without responsibility: Rinse the plums, remove the stones and cut them into quarters. Peel and finely chop the onion. Peel the ginger and chop it into small cubes. If using fresh chili peppers, rinse them and cut off the top and bottom. Slice or chop them finely into thin rings. Mix all the fruits in a pot, add the 3 liquids with salt and bring to a boil while stirring. After 5 minutes, add all the spices and sugar and stir the mixture well for the next 30 to 45 minutes over low heat. Cook while stirring until the chutney is thick like jam, but be careful not to boil over now that there is sugar in it. Fill the Plum Chutney into sterile glasses that have been rinsed in Alcohol / Atamon. We recommend using 2 to 3 glasses, as there is approx. 1.5 l. 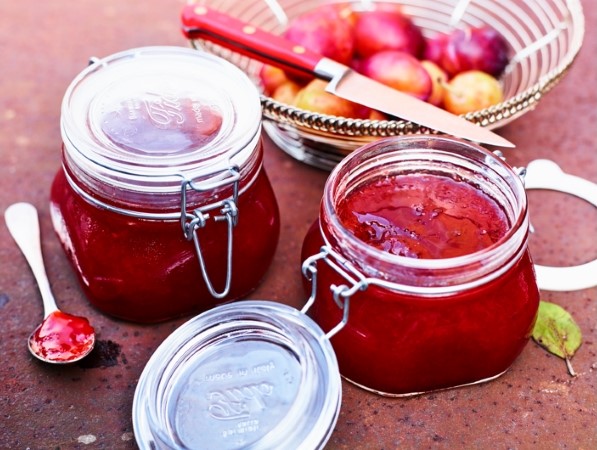
Plum Chutney Hot Procedure for Pickled Pepper-Onion Relish Without Responsibility: Place the sliced ??peppers and onions in a large bowl. In a medium saucepan, combine the white vinegar, apple cider vinegar, sugar, mustard seeds, celery seeds, turmeric powder, salt, black pepper, and red pepper flakes. Bring the mixture to a boil over medium heat, stirring until the sugar dissolves. Pour the hot vinegar mixture over the sliced ??peppers and onions. Stir well. Let the relish cool to room temperature, then transfer to airtight containers or jars. Refrigerate for at least 24 hours before serving to allow the flavors to meld. Fills about 1000 ml.
Syltet peber-lřg relish Serving: Use these three recipes as a side dish for many dishes that you want to spice up a bit. |
Here from No. 200 onwards you will find recipes made on my new Ninja Woodfire PRO XL with Smart Cook System.
Ninja Woodfire is not only an Air Fryer, but has a total of 4 Programs: BBQ Smoker - BBQ Grill - Air Fryer - RoasterConverting between Fahrenheit and Celsius and vice versa
If you have an Android phone, you can use the calculator like this:
Conversion from °C to °F, °F = ( °C * 1.8) + 32 and Conversion from °F to °C, °C = (°F - 32) / 1.8
Example: 200°C to °F = (200 * 1.8) + 32 = 392°F and 392°F to °C = (392 - 32) / 1.8 = 200°C
Deviled Eggs with Lumpfish Roe - For a Lunch Dish
Next Down
Next Up
|
|
4 large Brunch Eggs XL. Weighs 70 g to 75 g each. 2 Organic Lemons 2 tbsp. Hellmann's Mayonnaise with top 1 tsp. Coarse Mustard 1 tsp. Fish sauce 1/2 tsp. Wasabi green paste. Be careful it's devilishly strong 1 Sprinkle Lćsř Sydesalt or another pickling salt 2 glasses of Lumpfish roe 1 bunch chives, cress, pea shoots or thyme White pepper from the mill Pepper from the mill is placed on the table together with a good bread. This is my new Ninja Woodfire PRO XL with Smart Cook System 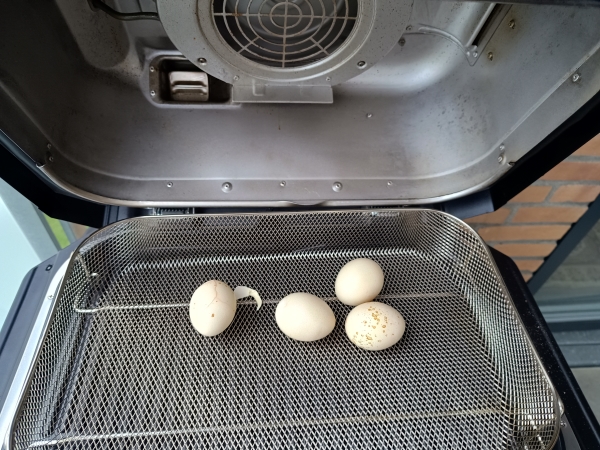
4 hard-boiled eggs for "Devil's Eggs" with Lumpfish Roe Procedure without liability:
The eggs must be hard-boiled. Prepare the eggs for the Airfryer in the following way and here I would like to point out that the temperature and times mentioned only apply to my Ninja Woodfire PRO XL. 1. Set the Program to: Airfryer. 2. Set the Temperature to: 150°C left arrow up/down. 3. Set the Time to: 17 minutes right arrow up/down. Start the program with "Preheat". Put the eggs in when the display shows "Add food". Stops itself when the eggs are ready after 17 minutes. Put the eggs in very cold water for a few minutes, then peel them under running cold water and then halve them. Take the yolks out and put them in a bowl and mash them. Mix the egg yolks with 1 tbsp. lemon juice, mayonnaise, wasabi paste and salt. Fill the 8 egg halves with the yolk mixture and sprinkle the Lumpfish roe on top. This is my new Ninja Woodfire PRO XL with Smart Cook System 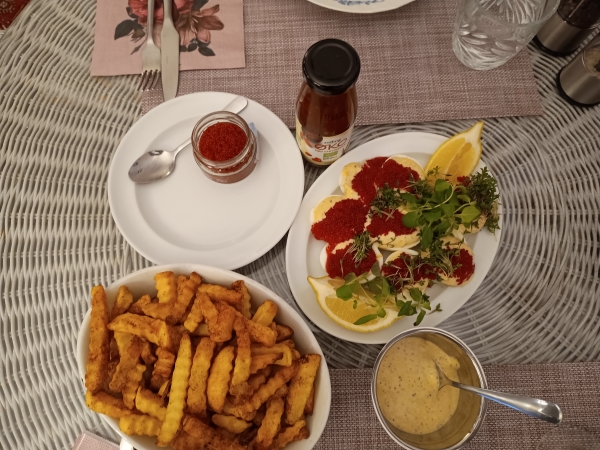
"Devil's Eggs" served with French Fries Garnish: The greens are distributed on the eggs as a decoration and lemon wedges are placed next to the eggs. Serving: Find a good bread of your choice and serve it with cold butter. That day we took Pommes in AF. Drink: Add a cold beer with a good Porse Schnapps. |
Smoking a BBQ Chicken in the Air Fryer - The Good Saturday Chicken
Next Down
Next Up
|
|
1 Chicken, fresh 1320 grams Olive oil, Spray Oil I use Flake salt Pepper, black Chile flakes Paprika, sweet or hot, your choice The smoker box needs to be filled up before proceeding.
This is my new Ninja Woodfire PRO XL with Smart Cook System 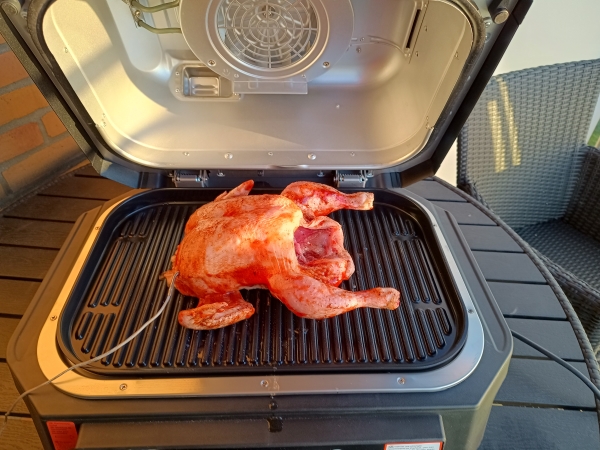
Smoke a BBQ Chicken in the Airfryer. Tender, delicious and juicy Procedure without liability: Prepare the chicken for the Airfryer in the following way and here I would like to point out that the temperature and times mentioned only apply to my Ninja Woodfire PRO XL. Spray the chicken with oil and rub the spices well into the chicken inside and out. Insert the thermometer into the thick breast meat, as shown in the picture. 1. Set Program to: Smoker. 2. Set Temperature to: 140°C left arrow up/down. 3. Set meat temperature to 75°C: Press Manual set meat temperature to 75°C. 4. Press Start/Stop to begin cooking, "Preheating" not necessary in this program. Stops itself when meat temperature of 75°C is reached. Postscript: I later learned that you don't spray the meat with oil when smoking, but you do on the Grill program. In this AF model there is no need to turn the meat (chicken) after half the time. The chicken was finished roasting/smoking after 35 minutes - meat temperature 75°C. This is my new Ninja Woodfire PRO XL with Smart Cook System 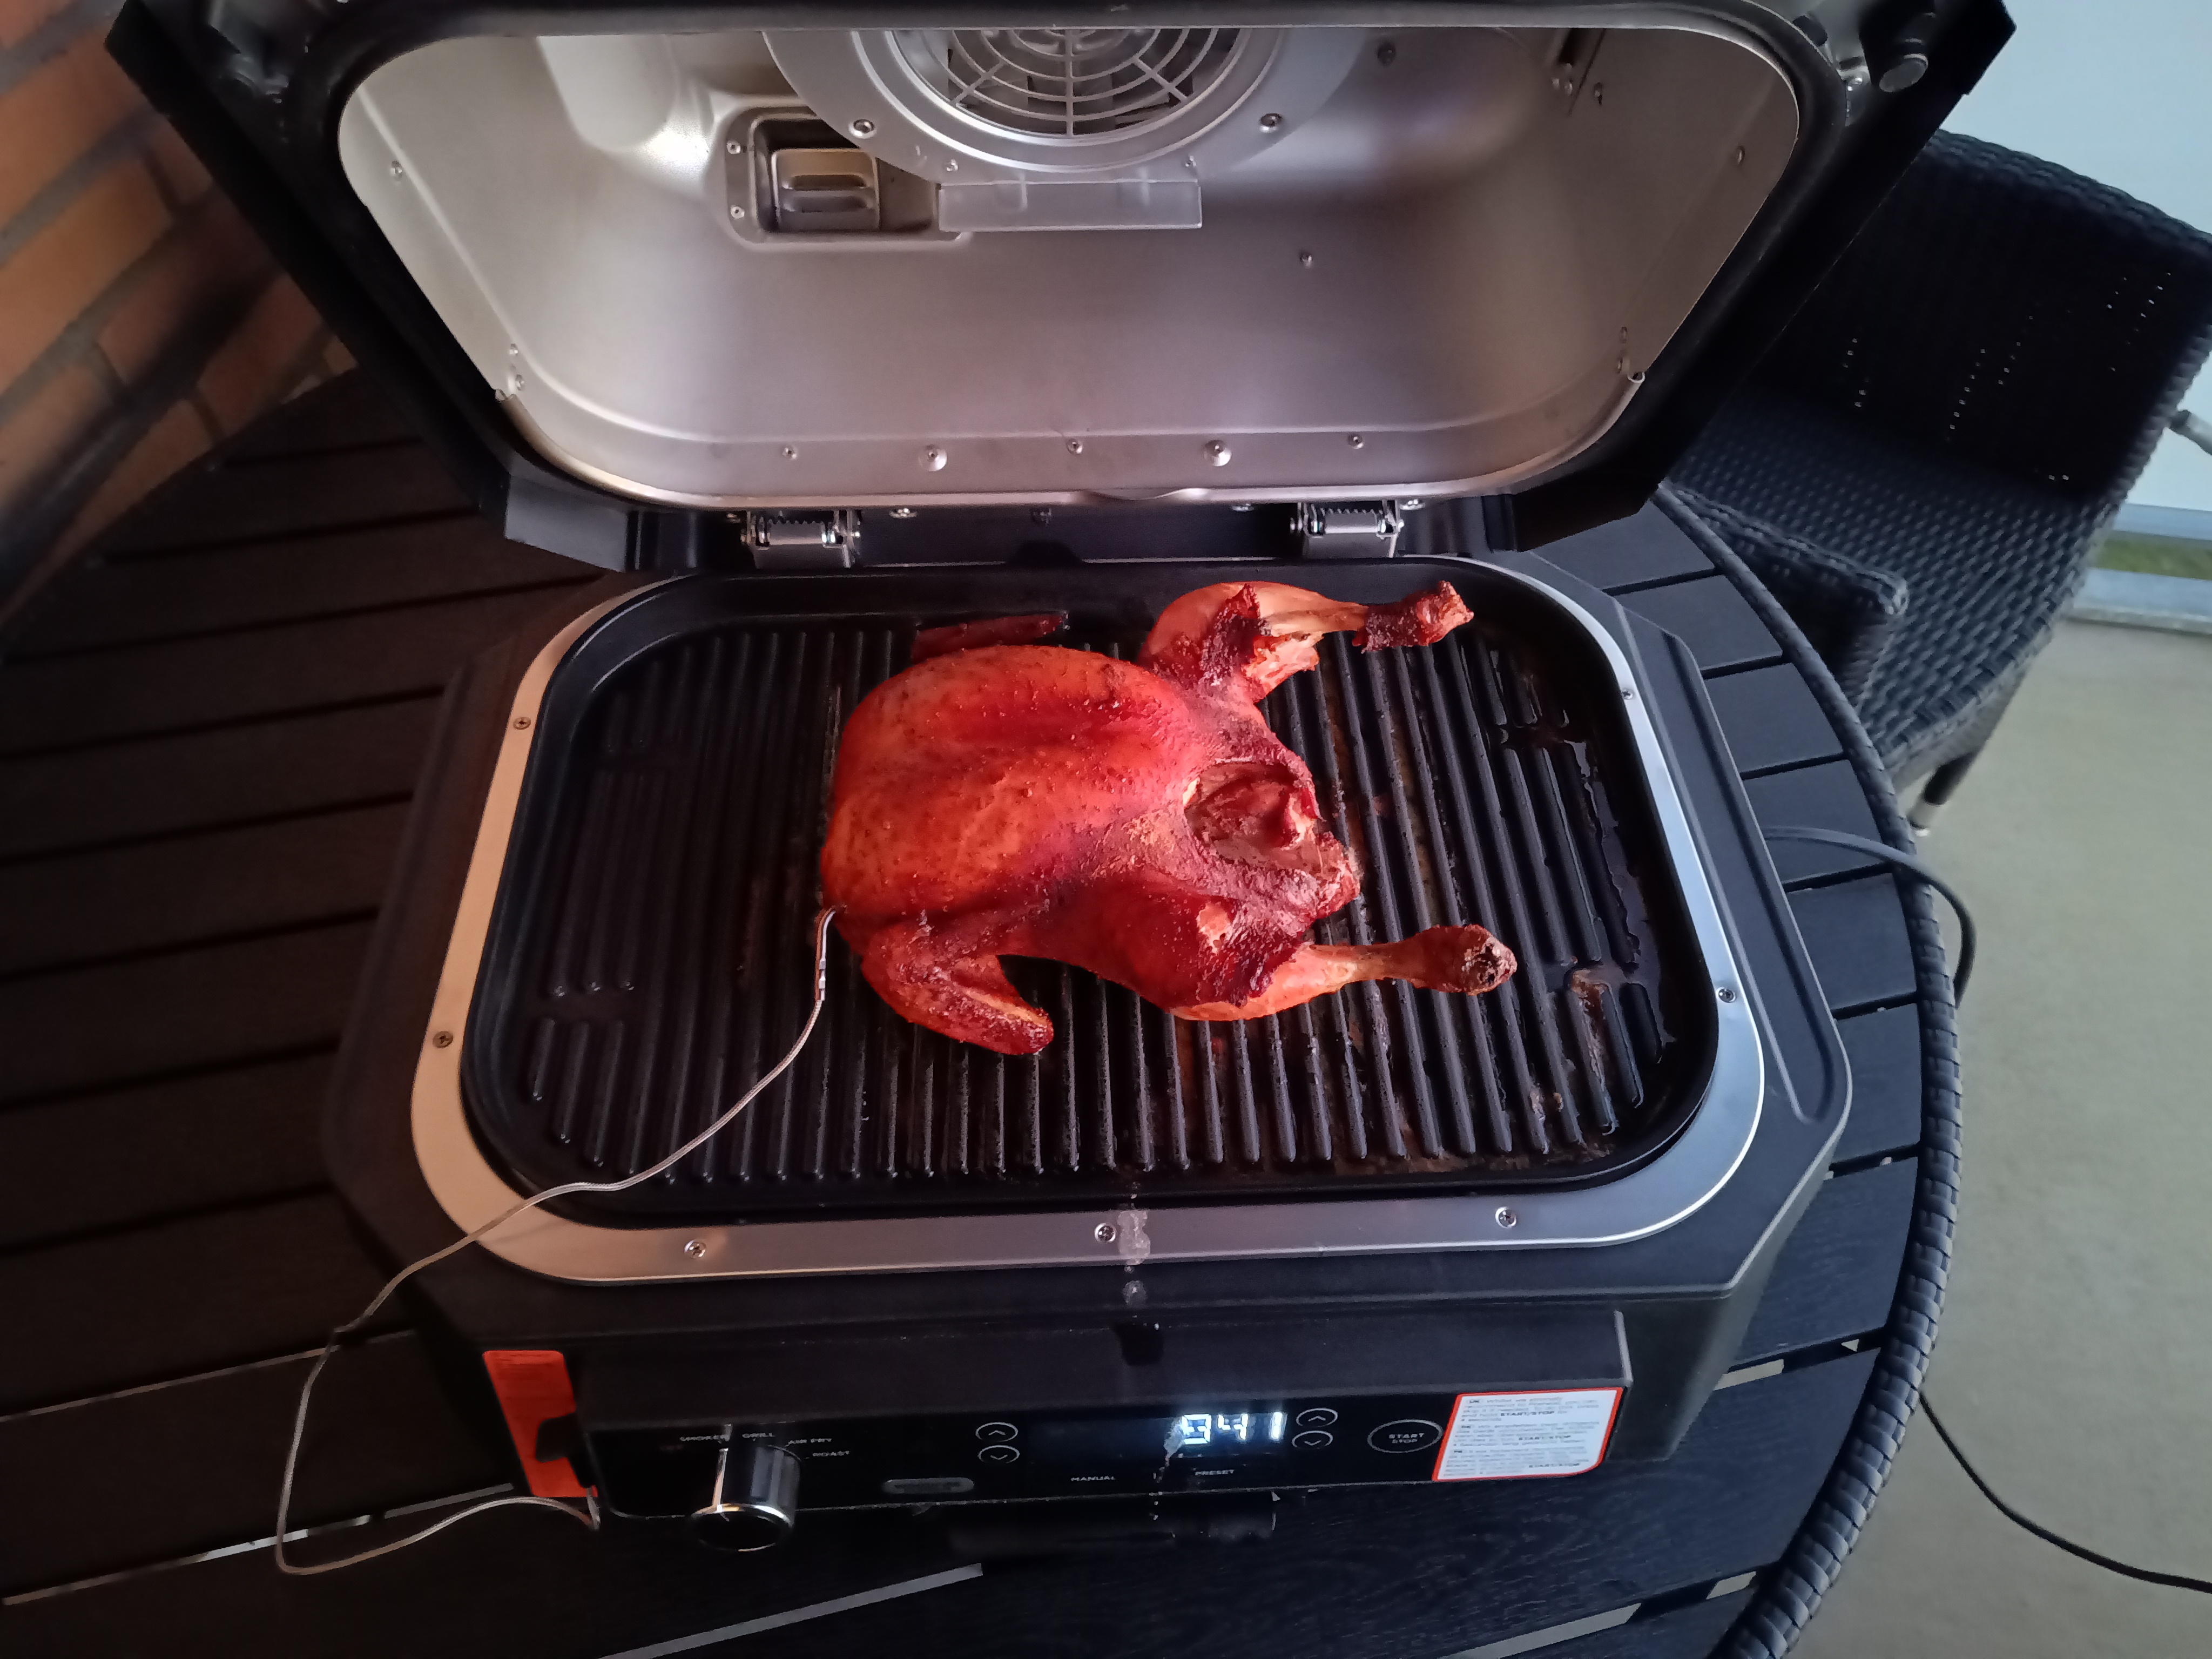
Smoke a BBQ Chicken in the Airfryer. Tender, delicious and juicy Garnish: A good "Grandma" salad was served with it. Serving: I bought a 1 kg bag of French fries - the wavy ones - and half of them were cooked for 18 minutes at 200°C in the Airfryer while the chicken was resting. Drink: A good "Saturday Chicken" requires a good mid-range red wine (200 kr.) - perhaps a Rioja from Spain, known for its rich flavor notes and complexity. |
Fresh smoked pepper mackerel fillets
Next Down
Next Up
|
|
4 Fresh mackerel, approx. 500 to 600 grams each. This is only made for 2 people. Each mackerel 450 grams Sea salt or Flake salt Pepper, black Chile flakes Thyme, dried The smoker box needs to be filled up before you continue.
This is my new Ninja Woodfire PRO XL with Smart Cook System 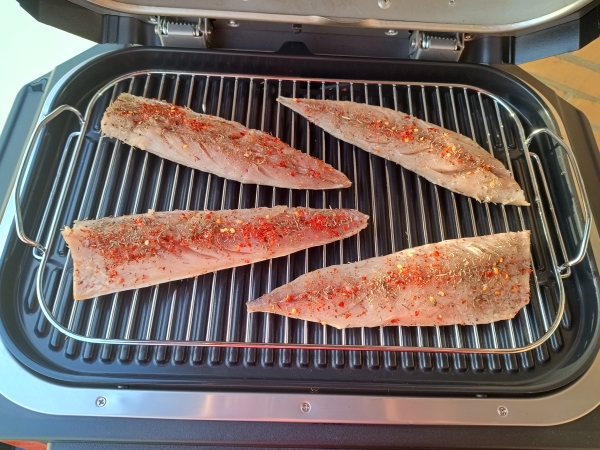
Freshly Smoked Pepper Mackerel in Airfryer Procedure without liability: Prepare the mackerel for the Airfryer in the following way, clean and fillet. Make sure that all bones are removed as best as possible. Then lightly salt the mackerel fillets 2.4% salt per weight of the mackerel fillets. 1. Set Program to: Smoker. 2. Set the Temperature to: 80°C left arrow up/down. 3. Set the time to: 1:00 hour. 4. Press Start/Stop to begin cooking, "Preheating" not necessary in this program. Keep an eye on the fillets after 30 minutes. Pellets last approx. 60 minutes. You can refill once. The fillets were ready after 35 minutes. This is my new Ninja Woodfire PRO XL with Smart Cook System 
Freshly Smoked Pepper Mackerel in Airfryer Garnish: A sprinkling of chopped chives. Serving: Eggs or scrambled eggs go well with smoked mackerel. Drink: A cold Pilsner with a Dram is a great accompaniment to this dish. |
A whole trout made in the Airfryer
Next Down
Next Up
|
|
1 Trout, whole approx. 1 kg to 2 kg 1 Red onion, finely chopped 1 Lemon Organic. cut into slices 1 Small bunch parsley If you like coriander, you can also use it Flake salt Pepper, black 1 Shot white wine, 2 cl Baking paper and tinfoil, (both important, because tinfoil, acid and food are not good) This is my new Ninja Woodfire PRO XL with Smart Cook System
A whole trout made in the Airfryer. Picture to come when the fish is done. Procedure without liability: Prepare the trout for the Airfryer as follows: Clean the trout of entrails and kidney blood, scrape the outside of the fish with a dull knife from head to tail to remove mucus and loose scales. Then lightly salt the trout with 2.4% salt per weight of the cleaned trout. NB: If there is a shortage of space in your AF, cut off the head and tail.
Place tin foil on the kitchen counter and place baking paper on top. Place the fish neatly in the middle of the baking paper and pour all the herbs and a splash of white wine into the fish. Distribute the lemon slices on both outsides. First wrap the fish completely in the baking paper, then in tin foil and make sure that both wraps are as tight as possible. 1. Set the Program to: Airfryer. 2. Set the Temperature to: 200°C left arrow up/down. 3. Set the time to: 20 minutes for 1 kg trout. Set the time to: 30 minutes for 2 kg trout. Turn the fish after half the time. 4. Start the program with "Preheat". Put the fish in when the display shows "Add food". Take the fish out and wrap it in towels while the boiled potatoes finish cooking in AF. They should normally take 40 minutes. This is my new Ninja Woodfire PRO XL with Smart Cook System 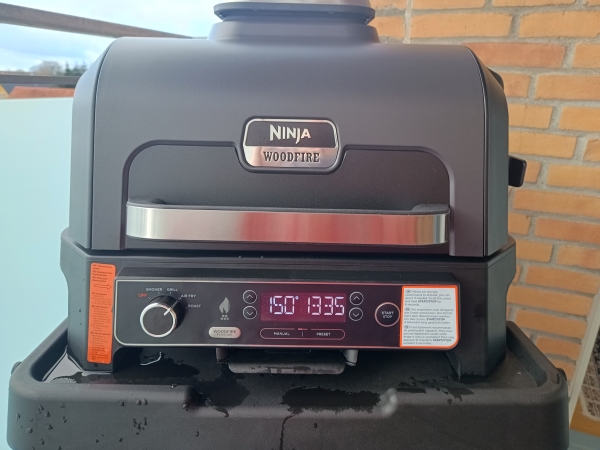
A whole trout made in the Airfryer. Picture to come when the fish is done. Garnish: A little green: parsley or coriander. Serving: You can use Pommes ou Remo or boiled potatoes/white asparagus with Hollandaise sauce. Drink: A cold bottle of white wine is always good with boiled/steamed fish. |
Grilled Honey and Dijon Salmon in Airfryer
Next Down
Next Up
|
|
4 pieces of salmon, 100 grams each 10 grams of salt flakes are distributed among the 4 pieces The dressing is made as follows: 2 cl Dijon mustard 2 cl Honey 1 tbsp. Olive oil 1 Sprinkle white pepper Accessories: Baby potatoes White asparagus in May and June Hollandaise sauce or Lemon sauce ˝ Lemon Organic. cut into wedges for serving Dill This is my new Ninja Woodfire PRO XL with Smart Cook System 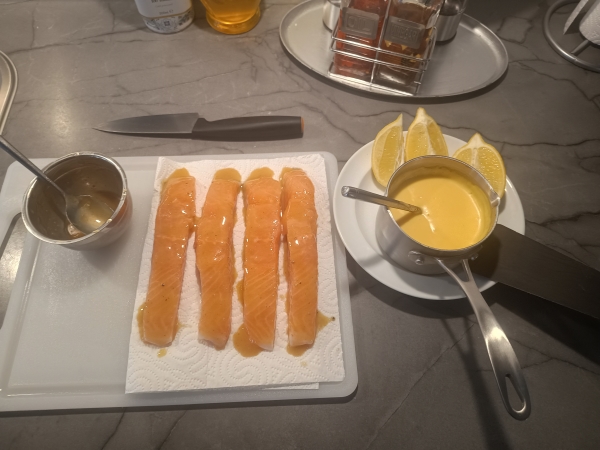
Laksestykkerne marineret med Honning & Dijon Sennep Procedure without liability: Prepare the salmon pieces for the Airfryer as follows: Sprinkle or take your salt grinder and salt the pieces with 2.4% salt by weight. Let the salt work for 1 hour in the refrigerator. While making the dressing, use ˝ cl Dijon mustard and ˝ cl Honey per 100 g salmon. Mix the Dijon mustard and honey in a small bowl and stir until smooth. Add a little olive oil while stirring the dressing gently so that it can be spread on the salmon pieces.
I have decided to serve "Baby Potatoes from Vildmose" with the dish, these need 18 minutes at 200°C in my AF. I keep the potatoes warm wrapped and in a towel at the foot of the bed. It worked absolutely fantastic for the few minutes that the salmon needed in AF. Baby potatoes: 1. Set Program to: Air Fry. 2. Set Temperature to: 200°C left arrow up/down. 3. Set Time to: 18 minutes right arrow up/down. These potatoes were particularly small, therefore only 18 min. 4. Done: Take the potatoes out. Salmon: 1. Set Program to: Grill. 2. Set Temperature to: HI. This is the default setting on my AF. 3. Set Time to: 7 minutes right arrow up/down. Small/thin pieces, therefore only 7 min. 4. Start the program with: Preheat Add the fish when the display shows "Add food". 5. Done: Take the fish out and serve with accompaniments. With a meat thermometer, the fish is done at 65°C. This is my new Ninja Woodfire PRO XL with Smart Cook System 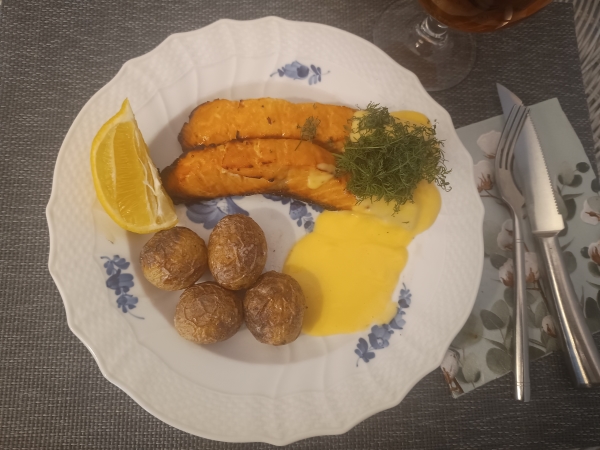
Grilled Honey and Dijon Salmon with Baby Potatoes in Airfryer NB: The salmon pieces were too small for the temperature skewer. The display shows "Turn" halfway through. I don't do this with small salmon pieces with skin and because the flesh side is smeared with dressing. Garnish: A little green: Dill or coriander. Serving: Boiled potatoes and/or white asparagus with Hollandaise sauce. (A must in May and June) Drink: A cold bottle of white wine is always good with boiled/steamed fish. |
Cold smoked salmon in my Ninja Airfryer
Next Down
Next Up
|
|
850 g salmon piece from the thick end Sea salt or flake salt Must be fine, so use a grinder Pepper, white A small sprinkle of sugar The smoke box needs to be filled up before continuing.
This is my new Ninja Woodfire PRO XL with Smart Cook System 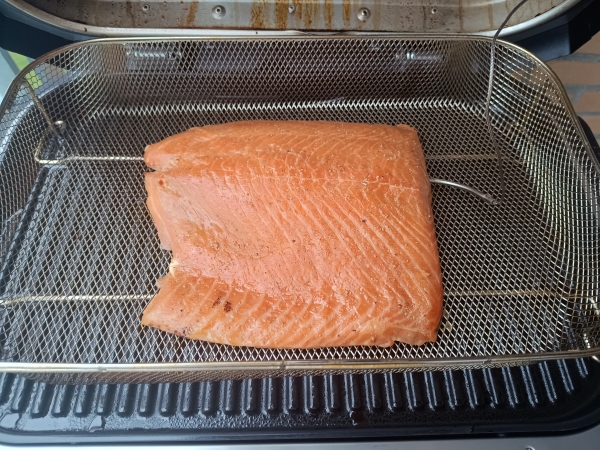
Cold smoked salmon in my Ninja Airfryer Procedure without liability: Prepare the salmon piece for the Airfryer in the following way: Since the piece is purchased from the fishmonger, it only needs to be lightly salted with 2.4% salt per weight of the salmon. If necessary, season the salmon to your own taste with pepper and a little sugar. 850 * 2.4% = 20.4 grams of salt. 1. Set Program to: Smoker. 2. Set Temperature to: CLD left arrow up/down. 3. Set Time to: 1 hour. 4. Press Start/Stop to begin cooking, "Preheating" not necessary in this program. 5. Keep an eye on the pellets as they burn out after approx. 60 minutes. You can refill once. Serving: The salmon was served on a good piece of walnut bread seasoned with pepper and garnished with cress. Because it was Sunday, strawberries were also served. (It was strawberries in February, so they were slightly sour.) Garnish: Cress and strawberries. Drink: A cold Odense Classic with a Dram is perfect for this dish. This is my new Ninja Woodfire PRO XL with Smart Cook System 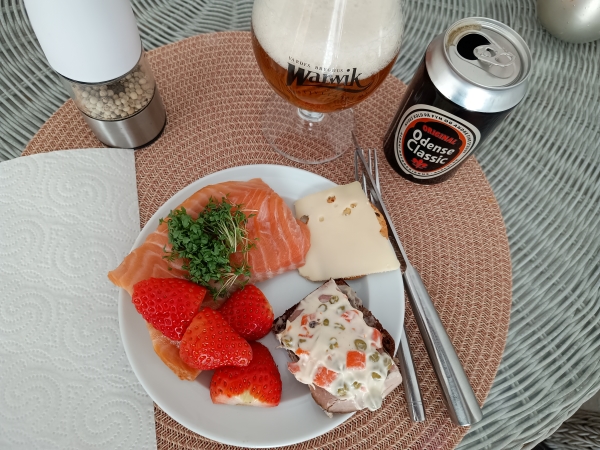
Cold smoked salmon is a delicious salmon dish Postscript: It was mid-February, when we had calm weather and a light east wind. This evening/night/morning the temperature was stable at 0°C to -1°C. I started the first batch of pellets at 5:00 PM and at 6:00 PM they had burned out and the Airfryer turned itself off. The temperature in the Airfryer rose to 17°C after the 3rd refill, so I took a break and cleaned the smoke box. I did the fourth refill at midnight and went to bed. At 5 am I got up and did the fifth batch. At 9:00 am the salmon was finished smoking and was checked, a bite was taken out from the left side. See the picture above, the salmon was cut-proof (cut-resistant) after a day in the refrigerator. |
Hot smoked duck leg in my Ninja Airfryer
Next Down
Next Up
|
|
2 Duck legs approx. 220 grams each. 2.4% Fine salt by weight Pepper, white Chili flakes A small sprinkle of sugar or spread with Honey/Dijon mustard The smoke box should be filled halfway before proceeding. (Only a light smoke)
This is my new Ninja Woodfire PRO XL with Smart Cook System 
Duck legs and baby potatoes ready for light smoke in my Ninja Airfryer Procedure without liability: Prepare the duck legs for the Airfryer as follows: Thaw the duck legs in the refrigerator overnight. The next day, salt and season them with 2.4% salt per weight of the duck legs. If desired, season the duck legs to your taste, pepper and a little sugar or a dressing with Honey/Dijon mustard. 440 * 2.4% = 11 grams of salt. Clean the potatoes, prick lightly with a fork and spray with a little olive oil and salt. Baby potatoes are ready in 30 minutes at 190 °C in my AF. Same time as the duck legs. 1. Set Program to: Air Fry. 2. Set Temperature to: 190 °C left arrow up/down. 3. Set Time to: 30 min right arrow up/down. 4. Press Start/Stop: Starts cooking with "Preheating", put the food in when the display shows "Add food". 5. Press the flame mark "Woodfire" it lights the pellet. 6. The pellet burns out after approx. 30 minutes. OK, as it is only a light smoke. Serving: Served with baby potatoes - also from the air fryer - and red cabbage from Samsř with Port wine and currant jelly. Garnish: Cold butter over the potatoes. Drink: An everyday wine "Andes" from Argentina bought in Fřtex for 39.00 kr. Good for the money. This is my new Ninja Woodfire PRO XL with Smart Cook System 
Hot smoked duck leg in my Ninja Airfryer Postscript: Normally I don't turn the meat in my AF after half the time if it's on the grill, but here I used a baking dish so they were turned after half the time. I've done a very light smoking of the duck legs, as the lady of the house doesn't like too much smoke, (ha, ha, ha, who does that). |
Manor Chops in my Ninja Airfryer
Next Down
Next Up
|
|
2 manor chops approx. 370 grams per piece 2.4% Fine salt by weight Pepper, white Chili flakes A small sprinkle of sugar or spread with Honey/Dijon mustard Procedure without liability:
Prepare the manor chops for the Airfryer as follows: Thaw the chops in the refrigerator overnight. The next day, salt and season them with 2.4% salt per weight of the chops. Season the chops to your taste, pepper and a little sugar or a dressing with Honey/Dijon mustard. 740 * 2.4% = 18 grams of salt. Clean the potatoes, prick lightly with a fork and spray with a little olive oil and salt. Baby potatoes are ready in 30 minutes at 190 °C in my AF. Same time as the chops. This is my new Ninja Woodfire PRO XL with Smart Cook System 
Manor Chops in my Ninja Airfryer 1. Set Program to: Air Fry. 2. Set Temperature to: 190 °C left arrow up/down. 3. Set Time to: 30 min right arrow up/down. 4. Press Start/Stop: Starts cooking with "Preheat", put the food in when the display shows "Add food". 5. Done: Take the food out and serve. Serving: Served with baby potatoes - also from the air fryer - and a salad. Garnish: Cold butter over the potatoes. Drink: An everyday wine "Andes" from Argentina bought in Fřtex for 39.00 kr. Good for the money. Postscript: Normally I don't turn the meat in my AF after half the time if it's on the grill. Here it stands up in a holder and the meat is fixed with meat skewers so that it doesn't collapse during cooking. A good idea, but the potatoes shouldn't be so close to the meat because there was a lack of "browning" at the bottom of the meat. The meat was tender and juicy, the potatoes were well cooked. |
T-Bone Steak in my Ninja Airfryer
Next Down
Next Up
|
|
2 T-Bone Steaks approx. 370 grams each 2.4% Fine salt by weight Pepper, onion powder, garlic granules Thyme, dried Fresh watercress and garlic butter Procedure without liability:
This is my new Ninja Woodfire PRO XL with Smart Cook System 
The raw ingredients for T-Bone Steak Clean the baking potatoes, prick lightly with a needle/fork and spray with a little olive oil and salt. The baking potatoes are ready in 40 minutes at 200 °C in my AF. 1. Set Program to: Air Fry. 2. Set Temperature to: 200 °C left arrow up/down. 3. Set Time to: 40 min right arrow up/down. 4. Press Start/Stop: Starts cooking with "Preheating", put the baking potatoes in when the display shows "Add food". 5. Done: Take the baking potatoes out and keep them warm under the blanket while the steaks are grilled. Prepare T-Bone Steak for Airfryer as follows: Thaw T-Bone Steak in the refrigerator overnight. The next day, salt and season them with 2.4% salt per weight of the steaks. Season the steaks to your taste with: Pepper, onion powder, garlic granules and a little dried thyme. 740 * 2.4% = 18 grams of salt. 1. Set Program to: Grill. 2. Set Temperature to: HI left arrow up/down. 3. Set Time to: 8 min right arrow up/down. 4. Press Start/Stop: Starts cooking with "Preheat", add T-Bone Steak when display shows "Add food". 5. After half time (4 min here) "Flip" is displayed: Flip the steaks 6. Done: Take the steaks out and serve. This is my new Ninja Woodfire PRO XL with Smart Cook System 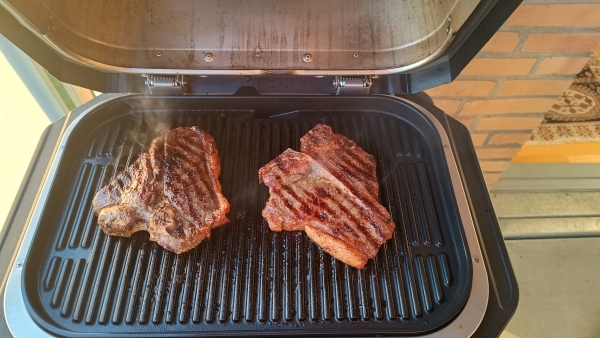
T-Bone Steak in my Ninja Airfryer Serving: Served with baked potatoes, garlic butter and fresh watercress. Garnishing: Cold butter over the potatoes, fresh watercress over the steaks. Drink: An Italian wine "Appassimento" from the Sicily region - purchased in Brugsen. Postscript: Normally I don't turn the meat in my AF after half the time, but here it's a Grill Program and after half the time the meat has to be turned. The steaks were tender and juicy, the baked potatoes were well cooked. I just had 2 large onions to try with the baked potatoes, they got half the time - 20 minutes. Tasted really good with T Bone Steak. I can mention that the temperature in the baked potatoes was 94 °C when I took them out after 40 minutes. |
Lamb culotte in my Ninja Airfryer
Next Down
Next Up
|
|
1 Lamb culotte approx. 450 grams 2.4% Flake salt by weight Mint jelly Marinade: 2 tbsp. Olive oil or Rapeseed oil 1 tsp. rosemary, dried. 1 tsp. thyme, dried 4 cloves garlic, pepper, onion powder Accessories: Baked potatoes with garlic butter or ramson butter Procedure without liability:
This is my new Ninja Woodfire PRO XL with Smart Cook System 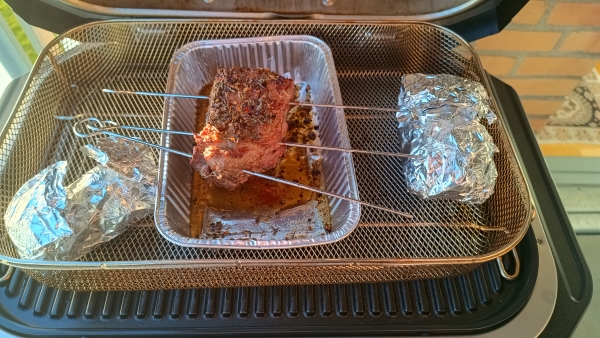
Lamb culotte in my Ninja Airfryer turned after half time 12 min. Clean the baked potatoes, prick lightly with a needle/fork and spray with a little olive oil and salt. Baked potatoes are ready in 40 minutes at 200 °C in my AF. 1. Set Program to: Air Fry. 2. Set Temperature to: 200 °C left arrow up/down. 3. Set Time to: 40 min right arrow up/down. 4. Press Start/Stop: Starts cooking with "Preheat", insert the baking potatoes when the display shows "Add food". 5. Done: Take out the baking potatoes and keep them warm under the blanket while the lamb culotte is being cooked. Prepare the lamb culotte for the Airfryer as follows: Thaw the lamb culotte in the refrigerator overnight. The next day, cut scratches in the fat marbling on the culotte roast in a Harlequin pattern, cutting only down to the meat and NOT through the meat. Salt the lamb culotte with 2.4% salt per weight of the meat. Marinate the lamb culotte with the above spices a few hours before cooking in the AF. 450 * 2.4% = 11 grams of salt. 1. Set Program to: Air Fry. 2. Set Temperature to: 180 °C left arrow up/down. 3. Set Time to: 24 min right arrow up/down. 4. Press Start/Stop: Starts cooking with "Preheat", put in the lamb culotte when the display shows "Add food". 5. After half the time (12 min here) "Flip" is displayed: Flip the lamb culotte 6. Done: Take out the lamb culotte and serve. This is my new Ninja Woodfire PRO XL with Smart Cook System 
The baked potatoes were pre-cooked, so 24 min. was sufficient Serving: Served with baked potatoes, garlic butter, mint jelly and a Shopska salad see Recipe No. 81. Garnish: Cold garlic butter over the potatoes and a green salad. Drink: An Argentinian wine "Malbec Organic" from the Mendoza area in Argentina for 55.00 kr. in Rema 1000. Postscript: I had some mushrooms from the day before, so I made a mushroom stew for the dish. The lamb culotte was turned after half time. I could also choose to roast the lamb culotte according to the temperature: 62 °C red - 65 °C - medium - 67 °C done. I will do that next time, because it got a little too much 67 °C well done. |
Veal culottes "Sous Vide Method" in my Ninja Airfryer
Next Down
Next Up
|
|
1 Veal culotte 950 grams 2.4% flake salt by weight = 22 grams RUB: 2 tbsp. Olive oil or Rapeseed oil 1 tsp. rosemary, dried. 1 tsp. thyme, dried 1 tsp. garlic powder and 1 tsp. onion powder, dried White pepper and chili flakes Accessories: 4 large baking potatoes with butter Bearnaise sauce for the meat Procedure without liability:
This is my new Ninja Woodfire PRO XL with Smart Cook System 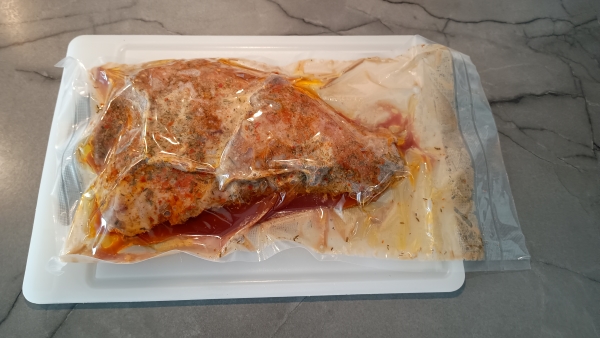
Veal culottes "Sous Vide Method" in my Ninja Airfryer Prepare the veal culotte for the Airfryer as follows: Defrost the veal culotte in the refrigerator overnight. The next day, clean the veal culotte of tendons and skin, cut scratches in the fat marbling on the veal culotte in a Harlequin pattern, cut only down to the meat and NOT through the meat. Salt the veal culotte with 2.4% salt per weight of the meat. Rub the veal culotte with the above RUB spices a few hours before cooking in AF. 950 * 2.4% = 22 grams of flake salt. Vacuum the veal culotte in a suitable vacuum bag for your vacuum machine. I seal 2 times at each end. Wrap the bag in tin foil and place it on the rack. Program your Air Fryer. 1. Set Program to: Smoker. 2. Set Temperature to: 60 °C left arrow up/down. 3. Set Time to: 4 hours right arrow up/down. 4. Press Start/Stop: "Preheating" is not necessary in this program. 5. After half the time (2 hours here) "Flip" is displayed: Flip the veal culotte 6. Done: Take the veal culotte out and serve. Clean the baking potatoes, prick lightly with a needle/fork and spray with a little olive oil and salt. Large baking potatoes are ready in 60 minutes at 180 °C in my AF, or 40 minutes at 200 °C. 1. Set Program to: Air Fry. 2. Set Temperature to: 180 °C left arrow up/down. 3. Set Time to: 60 min right arrow up/down. 4. Press Start/Stop: Starts cooking with "Preheating", insert the baking potatoes when the display shows "Add food". 5. Done: Take out the baking potatoes and keep them warm under the blanket while the veal culotte is cooked under Grill and gets a roasting crust. This is my new Ninja Woodfire PRO XL with Smart Cook System 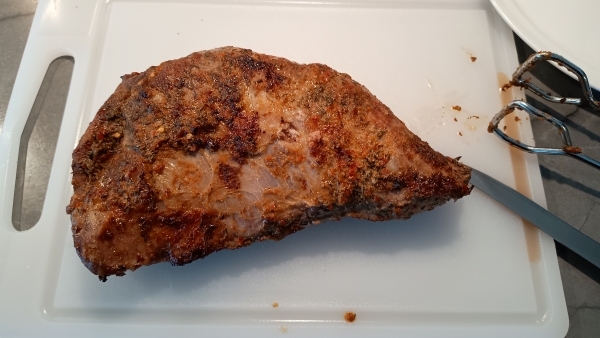
Veal culottes "Sous Vide Method" in my Ninja Airfryer Serving: Served with baked potatoes, garlic butter and Bearnaise Sous. Garnishing: Cold garlic butter over the potatoes and a little green sprinkle. Drink: An Argentinian wine "Malbec Organic" from the Mendoza area in Argentina for 55.00 kr. in Rema 1000. This is my new Ninja Woodfire PRO XL with Smart Cook System 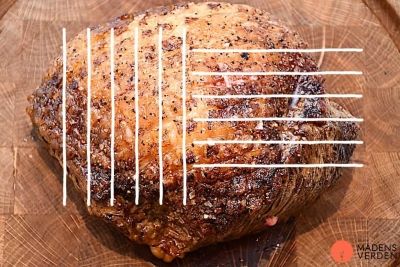
Correct cutting of a veal culotte. Start at the pointed end Postscript: My good old "Sous Vide Apparatus" was burnt, so I had to try something new. My new AF starts at 60 °C, but I wish it was at 50 °C. Many pieces of beef have a temperature range from 50 °C to 60 °C. The correct temperature for my 950 gram veal culotte would be 55 °C for 5 hours. Therefore, it was 60 °C for 4 hours. Afterwards, the roast went under the grill for 6 minutes on each side. Rested for 15 minutes before carving. The roast was wonderfully tender and also juicy, but a little less red inside than I usually prefer. This is my new Ninja Woodfire PRO XL with Smart Cook System 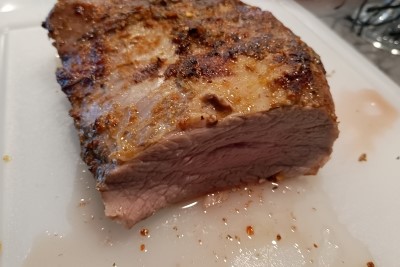
Correct cutting of a veal culotte. Start at the pointed end |
Names of potato varieties for AirfryerNinja Woodfire is not just an Airfryer, but has 4 programs: BBQ Smoker - BBQ Grill - Airfryer - RoasterDanish potatoes and foreign potatoes mentioned in connection with use in the Airfryer 1. Russet potatoes: Russet potatoes are an English term that refers to a specific type of potato. In Danish, they are called russet potatoes. These potatoes are known for their characteristic brown or grayish-brown skin and their starchy interior, which gives them a special texture and flavor. It is a very large potato that vegans use to make "Pizza Potatoes". 2. Peruvian Blue Potatoes: These potatoes have a deep blue color and a slightly nutty flavor. They are great for cooking, baking, or making salads. 3. Sweet potatoes: Sweet potatoes are not just for sweet potato fries. They can also be used in salads, baked dishes, and much more. 4. Yam: Yams have a sweet flavor and are popular in many African and Asian dishes. They can be boiled, fried or baked. 5. Bintje: Bintje potatoes have a creamy consistency and are suitable for baking and frying. 6. King Edward: These potatoes have a light, velvety texture and are great for making mashed potatoes or French fries. 7. Yukon Gold: Yukon Gold potatoes are golden in color with a buttery flavor and are great for baking, pureeing and salads. 8. Fingerling: These small potatoes have an elongated shape and a nutty flavor. They work well in oven dishes or frying. 9. Baby potatoes from Vildmose: These small potatoes are round and are suitable for airfrying fish. Only need approx. 25 minutes at 200°C in a Preheated AF. Danish potatoes from very early to late potatoes Very early potatoes: 1. Soloist: Light, yellow-fleshed, well-shaped tubers. Boiled & Baked & Roasted & Soup & Salad 2. Frieslander: Yellow-fleshed, well-shaped, tubers with good flavor. Early potatoes: 3. Princess: Oval tubers with yellow flesh - good for salad, as they are resistant to cooking. 4. Linzer: Asparagus type with resistant to cooking yellow-fleshed tubers - a delicacy for salad. Boiled & Roasted & Salad Medium-season potatoes: 5. Hansa: Well-known old variety with yellow-fleshed firm tubers. Boiled & Roasted & Roasted & Salad 6. Bintje: Uniform, medium-sized tubers. Boiled & Roasted & Roasted & Deep-fried & Mashed & Soup 7. Egg yolk: Strong, yellow-fleshed - round tubers that are resistant to cooking. 8. Folva: Fine taste, high yield and resistant to cooking. Boiled & Roasted & Roasted & Deep-fried & Mashed & Soup & Salad 9. Asparagus: Long-oval, firm delicacy tubers that are good for salad. Boiled & Baked & Roasted & Salad 10. Rosara: Yellow-fleshed with red skin. Also good for salads. 11. Blue Congo: Exciting blue-coloured potato that looks great in a salad bowl. 12. Ditta: Long-oval tubers with smooth skin. Baked & Roasted & Deep-fried & Salad 13. Nicola: Yellow-fleshed long-oval tubers with smooth tubers. 14. Exquisa: Oval, regular, firm-boiling - good for salad. Late potatoes - Winter potatoes: 15. Sava: Medium-sized, uniform tubers with good keeping quality. Boiled & Baked & Roasted & Mashed & Soup & Salad 16. King Edward: White-fleshed, oval tubers that are red-mottled and cook out easily. A potato is far from just a potato. Read more here. |
Silver eel Salmon and Trout Garfish Herring Mackerel Cod roe Smoked cheese
Danish version
Grooved vacuum rollers for vacuum packs
Vacuum rollers that I use The picture above shows the sizes of vacuum rollers that I use in my household when vacuuming meat and fish. I use them for several purposes: 1. Vacuum salting, 2. Storing food in the fridge and freezer, 3. Sous vide dishes, 4. Dried herbs and mushrooms, 5. Ice cubes in the freezer.
I have 5 sizes of rolls, so I can always adapt the width of the roll to the item, so I avoid wasting the material, space and money. When vacuum bags and vacuum rollers came out 10 - 15 years ago, they cost a fortune in Denmark. I found them on the web - Wish - at a reasonable price. They have all the sizes that I use: 12 cm, 15 cm, 20 cm 25 cm, all with a length of 500 cm. From DKK 34 - DKK 56 plus shipping. There are several suppliers at - Wish - which has several sizes: 12 cm, 15 cm, 17 cm, 20 cm, 22 cm, 25 cm, all with a length of 500 cm. I bought the large size of 28 cm at the time at Biltema and on offer in Lidl. There are also rolls of 30 cm and 32 cm, all with a length of 500 cm, but I have to stop here, because my vacuum packer has a limitation of 28 cm. Not anymore! I have solved that problem, see below. The 5 sizes in the picture are 12 cm, 15 cm, 20 cm, 22 cm and 28 cm, all with a length of 500 cm. The 12 cm roll is best suited for smoked eels, but just remember to start welding before the eel becomes completely puffy. My vacuum packer can do that. It is an Andersson VMS 2.0 vacuum sealer purchased in Sweden from net.on.net but I've heard it no longer exists. New models have arrived. The one that comes closest to my vacuum sealer is OBH Nordica Supreme Vacuum Sealer Art. Nr. 195507. Net.on.net does not deliver abroad. So it was bought on one of my many fishing trips to Stensĺn in Bĺstad - understandable. 
Andersson VMS 2.0 vacuum sealer DKK 400 Do this if you have vacuum bags that are wider than your Vacuum Packer
Adaptation of 300 mm vacuum bags to a vacuum packer for max 280 mm bags Drying bags: Recommendable. If you have a Vacuum Packer, which takes a maximum of 280 mm bags in width, then you can adapt the bags at both ends, as in the drawing above. And why now? Yes! I was "hunting" for Dryaging poses and came across MeatLovers Delight's website. Here I found these bags - Large 30 x 60 cm DKK 139.00 for 5 pieces. - the bags are smooth, therefore a pack of vacHelper must be purchased for DKK 10.00 - strips - if you have a vacuum packer for ribbed bags. The bags are intended for a vacuum packer with "Beak", but since these vacuum packs are on the way "Out", you must use strips. Why are they on the way "Out"? They are too poor to form a vacuum and therefore vacuum packs are now made with a vacuum chamber into which the entire width of the bag is inserted. Therefore, the bags must have grooves or an insert of a strip so that the air can be sucked out. It is extremely important that the bags are completely sealed when they are used for sous vide, because otherwise water will be sucked into the meat, which will then be poorly cooked. I have tested these Dryaging bags on my Schwarz-Walter-Schinken and they were very effective in re-maturing the ham in the refrigerator. But you just have to remember that the bag must not lie on a glass plate in the fridge, because then you close the microscopic pores in the bag. The bag must lie on a wire rack and should preferably be turned a few times a week. The ham I made lost just over 30% - and that's right by the book. Smoke 'n Dry bags: Can NOT be recommended. During my search for dryaging bags, I found Smoke 'n Dry bags from the same companies. Now what is this, do you have to pack your meat/fish in bags and then smoke the whole mole? The bags above - Dryaging bags - are diffusible from the inside out and not the other way around. You'd think they've turned the Smoke 'n Dry bags inside out. We must look at why you smoke your meat/fish. In the old days, there were few means of preserving food. Salt, drying and smoking were the most familiar methods of preservation. Many people know "Klipfisk", "Třrfisk" and "Rřget Spćk". The discussion here only applies to smoking. When wood = firewood burns with a deficit of oxygen, heavy smoke is produced. This smoke contains wood tar, which in turn can contain 10,000 different components. One of these components is the bacteria-inhibiting phenol, which precisely gives the fish/meat an extended shelf life. Different types of wood give different flavors and colors to the food. In the food industry, they stick to deciduous trees, except for one evergreen shrub, namely juniper. The juniper smoke, also called "Eel smoke", gives the product a piquant and strong smoky taste. The trick with smoking your food is that the surface is covered by an impenetrable and protective layer of a "smoke film", which consists of wood tar, with various flavors, depending on the type of wood chosen and possibly added spices. When you then pack your food in a Smoke 'n Dry bag, this bag will be coated with a "Smoke film" that after some time will block all the microscopic pores in the bag. Maybe a little smoky taste comes through the bag in the first hour, I won't contradict that, but there is no point in giving the bag of meat/fish another 24 hours for more flavor. The microscopic pores of the bag have been closed. The bag will smell of smoke and who wants such a strong smell in their fridge. I "love" smoked products, but not the smell in the whole fridge. If you still want to try, the bag must be treated like the above drying bag, as this is also a smooth bag. |
Back to the page where you came from.

one.com |